instagram takipci satin al - instagram takipci satin al mobil odeme - takipci satin al

bahis siteleri - deneme bonusu - casino siteleri

bahis siteleri - kacak bahis - canli bahis

goldenbahis - makrobet - cepbahis

cratosslot - cratosslot giris - cratosslot

Announcement

Collapse
No announcement yet.

Inside Doc's Machine Shop

Collapse
X
 
  • Filter
  • Time
  • Show
Clear All
new posts

    #46
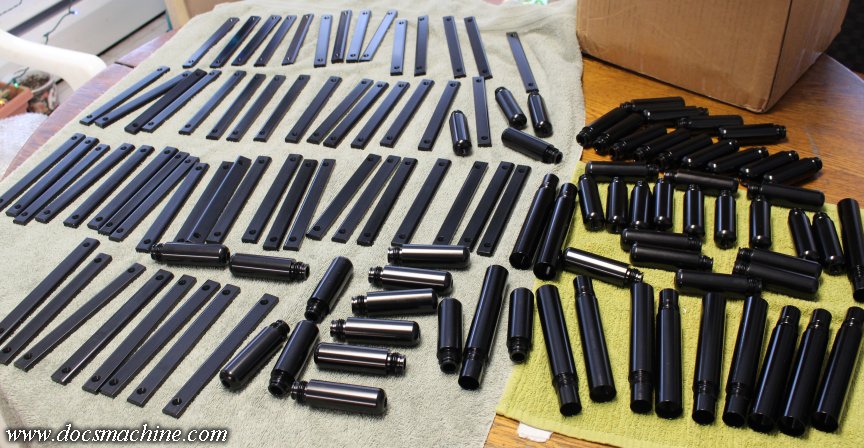
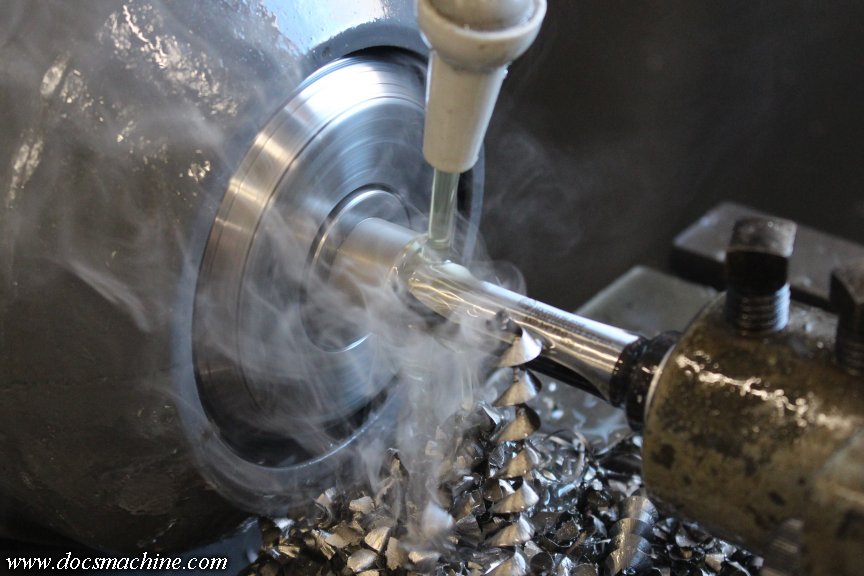
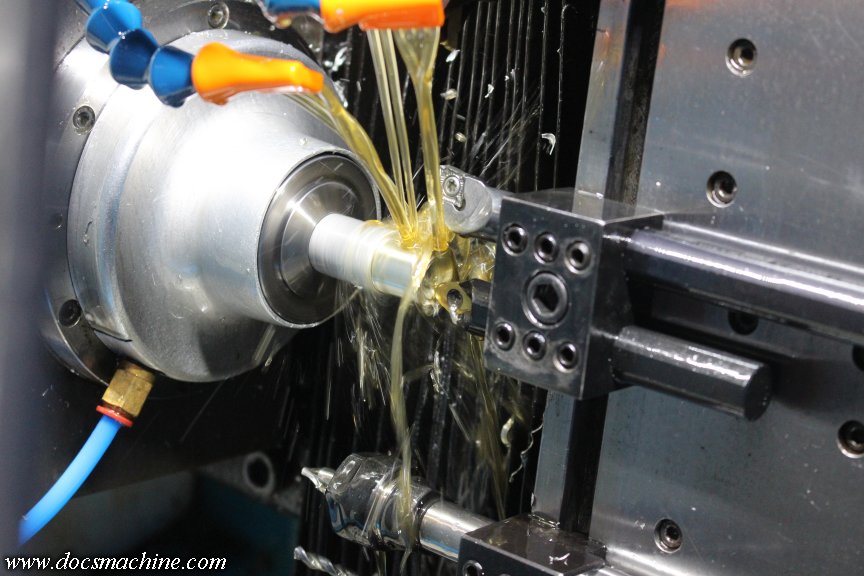
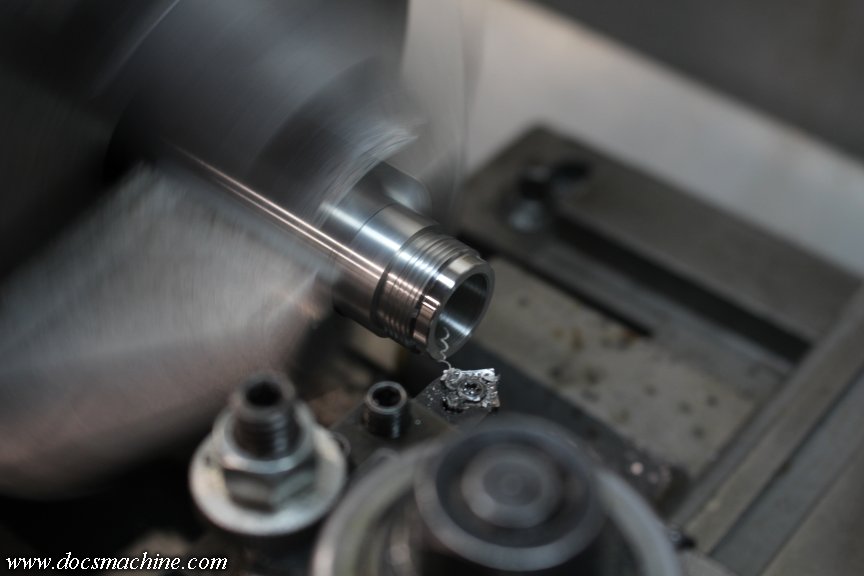
    Quick update, since I seem to have attracted some attention.

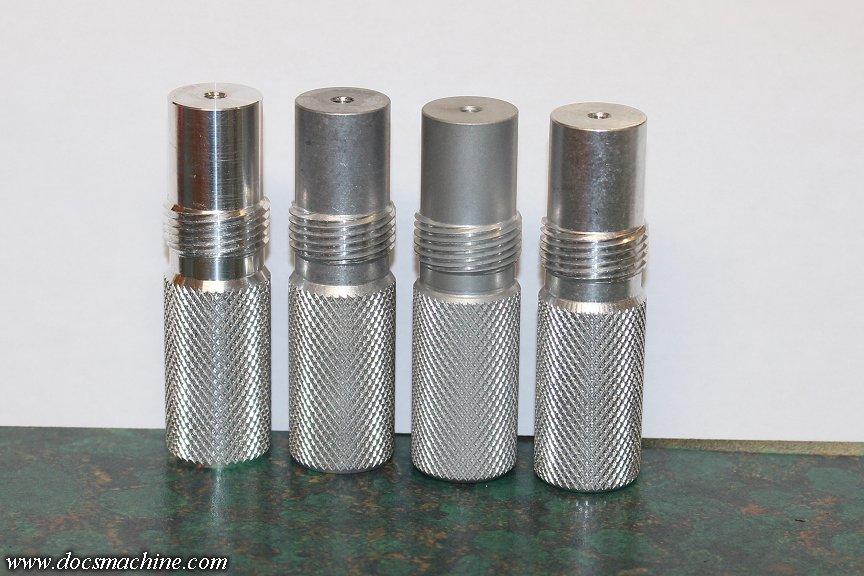
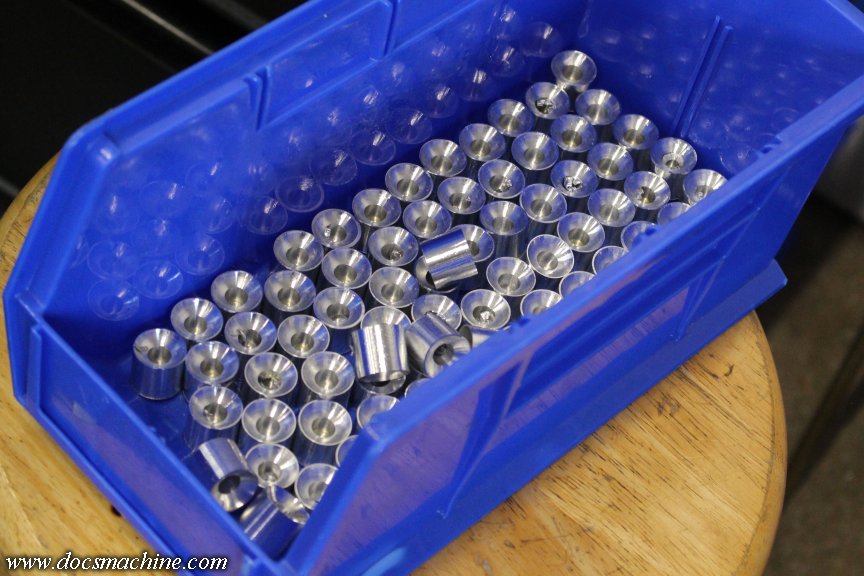
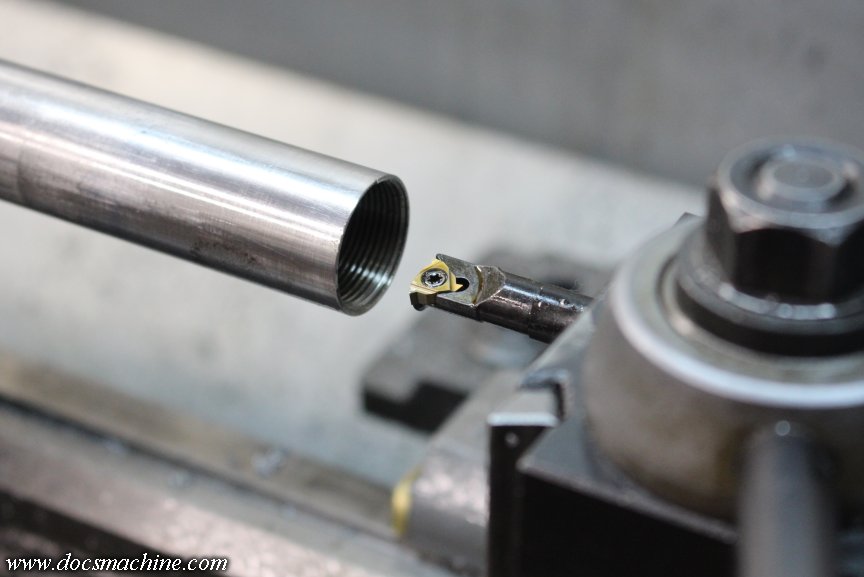
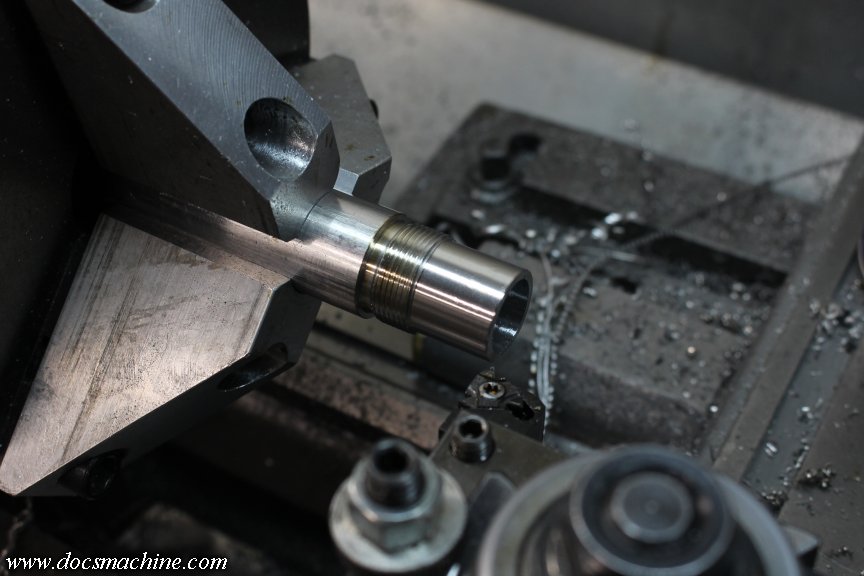
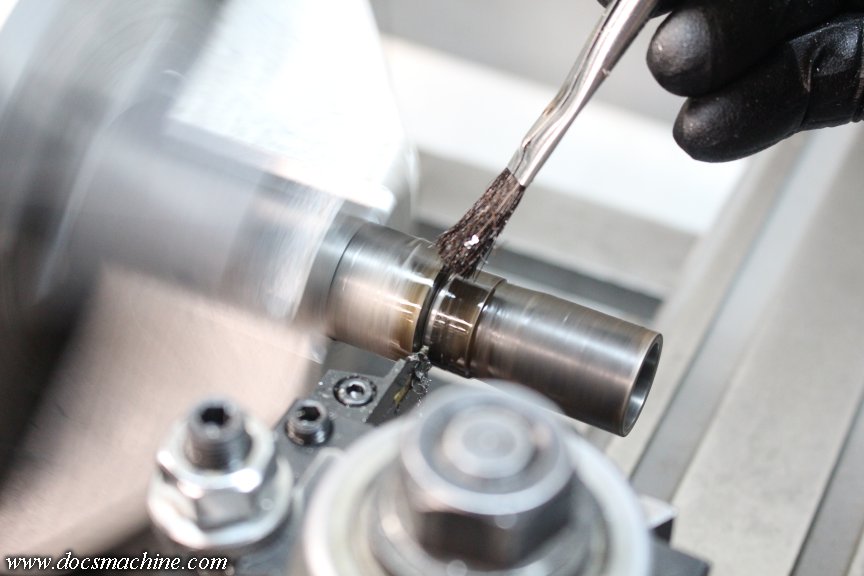
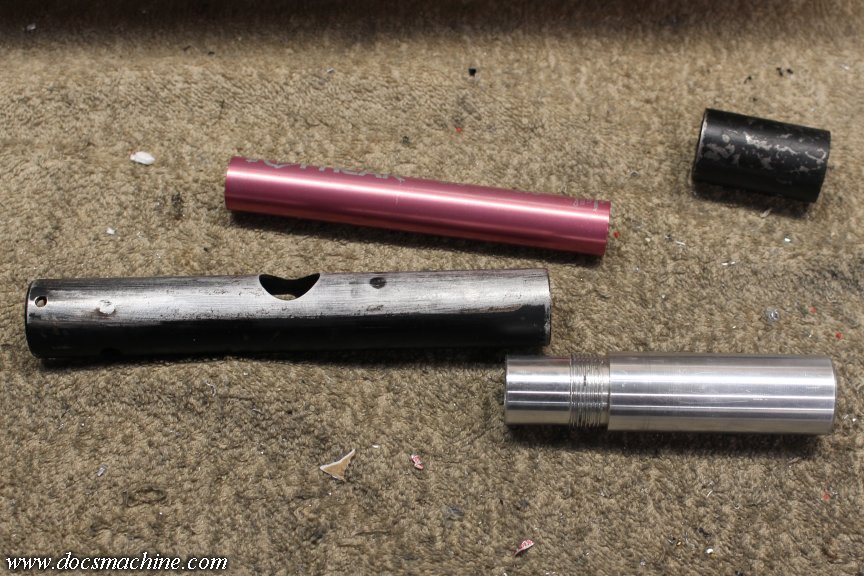
    I got the first half of the batch fully run, and was cleaning them a small handful at a time in the ultrasonic cleaner. The knurling felt to rough to me, and that could be a problem with the anodizing. The knurling raised a fine "burr" on each cut, and that's metal that could easily ding or wear after it's anodized. Making the part look worn and shabby somewhat ahead of its time.

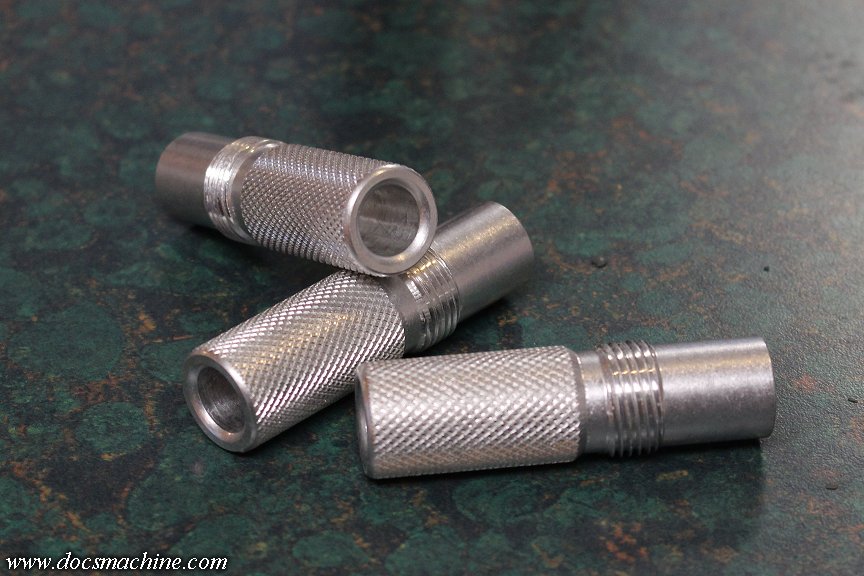
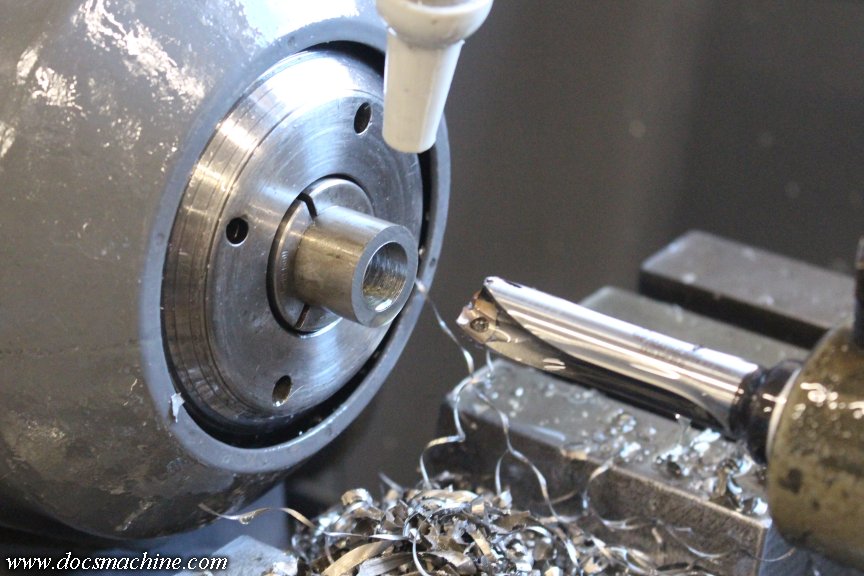
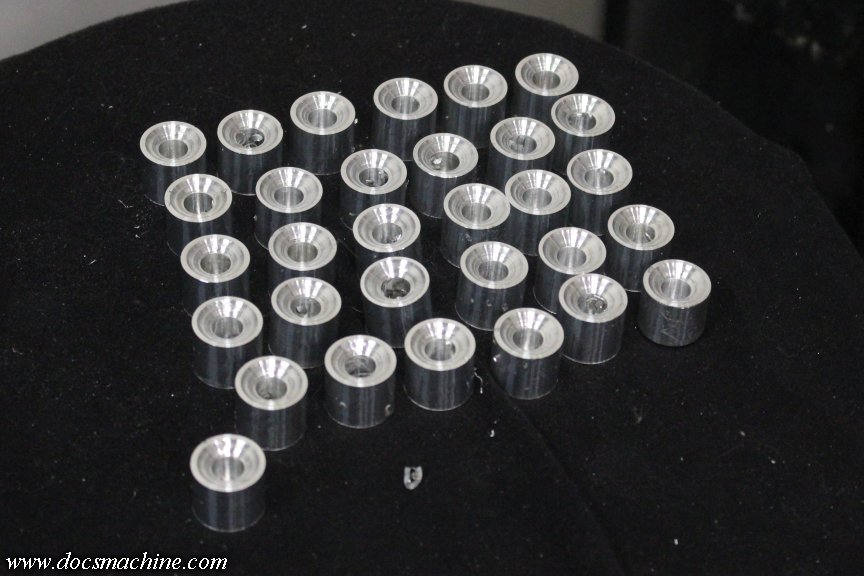
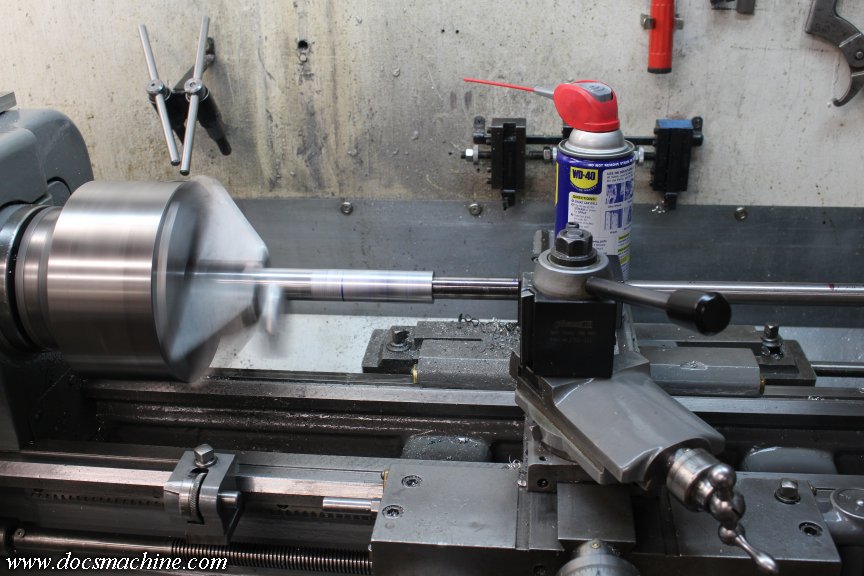
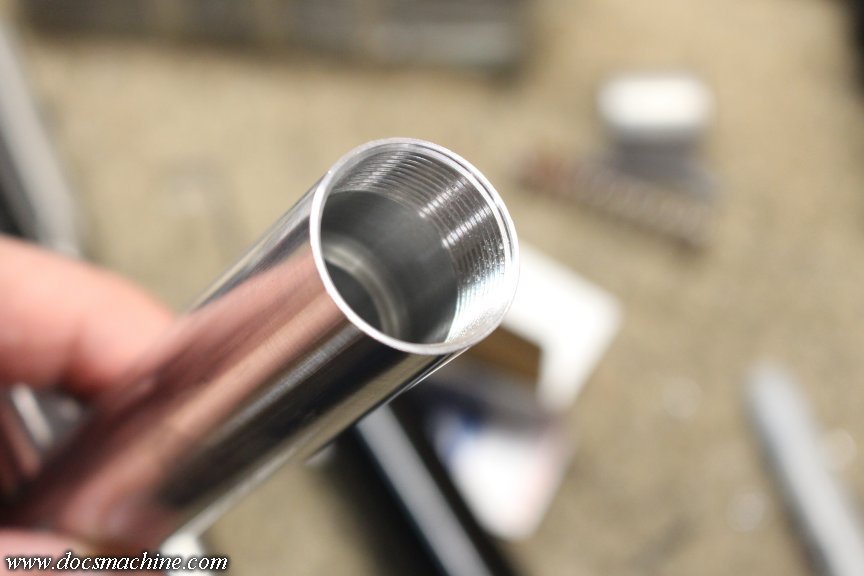
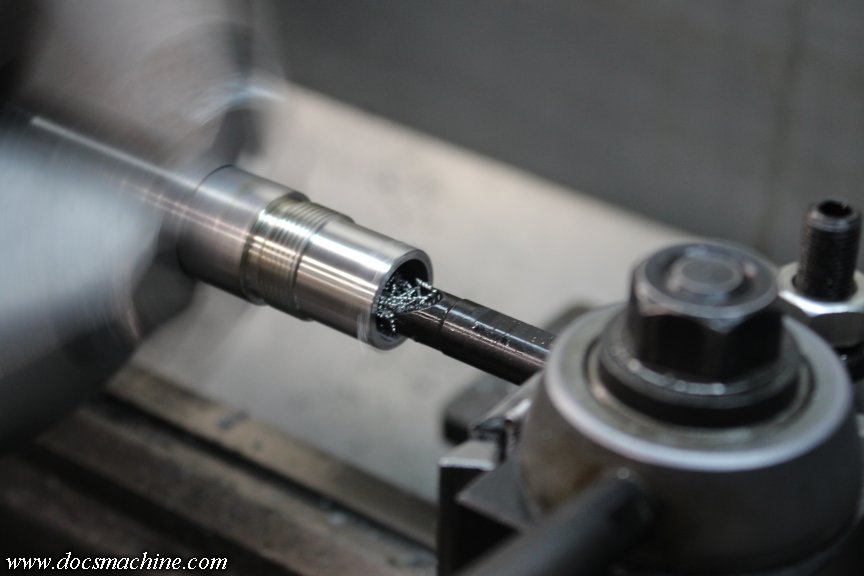
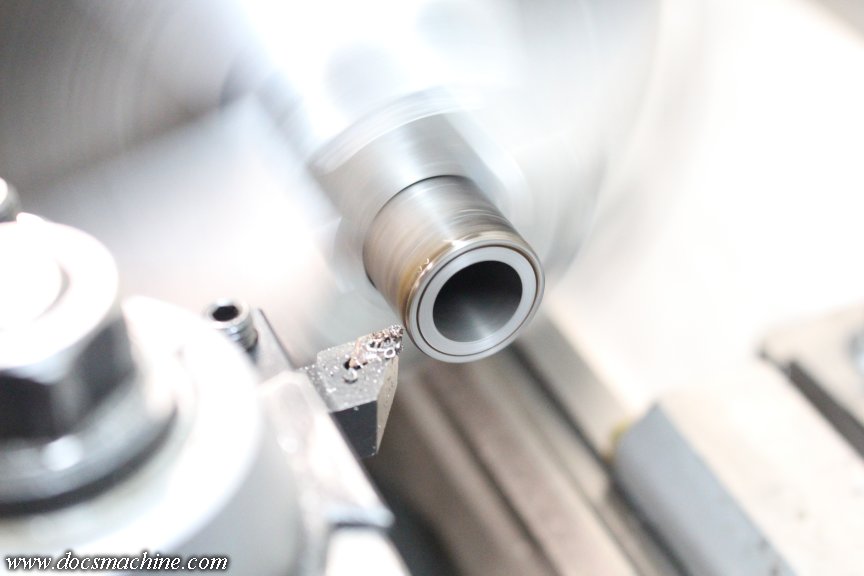
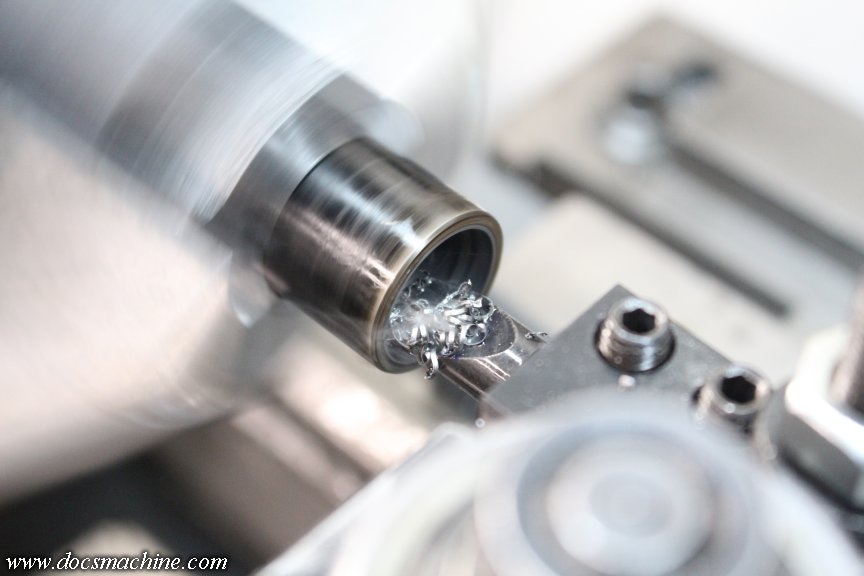
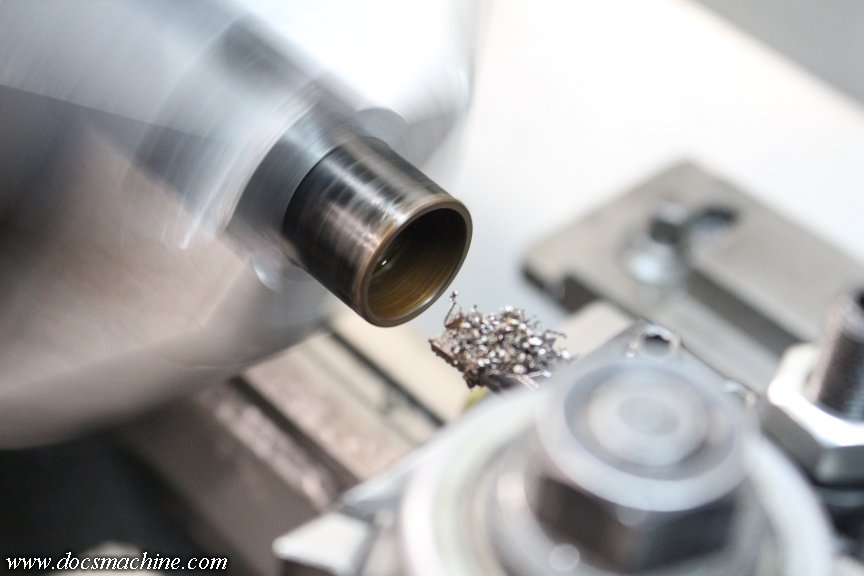
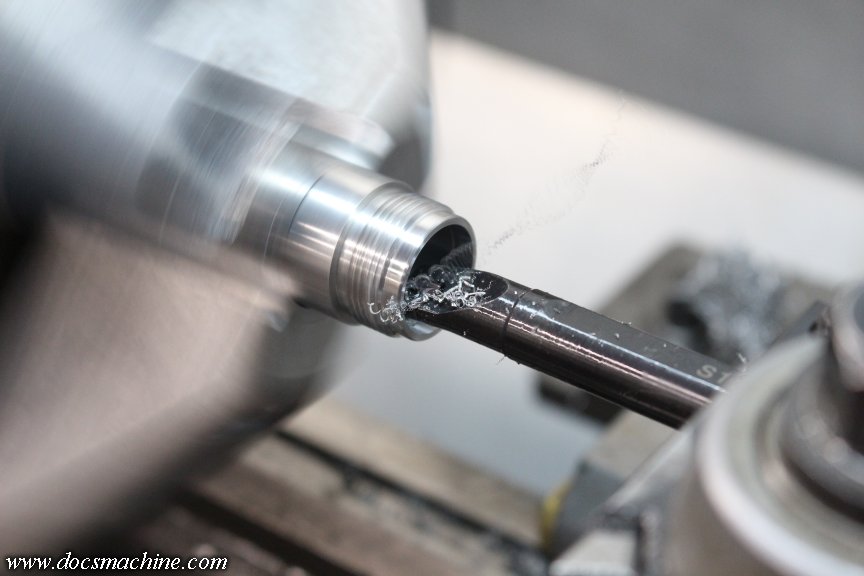
    I did a little experimenting, and a light filing or turning pass takes care of it nicely- not only making it feel better in the hand, but should also make the anno longer lasting.

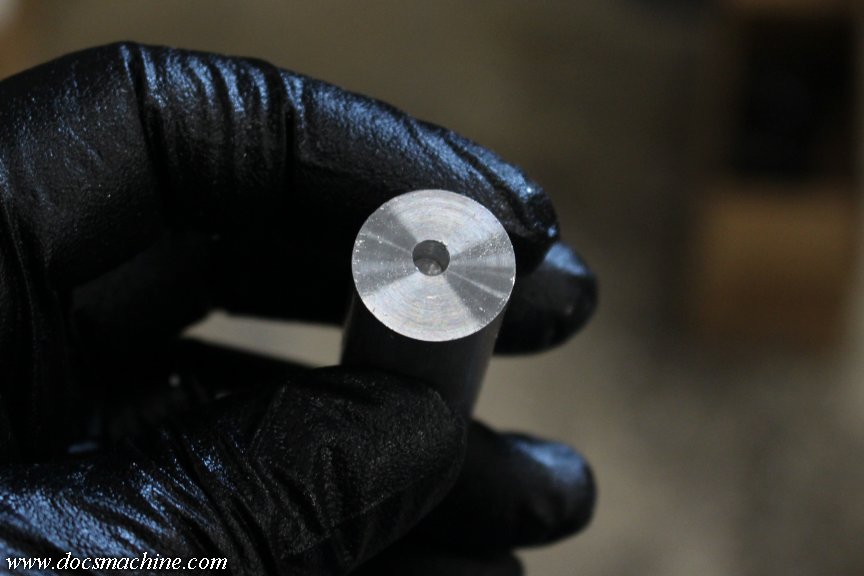
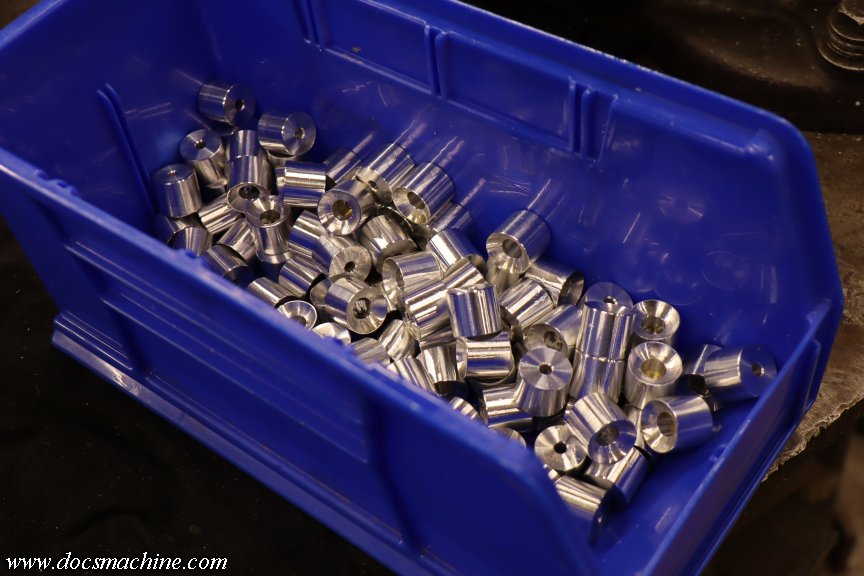
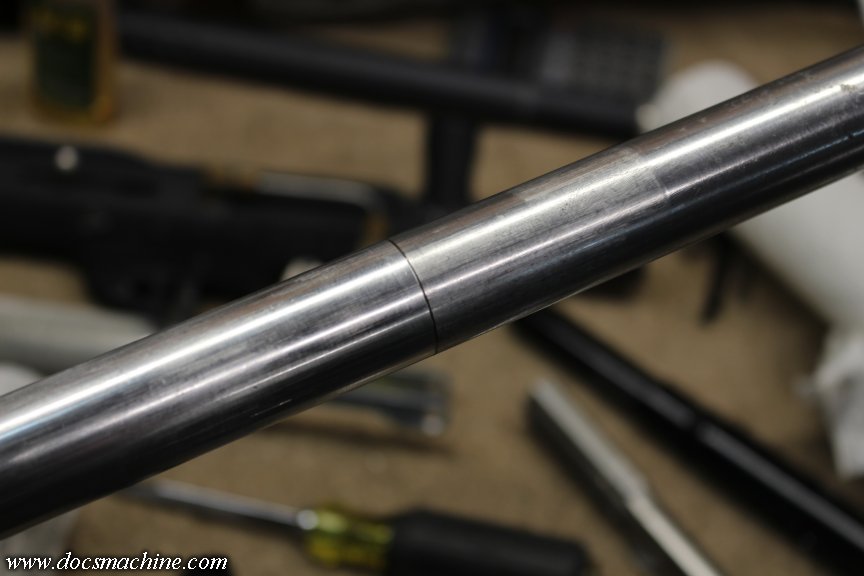
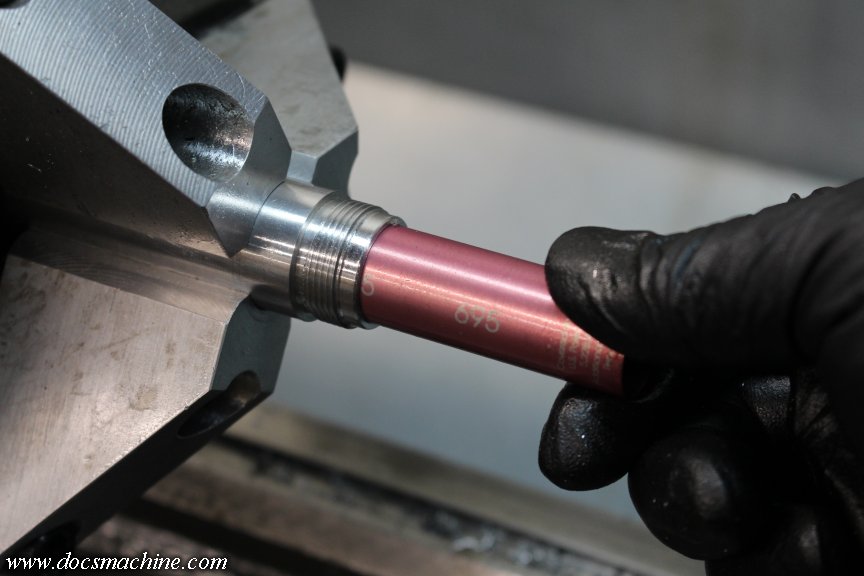
    I also came up with a minor cosmetic change I want to make, so I'll be running the second half once I've tweaked and tested the program to include those.

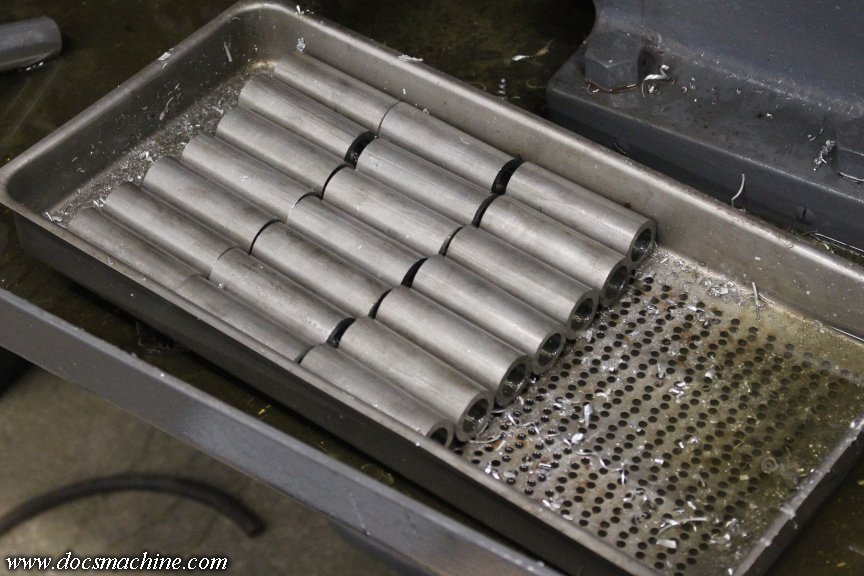
    But, that leaves me a hundred of these things to either hand-file one at a time, or... I dug out the vibratory polisher I've had for a couple of years- but have yet to actually use - and I'll run the finished ones through that. Except I have no media for it- I just ordered some, but that means it'll be next weekend before I can try it.

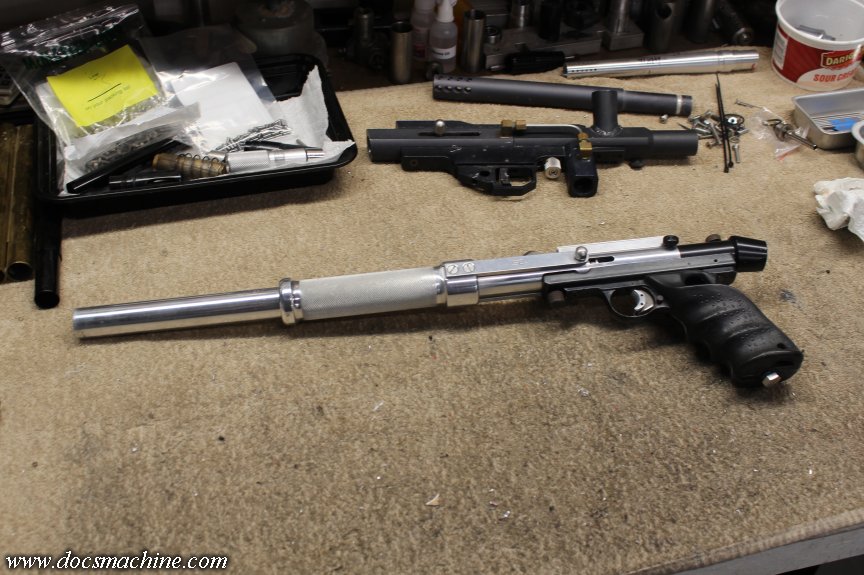
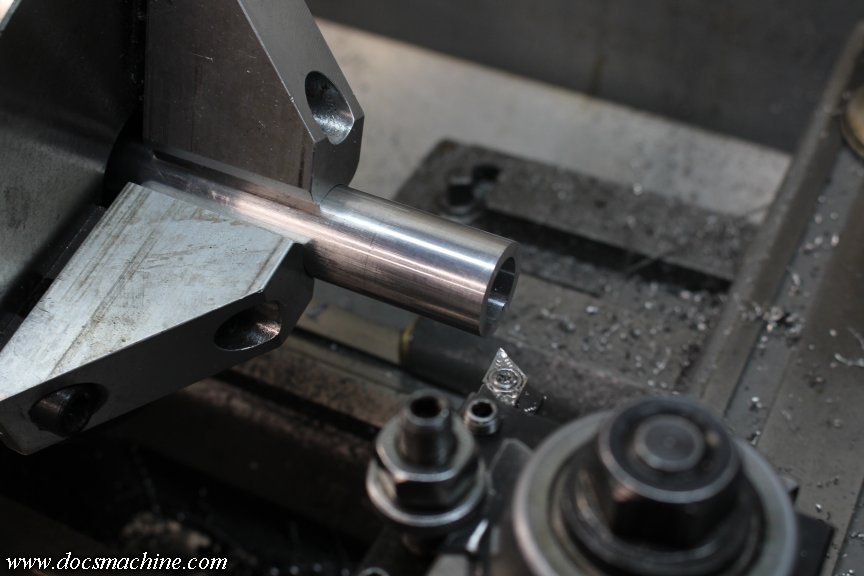
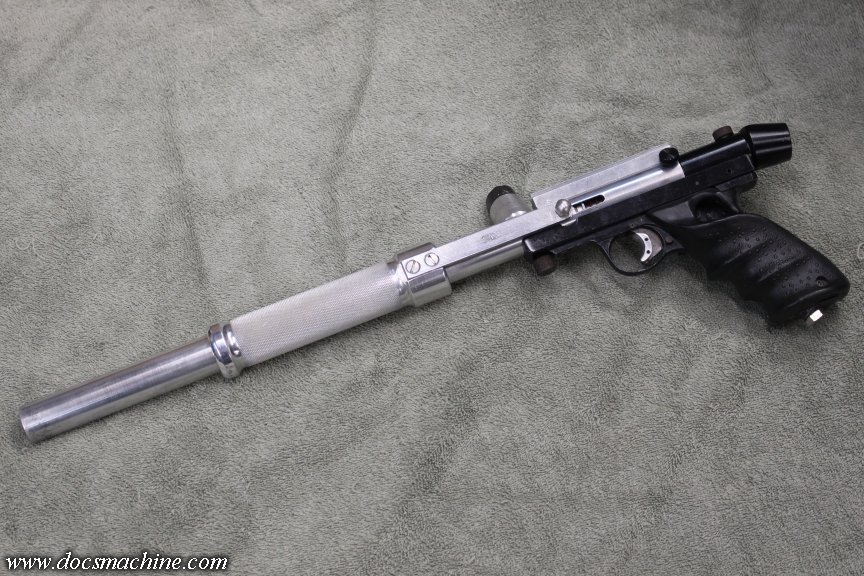
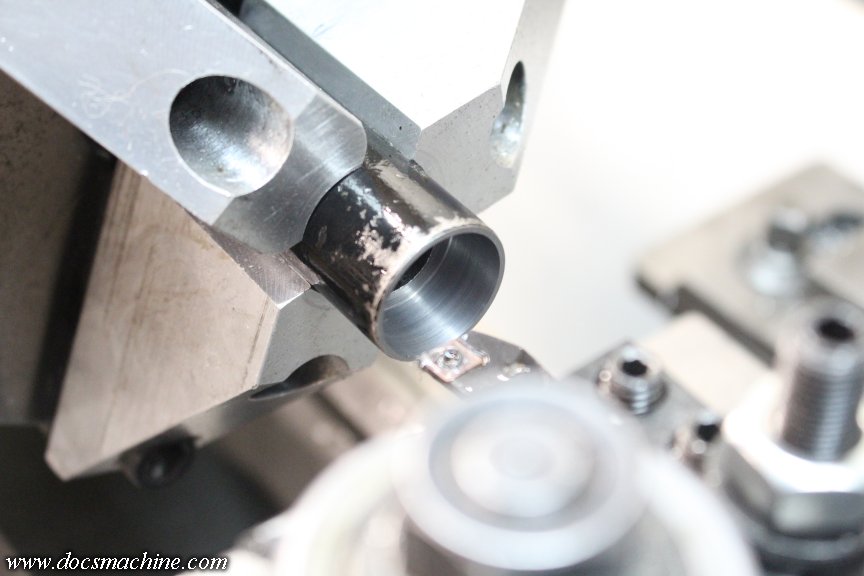
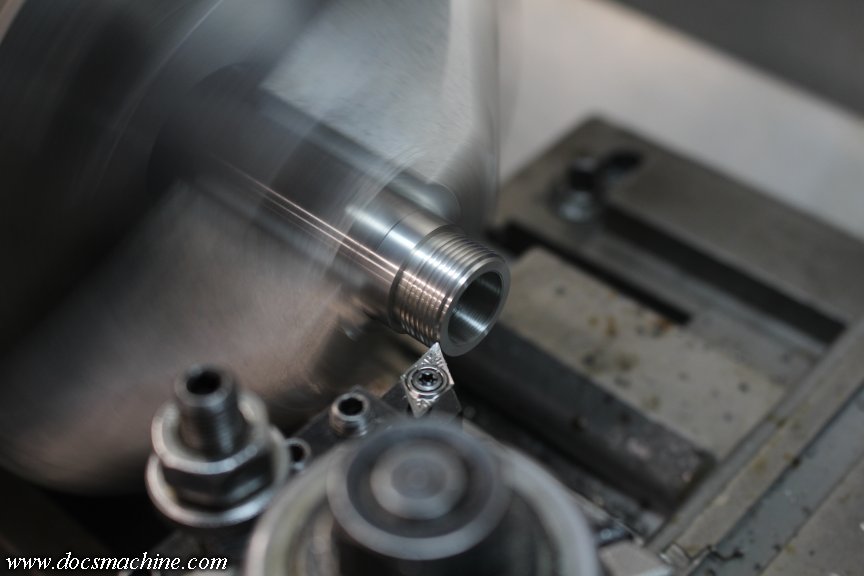
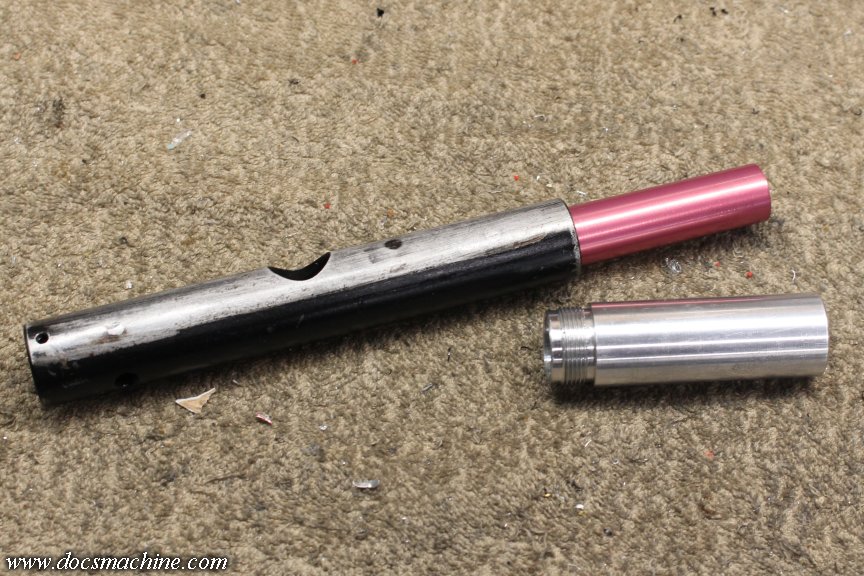
    And... of course I also have to make the collars and the 'shoe' that pushes on the 12-gram itself. Along with about three hundred other things I need to do this week...

    Stand by, folks. None of this is ever as fast as I want it to be.

    Doc.
    Doc's Machine & Airsmith Services: Creating the Strange and Wonderful since 1998!
    The Whiteboard: Daily, occasionally paintball-related webcomic mayhem!
    Paintball in the Movies!

    Comment


      #47
      The second batch of the year, back from the anodizer and freshly unpacked!


      I got the first batch back about two weeks ago, and I've been needing to take the time to set up some lights and get some decent product shots.

      But, for you ladies and gentlemen, a quick snapshot, and first stab at being able to pick some up for yourself! I'll be putting a post up in the Dealer's section in a few moments with more info.

      Doc.
      Doc's Machine & Airsmith Services: Creating the Strange and Wonderful since 1998!
      The Whiteboard: Daily, occasionally paintball-related webcomic mayhem!
      Paintball in the Movies!

      Comment


        #48
        One other new thing- new to me, that is- that I'm getting into, as I ramp up the CNC production, is surface prep for the parts.

        Usually, if I'm only making a dozen or two parts, it's no big deal to do a little hand-filing and manual deburring. But when you start talking fifty or a hundred or more, that starts taking a fair bit of time. And time is the one resource I cannot spare these days.

        The "big guys" use vibratory tumblers- a big shop might have a row of them, each with different media, and each able to hold hundreds of even large parts. For us little one-man garage shops, the little tumblers like reloaders and rock-polishers use, work just as well, with smaller batches.

        As I mentioned above, I've had one, myself, for a few years now, but never really had the need to actually use. This run, at just over 200 parts, though, was a perfect place to start.

        I'll fully admit this was new ground to me- I knew of tumbling, but what media? How long? Wet or dry? The more I looked around, the more it was obvious there's a big chunk of "witch's brew" to it- this media, for that long, with this additive, with this much liquid, etc. Unless you're doing this other material, in which case it needs to be this other media, with a different additive, and so on.

        I settled on one kind of common media, ordered some- and not even knowing how much I'd need- and gave it a try. I ordered five pounds, which turned out to be not enough for my big tumbler, but I was able to borrow a smaller one for which five was plenty. I won't bore you with all the details- unless you ask - but after a weekend of screwing around, here's the results:


        The one at the far left is straight out of the machine, simply cleaned of the cutting oil and the "fines" from the knurling process scrubbed off.

        Second from left was tumbled, dry, in a plastic "green pyramid" media, for about two hours. That deburred and smoothed it nicely, and I was happy with the results.

        But, between the two tumblers, I had a quantity of leftover corncob media, usually used just for polishing cartridge brass, so I ran a handful through that for several hours. That's third from the left: Tumbled in the dry plastic media for a while, then tumbled in the corncob.

        That gave me some pretty good results, but the dry media produced a lot of fine aluminum powder- the media turned dark graphite grey. I was strongly thinking I needed a respirator when handling it.

        The last trial was the plastic media, but wet, and with a touch of dish soap. That's the right-hand-most example.

        That one's easiest- no dust, one cycle, the parts just need a rinse to be clean- and I think out of the three attempts, will give the best surface finish. It won't be glossy, but it also won't be flat. It should be a 'satin' finish like you see, say, on factory Phantom parts.

        As I type this, I have one more batch cookin' now, and when that's done, washed and dried, I'll box it up and it'll be off to the anodizers in the morning. After that, I just have to kick a couple other projects out of the way, and then set up to cut the other two parts.


        Doc.
        Doc's Machine & Airsmith Services: Creating the Strange and Wonderful since 1998!
        The Whiteboard: Daily, occasionally paintball-related webcomic mayhem!
        Paintball in the Movies!

        Comment


        • superman

          superman

          commented
          Editing a comment
          I actually really appreciate you posting about this. I suspected this topic would come up shortly after parts were machined. lol Keep us posted on any changes as you run more.

        • Cal440

          Cal440

          commented
          Editing a comment
          Looking good Doc, patiently waiting for the finished product.I have subscribed so I don't miss your shop updates ,keep them coming.

        • tyronejk
          tyronejk commented
          Editing a comment
          Nice! I'm a fan of that marbled look of the #2 and #4.

        #49
        Doc, are these your own specs, or will these knobs thread into a PGP 2K body? Im aware that they are too long as these are made for quick changers, but I know I would definitely be interested in longer knobs that would fit. Some others might want them, too.
        💀Team Ragnastock💀
        Ion Long Rifle
        Spyder Pump
        BST Feedback
        Brass Thread

        WTB Sheridan Parts

        Comment


        • Jordan

          Jordan

          commented
          Editing a comment
          I think he's said these share PPS Fastchanger specs, either on here or the Guild.

        #50
        These things should be 100% compatible with the older Fast-Changers. That is, my knobs should fit the older collars, and older knobs should fit my collars, etc.

        As for length, the way these were originally designed, was with an add-on piece on the 12-gram end, I've been calling a "cup". The default size will be for pre-2K PGPs, but longer cups can easily be made for the 2K models. And an extended version can be made for things like the PMI-2 or even the KPs.

        I don't, however, know which ones will be popular enough to make, so I'm defaulting to the 'standard' PGP size. Once I have all the pieces together, I will handmake a few extensions, and offer versions for the other lengths.

        I think he's said these share PPS Fastchanger specs[...]
        -Actually, the one I'm copying is marked TASO. I was thinking about it the other day, and I'd be curious to know who actually invented the thing, and/or who produced the first ones.

        This TASO one is off one of my personal PGPs- and I know I bought that -the knob, not the PGP- probably around '96 or '97, back when a local hobby store still carried paintball gear. Earliest mention of them I've been able to find in my magazines, is a Direct Connect catalog- listed as a "Fassst-Changer"- which has a postmark date on the back, of August of 1991.

        Did Palmer's invent it? Their "Quiksilver" changer of the time, required a drop-out slot to be machined into the Sheridan lower tube. Was it an original PMI upgrade? They, of course, had a whole line of Sheridan upgrades; the "Turbo" valve, quick-pull and 'centerfire' bolts, delrin pump grips (back when most of the guns came with aluminum pumps) wooden grip panels, velocity-adjustable hammers, etc.

        And, if I recall correctly, TASO was a spin-off from PMI...

        Doc.
        Doc's Machine & Airsmith Services: Creating the Strange and Wonderful since 1998!
        The Whiteboard: Daily, occasionally paintball-related webcomic mayhem!
        Paintball in the Movies!

        Comment


        • Jordan

          Jordan

          commented
          Editing a comment
          Interesting, I have one of each AFAIK (TASO and PPS) and the knobs are not interchangeable. Whether that's due to wear or not, I don't know.

        #51
        Interesting, I have one of each AFAIK (TASO and PPS) and the knobs are not interchangeable. Whether that's due to wear or not, I don't know.
        -Oh? I have to admit I only assumed the PPS pieces were direct copies. All the ones I have, including two new-in-the-bag, are marked TASO. I'm pretty sure I've had a couple PPS ones over the years, but those either came on or went with customer guns.

        Not that it matters, my setup will of course come compatible with itself. And will definitely interchange with the older TASO and presumably even earlier PMI stuff (if that's indeed who made the originals.)

        Mr.J: Any chances you could get me some side-by-side photos and/or some measurements, comparing the two? You have me curious as to what the difference is.

        Although, come to think of it, I remember thinking, when I first started measuring these things, that I'd thought they had an ACME thread- kind of like Phantom barrel threads. I was kind of surprised to see they're typical 60 degree threads.

        I wonder if the PPS ones had an ACME, and that's why I was thinking that... If you could get us some pics, that'd clear things up a bit.

        Doc.
        Doc's Machine & Airsmith Services: Creating the Strange and Wonderful since 1998!
        The Whiteboard: Daily, occasionally paintball-related webcomic mayhem!
        Paintball in the Movies!

        Comment


          #52
          It has come time to make another batch of one of my few reasonably successful products- the Automag Barrel Adapter.

          I used to make these in-house, which was difficult and time consuming without CNC, and with generally-underpowered machines. A number of years ago, I started having a local CNC guy make them for me, but his lead times got longer and longer- the last batch I waited literally 2-1/2 years for, between ordering and delivery.

          This sort of thing was, as longtime readers might know, a big part of the reason I went heavily into debt to buy my own CNC machines.

          Anyway, that last batch is running critically low, so I need to start cranking another batch through. Thankfully, I think, that with the better machines and superior tooling, the task will hopefully be considerably less arduous than it was before.

          The first task is to drill out some solid round 303 stainless steel, so it can be bored to size. The Omniturn can bore easily enough, but can't take a big drill- I'd have to drill several small steps, and then do a good many small boring passes. So, once again, the big, hefty turret comes into play.

          We start with some slugs, cut roughly to length, of 1" 303 stainless steel:


          These get chucked up in the Warner & Swasey, with my latest secret weapon: A 3rd-generation indexible carbide spade drill:


          Which, I'd like to point out, wasn't cheap. I had an older model Iscar spade drill before (and still have it, actually) which was a HUGE step up from a standard twist drill, but that poor little Logan just simply didn't have the rigidity or horsepower to really push it. In this case, with the massive W&S (nearly four times the road-hugging weight of the Logan) and considerably more beefy geared-head spindle, I should be able to push it pretty hard.

          I am, however, still limited to the relatively slow spindle speed of the turret, and the lack of proper coolant- especially thru-drill coolant.


          But, nonetheless, considering I can go from solid bar- of stainless!- without even a center drill, to about a .650" bore, in one pass (well, one from each end, anyway) in less than two minutes (including swapping ends) is not bad at all.


          And don't let that pic fool you- the bore is actually amazingly smooth:


          With proper coolant and a somewhat faster spindle, I have no doubt I could push it even harder- I actually kind of get the feeling I'm not pushing it hard enough, here. Both this and the old Iscar of course can accept through-drill coolant, but I have no easy way of connecting such a thing- and on the turret, no convenient splash guarding.

          I still have at least two other batches of aluminum parts to run through the Omni (possibly three) but once those are done, I'll sweep it out thoroughly, and I have a further three batches to be run in stainless. (Sweeping it out means the metals aren't mixed when it comes time to take the swarf over to the recyclers.)


          Stand by, this one will be an "as time permits" project. I have enough stock for another couple of months, and I should be able to have these finished up before those run out.

          Doc.
          Doc's Machine & Airsmith Services: Creating the Strange and Wonderful since 1998!
          The Whiteboard: Daily, occasionally paintball-related webcomic mayhem!
          Paintball in the Movies!

          Comment


            #53
            I haven't abandoned the changers, either. I have plenty of other things on my to-do lists, besides just manufacturing. There's that meeting with the Pope, dinner with Elon, the Senate hearings, the treatments to control my hallucinations...

            Anyway, I got back to it, with the next part being the end cup. As usual, took me a good chunk of a day to get the tools set up, to get the program written and tested, etc. but eventually I got it dialed in.


            Just ran the first short bar I had set up for testing. I'll run the rest on Sunday, and likely have to go pick up some more material on Monday.


            And with luck, I can have those off to the anodizers by Tuesday or Wednesday.

            Doc.

            Doc's Machine & Airsmith Services: Creating the Strange and Wonderful since 1998!
            The Whiteboard: Daily, occasionally paintball-related webcomic mayhem!
            Paintball in the Movies!

            Comment


            • Cal440

              Cal440

              commented
              Editing a comment
              Thanks for the update Doc,those parts look good as always!

            #54
            Gonna title this one "You win some and you lose some".

            I was cleaning up the batch of parts I ran yesterday- about 30 pieces- and as I was trimming the bit left from the parting, I noticed a few problems. Best illustrated with this stub bit left over:


            The sharp-eyed among you may notice a slight problem.

            It's only about 20% of the parts from that handful, and it took me a minute to figure it out what caused it. The process is I centerdrill, then pilot drill (with that size drill) then counterbore.

            The piece is parted off at 5/8", but I'd been drilling that pilot a full 1" deep- why not? With the kerf of the parting tool, that left another 1/4" or so of previous pilot bore. My drill apparently has a dull edge, or is possibly not perfectly centered, and wanders slightly.

            For a fresh centerdrill, it's not a problem. But with the previous bore already started in the next part, the error accumulates, til 'it's noticeably off, like that.

            The fix was easy- I backed off the pilot drill 'til it was only about 10 thou past the parting kerf. The next cycle with the centerdrill, refreshes the hole, and keeps everything aligned.

            Try and find that one in a textbook somewhere.

            The other bit of fun was when I was hopping up my only other stick of material into pieces short enough to fit the Omni's headstock. And the blade in my bandsaw detonated halfway through.


            You can see it broke right at the weld. It was NOT giving me the classic "thump-thump-thump" or any other indication it was cracked or about to break.

            Can't complain too much, I got a lot of use out of that badboy, but on the flip side, that was my last good, sharp blade. The only other aggressive blade I had was the dull one I took off a couple years back when I thought my motor was somehow going bad.

            That got the job done, but yeah, I'm gonna need some more here pretty dang soon.

            All that aside, I was able to tweak the tooling and the program in the Omni, and get the rest of my available stock processed.


            Between that and what I can save/rework from the first handful, that's about half of what we need. I'll pick up more material in the morning and should be able to run the rest over the next couple of days.

            Doc.​
            Doc's Machine & Airsmith Services: Creating the Strange and Wonderful since 1998!
            The Whiteboard: Daily, occasionally paintball-related webcomic mayhem!
            Paintball in the Movies!

            Comment


            • Cal440

              Cal440

              commented
              Editing a comment
              Nice recovery Doc,I am no machinist but I can see how you have to think a few steps ahead of the process to keep everything correct in the end.Keep up the excellent work!

            #55
            How 'bout a bit more progress? I made a pretty decent job of the day, ran the rest of the 'cup' pieces, whipped off another simple program, turned a quick "emergency" collet to fit, and did the backside of each one.


            Nice quick little "second op" run, literally took maybe ten seconds to very lightly face, chamfer and deburr the center hole.

            Ran 'em all through the ultrasonic cleaner- with Pine Sol this time, to see if it worked any better against the oil- and they'll be wingin' their way to the anodizer in the morning.


            With them gone, I really need to catch up on a few other rather-cobwebby projects on the table. Some of you gents have been more patient than I might deserve. But hopefully after those are done, but before these parts get back from anno, I need to make the crucial third part to this assembly...

            Doc.​
            Doc's Machine & Airsmith Services: Creating the Strange and Wonderful since 1998!
            The Whiteboard: Daily, occasionally paintball-related webcomic mayhem!
            Paintball in the Movies!

            Comment


              #56
              Just a quick one for ya: Anybody want a lick of the Swarfcicle?


              Doc.​
              Doc's Machine & Airsmith Services: Creating the Strange and Wonderful since 1998!
              The Whiteboard: Daily, occasionally paintball-related webcomic mayhem!
              Paintball in the Movies!

              Comment


                #57
                I've been a bit busy in the shop lately, and let a few too many projects pile up- thankfully, some of you gents have been pretty patient.

                It'll be a couple of weeks 'til those changer parts will be back from anno, so while I still have a third part to make, I need to clear off some of this backlog first, before Guido swings by to break my kneecaps. Again.

                First up on the list- not necessarily in chronological order, but in this case, but by how much room the box takes up - is this early unibody Bushmaster.


                I'm told the owner has had it since back in the day, and wants to see if it can be upgraded to work with modern paint. Cutting and rethreading these for 'Cocker threads is easy and common, I've done a number of them. But in this case, the owner wanted the barrel cut to be hidden under the pump, and then bored to take Freak inserts.

                Since that's going to make for a custom setup anyway, I tweaked the idea even further.

                First step, take it apart. Try not to mix up the pieces with the three other markers on the table.


                Do a little funky eyeball measuring...


                And after checking it five or six times, run that badboy through the bandsaw!


                I have a chuck set up semi-permanently with extended soft jaws, bored in place and specifically for 1" diameter material, for projects like this. Holds with a little more support than a collet, and far quicker than a 4-jaw. With that, it was easy to bore it out for the Freak insert.


                Then simply stepped and bored, then threaded.


                Pretty easy stuff, the only tricky part was the unique Freak depth, which took a slight bit of finagling a little later on.


                Clean, oil and reassemble the main body, and we can move on to the other part.


                The barrel threads are easy- I can, and probably have, done them in my sleep. I hardly even need to look up the specs these days. (It's hard to forget they're 27 TPI, just like 1/8" NPT. )


                Double check the measurement again, and the barrel, too, gets bored to accept the Freak insert.


                Et voilá.


                So, for final assembly, we have the original barrel, which lost only a little over an inch and a quarter of overall length, which with the original gun body, accepts standard "classic" 5-inch Freak inserts.


                Now here's the tricky bit. You can also use a standard 'Cocker thread Freak back (the ones that take the 5" inserts) but fit it with the Freak XL 8" insert.


                That lets you use any classic back, with any Freak tip, for the old-school "All American" look. (Besides the potentially better efficiency of the longer insert.)


                Which moves the marker up from a barely-usable .693" bore, to a rather versatile setup, allowing the use of any bore and two different insert lengths.

                As soon as the owner pays me [does the pinky thing] one meelyun dollars! I'll have 'er wingin' it's way home on Monday.

                Doc.​
                Doc's Machine & Airsmith Services: Creating the Strange and Wonderful since 1998!
                The Whiteboard: Daily, occasionally paintball-related webcomic mayhem!
                Paintball in the Movies!

                Comment


                  #58
                  Next up on the backlog-clearing was another fairly simple mod- "Freaking" an old Nelson 007 body.

                  It was sent to me stripped and bare, and with the upper tube removed. That makes the mod easy- I can do this with the top tube in place, but it's trickier to accomplish.


                  First order of business was to remove the old barrel extension sleeve, which, typically (it's of course a steel gun body) has rusted into place. Fortunately, this one was a reasonably easy removal- I've had to cut or turn them off, before.


                  The body then gets chucked up in the soft jaws, and the barrel extension parted off as the first operation.


                  The slight bit remaining gets faced down to level with the body.


                  Note the 'ring'. The body is formed in two parts- the outer tube, that forms the hammer and bolt chamber, and a barrel insert that's pressed into place and spot-welded. This'll be interesting in a moment.

                  That inner barrel gets bored out to .500" or so deep...


                  And right around the .850" mark (ID) you break through and the last thin skin of the barrel falls away. (Note the rust.)


                  That just gets a couple more light skim cuts, to bring it up to the root diameter of 'Cocker threads.


                  Which, if you'll allow me to digress a bit, may very well be where we got 'Cocker threads. Early mods to the 007 included boring it out to take threaded-in barrel "extensions"- keeping in mind this was all years before we even had the idea of removable barrels. With the later 2-piece 007s like this (early ones had a machined 1-piece lower tube) that parting line between the insert and outer wall kind of falls right where you'd want to put a more conventional thread- that is, something more common like a 7/8"-14.

                  Going smaller would be tricky with potentially thin and fragile insert walls, so that left going larger. What was needed was a relatively fine thread, where the OD was safely under 1", and the thread root diameter was around .850". 15/16"-20 isn't a 'common' thread size, but neither is it custom or unique. Taps could be ordered off the shelf, even back in the 80s.

                  I suspect- but of course can't prove- that Bud, who was a general airsmith before going into Sniper production, had done some mods to 007s, and made barrel extensions with that thread. Not long after, in developing the Sniper, he not only had those taps on hand, but probably also some of the same 1" barrel material.

                  If I'm right- and I think I'm at least in the ballpark- then modded 007s are responsible for the 'Cocker thread we all use, today.

                  Anyway, with the thread step bored and threaded, the rest of the body is bored out to take the Freak insert:


                  And with a little deburring, that finishes up the body. As for a barrel extension, I had made up a small handful of stubby 'Cocker barrels a few years back, simply because I had the bored material left over from another project. I still had a couple of those left, so I dusted one off for this project.


                  Since we don't need full, proper 'Cocker threads, for ease of machining, I lop the breech hood off...


                  And then trim back the threads a little, in part so it doesn't take so long to screw it in and out.


                  Then, after a quick measure of the body with an insert, the extension is bored out to match.


                  Et voilá.


                  And before removing it from the chuck, we screw the body on to be sure the spacing and depth is right:


                  And that's it! It's a fairly simple job, especially, as I said, with the top tube already removed. Anyone with a lathe and the right tooling can do it, as long as you're careful to get your dimensions right.


                  Oh, almost forgot- we needed a screw hole for the Phantom feed block:


                  This one, too, should be wrapped up and on it's way home tomorrow morning!

                  Doc.​
                  Doc's Machine & Airsmith Services: Creating the Strange and Wonderful since 1998!
                  The Whiteboard: Daily, occasionally paintball-related webcomic mayhem!
                  Paintball in the Movies!

                  Comment


                  • Jordan

                    Jordan

                    commented
                    Editing a comment
                    Looks great! Can't wait to finish it up.

                  • DocsMachine

                    DocsMachine

                    commented
                    Editing a comment
                    On it's way!

                    Doc.

                  #59
                  Just a little teaser for you ladies and gents:


                  For those not following other threads, I've very generously been invited to Supergame in Oregon, at the beginning of May. I'm trying like hell to make it, although there are some things outside my control that may prevent it. (And no, it's not that pesky ankle monitor- I quietly slipped that onto a passing moose. They're currently looking for me up near Nome. )

                  As such, I'm trying to finish up a few of the projects I have on the table, get one last batch of anno out- and back!- and finish up a few custom bits I want to have along to show off.

                  The other day, I had one of those "wild hare" ideas, that was actually an adaptation of another idea I'd been rolling around in the back of my mind for a while. I made a test part, which is a little rough, but cool as hell. The small batch up there, I may or may not have done and back from anno in time, but I'm hoping I can.

                  What are they? Not tellin'. If everything works out, I'll have 'em with me at SG and you can check 'em out there. If not, I may send 'em to those that helped pay my way.

                  Doc.
                  Doc's Machine & Airsmith Services: Creating the Strange and Wonderful since 1998!
                  The Whiteboard: Daily, occasionally paintball-related webcomic mayhem!
                  Paintball in the Movies!

                  Comment


                  • superman

                    superman

                    commented
                    Editing a comment
                    I hope there will be a video of both whatever your making and hopefully your supergame trip.

                  • DocsMachine

                    DocsMachine

                    commented
                    Editing a comment
                    Time constraints have unfortunately kept me from doing much video work. I've recorded some of the fast-changer knob stuff, but not much more. I'm seriously short on time, and already very badly backed up- thankfully not so much on customer work, but definitely on production and other shop work. Shooting a video of a fix or mod at the very least makes that process take easily three times longer- and four or five times is not uncommon. I just don't have that much time to spare right now.

                    If/when I go to the game, yeah, you can bet I'll have a ton of photos- but I'm not gonna do the influencer thing walking around with an iPhone, prattling on like a moron.

                    Doc.

                  • NONOBLITUS

                    NONOBLITUS

                    commented
                    Editing a comment
                    Hmmmmm big block of aluminum, I sense something cool on the way.

                  #60
                  As noted, there's a few things I'm trying to get done before heading off to SG- either to have off the table, back to the customer, or to have with me at the game. The big one right this second is another batch off to the anodizer- and I'm cutting my margins razor thin here. There's every chance this stuff won't be back in my hands 'til after the game.

                  But I'm tryin'.

                  One of which is, I've been working up yet another batch of L-stocks. And, in a typical situation, I decided to spend some time in order to save some time.

                  After I get the bars machined, but before they're bent, I sand them smooth. I've usually just done this one at a time, by hand- as in literally, a hand powered block sander. One thing I've been meaning to do for a while is make a quick fixture to hold them stable, so I can use an electric sander- so, this weekend, I did just that:


                  Some scrap plywood out of the bin, a couple quick turned aluminum plugs, a couple screws and some white glue. Ain't pretty, but it works.

                  Then, outside in the three inches of fresh snow (and we got three more inches last night- welcome to Alaska! ) I was able to drop in two at a time, and they're held solidly enough I could run the palm sander over them.


                  After that, it was a simple matter of running each one through my bending fixture, and there we go!


                  They still need the grip-end machining, of course, and I need to rework my fixture for that today, but these should be done this evening. If you want one plain, drop me a PM or email, else these will all be heading off to anno hopefully by the end of the week. (Black, if it matters.)

                  And, since I use the same bending fixture for the P-stocks, and I have another batch of those in the works too, I made up a handful of the T-pieces, and ran those through the tumbler while I was working on the L's.


                  Those, too, will hopefully be done and off this week as well.

                  Doc.
                  Doc's Machine & Airsmith Services: Creating the Strange and Wonderful since 1998!
                  The Whiteboard: Daily, occasionally paintball-related webcomic mayhem!
                  Paintball in the Movies!

                  Comment

                  Working...
                  X