Hey doc, would you ever consider making a pgp quick changer out of brass? If so I'd definitely be first on the list!
-
-
The whole thing, or just the collar? I'd considered doing up some collars, which would better match the body, but they're rather thin when they're machined. That's why I went with the high-tensile stuff.
Doc. -
I'd be in to either/any options, I just like having metals that meet be the same material, and also love all matching markers.
I'm not very informed on machining, but is what your saying brass can't be threaded that fine and retain its form? I could see that being the case from an outsider perspective.
-
-
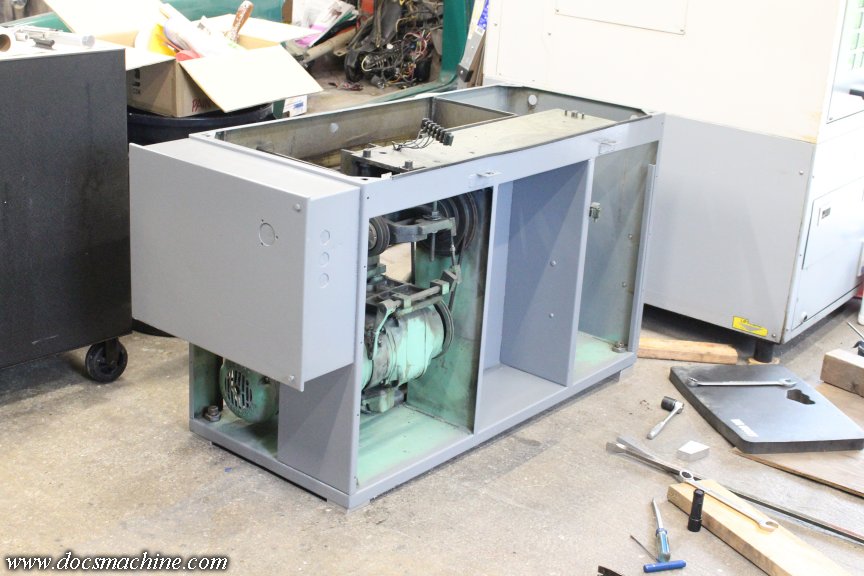
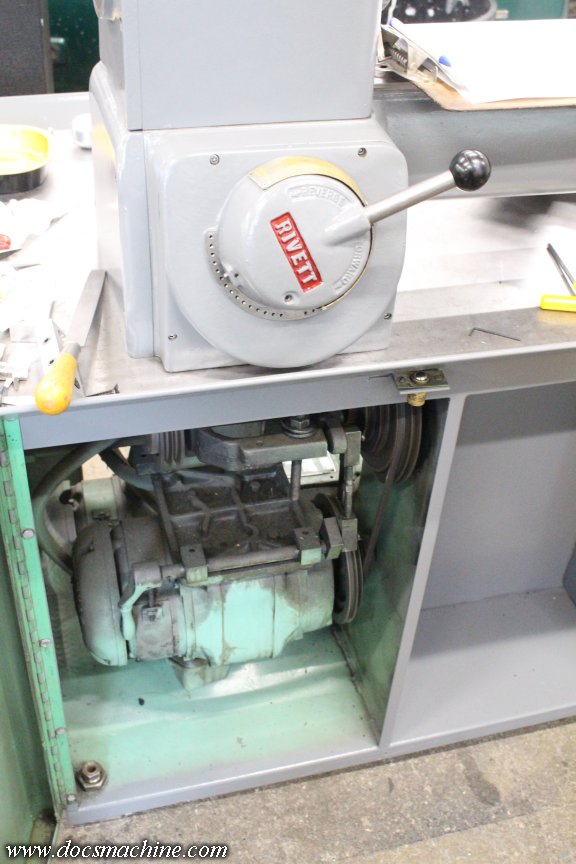
Got quite a bit done today- both in the shop and on the new machine.
Before I started reassembling things to the cabinet, it needed to be properly leveled. This section of the shop used to have a drain, which has long since been filled in, but the floor still 'slopes' towards it. This necessitated a little bit of customizing...
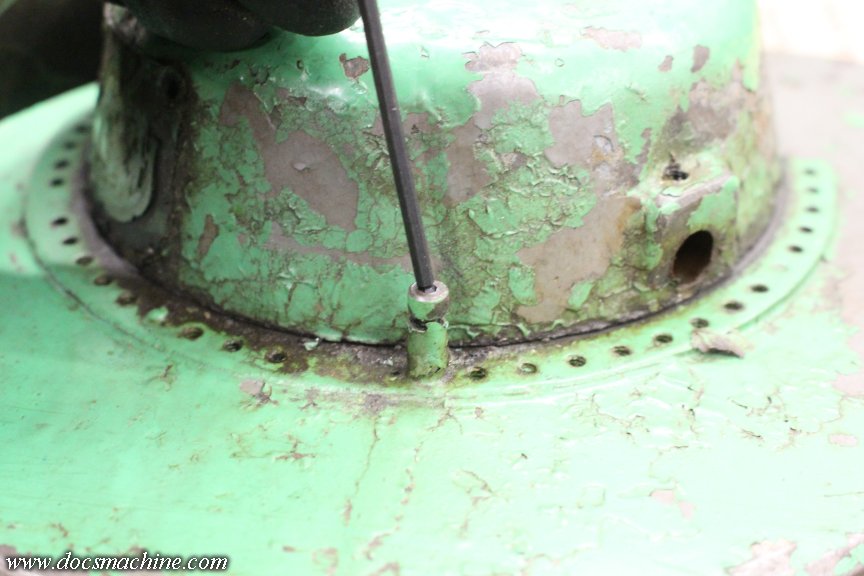
First, though, the lathe has these adjustable screw 'feet'.
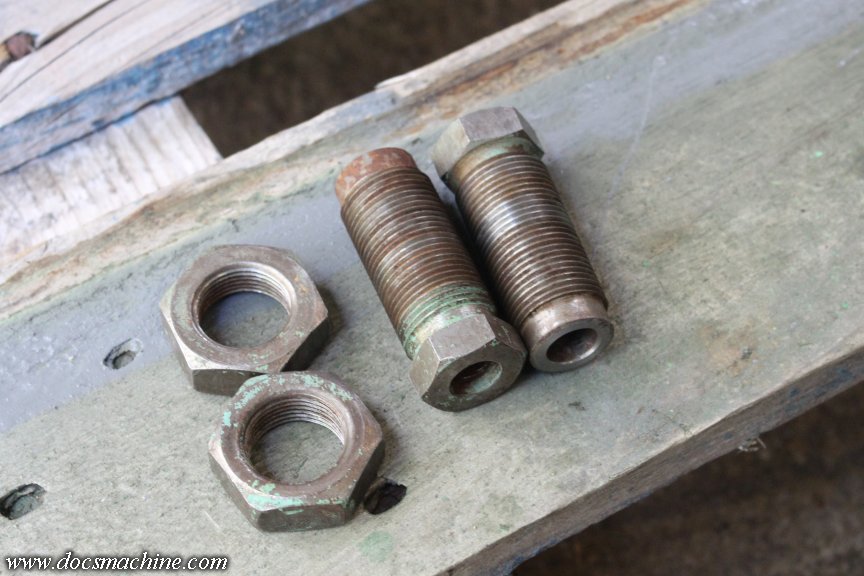
Common to many machines, the Springfield has ones much like it. (Eight of them much like it. ) The only problem being they only had about 3/8" of usable adjustment- they're only intended for minor unevenness, and fine-tuning the level of the machine. The floor slopes just a bit more than that...
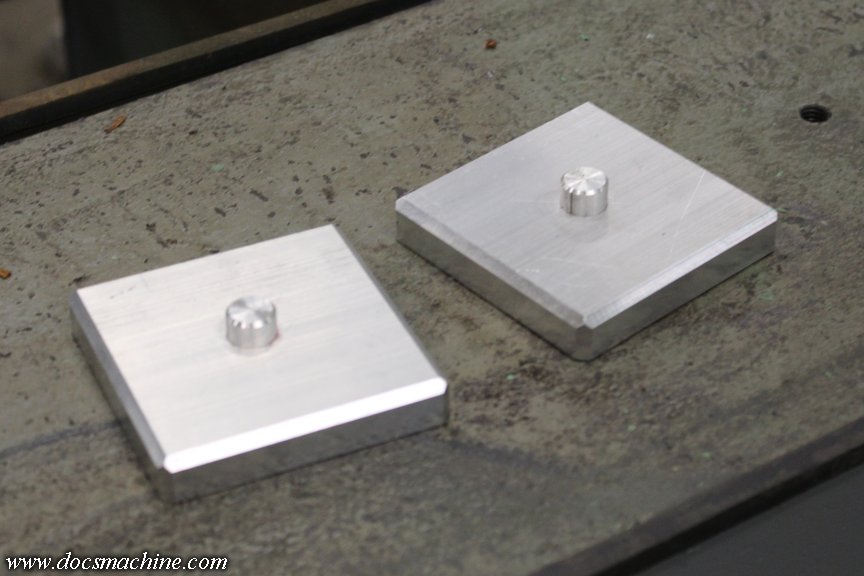
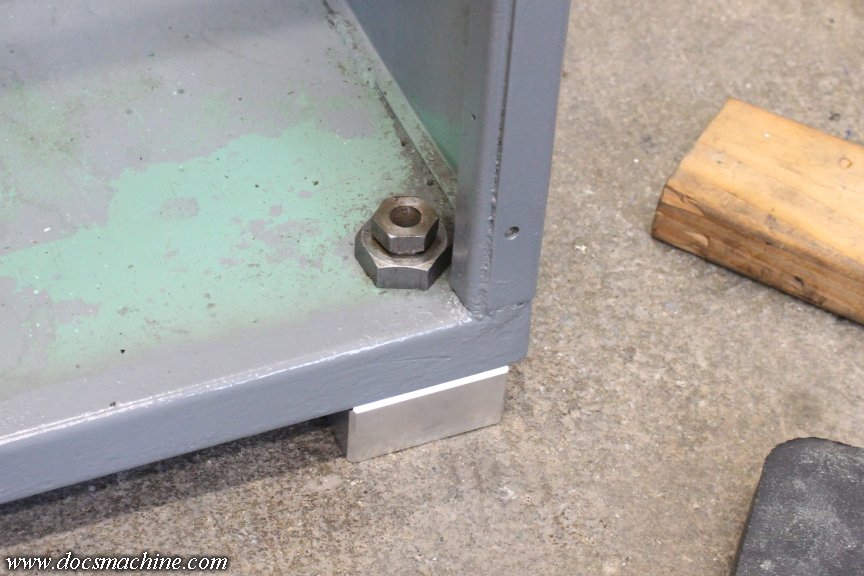
So, for the first two corners, the ones that need the least "rise", I bandsawed and milled-square two 3" chunks of 1/2" 'luanmum.
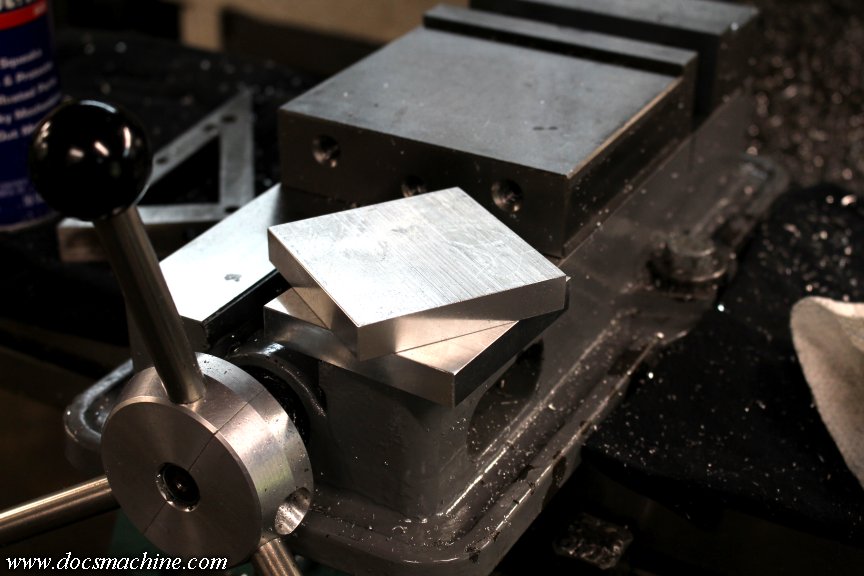
These I drilled and bored in the center to 1/2", simply using an endmill.
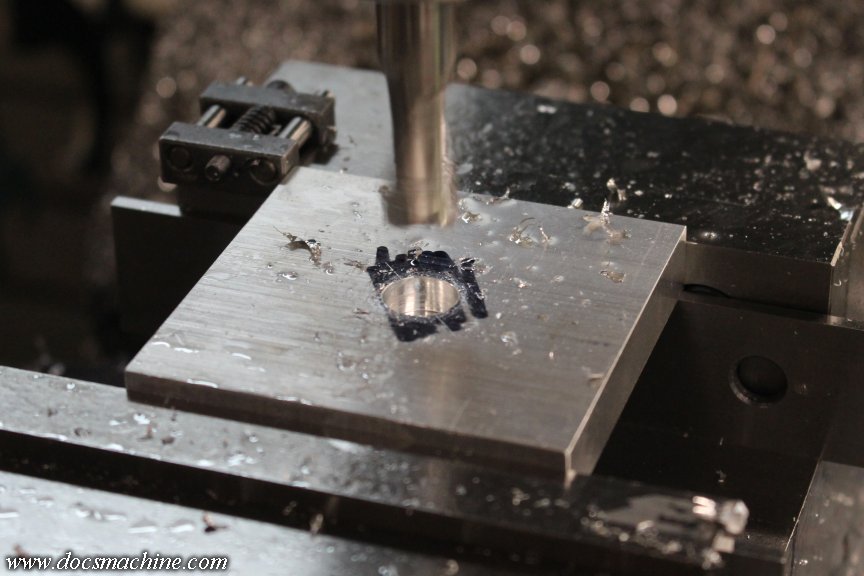
And, just for a little style, I chamfered the top edges a bit.
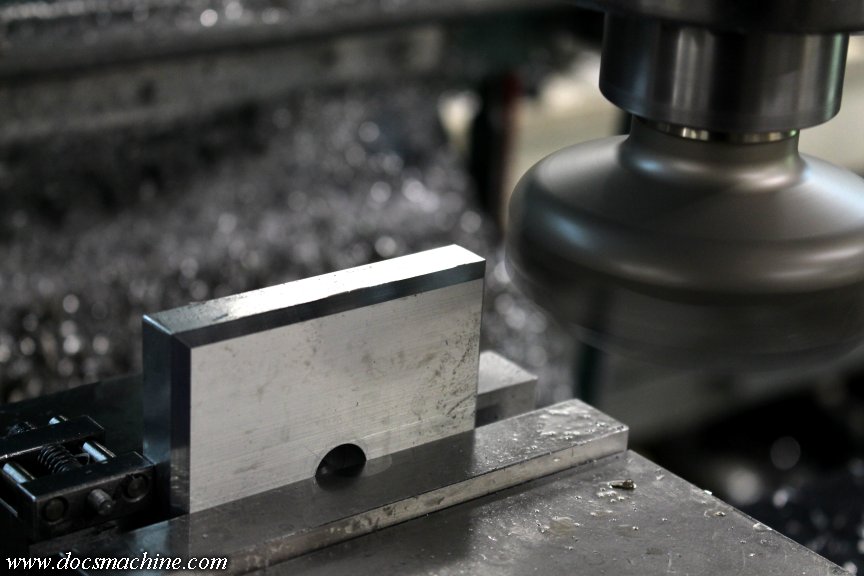
I then made some 1/2" long barrel pegs out of 1/2" round stock...
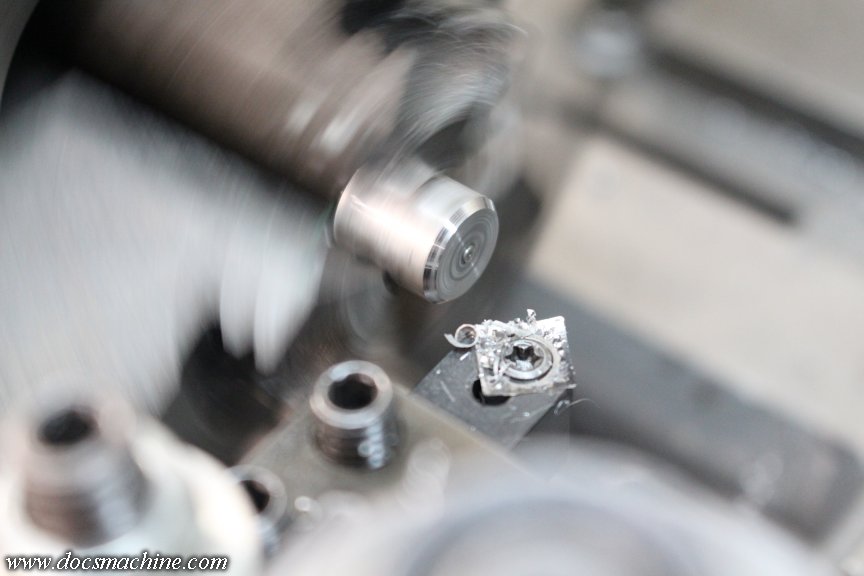
And corked those into the plates with a dab of red LocTite.
The plate spreads the load a little, and the 'peg fits into the bore of the adjuster (hollow because the machine was bolted through them to a shipping pallet when it was first sold) so the machine can't walk off the plate, or the plate slide out from under the foot.
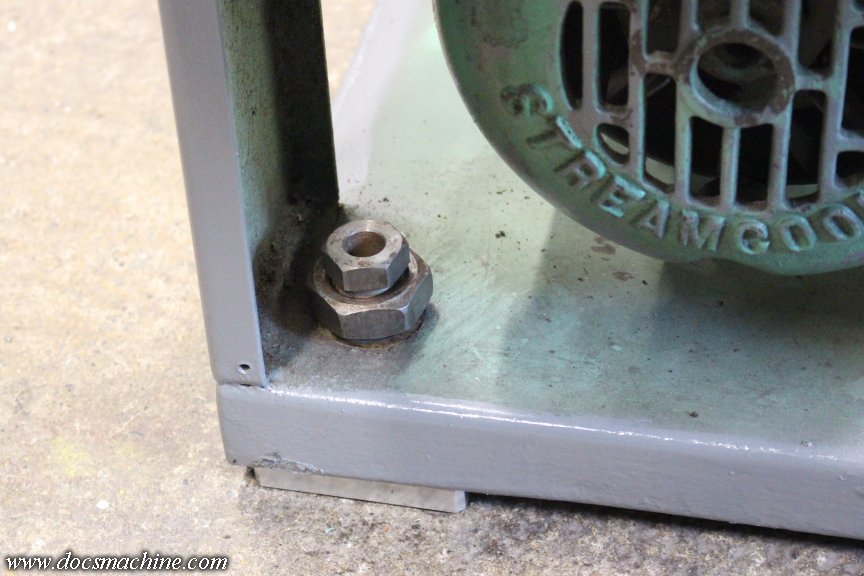
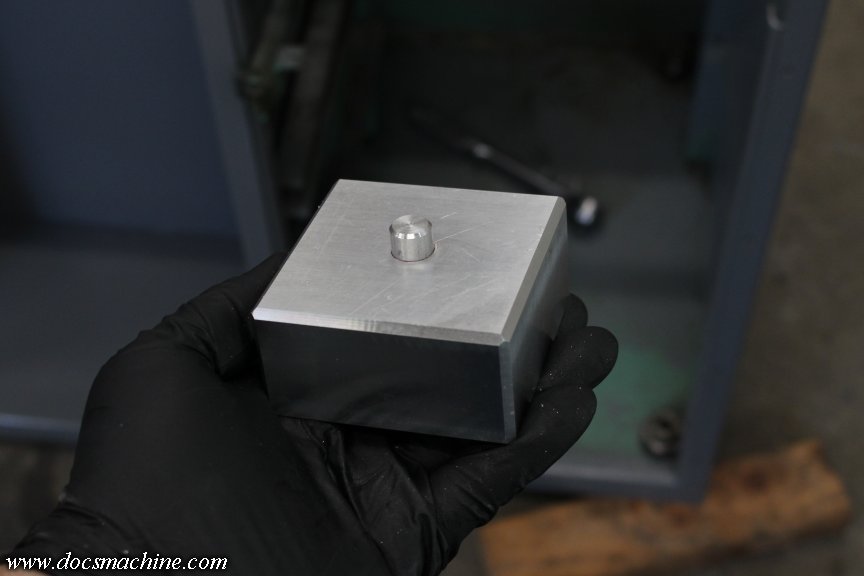
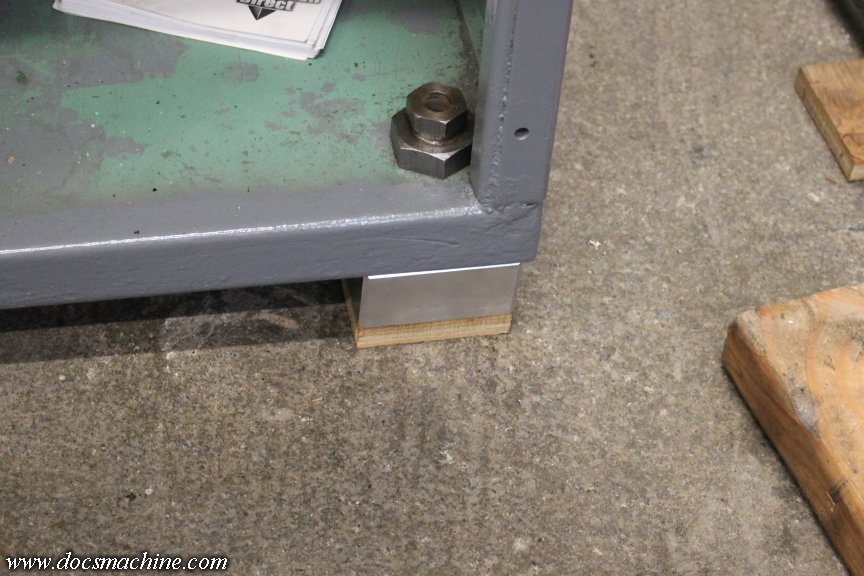
The third corner- rear right- needed a 1" thick plate, and the front-right corner, needed one a full inch and a half tall:
That gets us pretty close to level-and you can see how little adjustment is left on the bolt.
Et Voilá!

Next up, before the chip tray can go on, I needed to clean up the spring-loaded door latch detents.
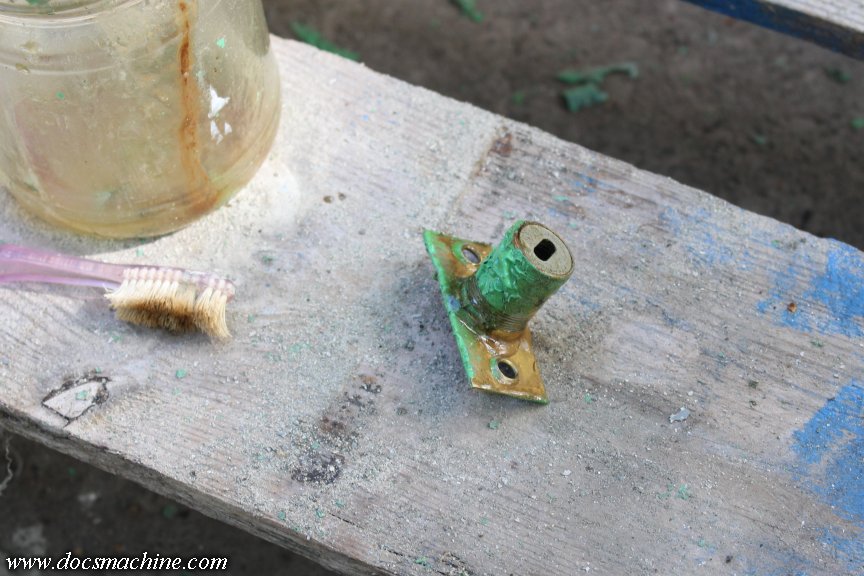
And get those installed.
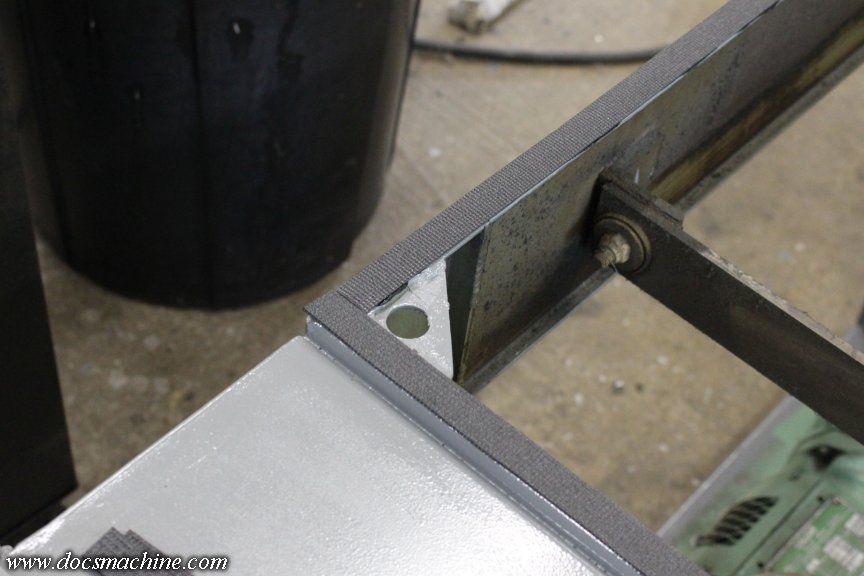
Now, when I took this thing apart, there were strips of a cork-gasket type material around the top edge of the cabinet, that the drip pan rested on. It was oil-soaked and disintegrating- this machine is around seventy years old- so I scraped it off and tossed it. For a replacement, I had a near-new roll of Homey-Dee tool-drawer liner, and sliced off a few strips with a razor knife...
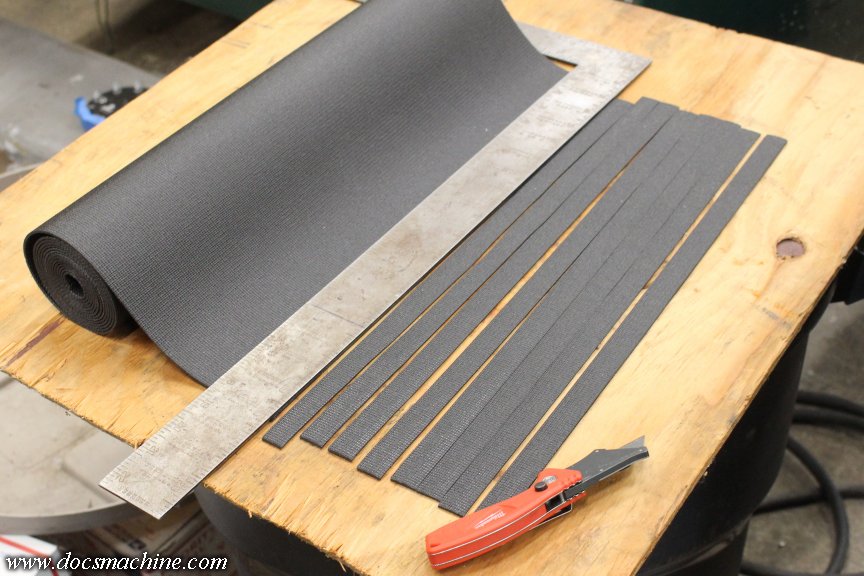
Which I then glued to the top rail with a few dabs of black RTV. It's not a "seal", it's really just an anti-vibration cushion.
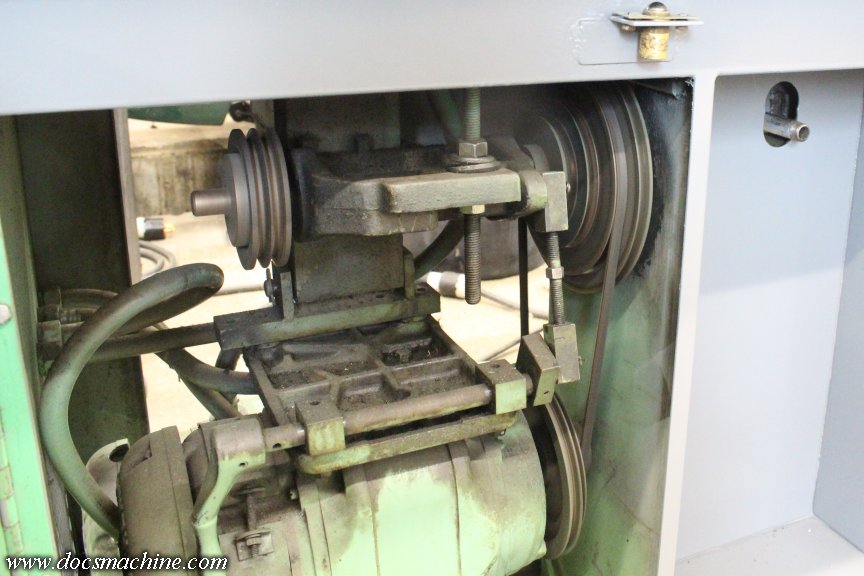
Then, while I was waiting for help to manhandle the drip tray back into place, I pushed that loose key back in, shifted the pulley over on the shaft a tad to better line it up with the motor pulley, and tightened the setscrew back down.
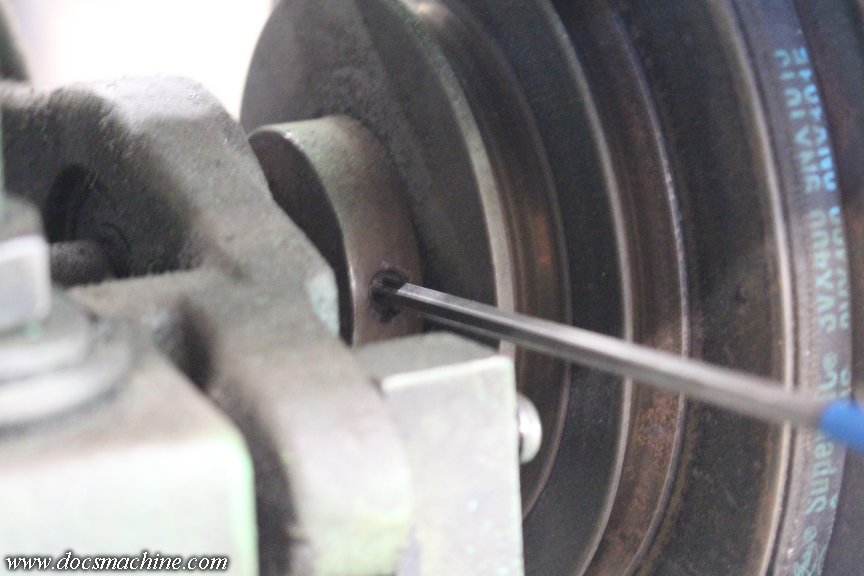
I'll keep an eye on it and see if it works loose or goes for a walk again.
And, I got out some fresh Scotchbrite and some WD-40, and scrubbed the rust off the bedway as best I could.
It's better than it was, but there's still more faintly-visible staining than when I got it. Kind of mildly annoying- concrete evidence of ones' laziness always is- but of course doesn't affect accuracy or performance.
Finally, help arrived and we got the drip tray worried back into place. (It's tricky to get the sump and it's drain 'rotated' into place when there's only just enough room for it.)
Next up, several days of... more cleaning, sanding and painting! Yaaaay! (And there was much rejoicing.)
Doc.Doc's Machine & Airsmith Services: Creating the Strange and Wonderful since 1998!
The Whiteboard: Daily, occasionally paintball-related webcomic mayhem!
Paintball in the Movies!Comment
-
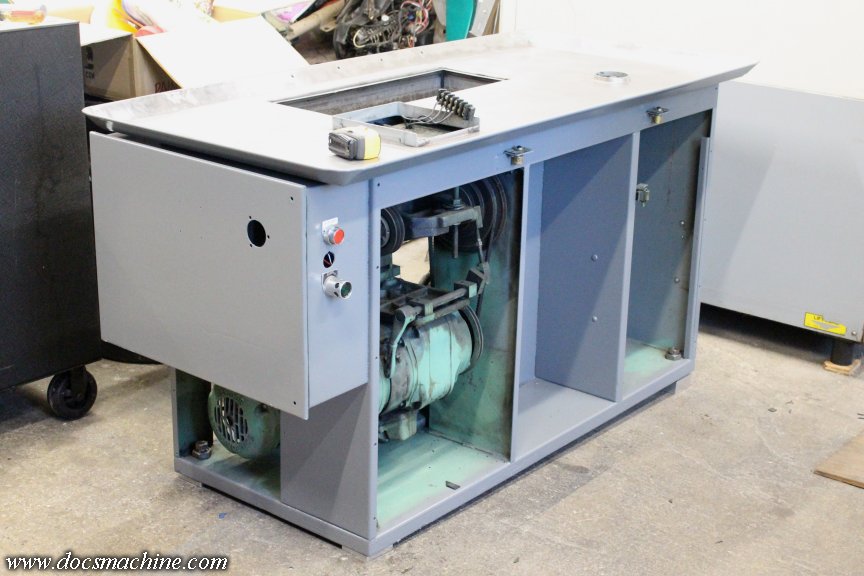
Gettin' down to the last of the big bits- and good thing, too, as there's supposed to be nasty wind and rain in the next couple of days.
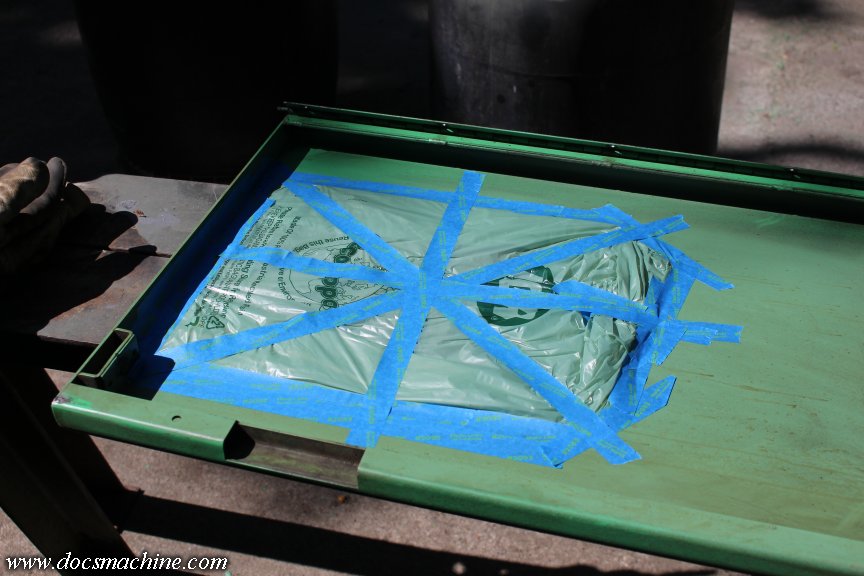
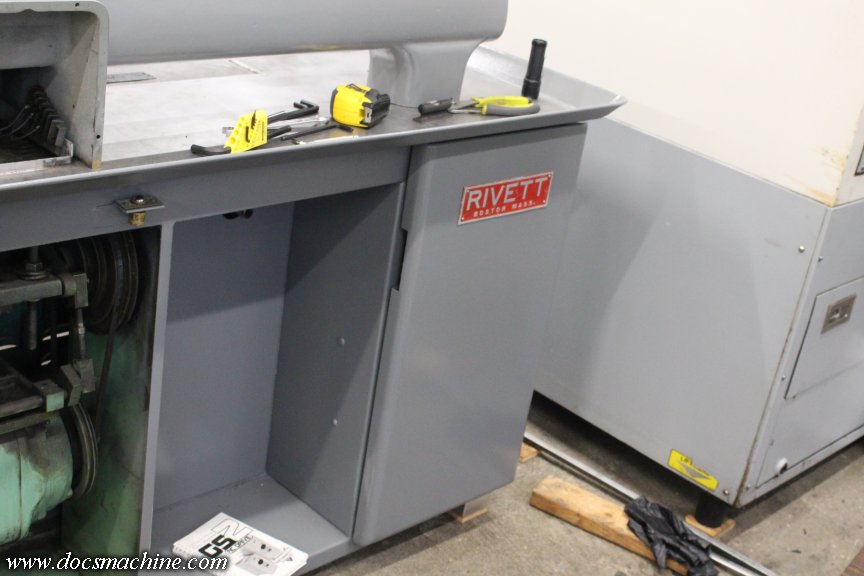
Inside one of the doors is another paper info tag, listing the speed ranges of the belts. It's in better shape than the other- being actually readable- but I still can't remove it. Thinking I was going to hose the outside of the door with the Purple ZEP and pressure-wash it, I taped it over with a plastic grocery sack.
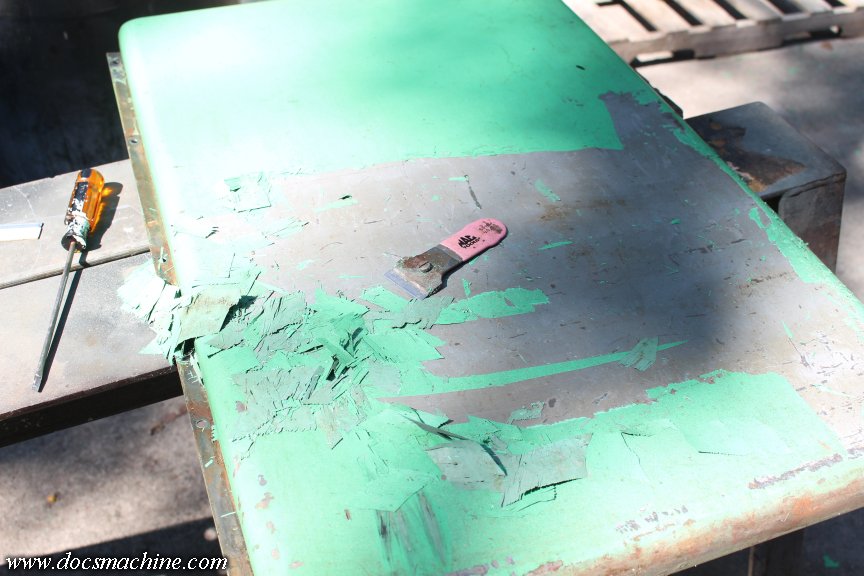
However, on a whim, I tried a simple razor blade scraper- and again, the green practically fell off.
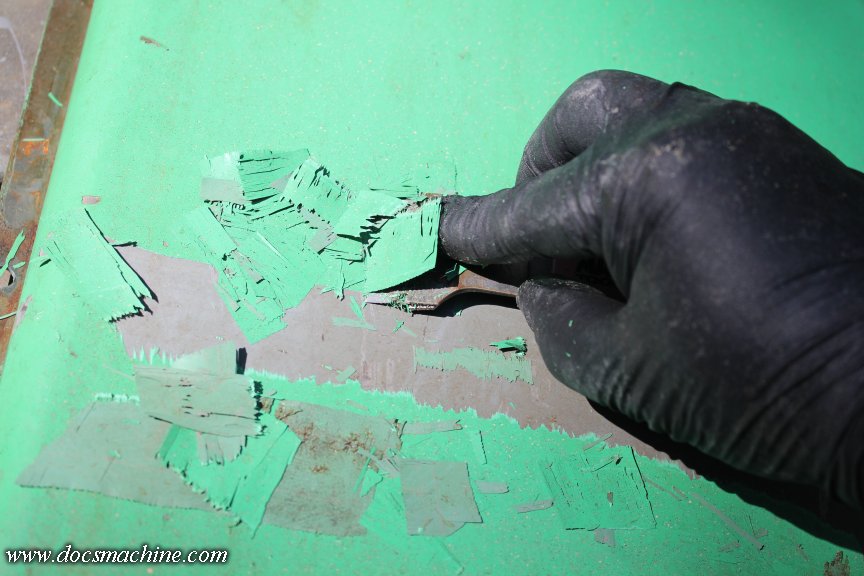
It took about an hour per door, and six or seven blades each, but I was able to get it down to the original grey, the original primer, or even bare metal with little effort.
After that, a few moments with the DA got it buzzed down to baby-butt smooth- if your baby happens to be armor-plated, anyway.
Then just primed...

and painted!

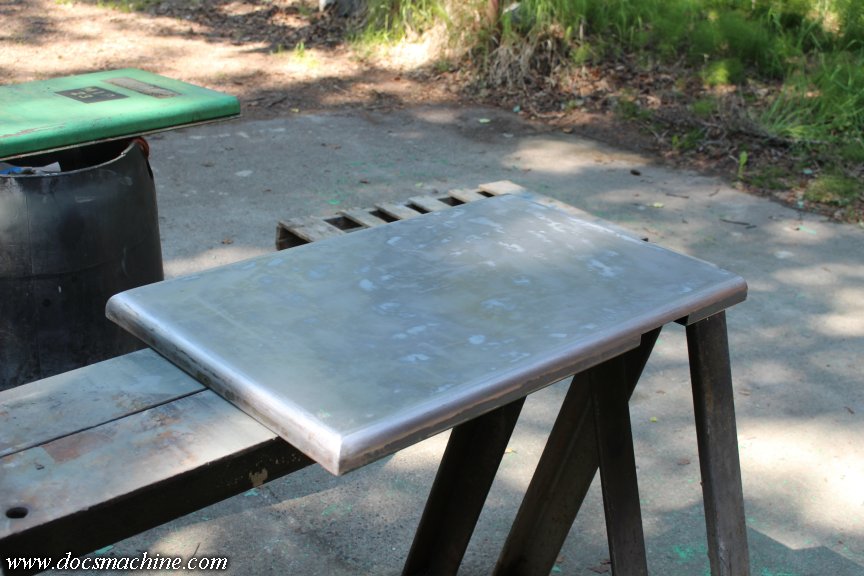
The back panel I wasn't so worried about, but I still needed to tweak it a bit. The corners had been dinged at some point, and needed straightening out.
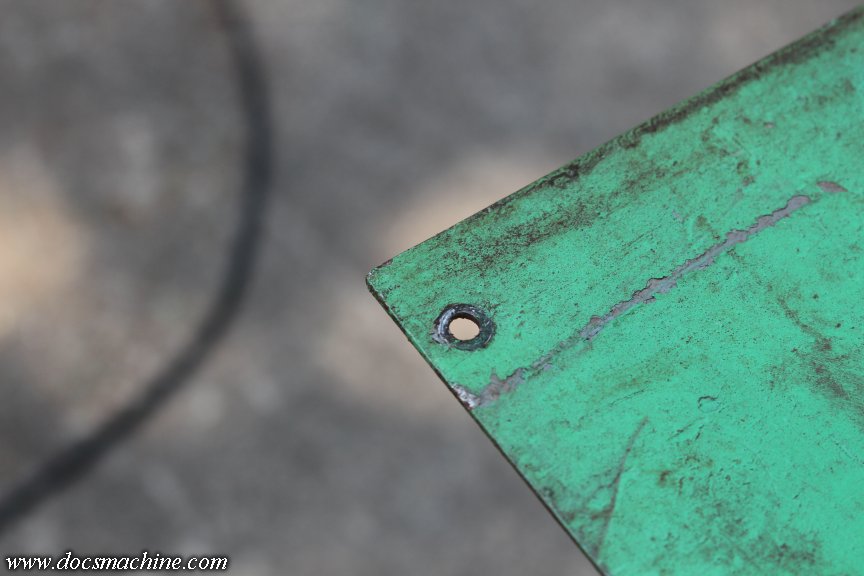
I also decided to cut a corner or two. Using a handy nickel- both appropriate, and being the lion's share of my remaining funds- I scribed a small radius at each corner of the panel.
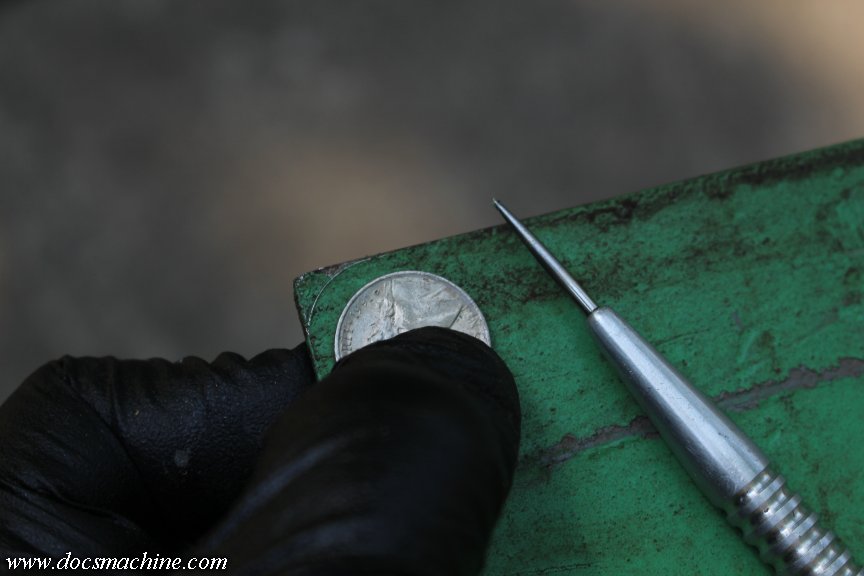
A pistol-grip air sander made short work of buzzing those down to shape...

After which it, too, got scuffed (not even sanded) and painted.

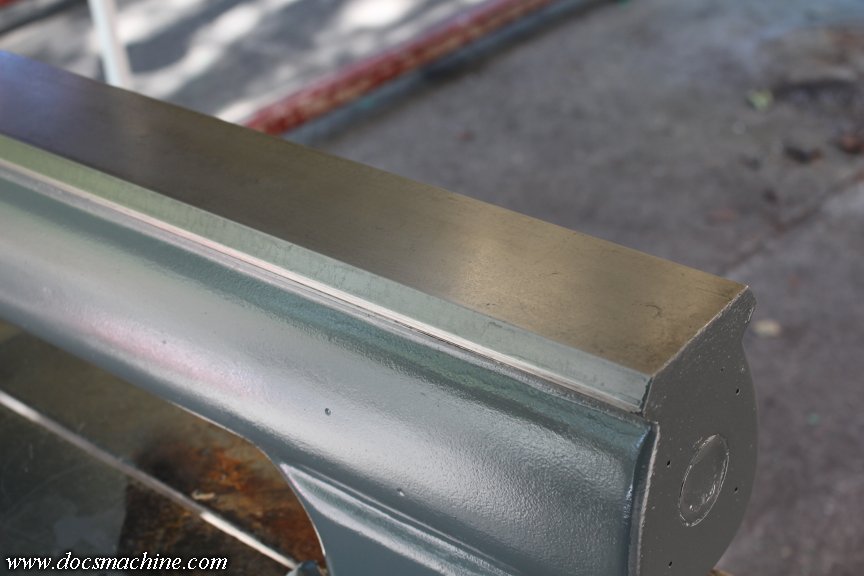
While I had the paint out, I also masked off the drip rail and gave it the first coat as well.

I'll probably take the 4th more or less off- if you can call it that- but I'll still try and give each of those their second coat.
Happy 4th Of July!
Doc.Doc's Machine & Airsmith Services: Creating the Strange and Wonderful since 1998!
The Whiteboard: Daily, occasionally paintball-related webcomic mayhem!
Paintball in the Movies!Comment
-
Today's weather was pretty blustery- but thankfully not raining, yet- so most of the cookouts I'd heard of had been postponed 'til the weekend.
So, on this day off from work, what do I do? Yep, go back into the shop and work some more. Jack is indeed a dull boy.
Trying to clean off the benches a little, I finished cleaning the sump screen and dropped that into place.
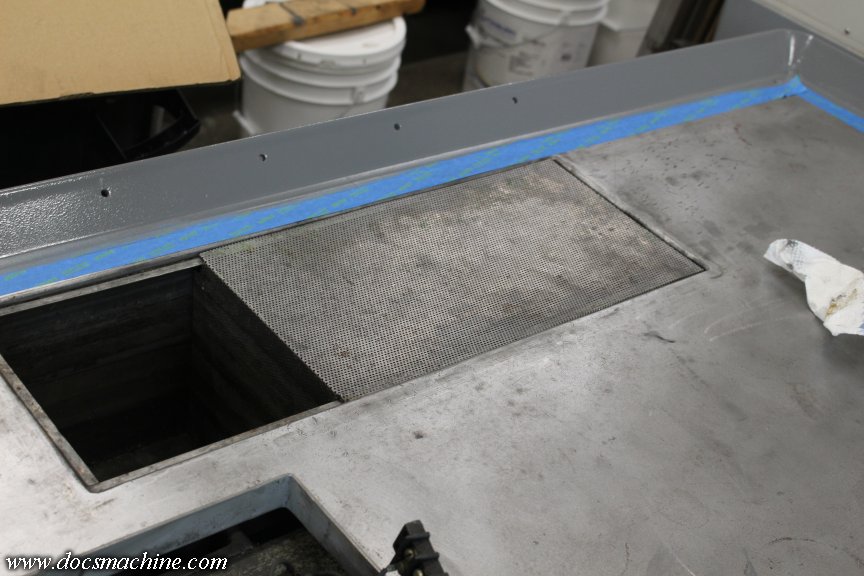
And by 'finish cleaning', I mean I took a small hunk of wire and rodded out roughly a third of those itty-bitty holes, that were clogged with tiny chips or wads of what was basically mud.
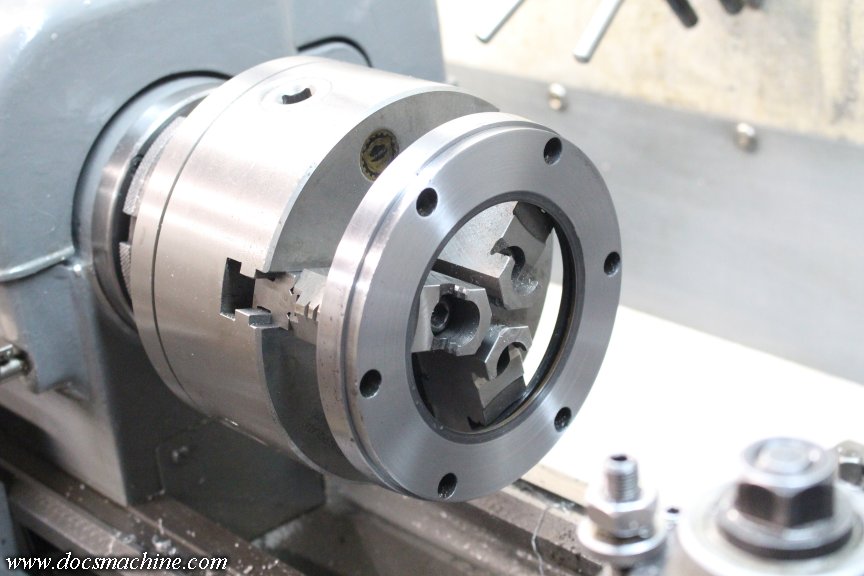
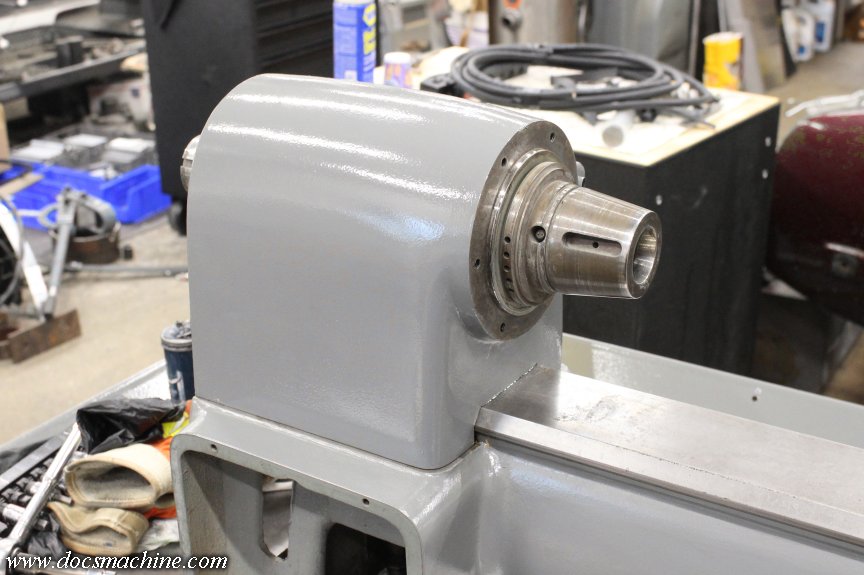
With that arduous task out of the way, it was time to turn my attention to the headstock. I wanted to put a second coat on the doors and whatnot, so I figured I'd prep a few of the other bits and get a first coat on those, too.
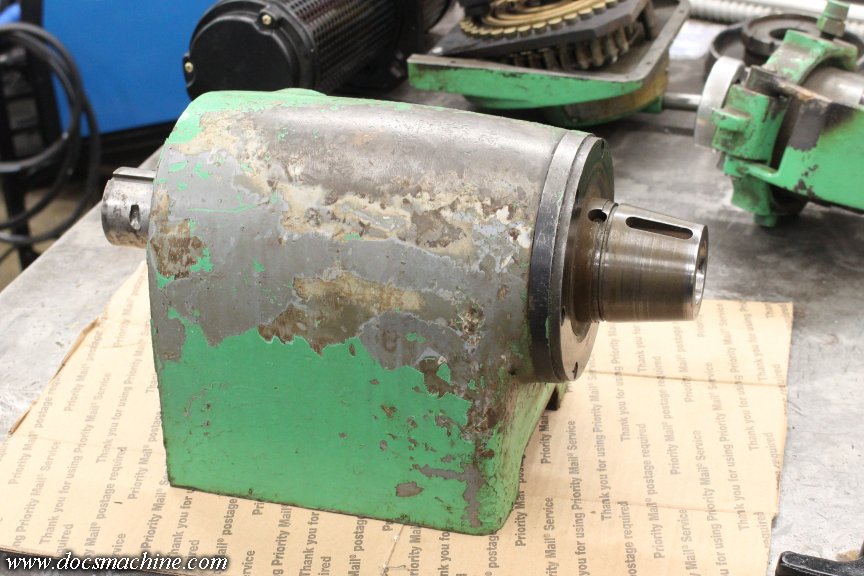
Interestingly enough, the front cover- which is just sort of a... guard plate, I guess, was missing half its screws for some reason.
Same game as before- the loose stuff scraped off with a razor blade, the tough stuff ground out with a Scothbrite wheel, and the rest DA sanded.
The headstock had a number of nicks and dings, and I didn't want to grind off ALL the filler, so I touched it up here and there with some spot putty.
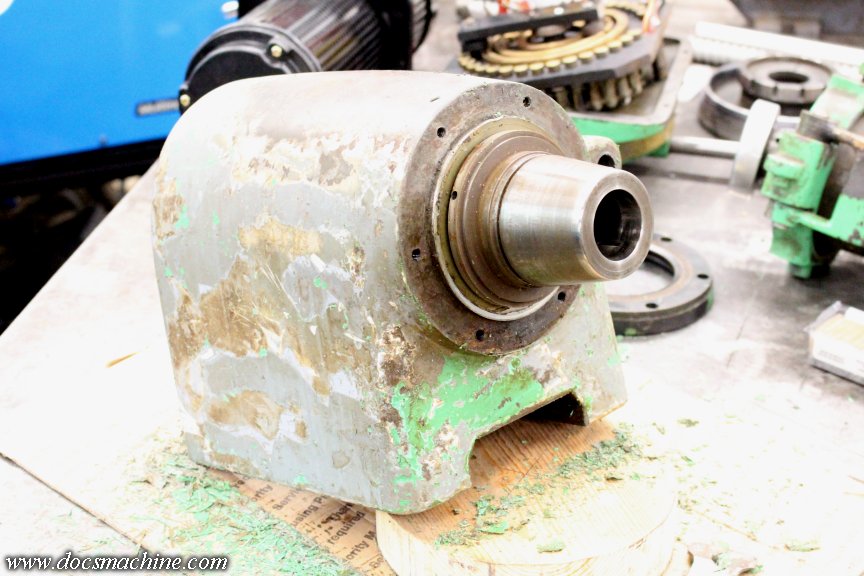
That too was sanded smooth, then the whole thing masked...
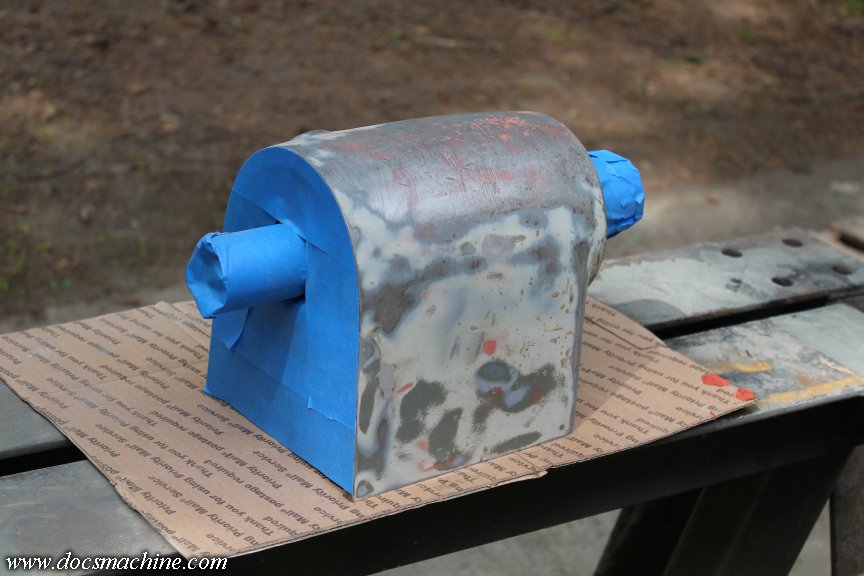
Primed...
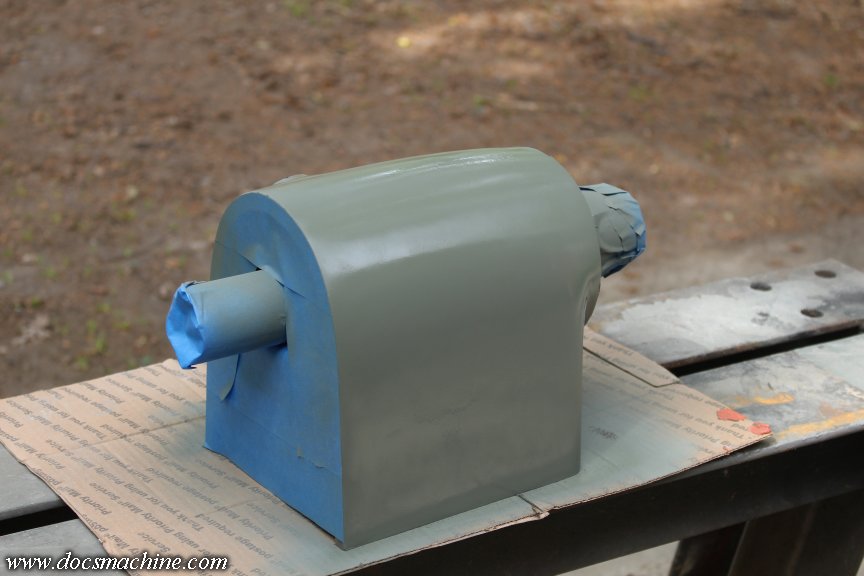
And painted!

While I had the paint out, I prepped and painted the two belt covers...
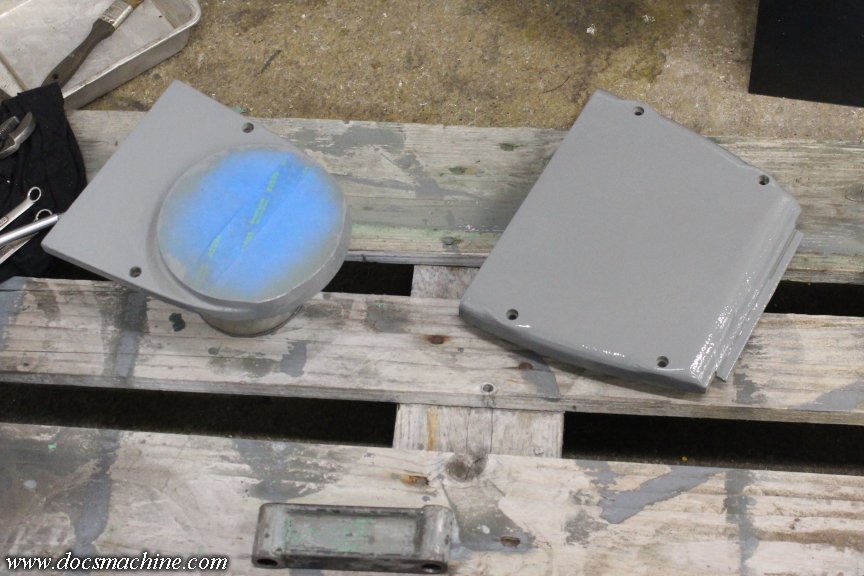
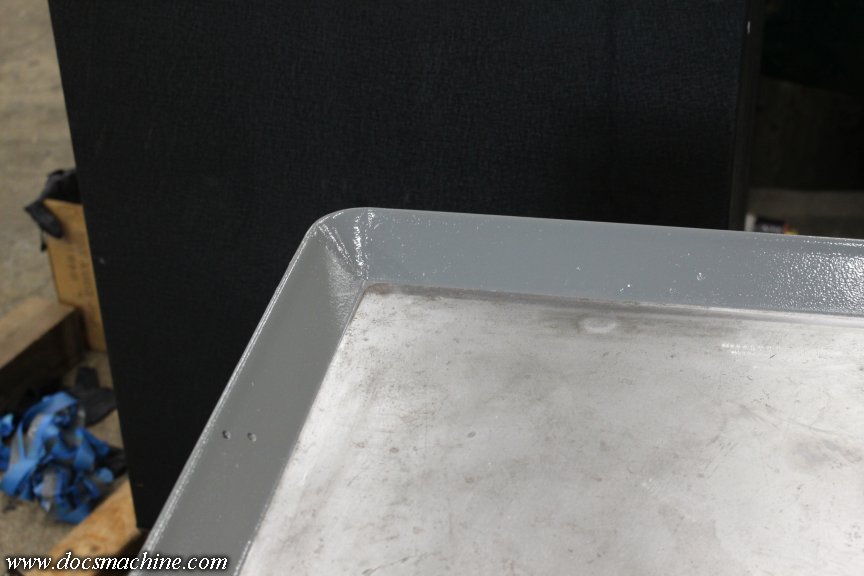
And gave the chip-tray rails their second coat, after which I peeled off the masking tape.
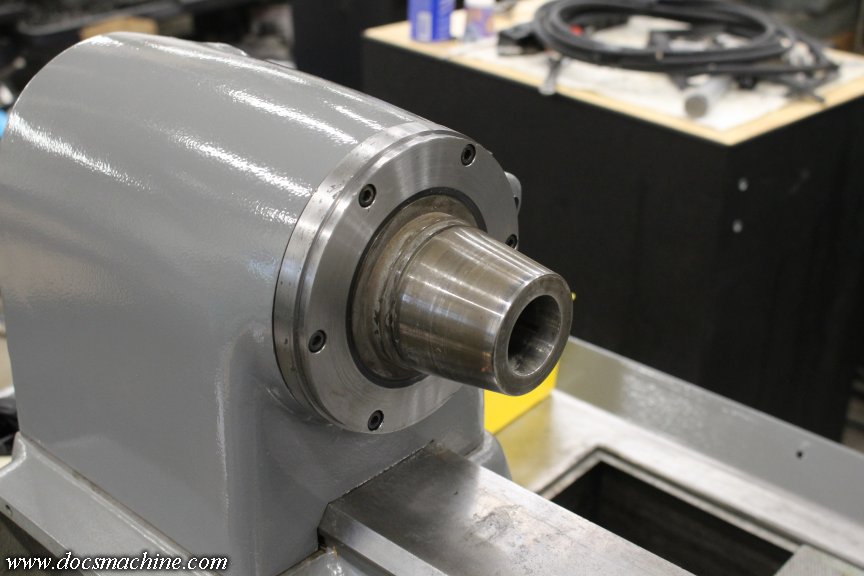
Before wrapping things up for the afternoon, I cleaned up the 'guard ring' a little, filing off some of the dents and dings, and then since the face was so beat up, I gave it a light skim cut to smooth it up.
Friday's going to be busy for me, but hopefully Saturday I can shanghai some help again, and get the bed remounted to the cabinet. The doors and back panel should be properly dry, then, too- we won't be done this weekend, but it'll be close.
Doc.Doc's Machine & Airsmith Services: Creating the Strange and Wonderful since 1998!
The Whiteboard: Daily, occasionally paintball-related webcomic mayhem!
Paintball in the Movies!Comment
-
-Not to brag, but I try to be more or less 'this productive' on everything I do. It's just that I have so many different things I'm working on- too damn many, really- that often progress on any one of them doesn't always seem all that fast.I am jealous of how productive you have been on that thing.
And, in this specific case, as I've mentioned, I'm dealing with limited time (personal and weather) the need to get back to other work, and the need to put THIS to work. I don't really have the luxury of being able to dawdle much.
-Like almost everything else, short-run production. I can't afford another CNC turning center (I could barely afford this, and I got a pretty good deal on it) and even if I could, most of the stuff I need to make, I need in such small numbers (20-50 at most) that it's kind of a waste to tool up and program the CNC.What are your plans for it with so many lathes already kicking around?
I'm an old-school machinist. I grew up with the manual machines, and I'm still far more comfortable running one than I am anything CNC. So for a small run of bits, something like a small turret lathe is a quick fix- especially if I can be running something else in said CNC at the same time.
The big Warner & Swasey turret actually gets quite a bit of use, but it's often too big. It's great for pushing a 1/2" drill through steel, but rather overkill when trying to drill something with a 1/16".
This Rivett has a lighter, more sensitive feed for the turret, and a considerably faster spindle- 4,800 RPM vs. a top speed of just 1,400 on the W&S.
I have four or five small jobs already lined up for this machine- stuff I could do in the OmniTurn, but in such small numbers (20 of this one, 15 of that, etc.) that with a good turret, I could have them run and done in the time it'd take me to tool up the CNC.
Doc.Last edited by DocsMachine; 07-05-2024, 03:13 PM.Doc's Machine & Airsmith Services: Creating the Strange and Wonderful since 1998!
The Whiteboard: Daily, occasionally paintball-related webcomic mayhem!
Paintball in the Movies!Comment
-
-Kind of an addendum: For the most part, each one of those "so many lathes" serves a different purpose. I don't just have a row of identical lathes...What are your plans for it with so many lathes already kicking around?
One's the CNC turning center, another is my homebrew conversion CNC that I made to learn on, one's a big 10HP monster I rarely use, one's a converted wood lathe just used for things like spin-polishing, another is a heavy turret lathe meant for production runs, and so on.
Trust me, if I could afford more CNCs, I'd sweep most of this manual stuff out in a heartbeat. But funding and availability (remember, I'm in Alaska) are pretty firm limitations to that sort of thing. Gotta do the best I can with what I have.
Doc.Doc's Machine & Airsmith Services: Creating the Strange and Wonderful since 1998!
The Whiteboard: Daily, occasionally paintball-related webcomic mayhem!
Paintball in the Movies!Comment
-
Finally, the paint is dry on enough of these bits, we can start throwing this off-brand Erector set back together!
Easy stuff first- the back cover:
(Besides, it'd been sitting on my trash can, and I've been needing that. )
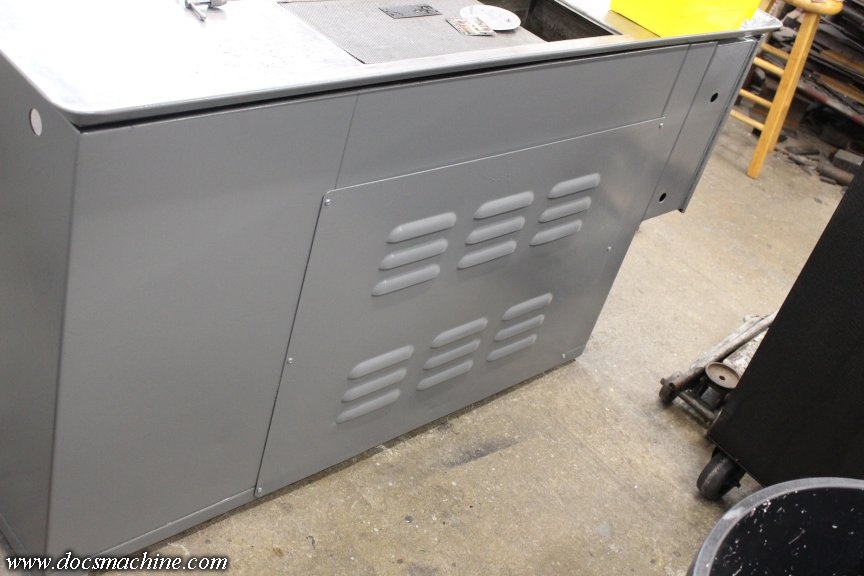
The end vent cover over the motor-generator...

And the little ID tag on the electrical box.

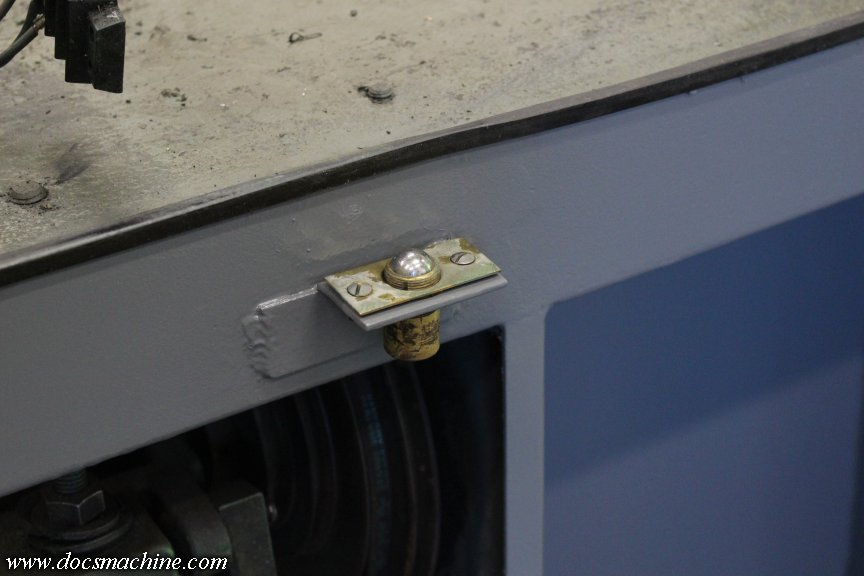
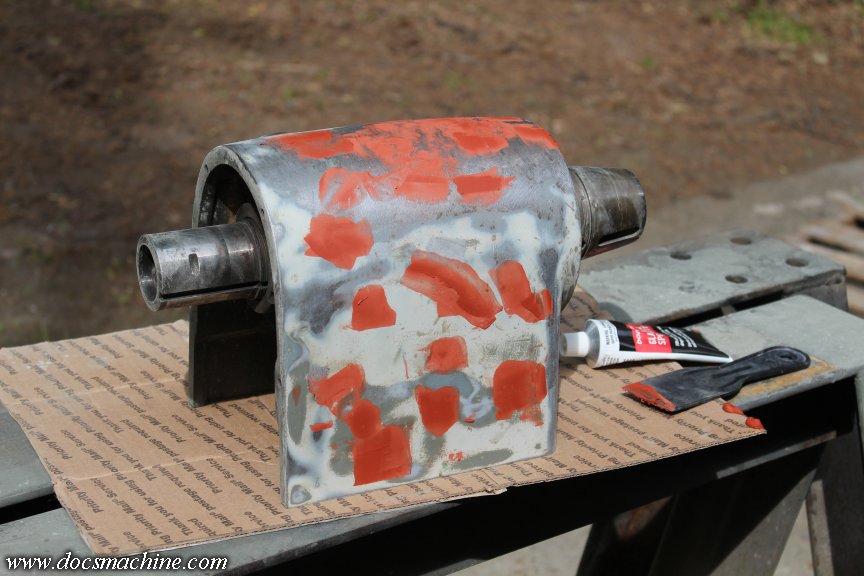
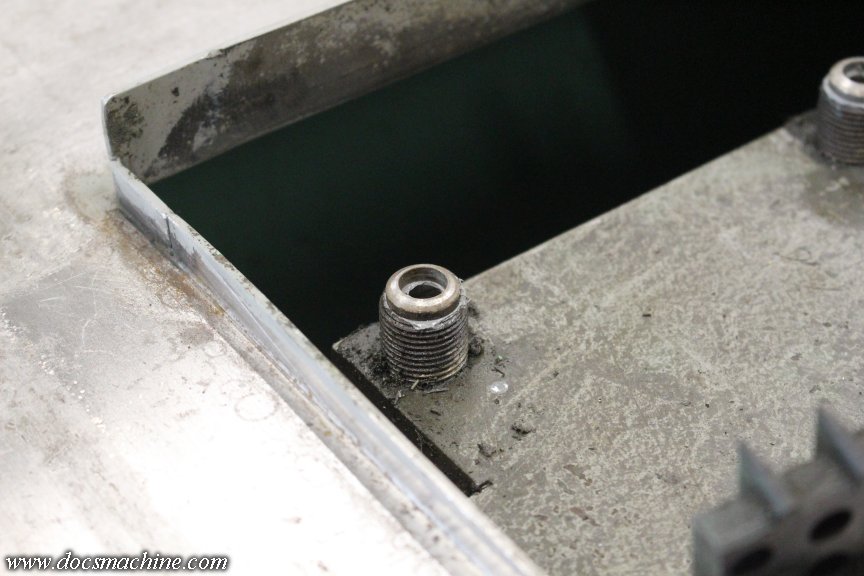
I hired some help to get the bed casting back in place- it sits on three of these jacking points, each with this little semi-hemispherical washer, which fits into matching recess on the bottom of the casting. That allows for a small bit of misalignment, so the adjusters can be used to level the bed.
After more fiddling than I care to relate, we got it socked down and the bolts placed.

Note how high the right-hand end is, by the gap under the "foot". I wanted to lower that down a little, to reduce that gap, so that chips and gunk wouldn't keep collecting under there. But, that meant there was now a distinct downhill slope to it. And to fix that, I had to raise the low end another half an inch.
I may revisit those feet eventually, but that should work for now.
I'd have thought that would throw off the level as measured at the chip tray, which was nominally level yesterday, but oddly enough, it was spot on, too. There were only a few places where this steel ball rolled in pretty much any direction.

Next up, I decided to attend this nasty dent in the right-hand door nameplate.
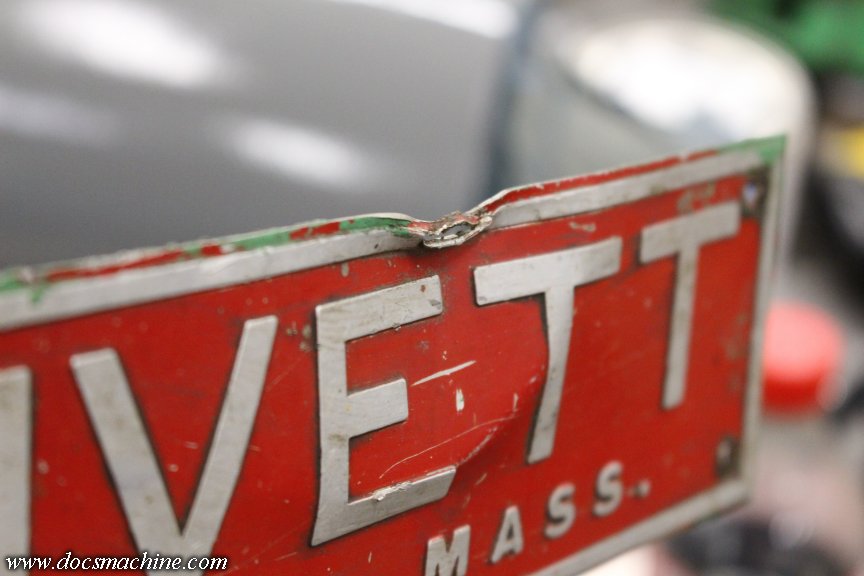
Some non-marring pliers and a small rawhide mallet, and I was able to gently massage it back to approaching straight-ish.
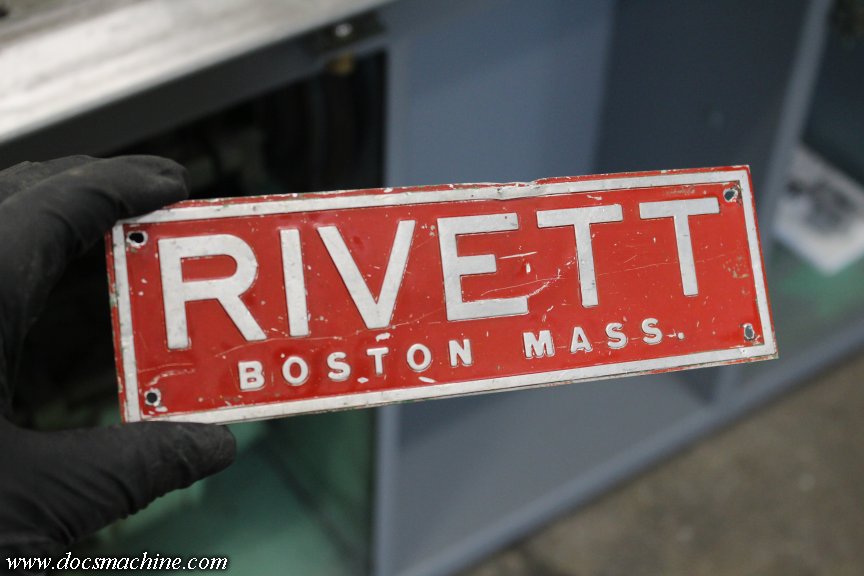
It attaches to the door with four shiny new stainless buttonhead 4-40 screws, and it damn near looks new again.
I then reinstalled the drawer slides and collet rack slide, before bolting the door back in place.
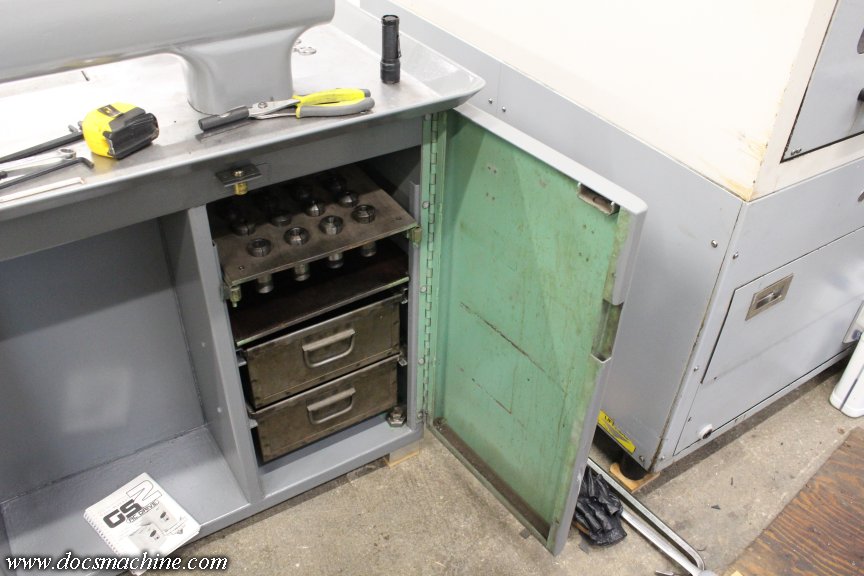
'Couple interesting bits: Those aren't actually drawers. They're old heavy steel... I guess small crates, made by a still-extant company called Pollard Bros. They make heavy-gauge industrial stuff like benches, stools and worktables. Somebody mounted some angle-iron 'rails' inside the cabinet so that the boxes can slide in on them, like drawers.
I also don't know if this thing ever had a collet rack like that from the factory- the wood, at least, on this one is shopmade, and a bit wonky. Some of the holes are pretty tight on the collets. I may have to make a new one at some point.
Anyway, I had to tweak the adjustment on that latch/detent thing a little, but now the door closes firmly and snugly.
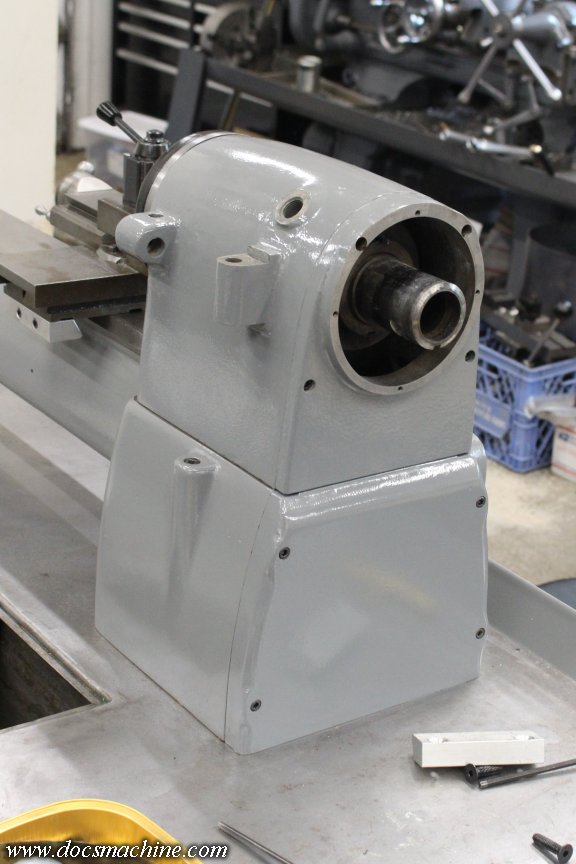
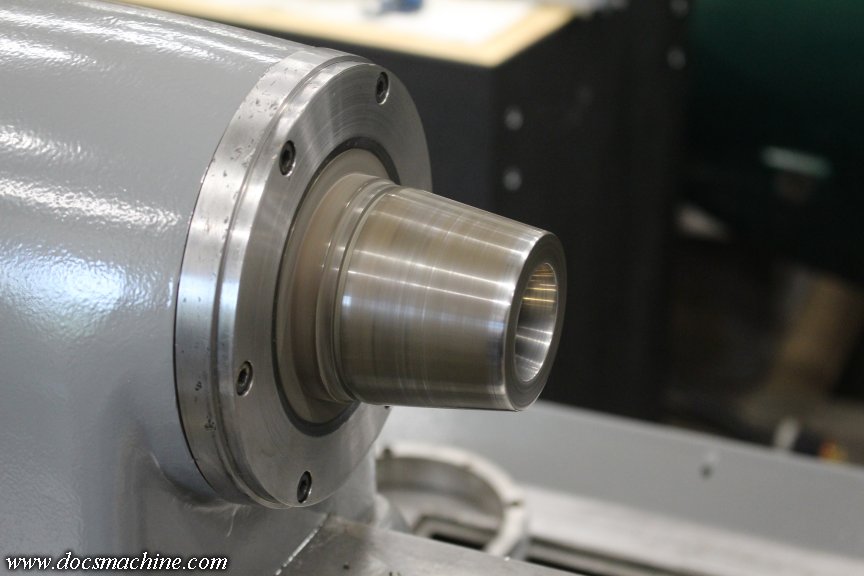
The paint wasn't quite 100% dry on the headstock, but it was dry enough so that I could clean off the mating surfaces, spray a little LPS-3 in there and slide 'em together.
I chased out the bolt holes- remember, some of them had been empty and open for a time- cleaned up the screws (and found some extras) and bolted the shiny clean guard ring back in place.
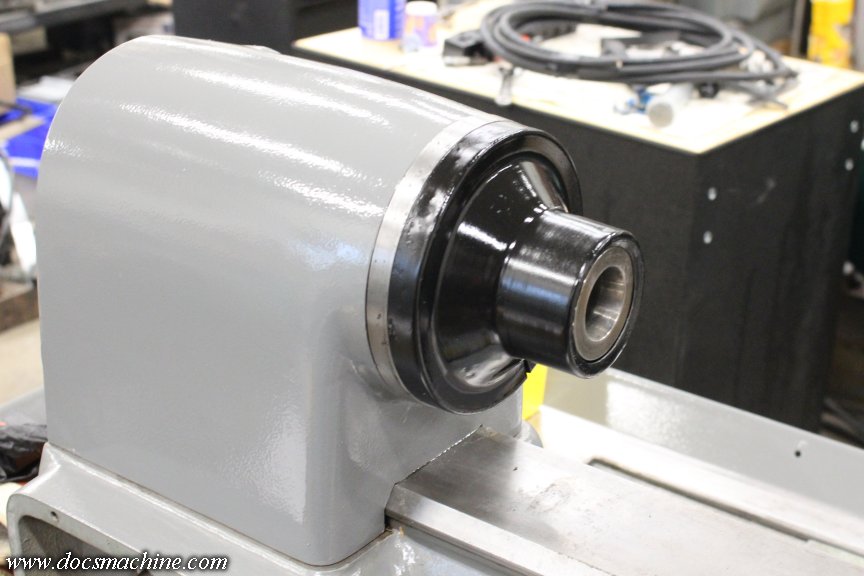
I had earlier done a little bodywork to the sheetmetal protector cap, and primed and painted it, so that was easy to snap into place.
And, out of curiosity, I pulled the X/Y slides off the little Hardinge, and tried it on for size.
It doesn't "fit", at least not yet. The Hardinge uses a dovetail bed, while this Rivett has a more prismatic bed- more like a Weaver rail. I can mod the slides to fit, although that's one reason, as I said earlier, I kind of wish this had been a Hardinge- so I could more easily share tooling between them.
But, I'll have to make do. Once she's up and running, I'll start looking more closely into the tooling, and see what I have and can do there.
Anyway, that pretty much did it for the day:

Over the weekend, I hope to get the "rheostat" switch cleaned and painted, and the rest of the electricals hooked up. Then we can actually try this thing!
Doc.
Doc's Machine & Airsmith Services: Creating the Strange and Wonderful since 1998!
The Whiteboard: Daily, occasionally paintball-related webcomic mayhem!
Paintball in the Movies!Comment
-
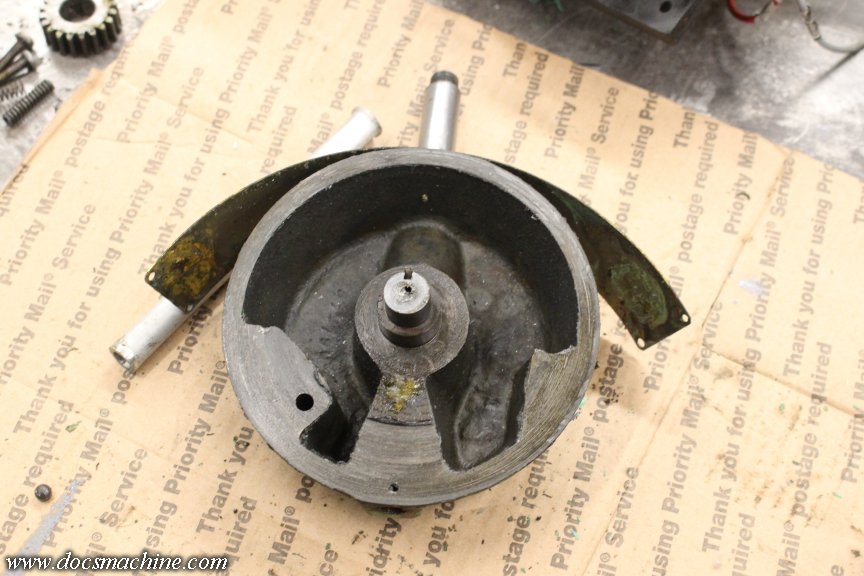
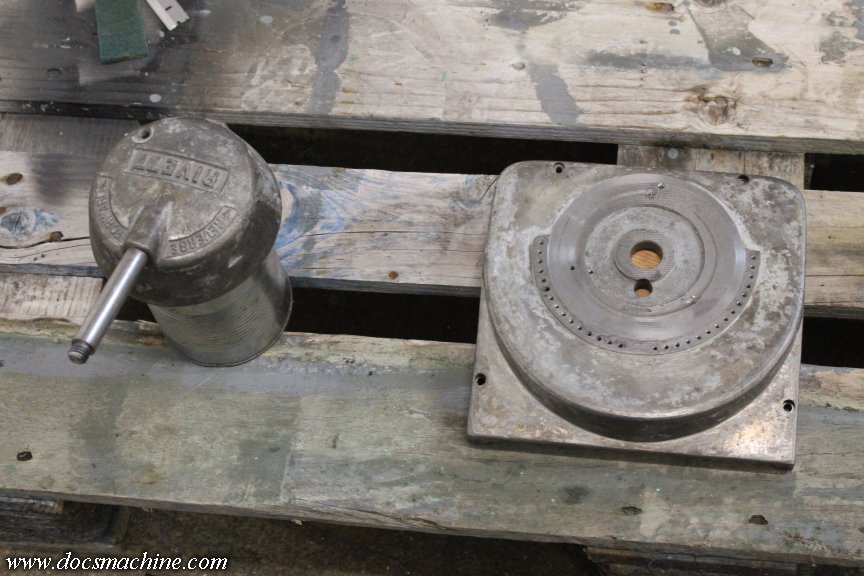
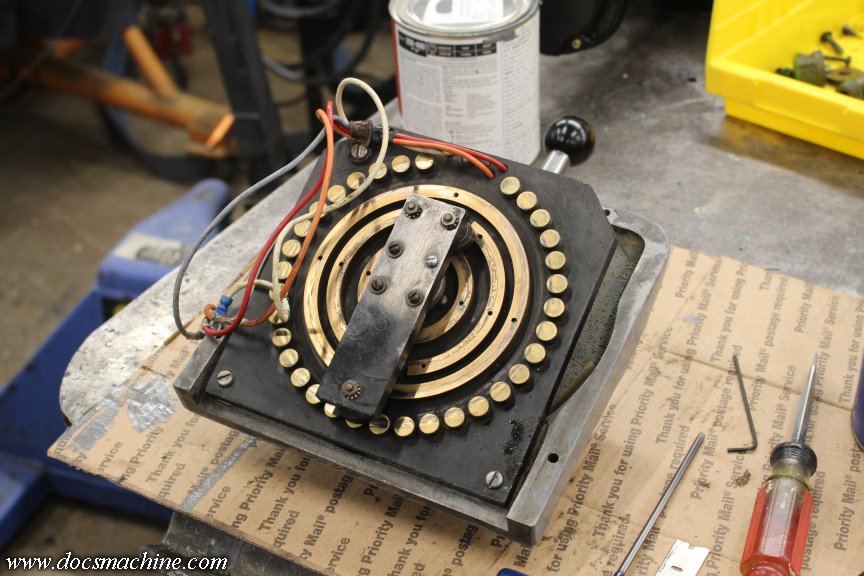
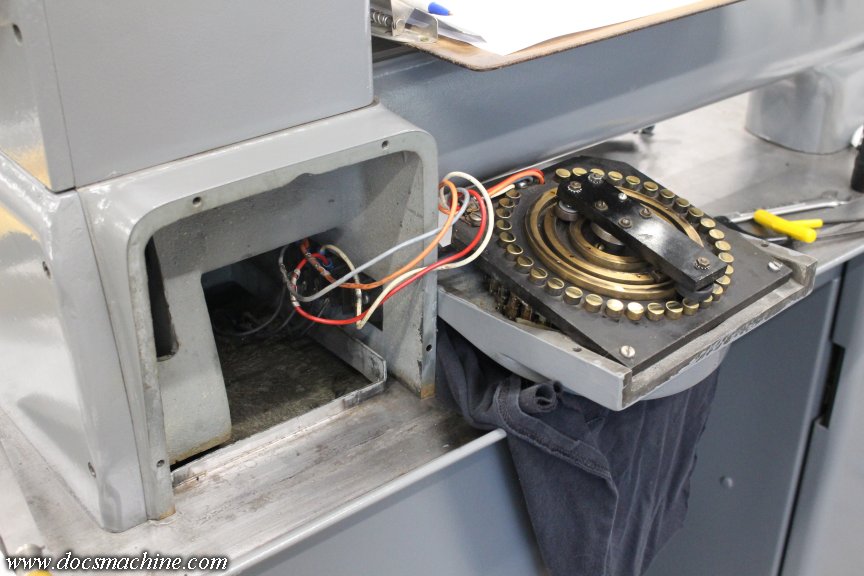
It's time to finally dive into the... for want of a better term, the "rheostat" control. Variable resistor, rotary switch, whatever you want to call it.
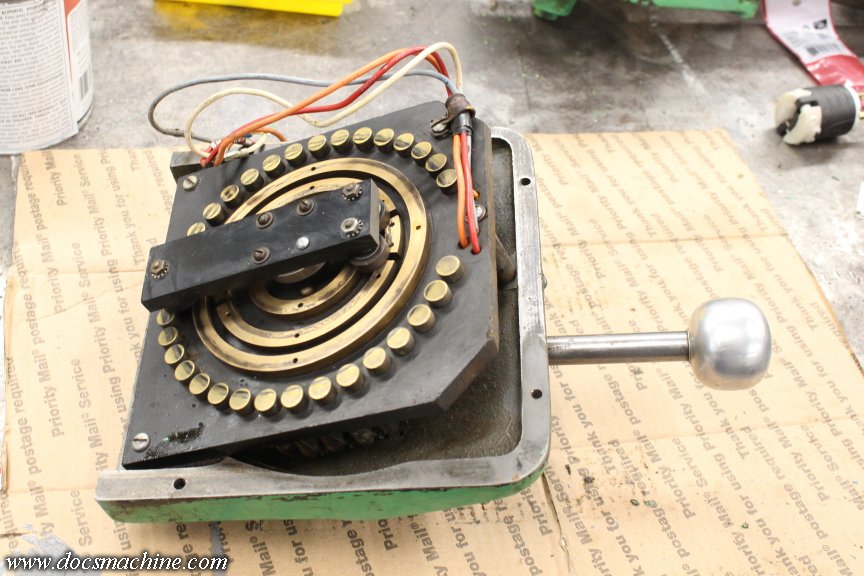
Fortunately, the electrical part was easy to remove, with just three screws:
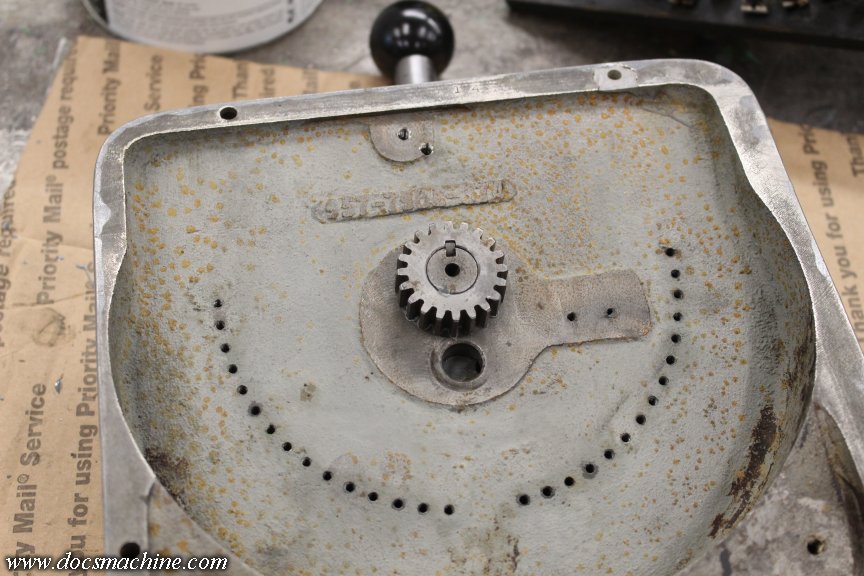
Leaving just the mechanical portion to play with. One interesting bit, is this semicircle of holes around the lever body. Heavily painted over, but clearly threaded- this little movable post can be shifted to any one of them, acting on a springloaded detent at the bottom of the casting. (The now-empty hole seen to the right.)
That way, you can set the speed to a certain range, and just turn the lever 'til it hits that detent. It's not a hard stop, but it lets you know you're in the range, without having to look at the tag. You could have muptiple stops, too. Fast for drilling, slow for threading, medium for parting.
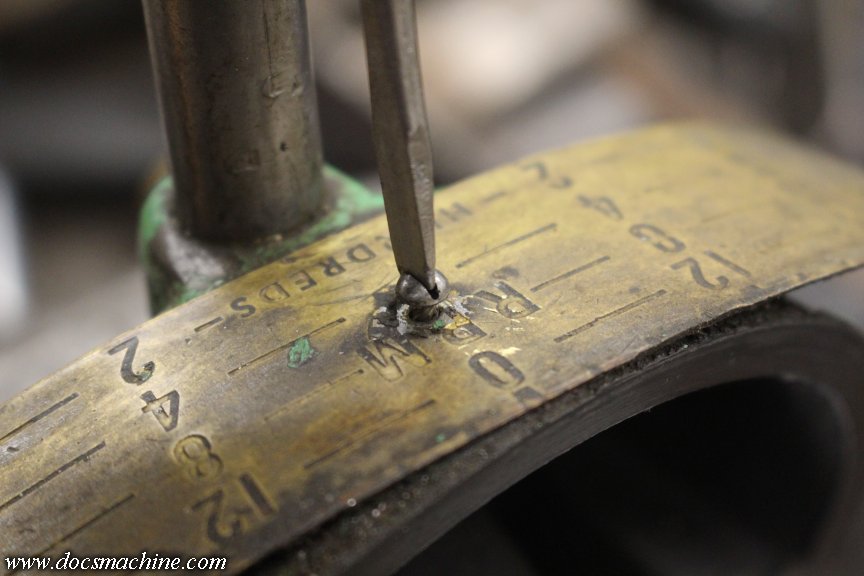
Speaking of tags, I pulled the corner screws, and it popped open- I suspect somebody had tried to remove it, and bent the ends outward.
The corners were screws, but the center was still a rivet. I'm sure the corners were originally rivets, too, but whoever painted this thing last, tried to remove it. I couldn't grab it with the nippers, but I was able to carefully grind a screwdriver slot in it, and back it out. (These rivets usually have a 'helix' of grooves to help it grip the hole.)
With both parts fully disassembled, I scrubbed off the grease and oil, and hit 'em with the paint stripper.

Took a couple applications to get all the gunk off, including some detail work to scrape out the lettering.
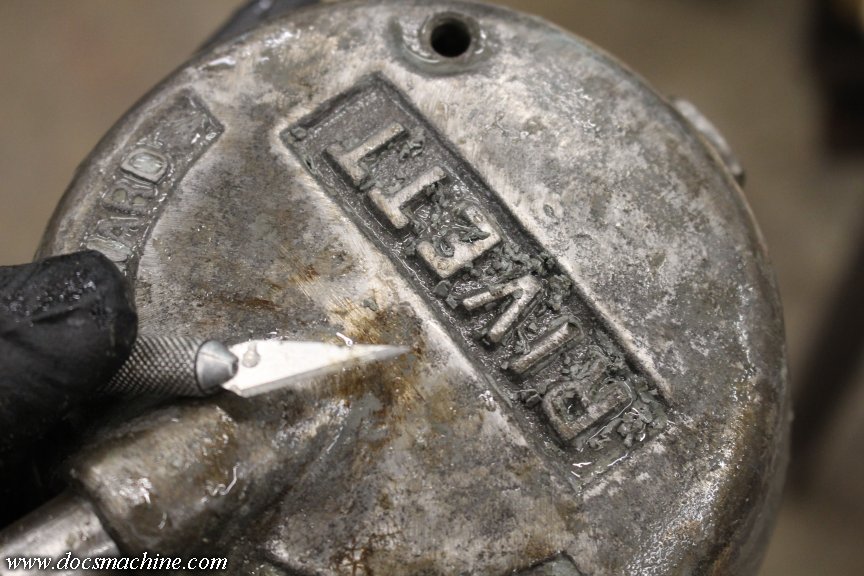
But they came out shiny clean!

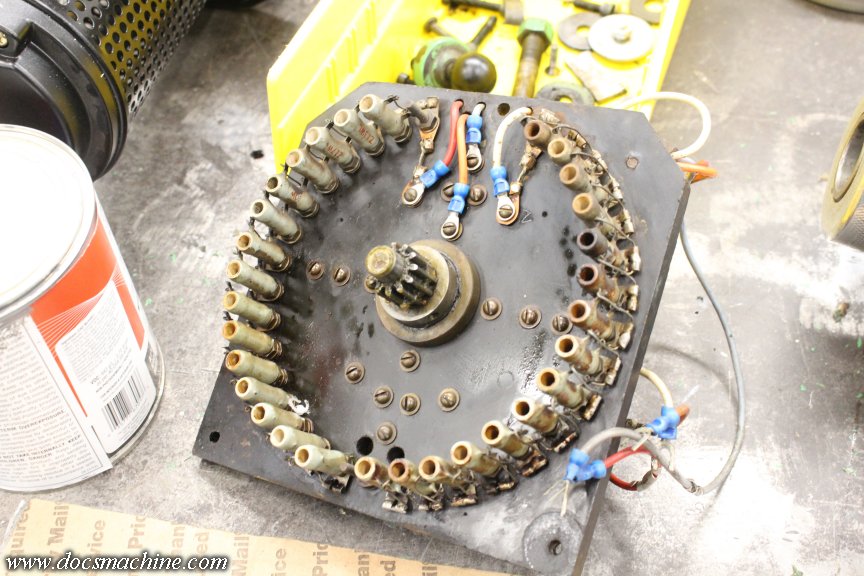
Still had a couple things to take care of, though- that ring of threaded holes had two broken-off screws:
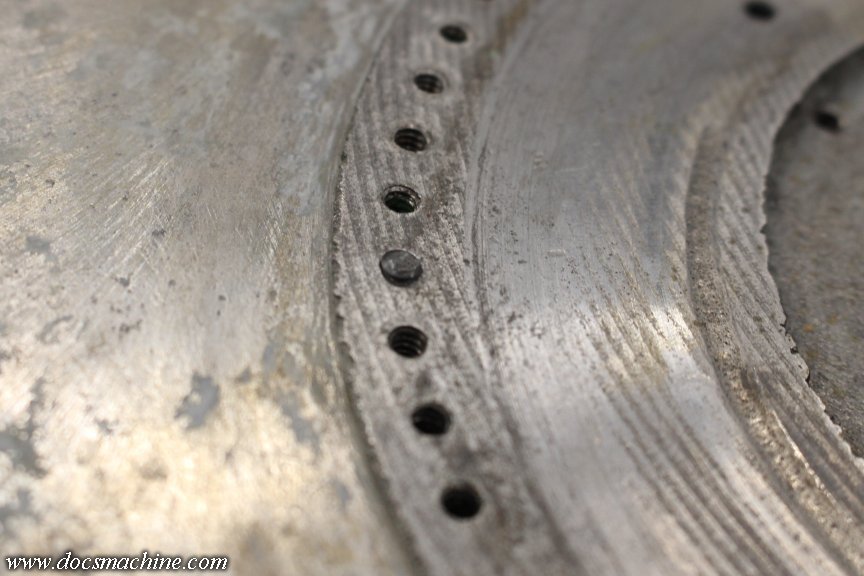
Fortunately, one was proud enough I could grab it with the nippers...
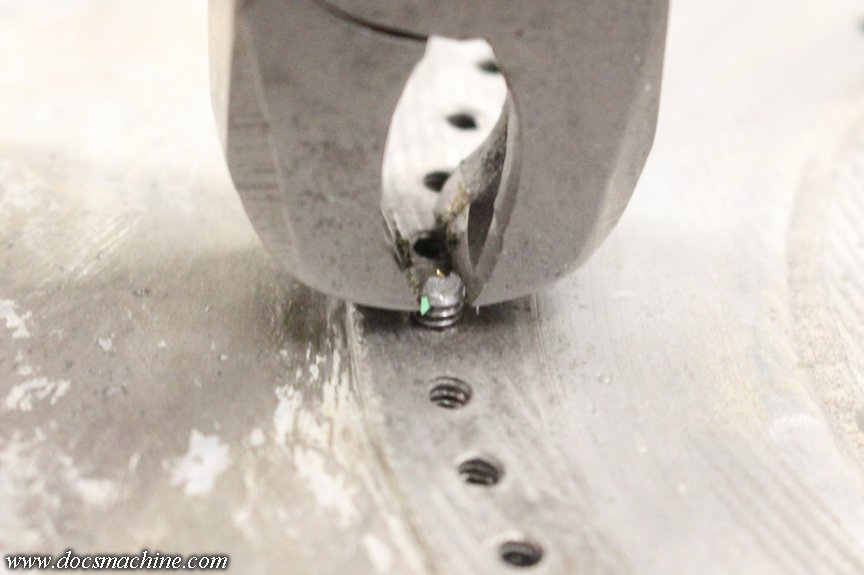
And the other was loose enough I was able to tap it lightly with a prick punch and unscrew it far enough to grab as well.
Of course, since most of the holes hadn't been used in years, and had been painted over maybe twice, I had to chase each one with a tap.

All nine hundred and thirty-seven of them.
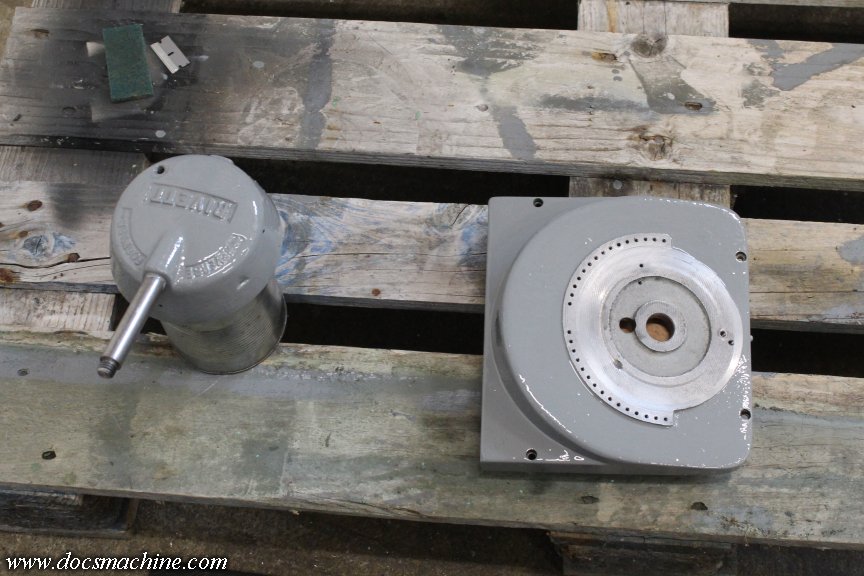
After that, laid out...
And painted.
After that, I cleaned up some more of the bolts, and stuck the back panels on, just to get them out of the way.
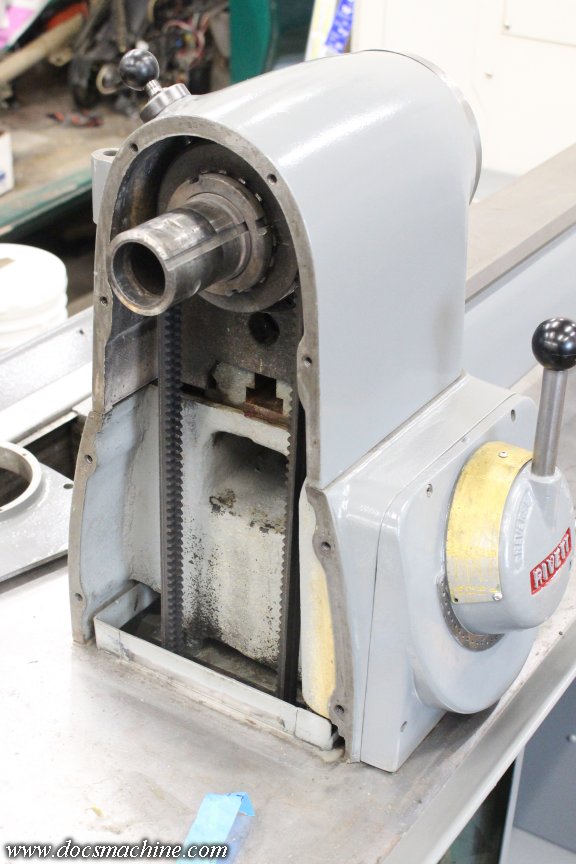
I don't have the belts on yet- I want to try powering up the drive, first, and see what kind of noise, if any, just the drive alone might make. Turning the spindle by hand seems to make more noise than I'd expect, so we may have to swap some bearings before too long. This thing should be smooth and quiet when it runs.
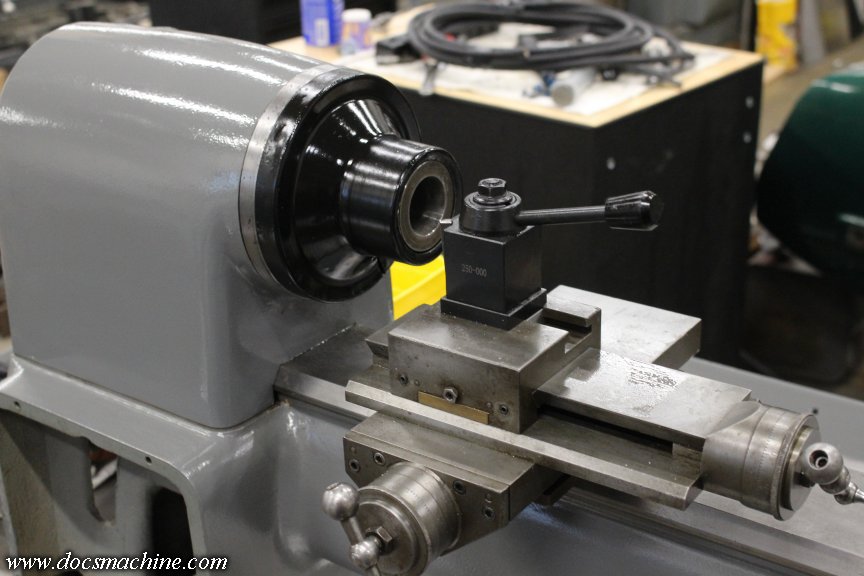
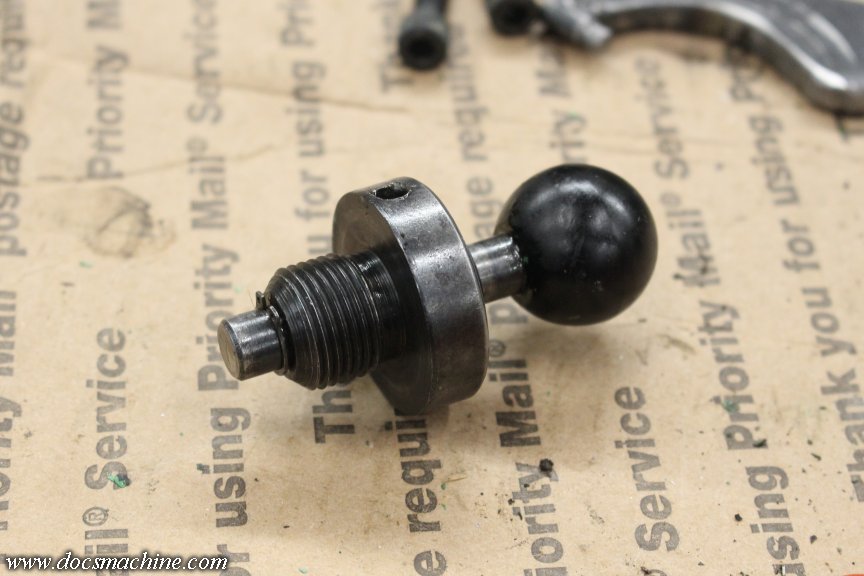
One other bit I cleaned up while I had the stripper out, was this... plunger thingy.
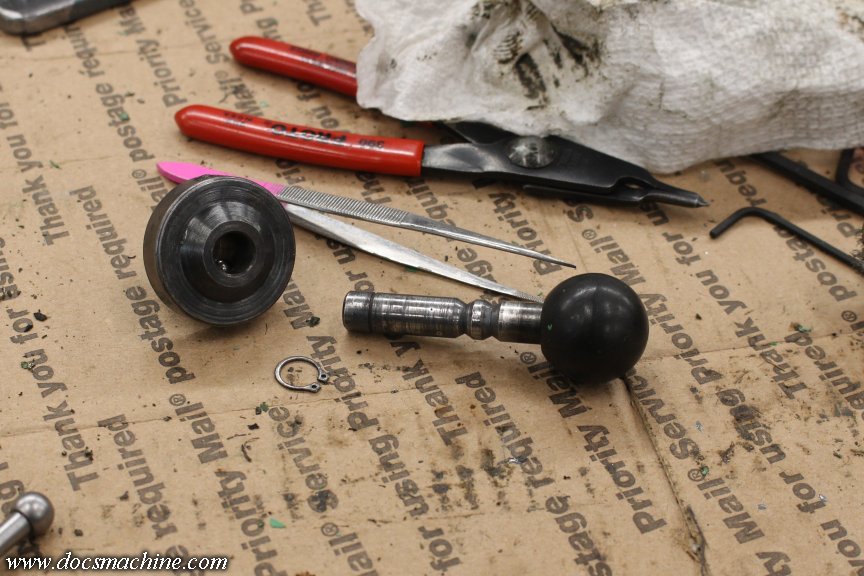
Which just took a little cleanup, a dab of fresh oil, and... that was about it.
That fits in the headstock like so:
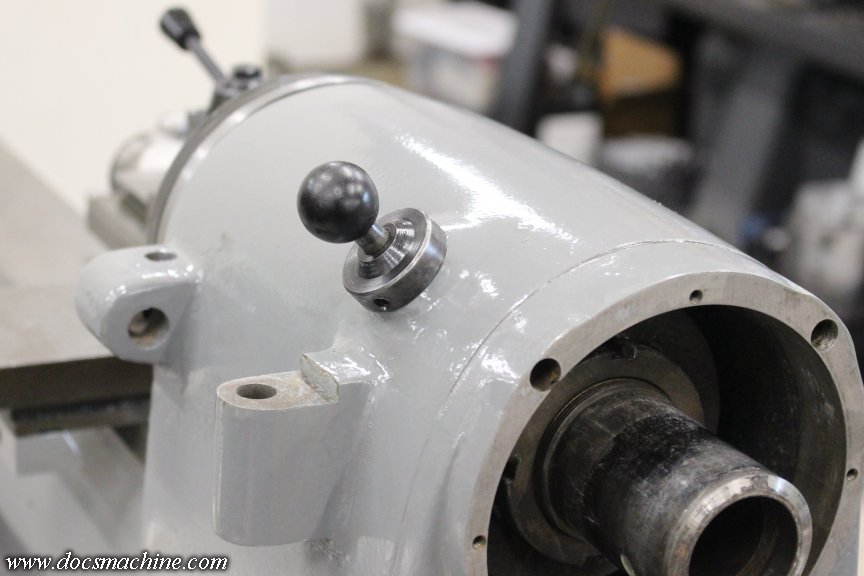
Where it... doesn't do anything.
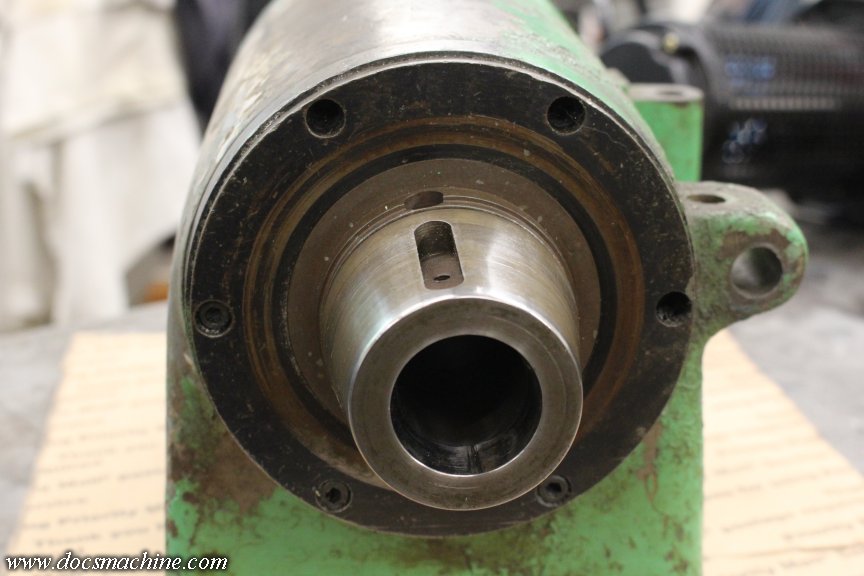
I believe it's supposed to be a positive spindle lock, probably for tightening or loosening chucks when using the L-00 spindle nose. This low-res image from a sales brochure from VintageMachinery seems to indicate that- there's a space on the inner edge of the pulley that presumably has grooves or holes for the pin to socket into.
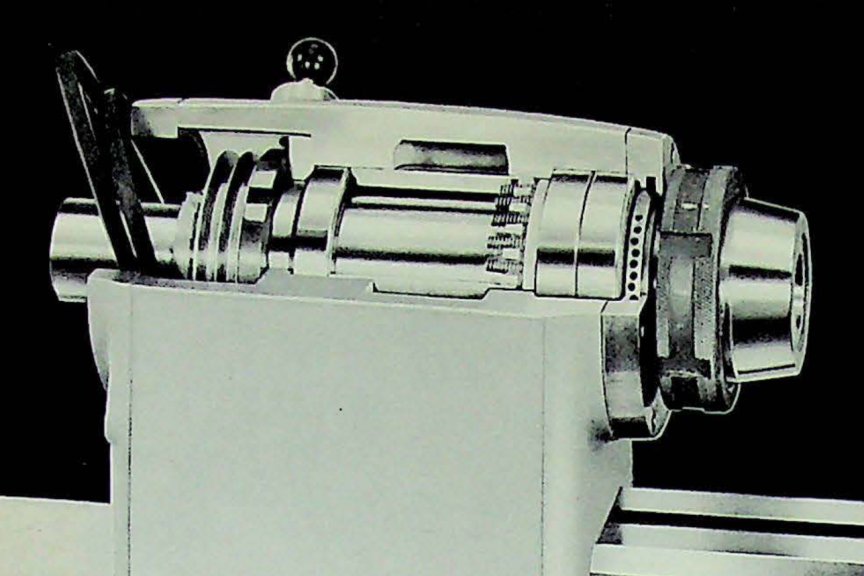
Except my pulley doesn't have that. The pin hits part of the pulley edge, and part of the belt itself- and the pulley shows no sign anywhere of a notch or hole for the pin.
I'm presuming the pulley has been replaced at some point- the locking ring shows signs of being both loosened and tightened with a hammer and punch, rather than a wrench. Why the pulley would be replaced I have no idea, but that's my best guess.
If I do have to crack the head open to swap the spindle bearings, I may play with the idea of making a new pulley, too, but the spindle lock is not a vital piece. Maybe I'll just label the knob "Self Destruct" and leave it at that.
Doc.Doc's Machine & Airsmith Services: Creating the Strange and Wonderful since 1998!
The Whiteboard: Daily, occasionally paintball-related webcomic mayhem!
Paintball in the Movies!Comment
-
Very short on free time today, but I wanted to get at least one more nibble in on this elephant.
I couldn't do anything on the speed control pieces, apart from giving them their second coat. I also rummaged through my stashes and found a different knob for the handle:
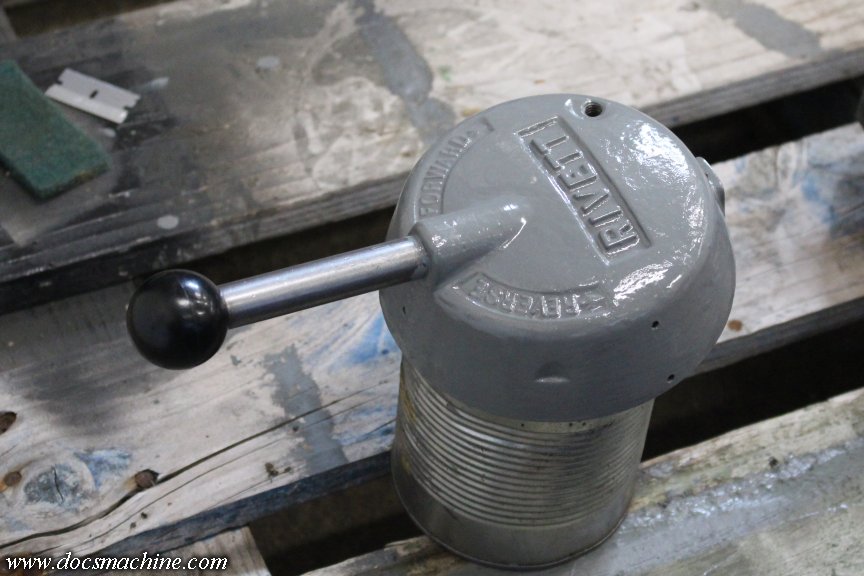
The big shop-made aluminum one was too big, and probably a bit heavy. This one seems a little more appropriate.
On the other end of the electricals, I wanted to add a shutoff/disconnect, so I didn't have to keep unplugging the thing. I was given an oilfield-surplus switch, of an appropriate rating and function- and no, I have no idea what it was supposed to "bypass".
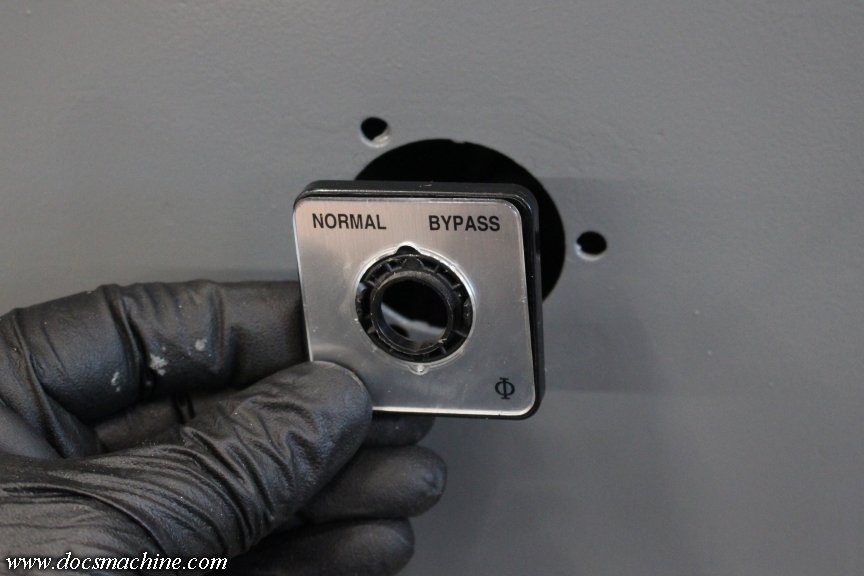
I may see if I can't flip that plate over, and print "SAFE" and "ARMED" or something. There's probably not enough room to pit "Safe" and "Decidedly less safe" on there...
The biggest issue is that I had two holes it could be mounted in, and neither really worked. The switch body is too big to fit next to the other controls at the front of the panel, and the hole on the door was too large and the screw holes don't line up.
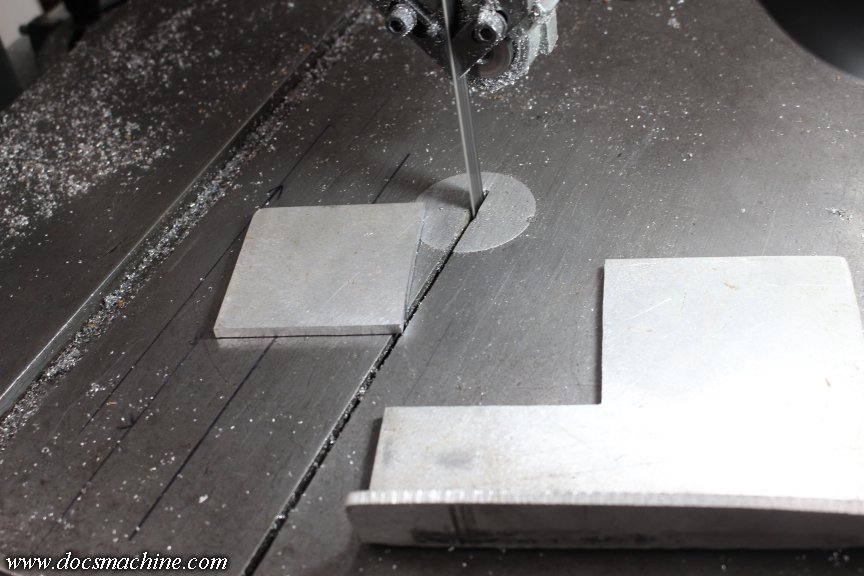
After some pondering, however, a solution arose. A simple application of a bandsaw...
A big rotabroach...
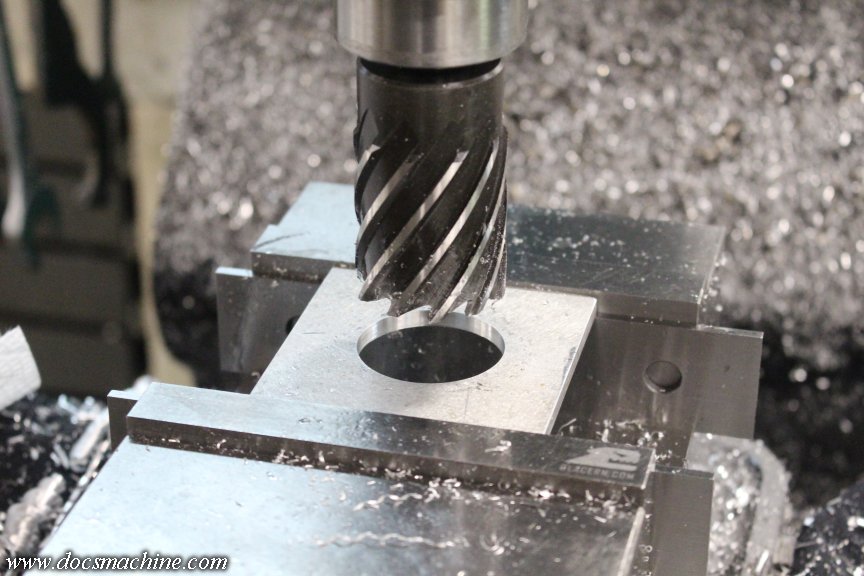
Some deftly-applied holes and a tap...
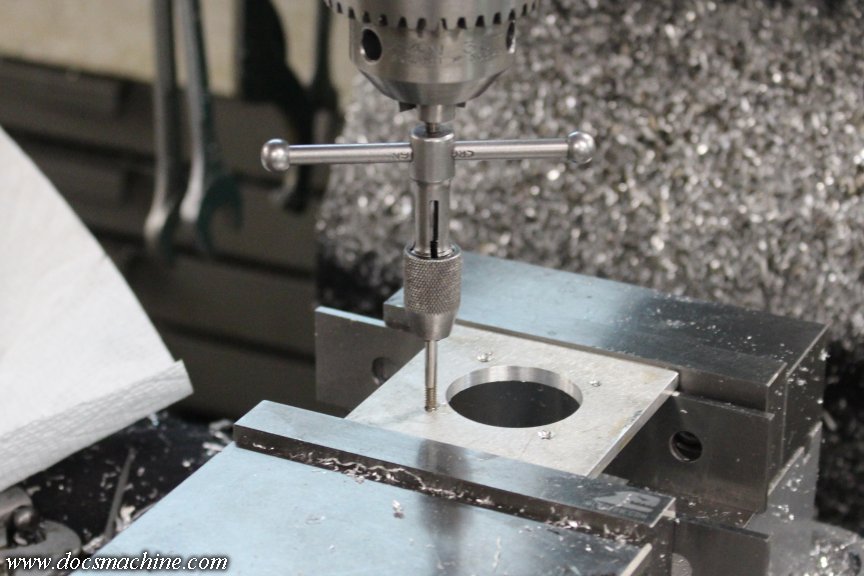
And a countersink.
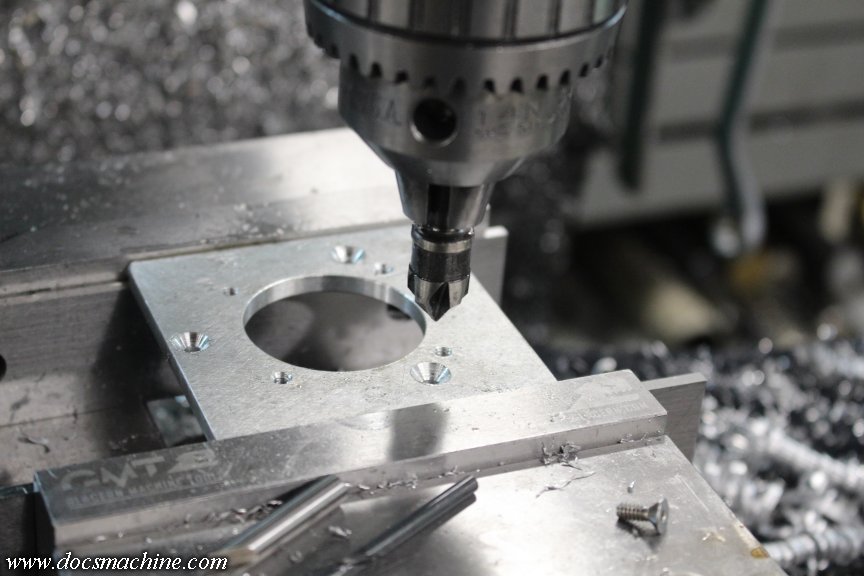
That all bolted through the big hole like so...
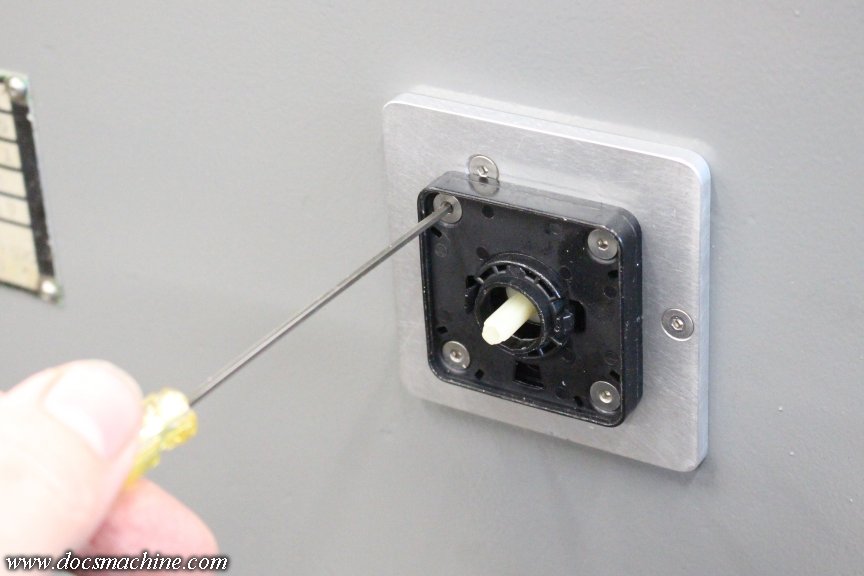
And done! Except for, y'know, the actual wiring, that is.
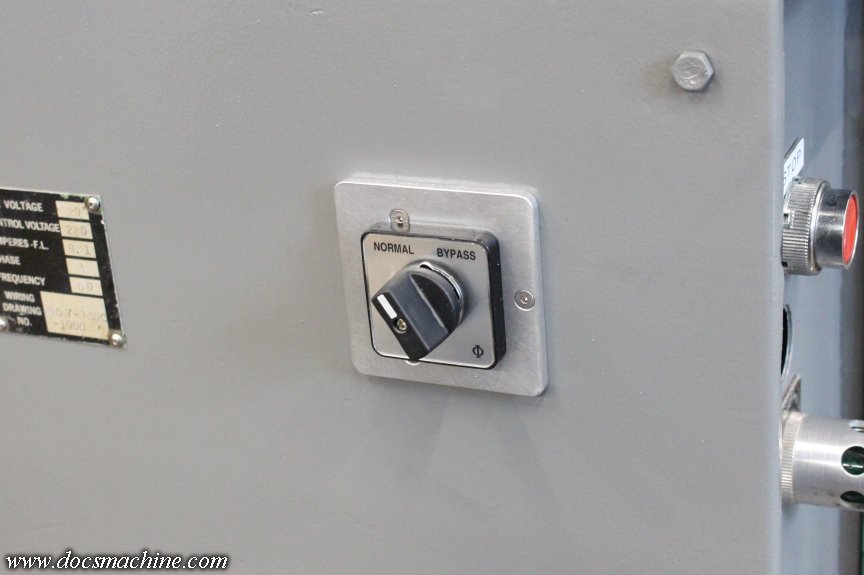
In this case, "Bypass" is "on"- I suppose "normally, it's off" works as a menmonic.
The only other thing I did was I cleaned and straightened the tag that goes on the end of the bed, and installed that.
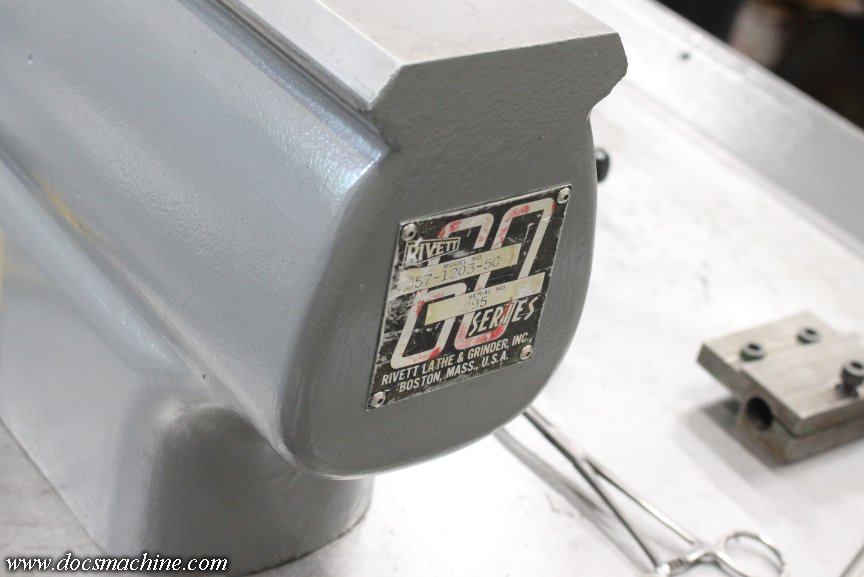
I'm actually running out of stuff to do on this thing...
Doc.Doc's Machine & Airsmith Services: Creating the Strange and Wonderful since 1998!
The Whiteboard: Daily, occasionally paintball-related webcomic mayhem!
Paintball in the Movies!Comment
-
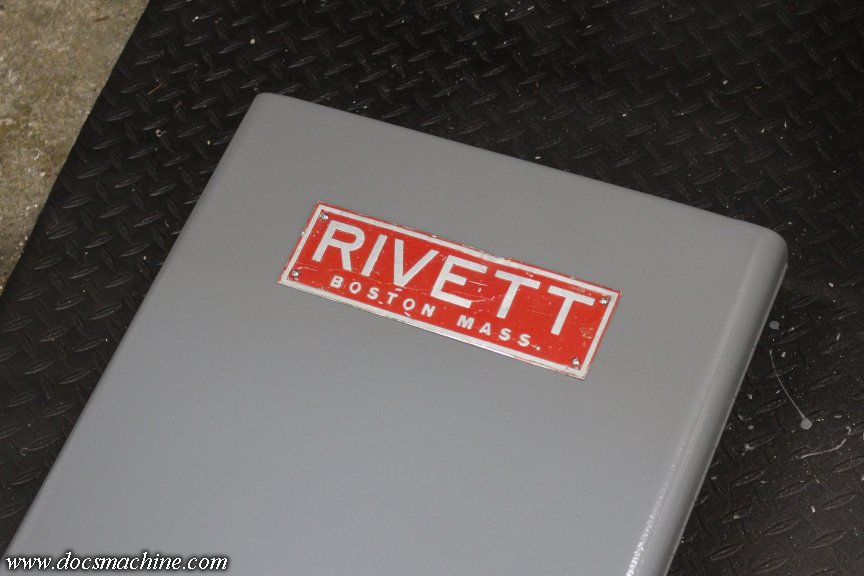
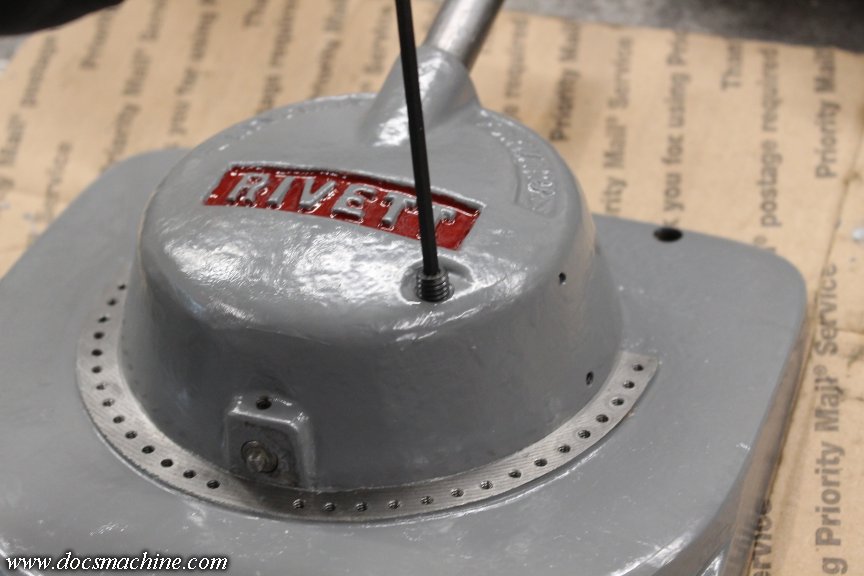
Had basically zero time to fool with this thing, today, but I still got a wild hair up someplace uncomfortable, and dug out that bottle of red Testor's I used to highlight the lettering on the Warner & Swasey.
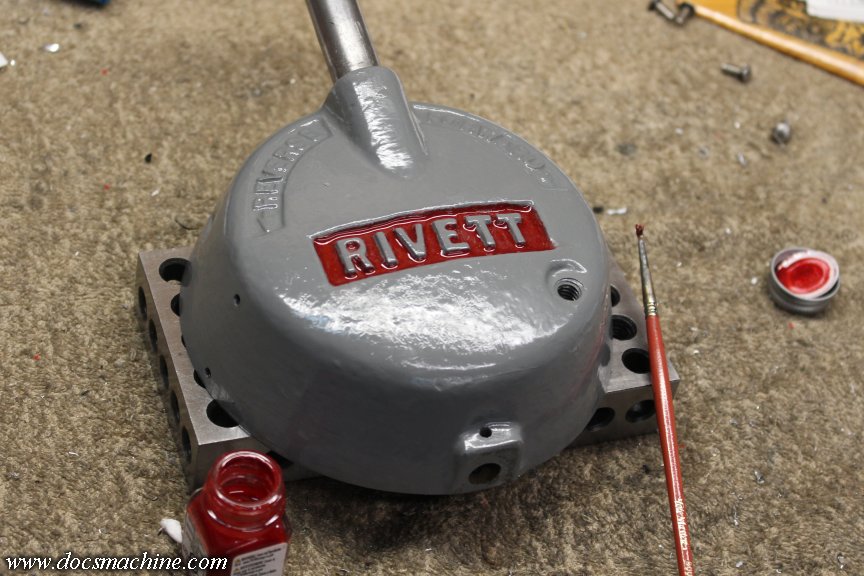
I'm sure those of you who paint miniatures could have done a better job, but the brush I used was probably half again too big- and it was the smallest I had- and the casting is none too even. Of course, the 60-70Hz tremors from the day's caffeine intake surely had nothing to do with it.
I was hoping to at least be able to power it up by the "two week anniversary"- that's tomorrow, the 9th- but I just have too much on my plates right now. I did, however, do one quick thing towards that, and got the new power cord wired in:
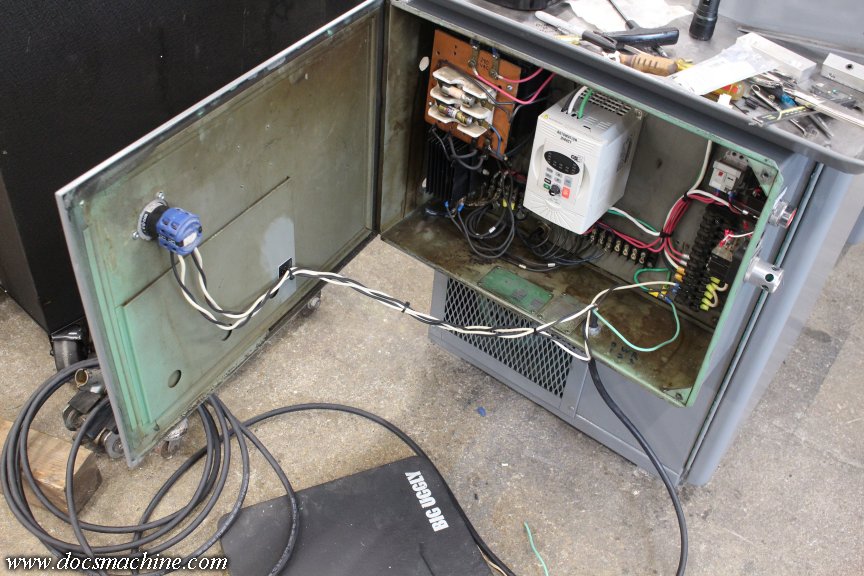
Hopefully I have that right- I've double-checked it, but even money says I still screwed something up...
I'll also have to double-check the motor is turning the correct direction when I do finally power it up- thankfully there's an arrow on the AC motor to indicate. I'm assuming the DC brushes won't be damaged if it spins backwards briefly?
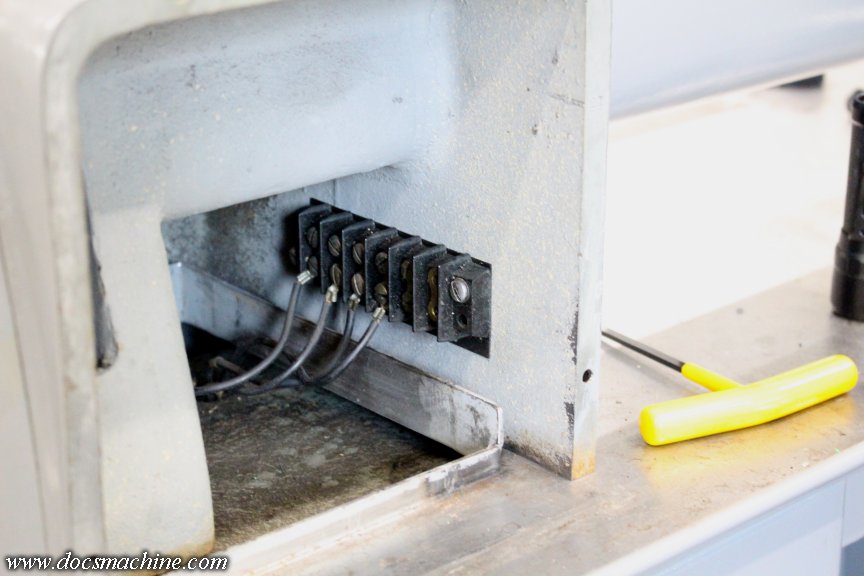
The other thing was I simply screwed the bus bar back to the inner casting, in preparation for whenever I can assemble and reinstall the "rheostat" lever.
And that was pretty much it for the day. I've gotta finish programming another part for the Omni, polish a couple of customer pieces, and run about twenty parts through the green mill.
And then after lunch...
Doc.Doc's Machine & Airsmith Services: Creating the Strange and Wonderful since 1998!
The Whiteboard: Daily, occasionally paintball-related webcomic mayhem!
Paintball in the Movies!Comment
-
It Lives! It LIIIIVES!! [mad cackle, lightning/thunder SFX]
... ahem.
Yeah, I do still have too much to do, to be fooling with this thing right now. But at the same time, I needed the parts off my workbench so I could do some of those things. Fortunately, this only took about an hour...
First, I dabbed a touch of grease on the lever pivot, and dropped it into place.

Then another dab of grease, and the gear gets pressed back on- there's a setscrew that retains it, and that assembly is what 'locks' the lever to the cover plate.
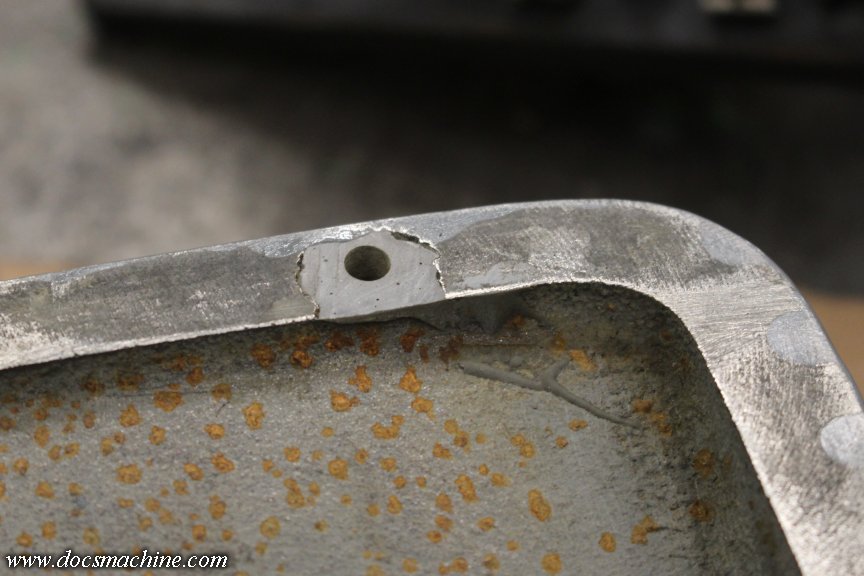
One interesting little bit- there was apparently a void in the casting around one of the cover plate mounting holes. As the plate was otherwise acceptable, they filled the void in with epoxy.
Anyway, all that was left were the two detents- the one at the bottom that just contacts that movable "indicator bar", and the one from the front that centers the lever assembly in the "off" position.
Then, the whole 'rheostat' assembly simply plunks back into place, with the three screws and one spacer.
Hook the four wires back up- hopefully in order- to the bus bar...
And bolt the whole assembly back into place, using some fresh stainless screws from my stashes. (The originals were kinda hammered.)
Not sure what I'm going to do with the indicator plate just yet. I tweaked it back into shape, so it better conforms to the cylinder, but it was originally nickel-plated, and most of that has worn off. The engraving is nice and deep, though, so kind of toying with the idea of just sanding it smooth and uniform, then filling in the lettering with black paint.
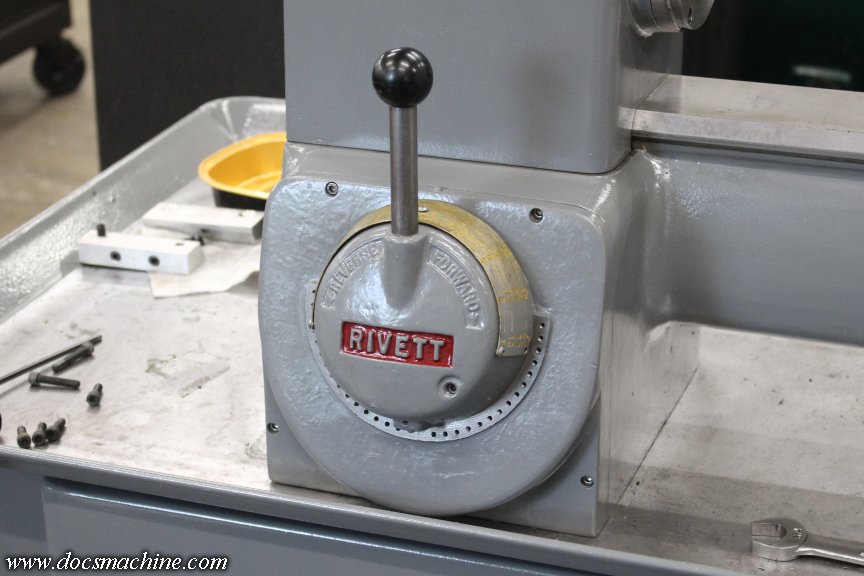
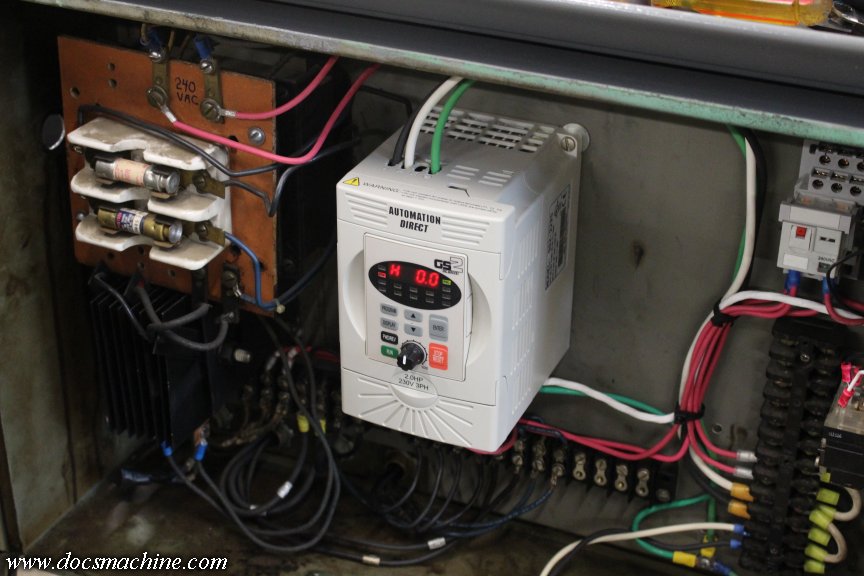
But, that's a trick for another day. At the moment, we are now- hopefully- back up to electrically complete, so it's time to try this thing! First, power up the VFD...
And start it- yes, according to the arrow on the AC motor...
It is indeed turning the correct direction. The roller-chain shaft coupler can be seen through the grille, itself barely seen at the lower right, to verify that.
So, with nothing better to do, it was time to try out the drive- and lo and behold, it worked! And, almost exactly two weeks- almost to the hour- from when it first landed on my slab.
Can't really tell, but the motor was spinning nicely in there, at probably around 1,000 RPM at a guess.
But, there's definitely some noise in the drive.
That (empty) left-hand pulley? It sounds like the bearing has a definite "click" to it, almost a "rod knock" noise. Not "death rattle" loud, but yeah, it's gonna need to be replaced before too long.
Apart from that, the speed control works smoothly and basically perfectly. I can run it at about 20 RPM (no idea how much torque it'd have at that speed) all the way up to whatever this belt setting is- about 3K, I think?
Then, I threw the spindle belts on to gave that a try:
The spindle wasn't as loud as I expected, but there, too, is a definite 'whirr'. I could probably run it as-is for a time, without any significant issues, but really, the rest of the work, save for getting the actual tooling set up, is basically done. There's not much left to do BUT the bearings and various tool slides.
But for now, it's time to clean up, set this aside (sort of) and catch up on my other work. I'll still be poking around with it as I have time and inspiration- I've been doin' some tool-horsetradin' in the background - but the major work is finally done.
Doc.Doc's Machine & Airsmith Services: Creating the Strange and Wonderful since 1998!
The Whiteboard: Daily, occasionally paintball-related webcomic mayhem!
Paintball in the Movies!Comment
-
Its a beautiful thing Doc! Transfixed by the process as always. I know the new tool feeling all to well.... like a tractor beam - you just can't let go till you get it going - clients be damned .Comment
-
A little bit of a follow-up on Cemento's post: One big aspect to this kind of project is, to put it simply, the enthusiasm. As much as I love working on the markers, and making parts, I also do that kind of thing pretty much every day.
I don't get to rebuild a machine like this every day. And I'm just as much a machine enthusiast as I am a paintball enthusiast.
If it wasn't obvious from my posts about it, above, I love this kind of thing. For those of you waiting- more than a few maybe a little too long- for parts or work from me, I very much apologize. I am still kicking out what I can, as fast as I can.
But, I gotta be me, too.
Doc.
Doc's Machine & Airsmith Services: Creating the Strange and Wonderful since 1998!
The Whiteboard: Daily, occasionally paintball-related webcomic mayhem!
Paintball in the Movies!Comment
-
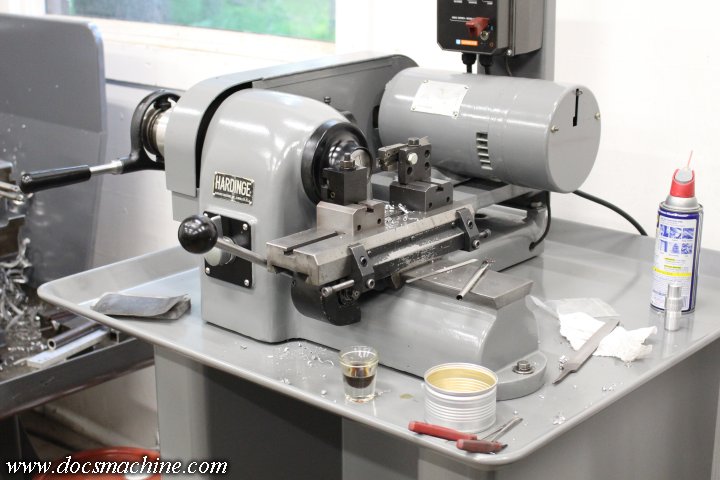
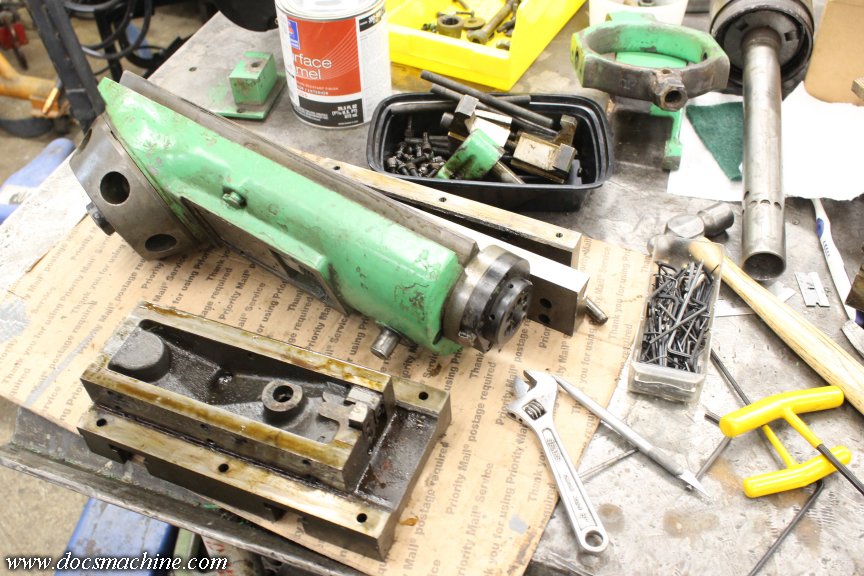
We're still a good ways from 'done' on this machine, and one of the more important things it still needs, is some tooling. I'm hoping to have the time this weekend to start cleaning up the turret, but in the meantime, I got in a new toy for it.
The machine came with a single axis lever-operated cross slide, that was either shop-made at some point (although moderately well done if so) or came off a much smaller lathe, something like a watchmakers' or similar.
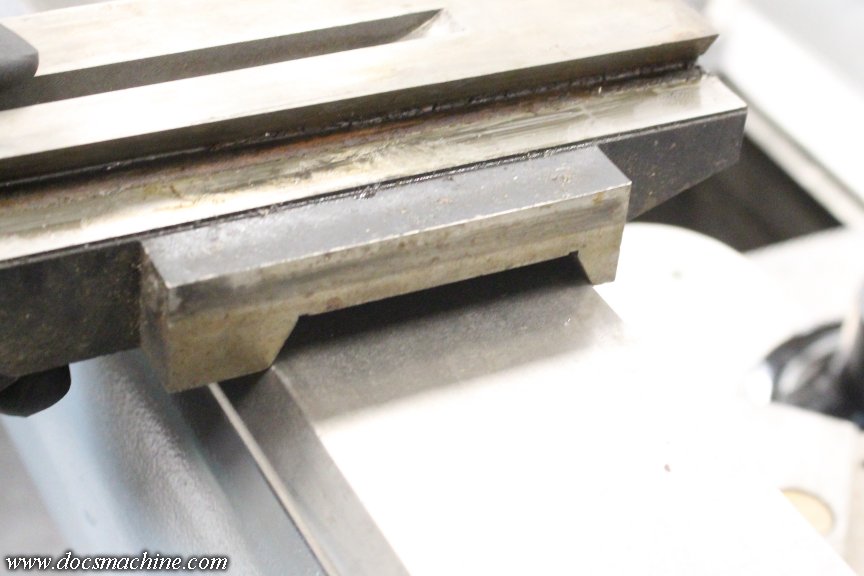
I had been hoping I could use the comparatively heavy-duty slide off the little 'speed' lathe, but the bed geometry is quite a bit different. However, while idly looking for Hardinge parts on eBay, I found one of their slides that fit the older "split" beds, which had a geometry a lot closer to that of this Rivett. The seller provided several clear photos, and the price was decent enough I thought I could modify it, so I took a risk on it.
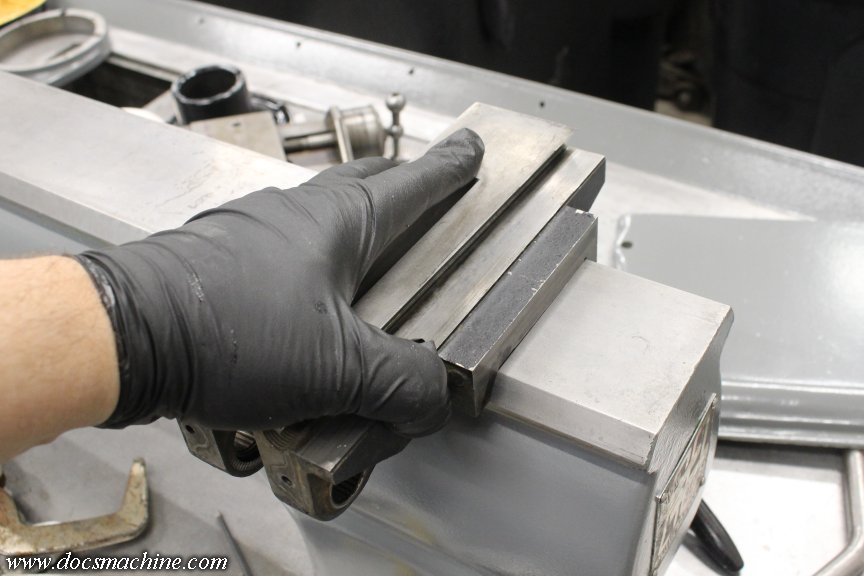
It had been disassembled for shipping, but it looks almost identical to the one on the HSL:
And, I had to disassemble it anyway, as the bed profile was close, but not a match.
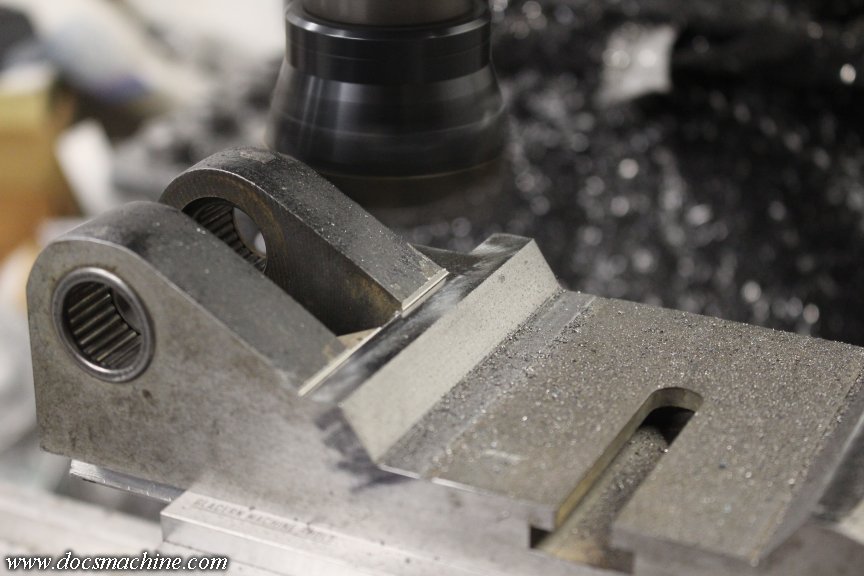
It also appeared the angles weren't quite the same, either. I'd assumed they were 45° facets, but as it turns out, not quite. With the aid of a machinists' protractor...
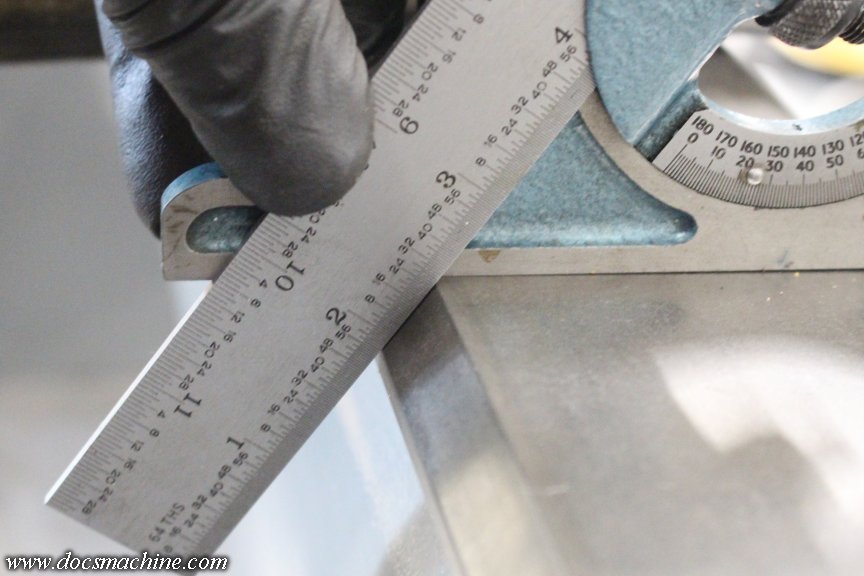
The faces proved to be 55°, while the new casting was the expected 45.

Using the same protractor, I kicked the head of the mill over to cut both faces to both the correct angle and spacing.

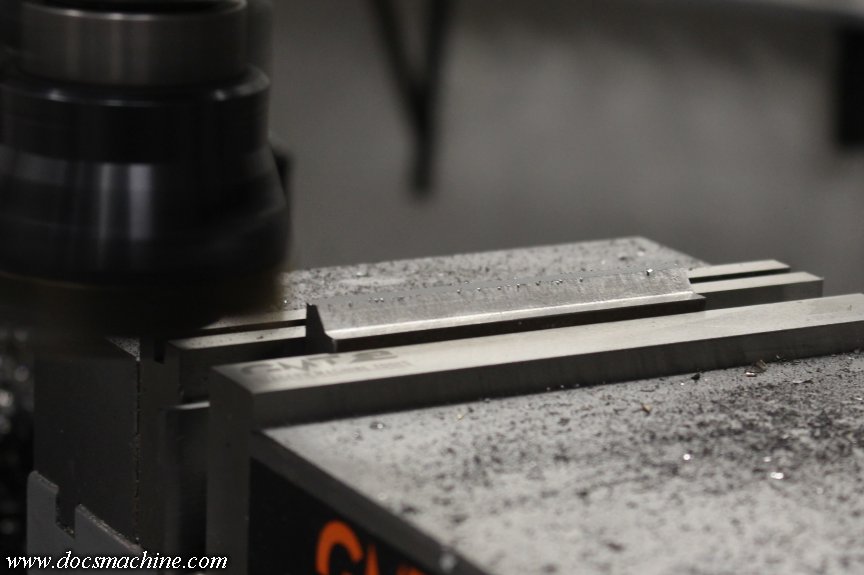
A quick trip over to the other mill smoothed out the 'stairstep' at the bottom face of the cut- since the angled face had to be pushed back almost 3/8".
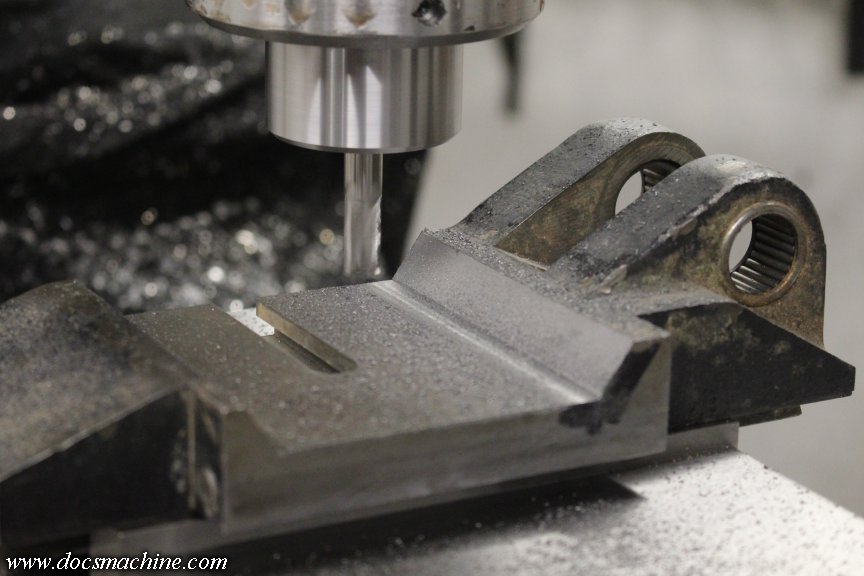
There was more cut-and-try than I've shown here, but eventually I was happy with the fit, The face angles are spot on, and there's only about 15 thou clearance in the center.
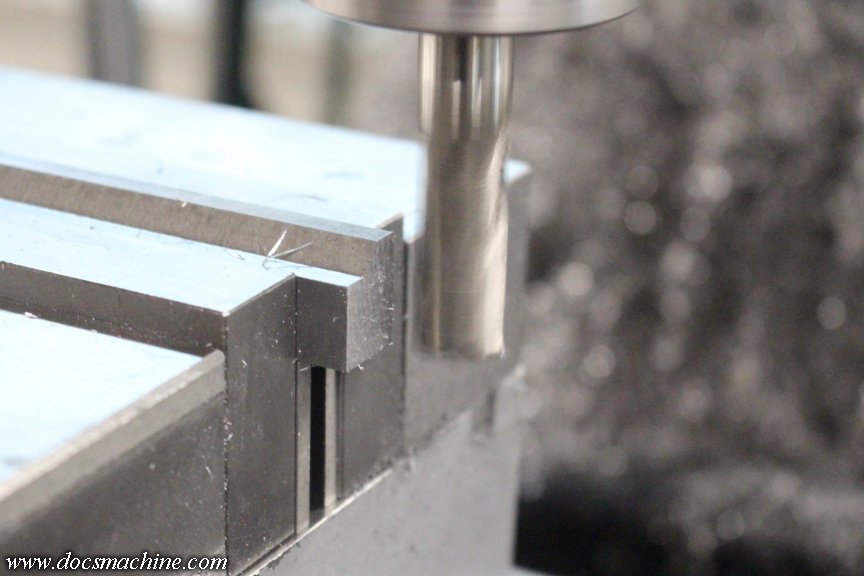
Now, we're going to need a place to attach the bottom halves of the dovetails- the 'clamps'- so I also smoothed and squared up the bottom of the casting on both sides.
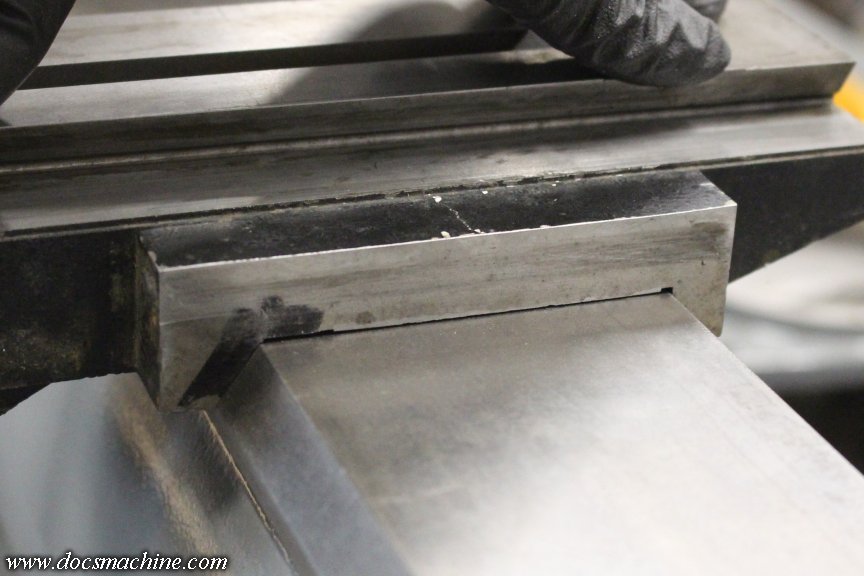
Then I found a suitable hunk of steel bar in the bins, and shaved that down 'til it looked about right:
That will attach something like this, with just a few thou of 'crush' in order to clamp to the bedway. (There'll be one on either side, too, of course.)

And that was all I had time for this evening. I need to do some pondering on the front bar, anyway.
Doc.Doc's Machine & Airsmith Services: Creating the Strange and Wonderful since 1998!
The Whiteboard: Daily, occasionally paintball-related webcomic mayhem!
Paintball in the Movies!Comment
-
As usual, not much time this evening, but at least managed to get a couple small things done. First things first, I cleaned the green mill off and re-trammed the head back to true and square and plumb and colinear properly fenestrated and all that, then I faced one end of that bar from last night in order to have a reference surface.
Then I measured, spaced out, drilled and countersunk three holes, for some 1/4-20 capscrews.
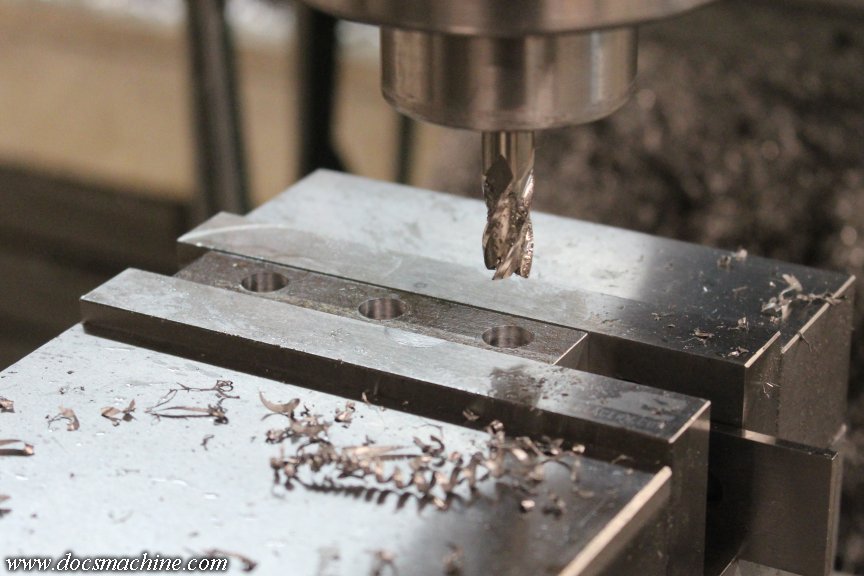
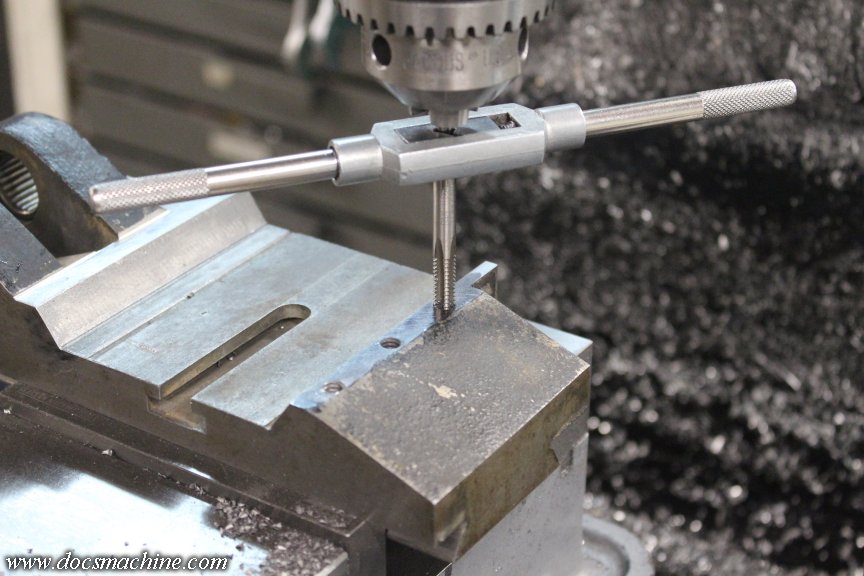
Those measurements I transferred over to the underside of the slide casting, and drilled and tapped receiving holes.
I didn't have the right size screws, and it was way too late to hit up Homey-Dee, so I found a couple of countersunk ones that'll work to test fit the assembly.
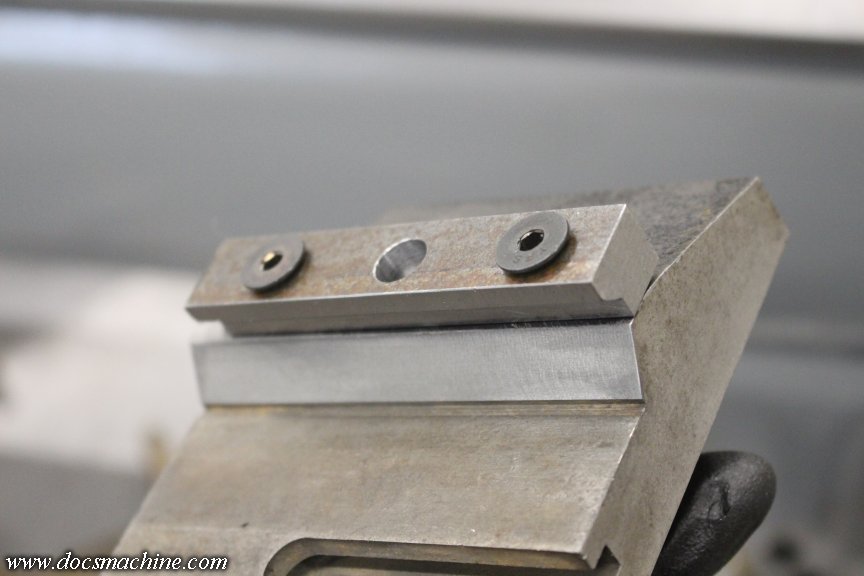
And, if I do say so myself, it's frikkin' perfect.
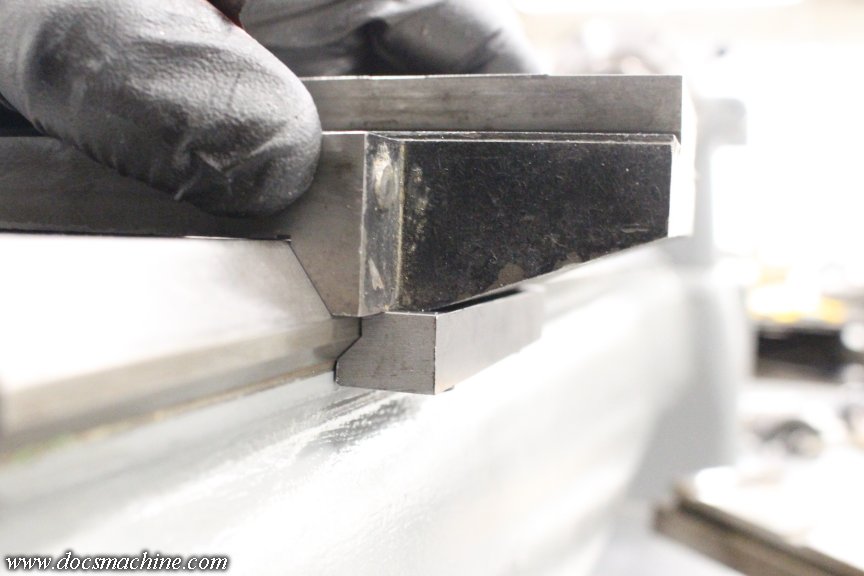
The assembly slides on from the end, very smoothly, no binding, and yet I can feel basically zero slop. I can lift the front edge- no clamp, of course- but I can't even wiggle the back.
Which is perfect- when it comes time to finish this thing, if I need to tighten up the fit a touch, I can shave off- or more likely just surface grind off- a couple of thousandths and give it just a touch of "clamp".
One other thing I did was I started dismantling the turret...
... So that hopefully over the course of this coming week, I can start getting those parts cleaned up, stripped and painted.
It's slow going, but kicking the can along as best I can. More on the way!
Doc.
Doc's Machine & Airsmith Services: Creating the Strange and Wonderful since 1998!
The Whiteboard: Daily, occasionally paintball-related webcomic mayhem!
Paintball in the Movies!Comment
Comment