instagram takipci satin al - instagram takipci satin al mobil odeme - takipci satin al

bahis siteleri - deneme bonusu - casino siteleri

bahis siteleri - kacak bahis - canli bahis

goldenbahis - makrobet - cepbahis

cratosslot - cratosslot giris - cratosslot

Announcement

Collapse
No announcement yet.

Inside Doc's Machine Shop

Collapse
X
 
  • Filter
  • Time
  • Show
Clear All
new posts

    Day 437 of eating this particular elephant, and running low on ketchup.

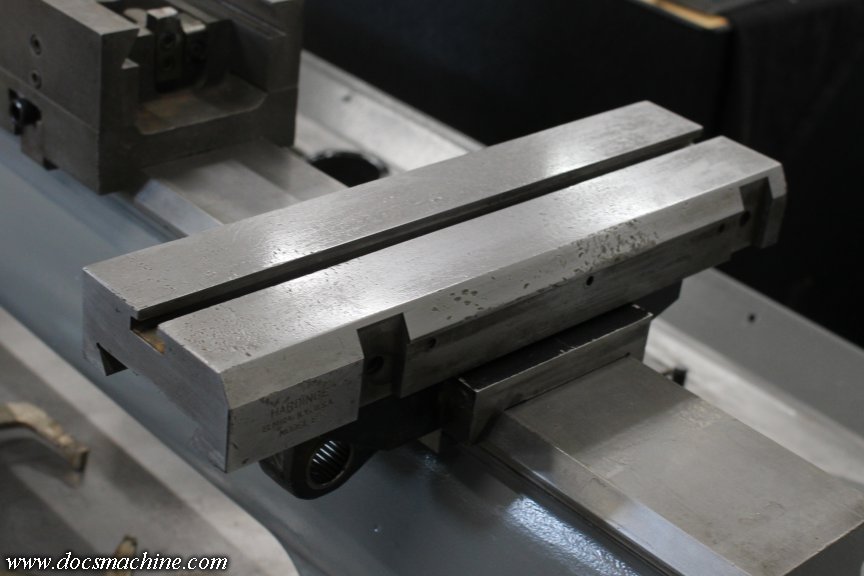
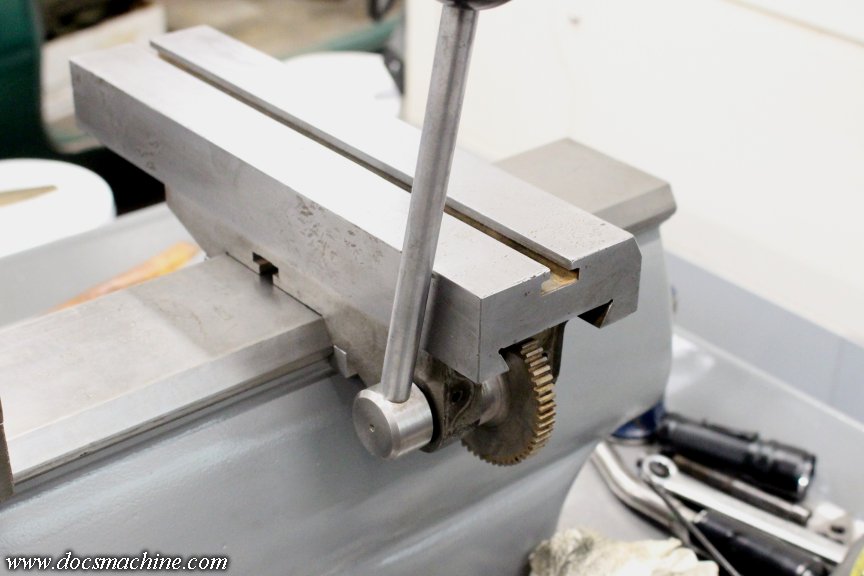
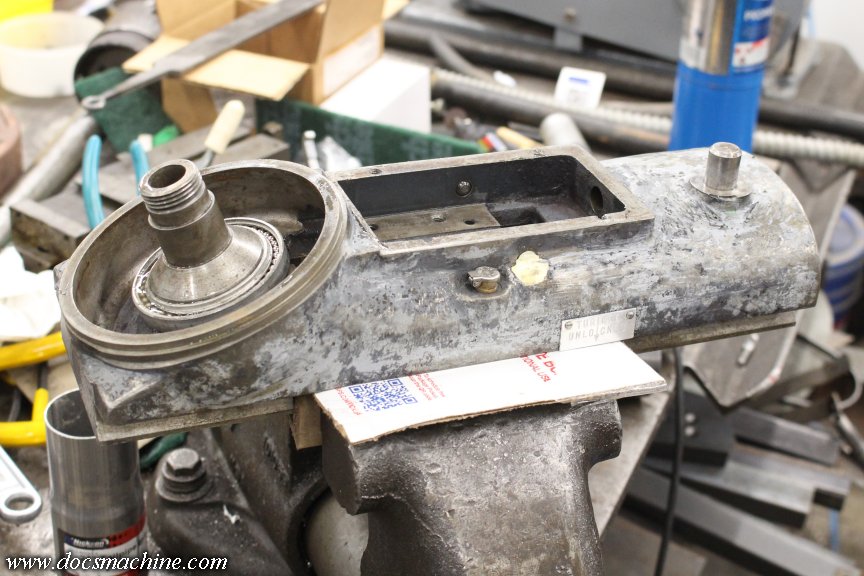
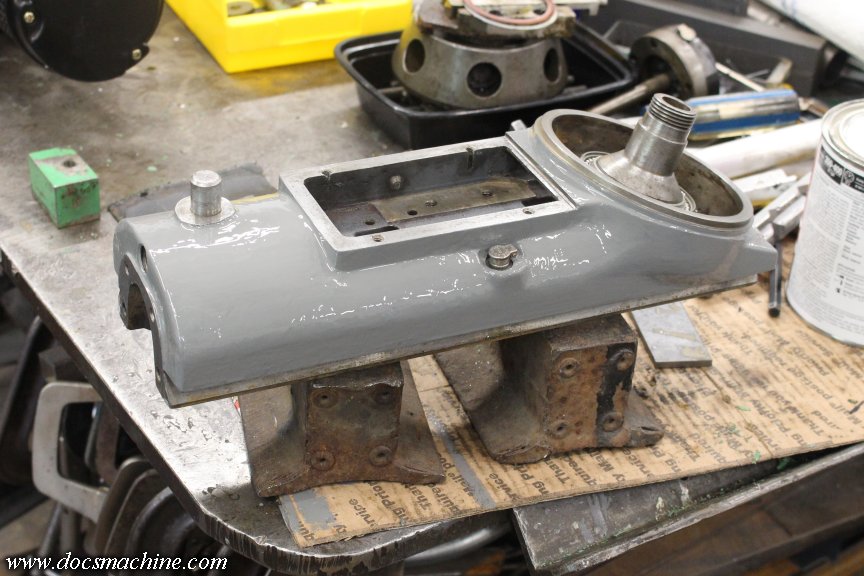
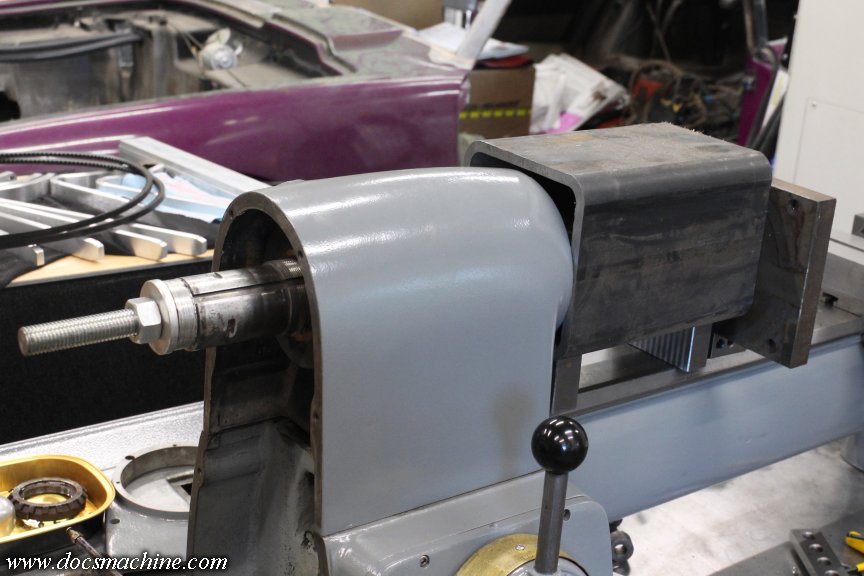
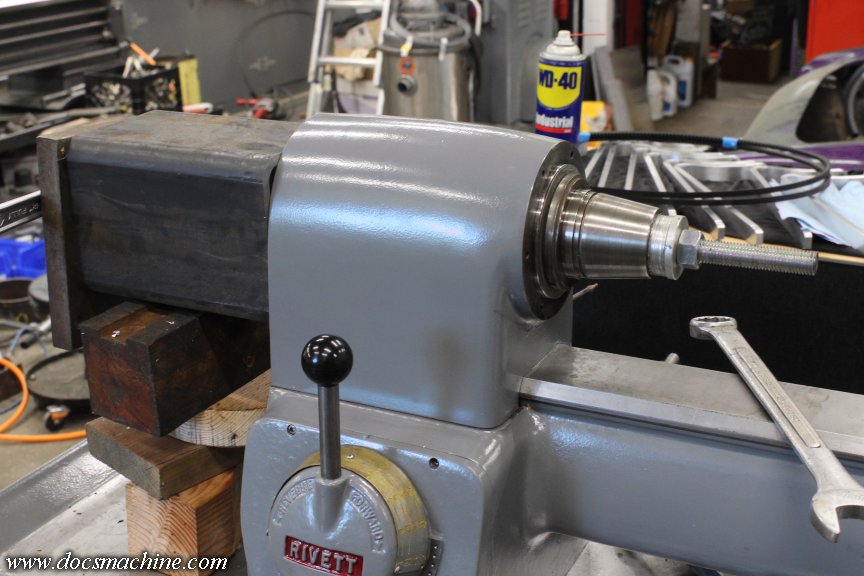
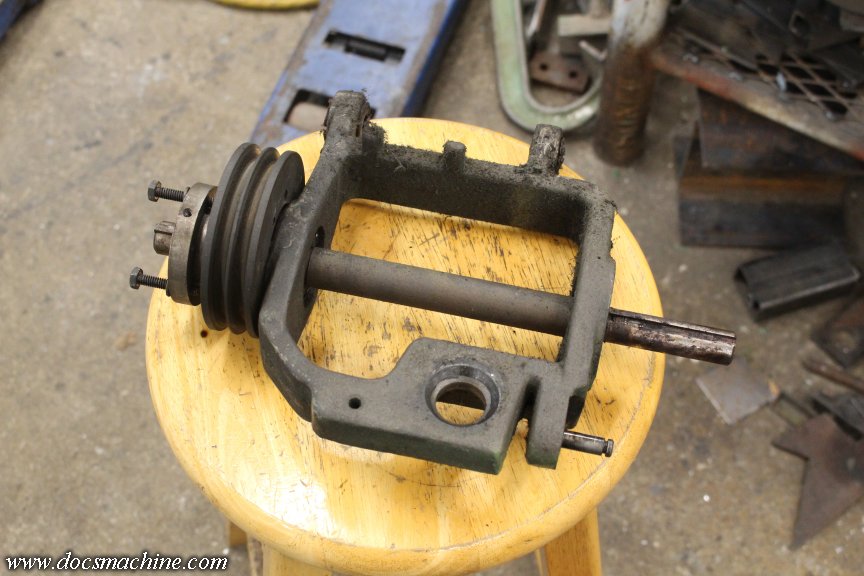
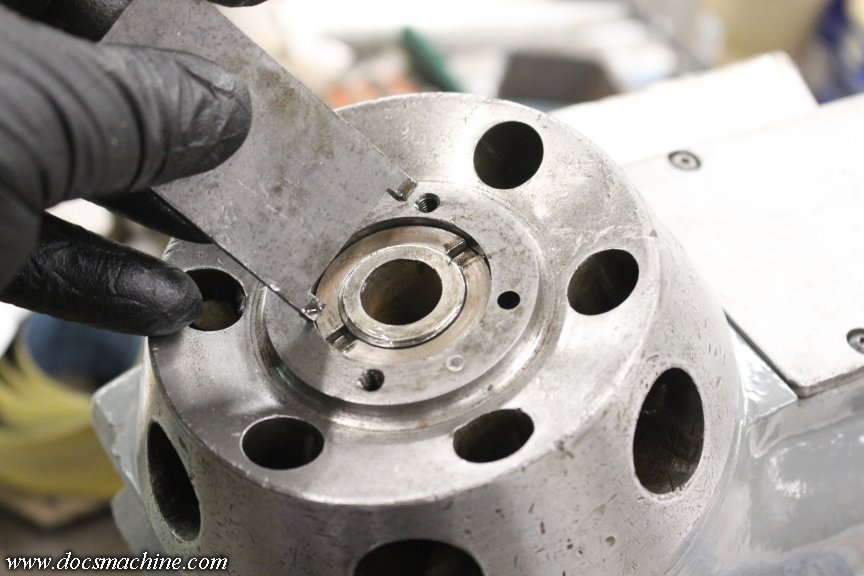
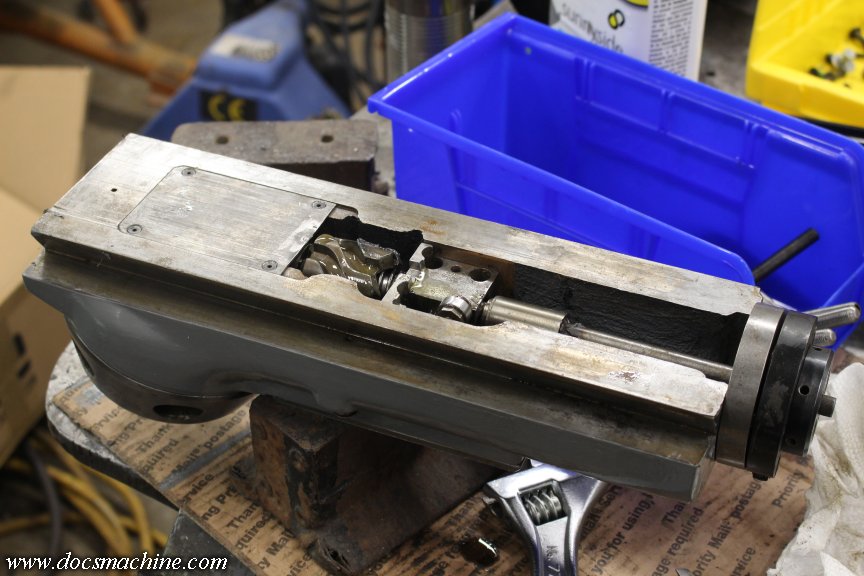
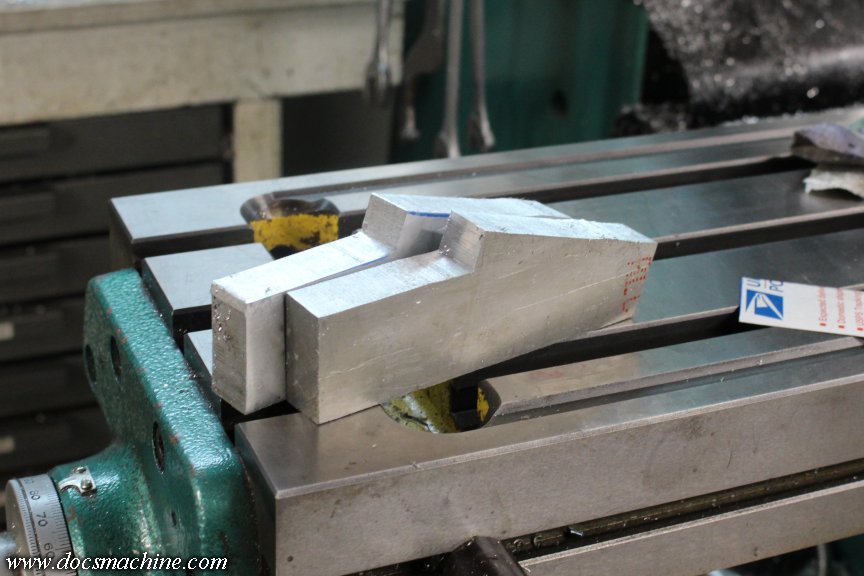
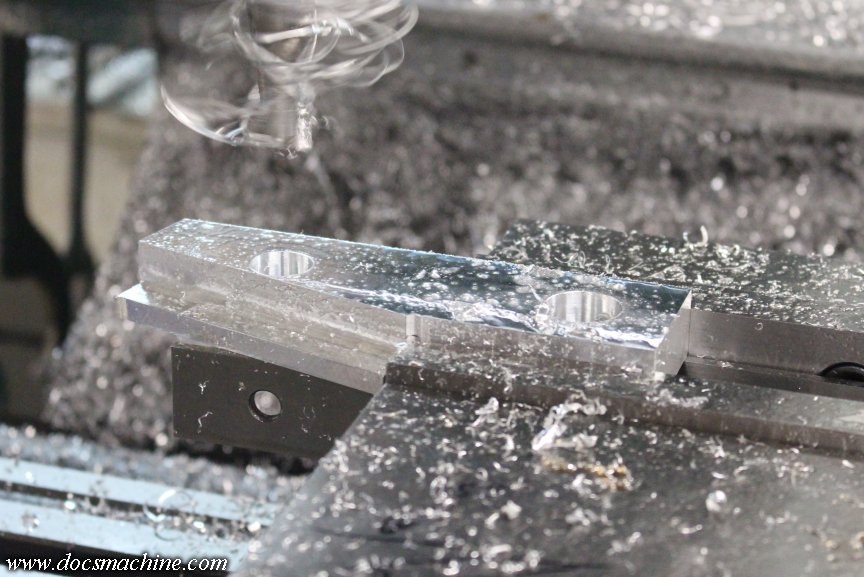
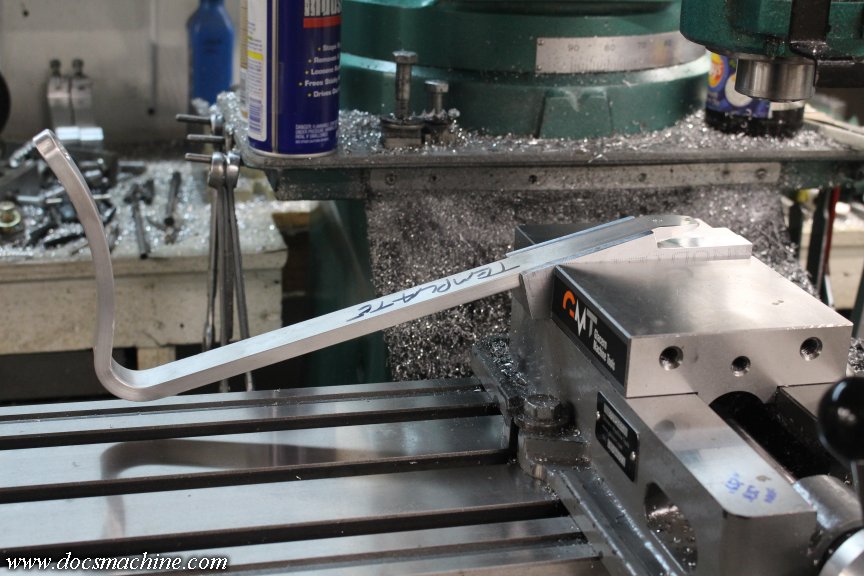
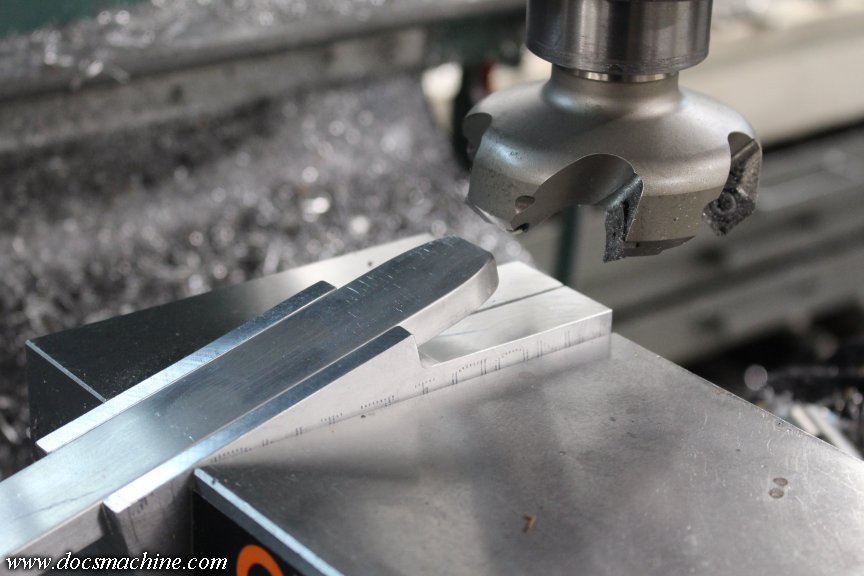
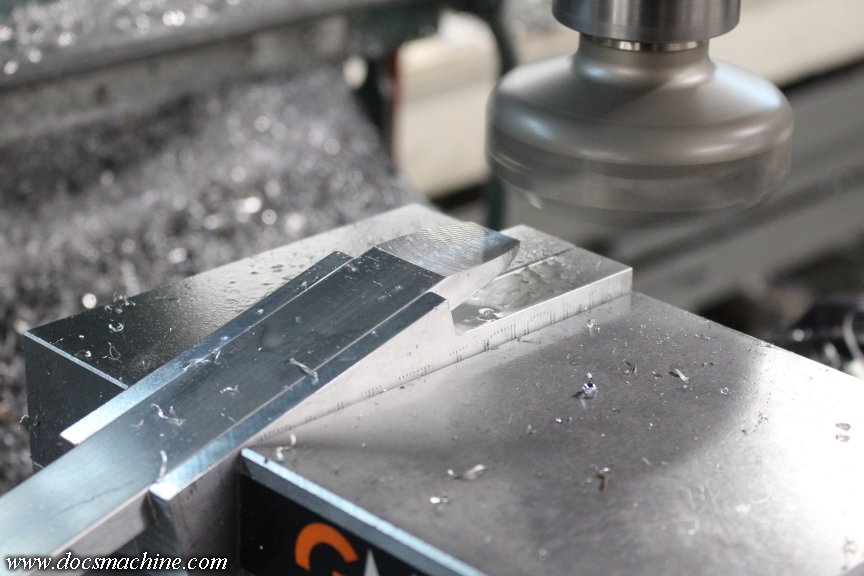
    Not much today, took the other part of that bit of scrap steel and milled it to shape, then drilled and tapped it all, again.


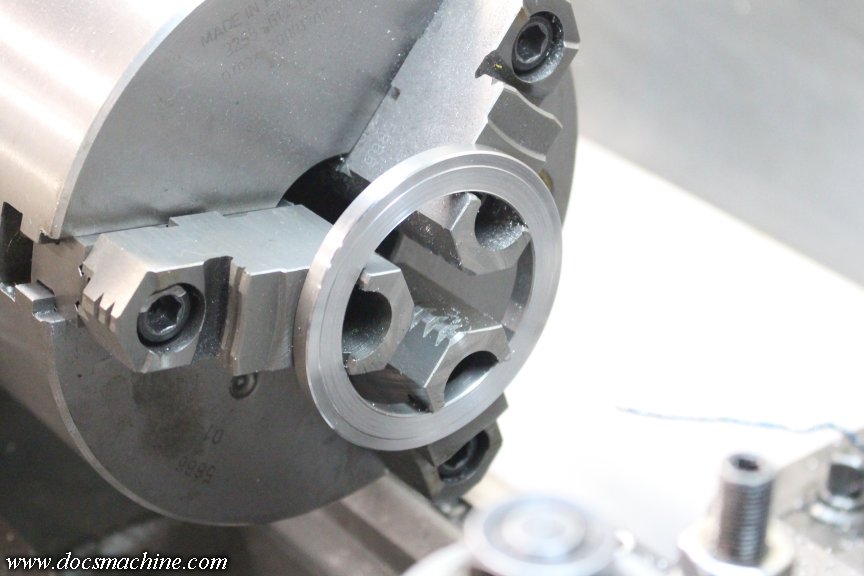
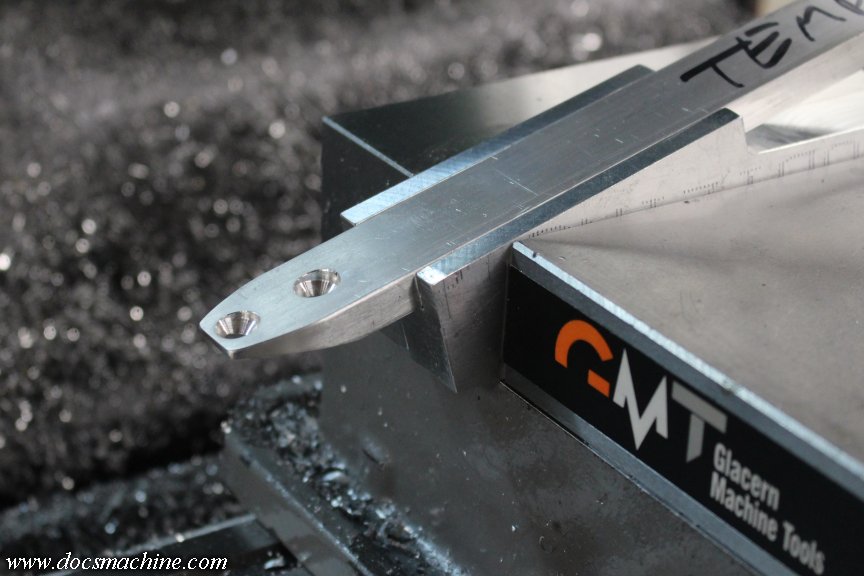
    And, if I might be allowed to toot my own horn here in public without fear of arrest, it fits perfectly.


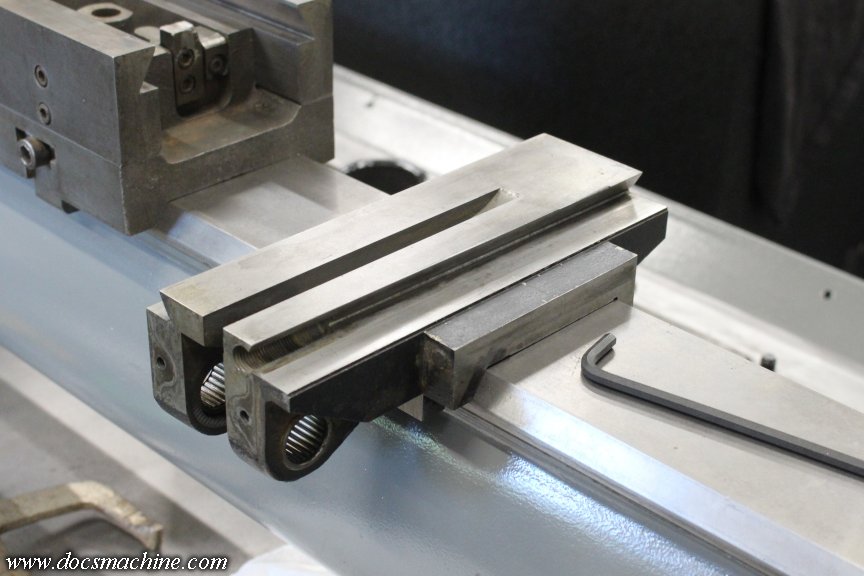
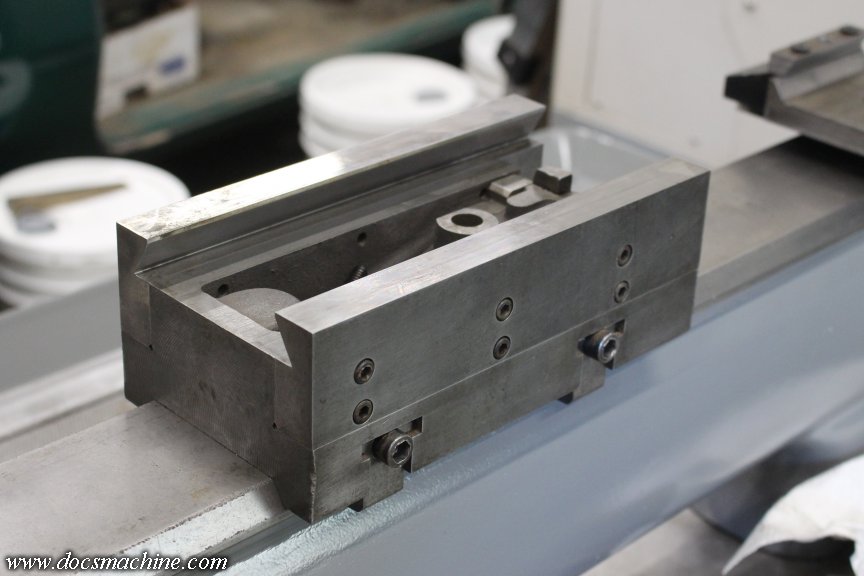
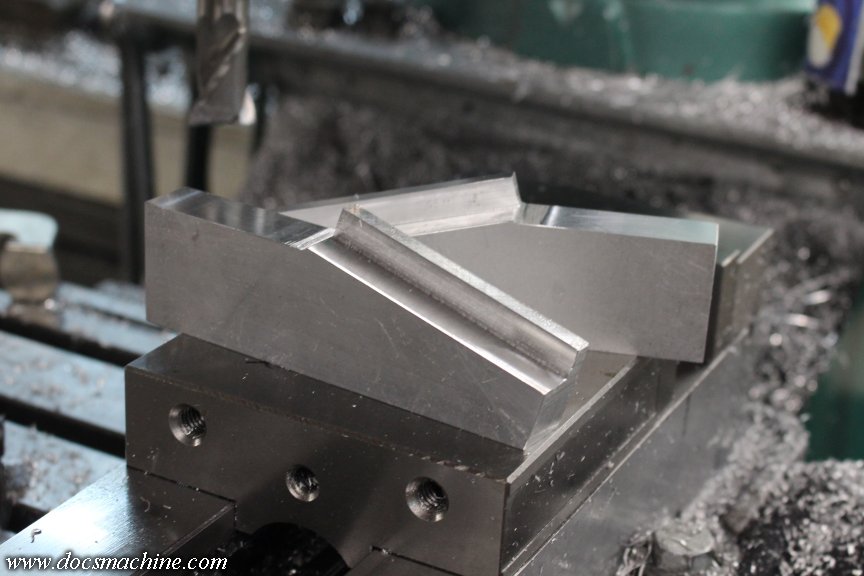
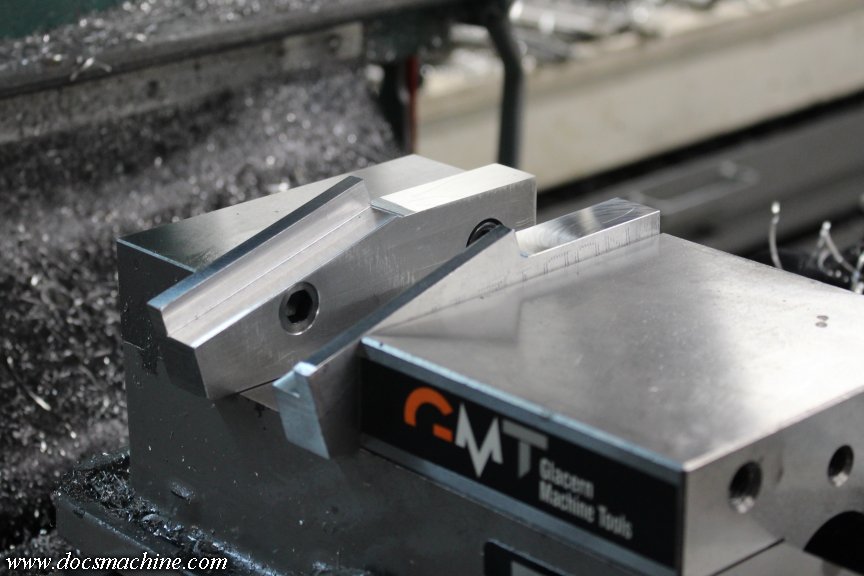
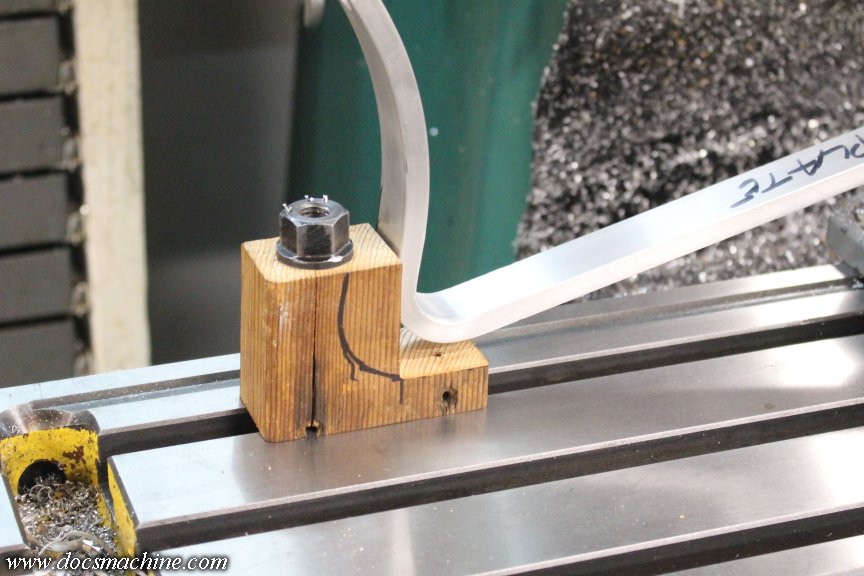
    Loosen the front screws a turn and a half, and she slides right on. Snug the screws back up and it's solid as a rock.

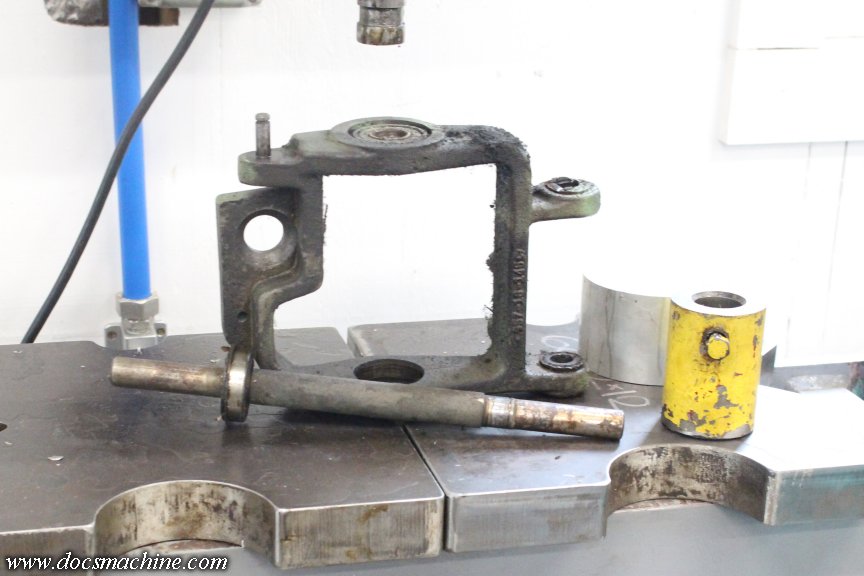
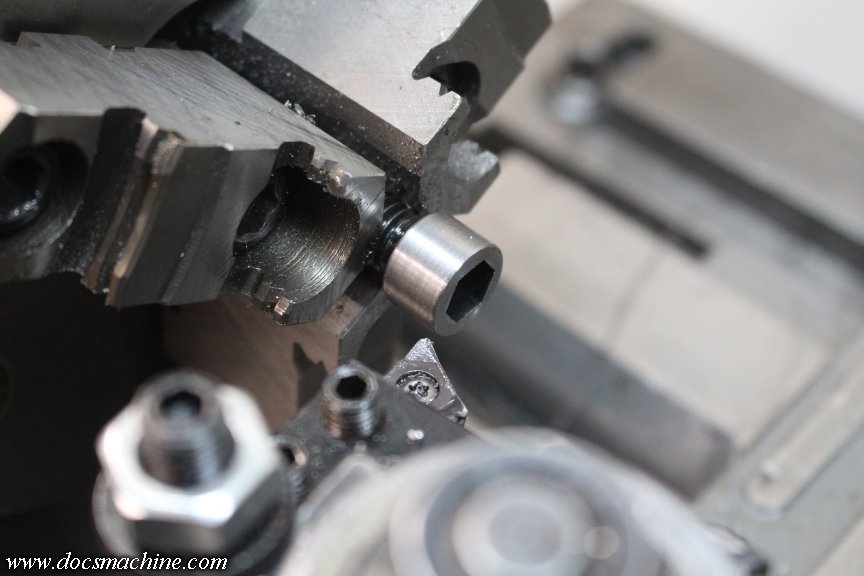
    The only drawback- and kind of expected- is the screws are tough to get at. I can reach 'em easily with a ball-end wrench, though what I might do for regular use on this machine, is cut down the short leg of a wrench, to make it easier to tighten them, once they're snugged with the ball-end. A second option is to use a shouldered screw (since they're countersunk holes) with a hex head, and simply use an open-end wrench on them.

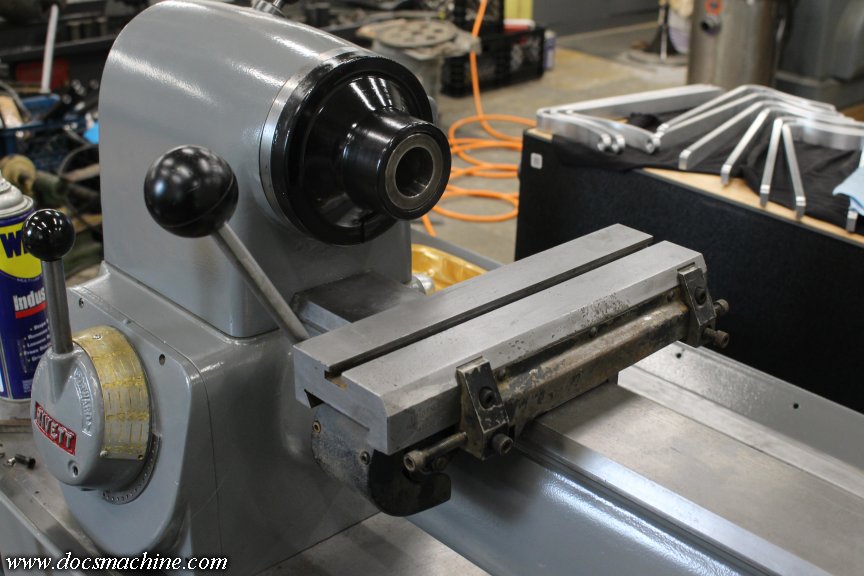
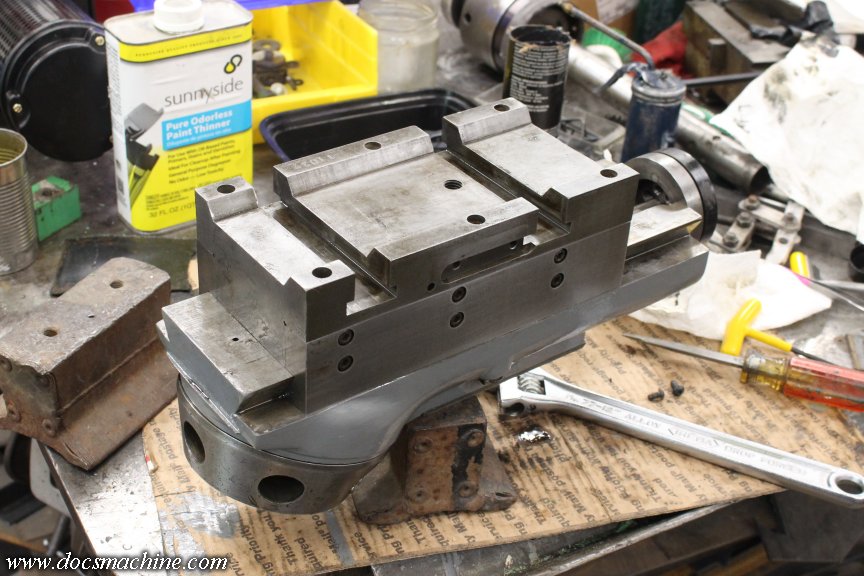
    Not the slickest setup, but I was pretty limited on what I could fit in there.

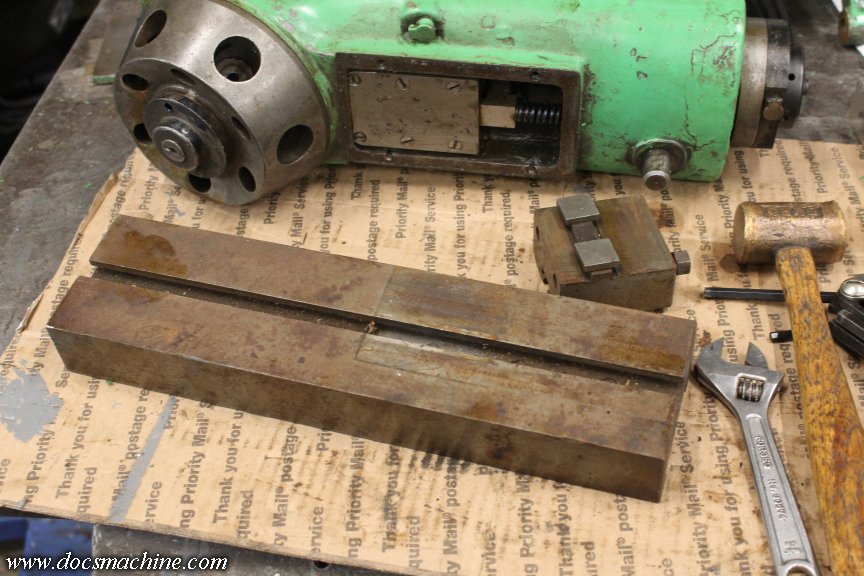
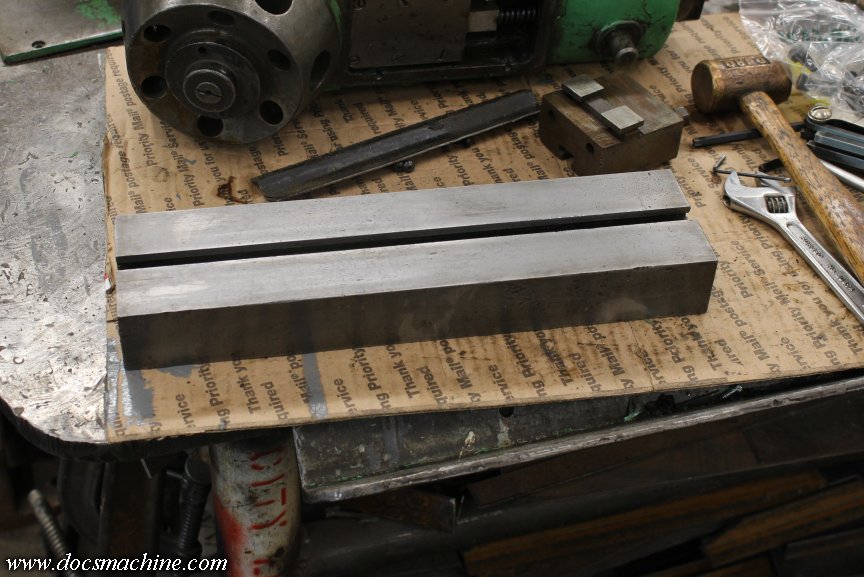
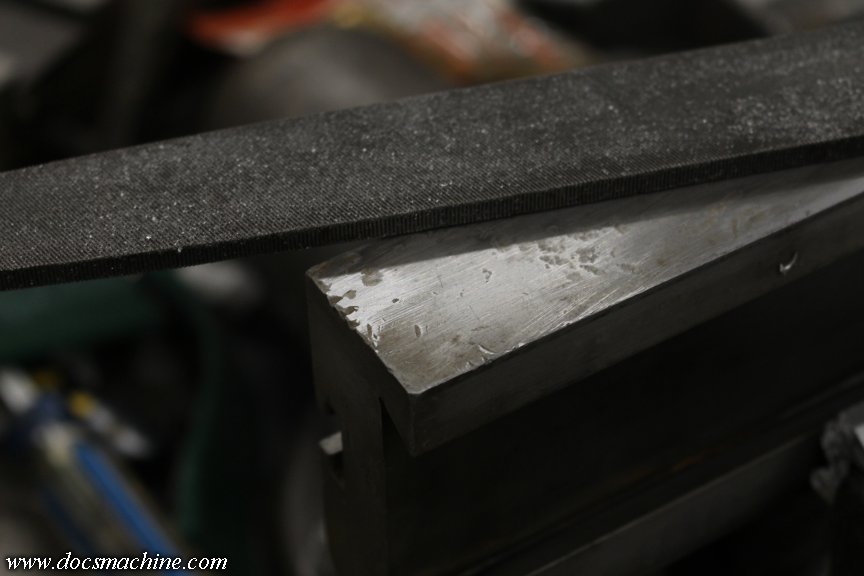
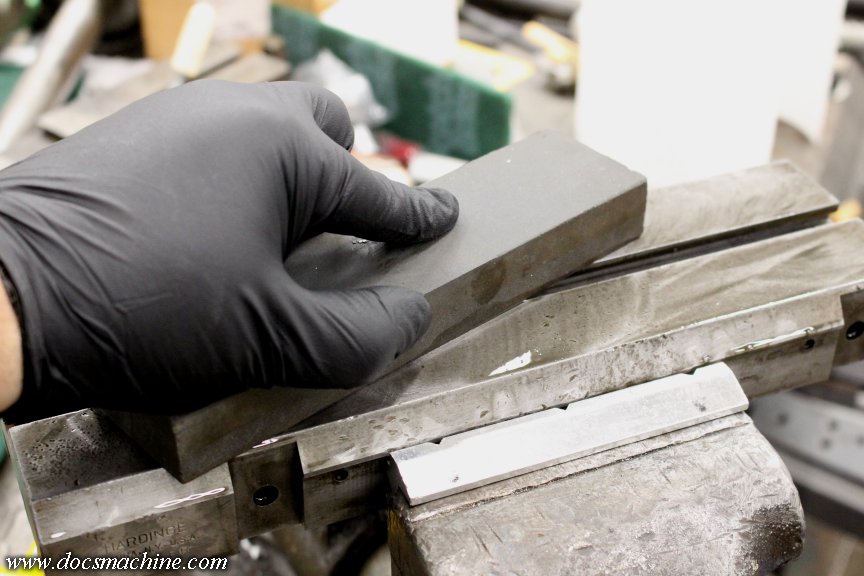
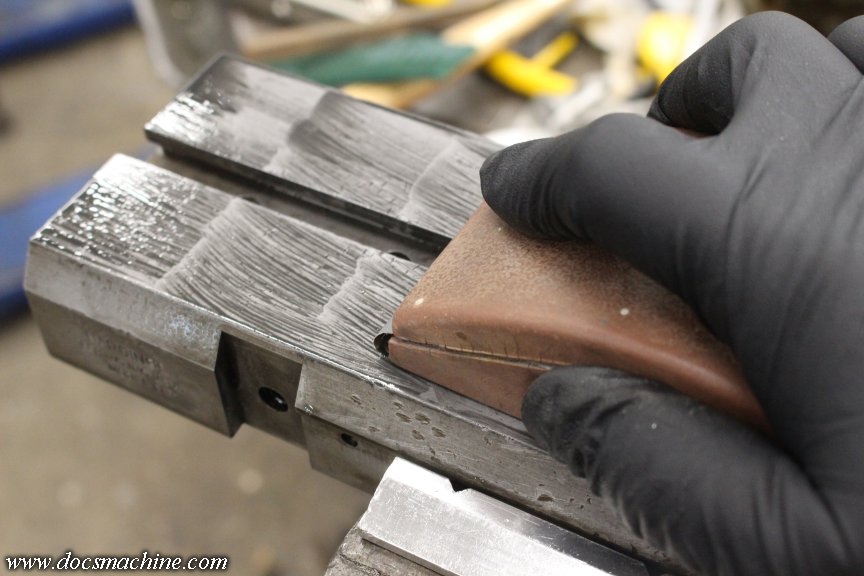
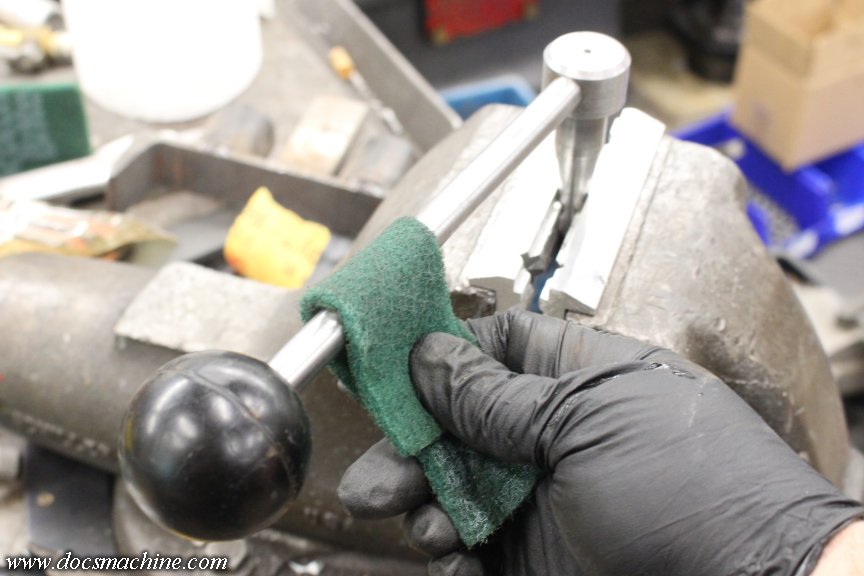
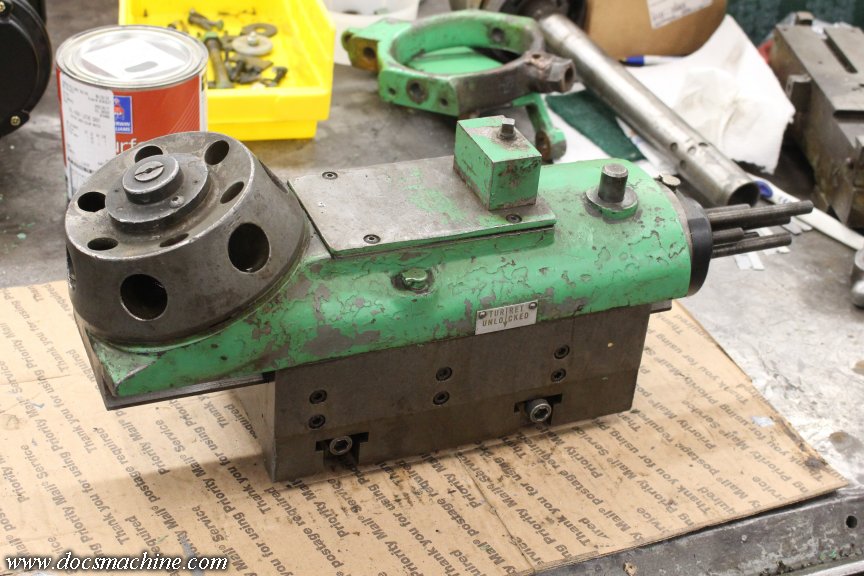
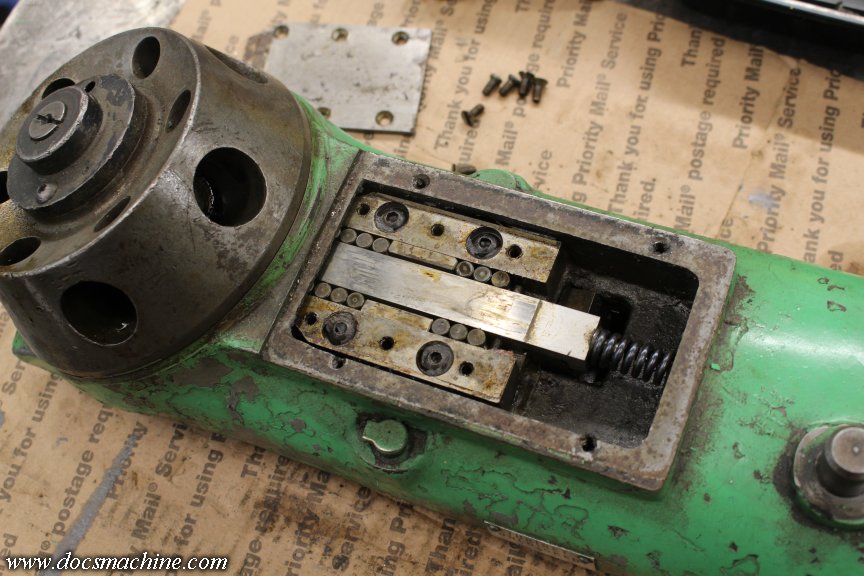
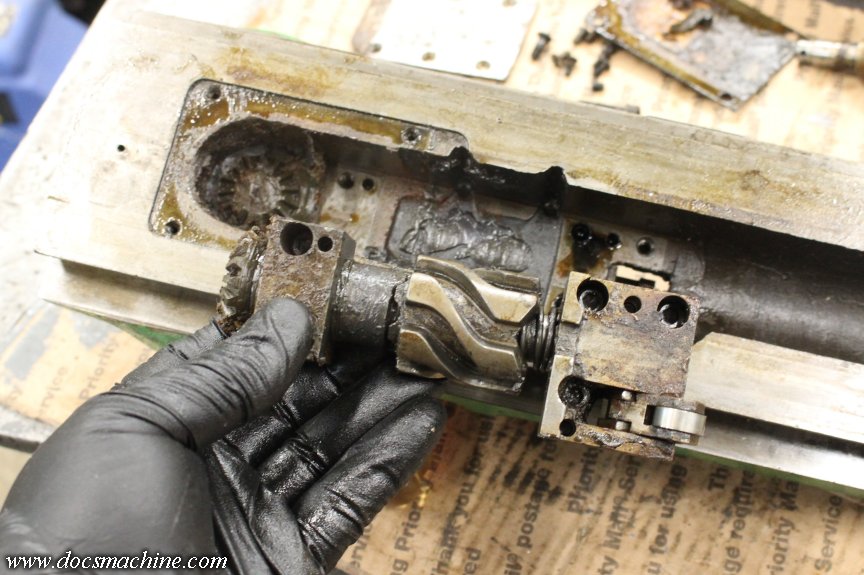
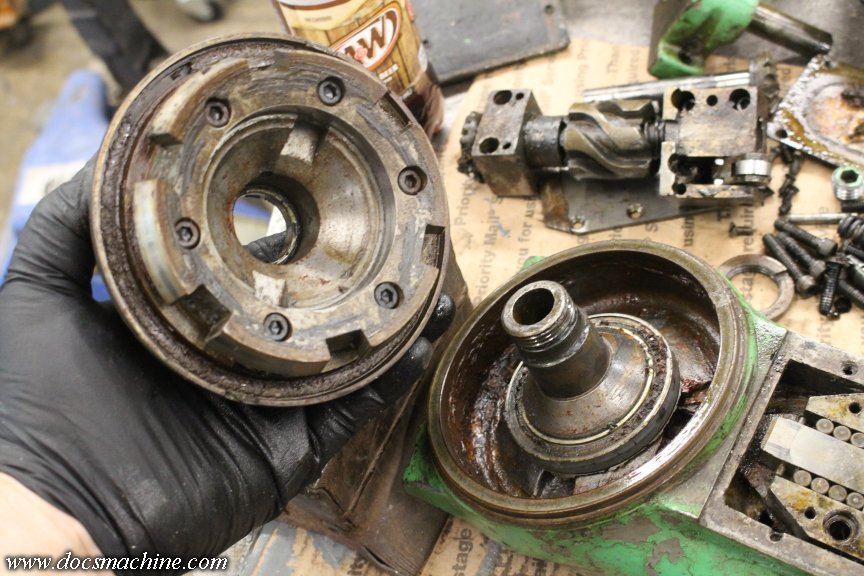
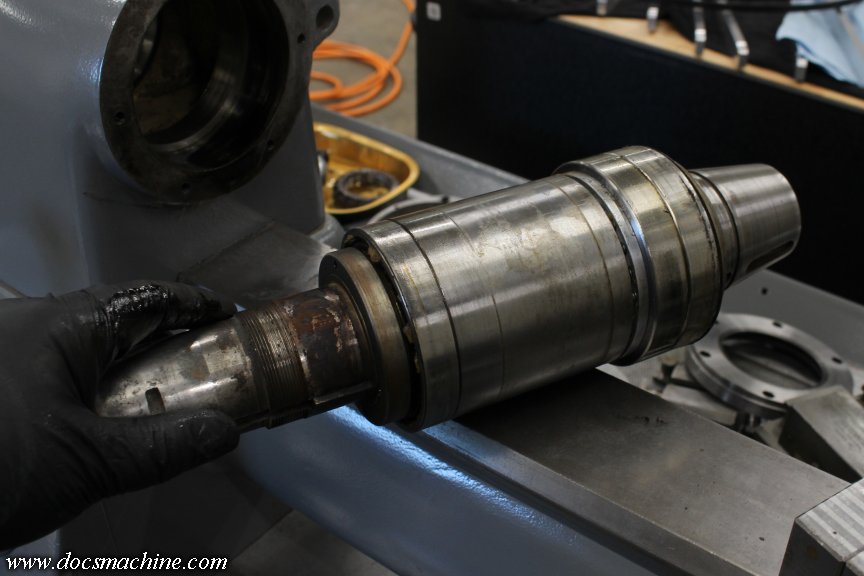
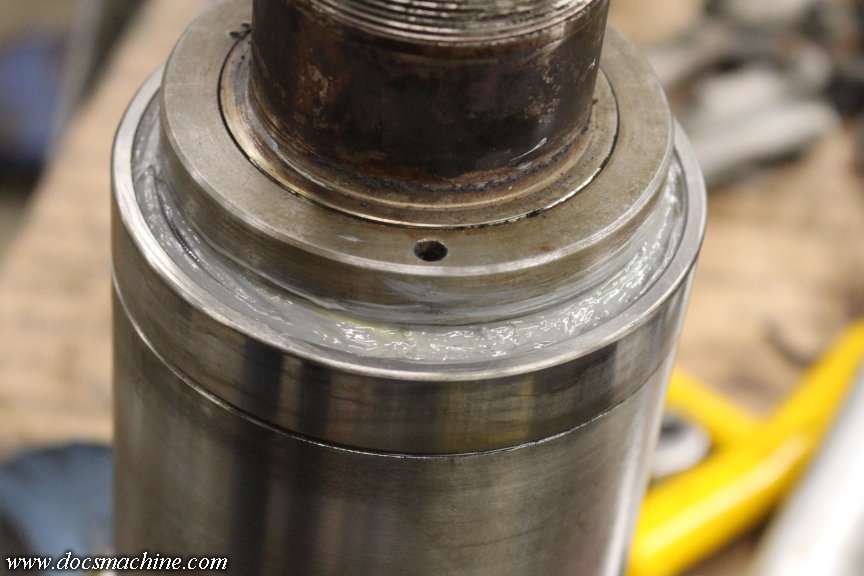
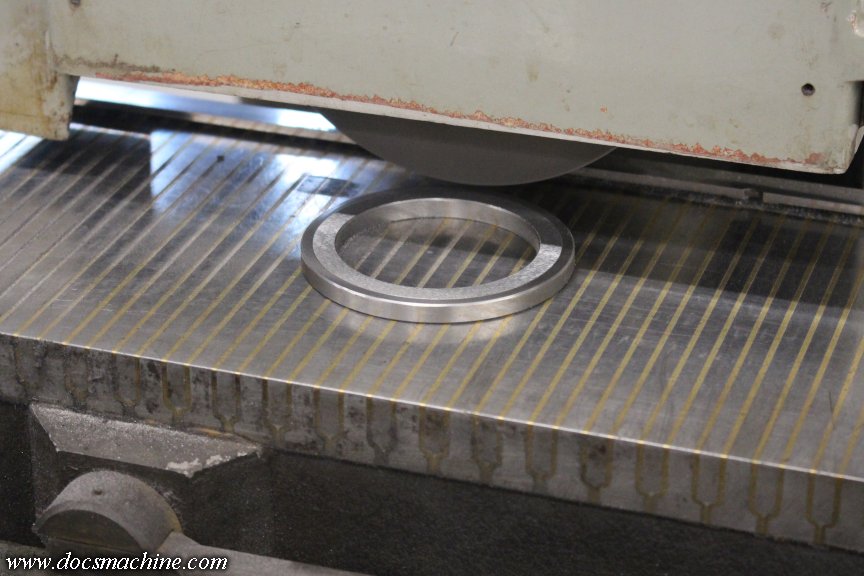
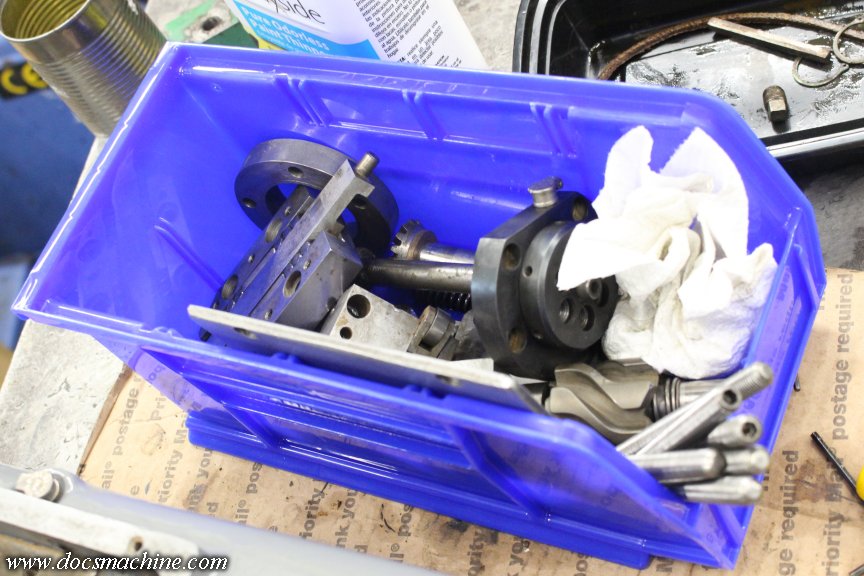
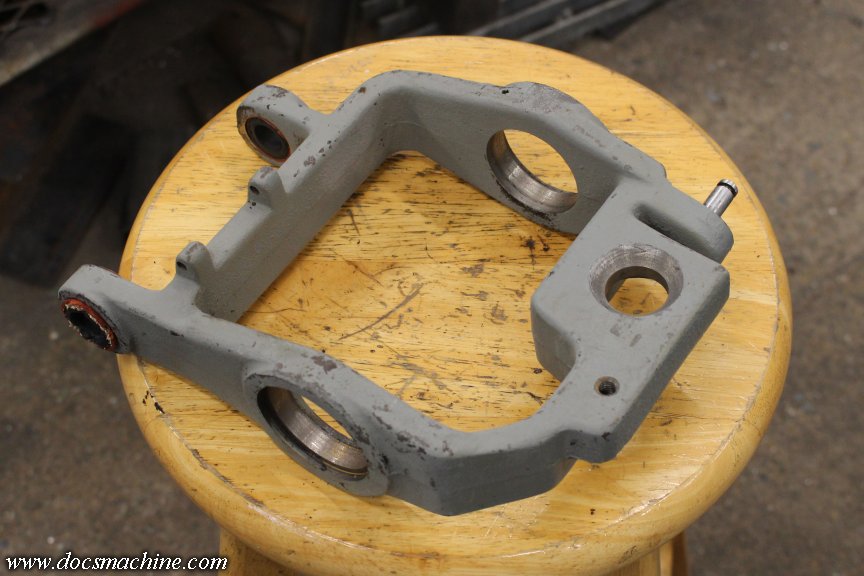
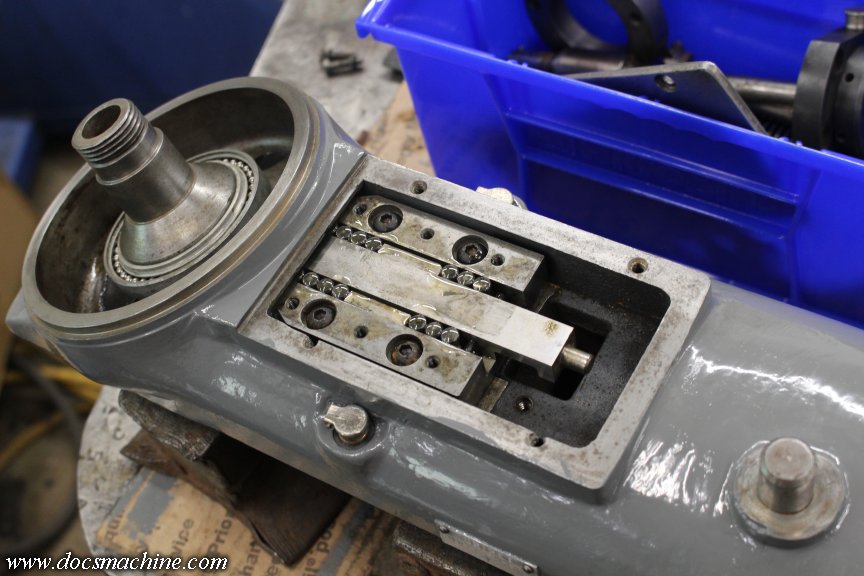
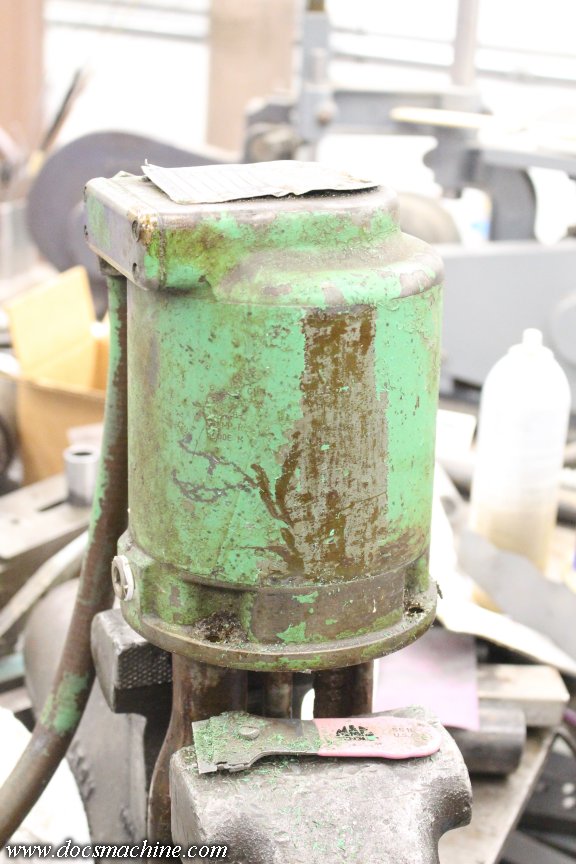
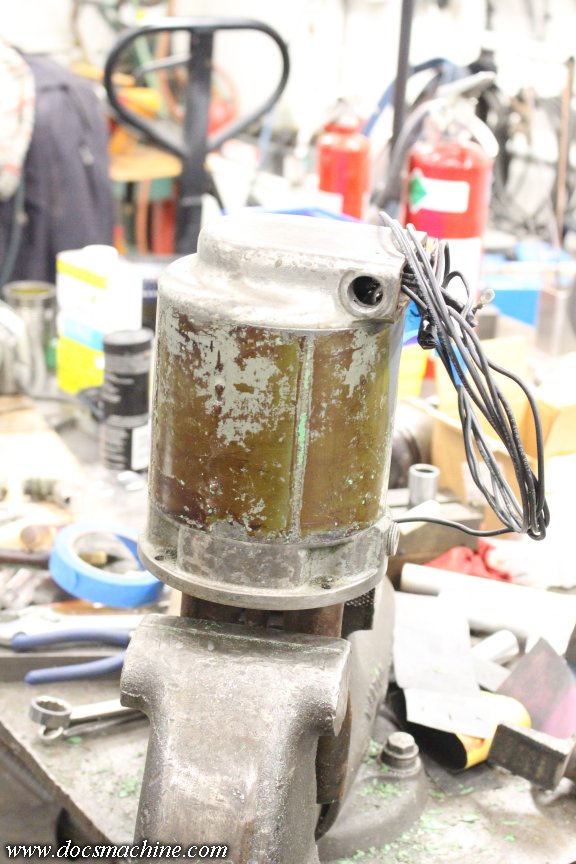
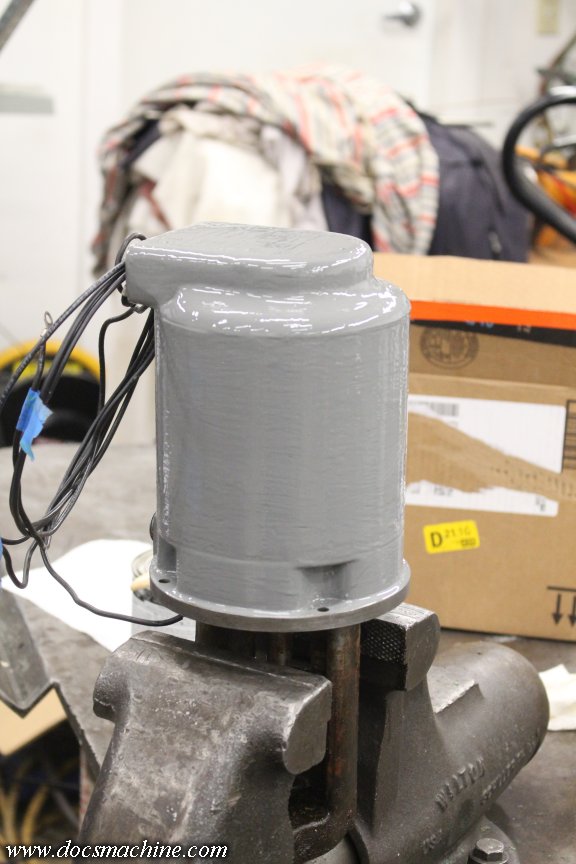
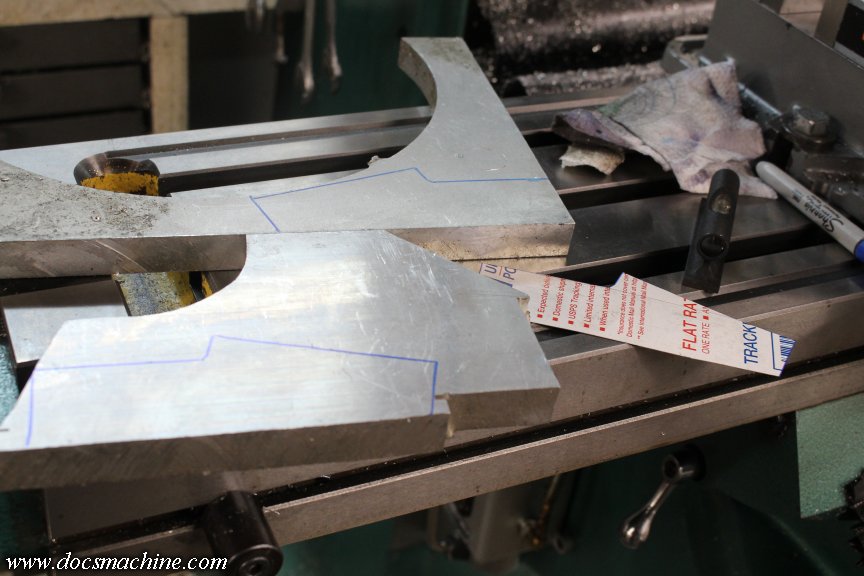
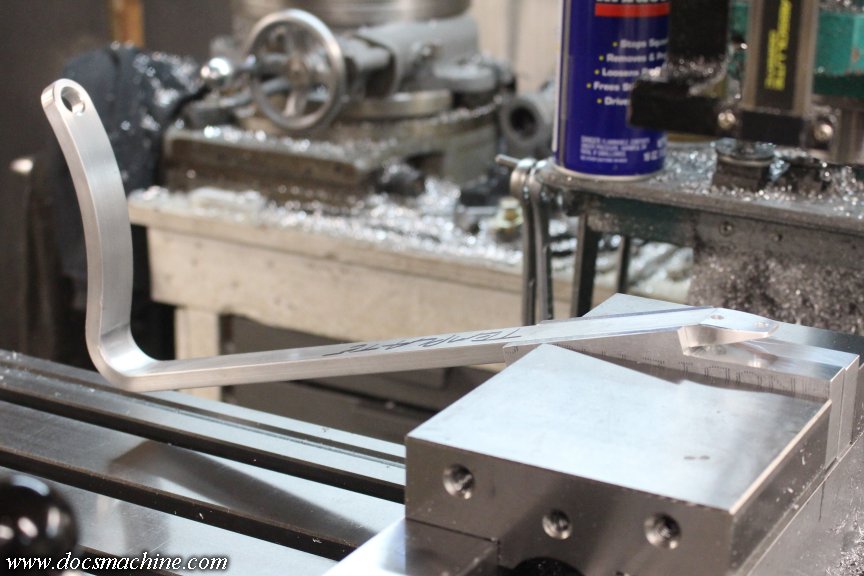
    The only other thing I did was get out some solvent and scrubbed clean the base pieces for the turret:


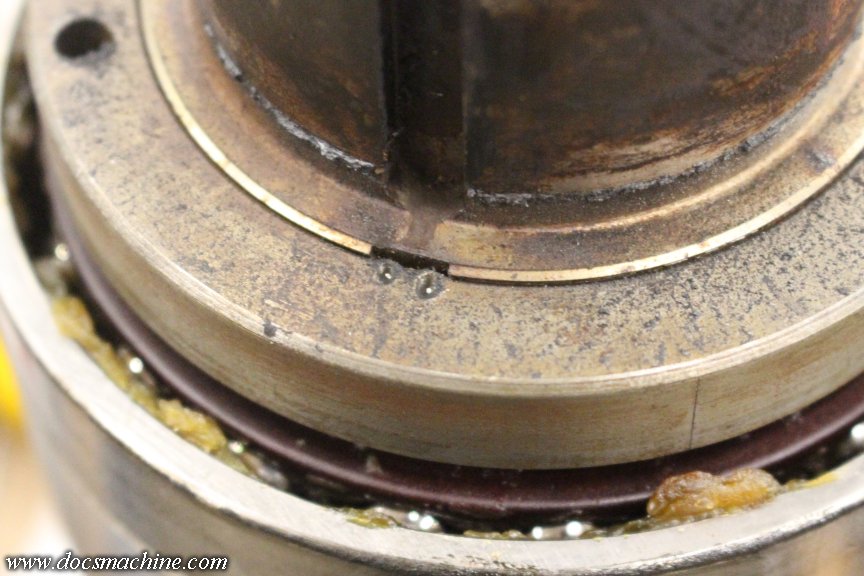
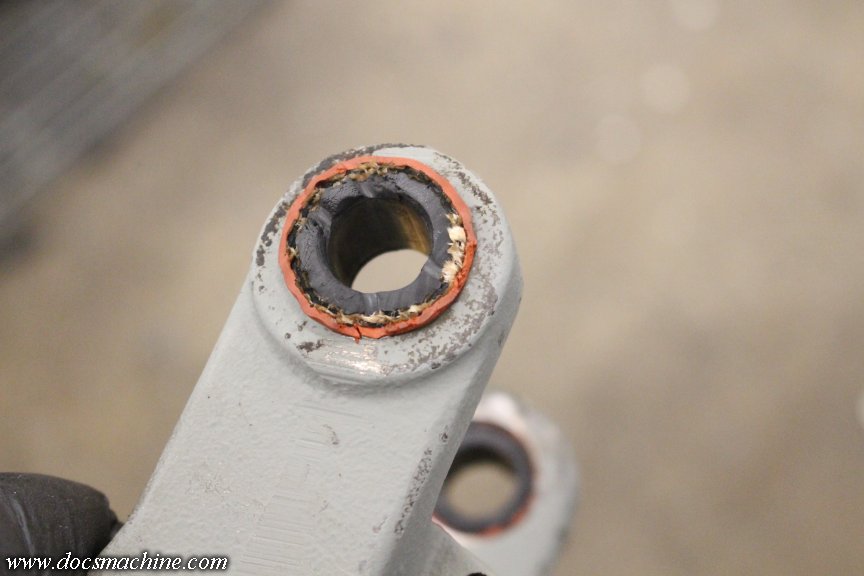
    The parts themselves are cherry- there's very little sign of wear. But on the other hand, there's also zero adjustment- as in none whatsoever. Theoretically, you could tighten up the dovetail by lightly surface grinding one of those side plates but as for up, down or left and right? None. Nothing at all. (The Warner & Swasey has tapered gibs for left-and-right, and replaceable hardened wear plates for up-and-down.)

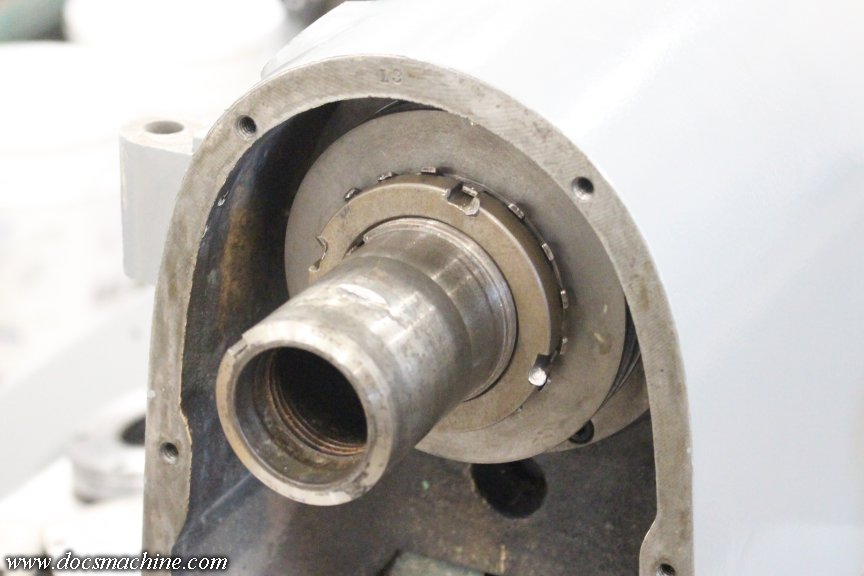
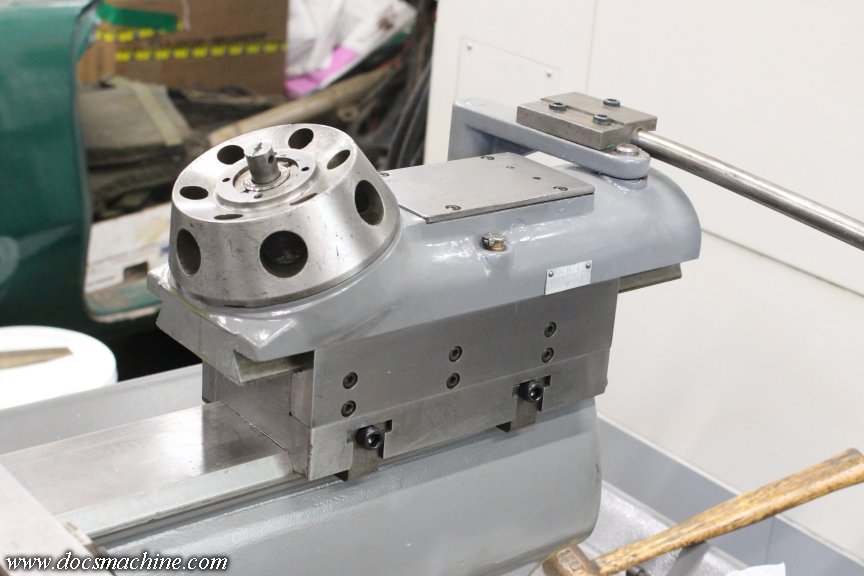
    I can hope the turret sockets are still closely aligned- and some turret tooling can be adjusted a little for alignment- but that remains to be seen.

    Doc.​
    Doc's Machine & Airsmith Services: Creating the Strange and Wonderful since 1998!
    The Whiteboard: Daily, occasionally paintball-related webcomic mayhem!
    Paintball in the Movies!

    Comment


      With the base casting suitably modified, it was a simple matter of just reassembling the slide back into place.

      Simple, yes...


      Okay, so it needs just a little cleaning first.

      Most of the surface rust came off easily with some solvent and Scotchbrite...


      But revealed that the casting had kind of a hard life, with dings, dents and hammer marks here and there. No surprises, as this assembly is probably some eighty years old. (The Hardinge "split bed" format, as I understand it, was phased out around WW2.) I smoothed down what I could first with a file...


      Then hit the whole surface with a stone to knock down even the small stuff (just a cheap whetstone, which is hardly ideal, but it did the job.)


      And then I evened up the surface finish with a little 600 grit wet/dry paper on a sanding block.


      Slid back into place on the base casting, it looks tons better.


      A little more Scotchbrite took care of the surface rust on the lever arm...


      And that slid back into place with the gear, and a little oil on the needle bearings.


      The travel stop blocks, screws and cover plates were simply cleaned and put back into place as well- at some point in the not-too-distant future, I'll touch those up with some fresh black, but I just didn't have time today.


      One other little bit I did a few days ago, I cut some of that leftover drawer liner for both the "drawers", since I'm going to start setting this machine up with it's own tool set here shortly.


      And, for those thinking I've been neglecting my other duties (can't imagine why you might think such a fool thing) my robot was churning away this whole time:


      This particular one is a job that's going to eat most of the week- I still have three more full bars to cut up. In fact, I need to get a buddy's Scotch cold saw running in order to chop them up- doing it with a Portaband is annoyingly slow, and is hard to keep the cut straight.

      More on that later.

      Doc.​
      Doc's Machine & Airsmith Services: Creating the Strange and Wonderful since 1998!
      The Whiteboard: Daily, occasionally paintball-related webcomic mayhem!
      Paintball in the Movies!

      Comment


      • Cal440

        Cal440

        commented
        Editing a comment
        You've been making excellent progress Doc, that's going to be one nice machine when you're done!

      I hate you brother and jealous as hell. That turret is sexy.

      Plus i'm noticing something that has been eating at me. Your OCD I could never keep a shop that clean.

      Comment


        Originally posted by rainman229 View Post
        I hate you brother and jealous as hell.
        -What's to be jealous about? All you have to do is give up all your hobbies, pastimes and any form of entertainment, avoid all forms of social contact, and spend literally every waking hour and every dime you make buying and refurbishing horribly-obsolete antique equipment in an attempt to scratch a living out of a small and stagnant specialty market.

        Heck, it's easy, as long as you're kind of an idiot.

        Your OCD I could never keep a shop that clean.
        -My shop is "clean"? Yeah, in the same way you can call a bald guy "Curly", I suppose.

        Doc.

        Doc's Machine & Airsmith Services: Creating the Strange and Wonderful since 1998!
        The Whiteboard: Daily, occasionally paintball-related webcomic mayhem!
        Paintball in the Movies!

        Comment


          I see more of them L stocks laying in the back ❤️

          Comment


          • Drcemento
            Drcemento commented
            Editing a comment
            I was thinking the same thing....


          Hey Doc - in reference to those lovely L stocks please check your PM's from me - sending another now.

          Comment


            Originally posted by DocsMachine View Post

            -What's to be jealous about? All you have to do is give up all your hobbies, pastimes and any form of entertainment, avoid all forms of social contact, and spend literally every waking hour and every dime you make buying and refurbishing horribly-obsolete antique equipment in an attempt to scratch a living out of a small and stagnant specialty market.

            Heck, it's easy, as long as you're kind of an idiot.


            -My shop is "clean"? Yeah, in the same way you can call a bald guy "Curly", I suppose.

            Doc.
            Thanks Doc I needed a laugh in the morning. And it doesn't sound as bad as you make it out to be. I wish i could do that.
            Better to do what you love, then to be miserable doing a 9 to 5 you don't.

            And to be honest I rather do what you're doing rather than dealing the stupid out there these days.

            And I do most of what you do already. lol.

            Comment


              Quick update: We're finally comin' round to the turret!


              I of course pulled off the base and clamp castings, and cleaned those up, several days ago, so it was time to break down the ram assembly itself. I won't
              detail all the bits and pieces, but I have more photos if anyone needs help reassembling or troubleshooting their turret. I also have access to a Hardinge DV/DVS-59 turret for comparison. (Quick analysis: They're very close, to the point the Rivett was almost certainly inspired by the Hardinge- or possibly vice versa- but one major difference is the Hardinge has "box" ways, and the Rivett has a dovetail. They're not at all interchangeable.)

              Anyway, the turret locking mechanism was kind of surprising:


              A roller-bearing-supported and very beefy bolt locks the turret in place.

              Here's the cam mechanism from underneath- this of course automaticaly advances the turret each time it's retracted.


              And the underside of the turret. The notches are where the "bolt" locks in, and that 'ring' on the pillar is a thin roller bearing. There's a smaller one at the top of the turret.


              I won't bore you with more of the cleaning- the usual degreasing (including spooning half a pound of dried-up grease out of it) then a couple applications of paint stripper, and multiple pressure-washings.


              'Couple things to note: I borrowed a bearing puller to try and get that bearing off, but it refused to budge, even with some heat, and even with enough pressure to lightly but visibly distort the outer race. There's nothing wrong with the bearing- it rolls smoothly- so I didn't want to ruin it. Lacking a better option, I carefully pried out the snap ring and seal befoe scrubbing anything. I wouldn't be able to keep water, cleaners or gunk out of the bearing, but at least the seal wouldn't hold it in- and I can blow it out and re-grease afterward. (In this pic, I've applied some WD-40, after blowing the water out, to keep it from spot-rusting. It's not ideal, but it's a low-speed bearing, and I had no other real options.)

              Second, that white spot next to the oil cup? There's two adjuster screws- apparently that locking bolt mechanism can be tweaked slightly left or right, to align the turret. But the factory clearly intended them to be "aligned for life", as they've been potted over with a filler, and had been smoothly painted over. At the factory, not just by the later green layers.

              I have no reason to suspect misalignment of the turret, but it's nice to know it could be tweaked lightly if necessary.

              Over the weekend, I'll scuff the remaining primer/filler and give it the usual two coats.

              Doc.​
              Doc's Machine & Airsmith Services: Creating the Strange and Wonderful since 1998!
              The Whiteboard: Daily, occasionally paintball-related webcomic mayhem!
              Paintball in the Movies!

              Comment


                Originally posted by Chuck E Ducky View Post
                I see more of them L stocks laying in the back ❤️
                -Yep, and I'm finishing those up. Hoping to have those ready to go sometime next week- I know several of you have been waiting patiently. (And one or two of you, impatiently. )

                Wish I could go faster, ladies and gents, but doing the best I can.

                Doc.
                Doc's Machine & Airsmith Services: Creating the Strange and Wonderful since 1998!
                The Whiteboard: Daily, occasionally paintball-related webcomic mayhem!
                Paintball in the Movies!

                Comment


                  Closin' in on it, thankfully. Next step on the turret ram was easy, just scuff the remnants of the old filler smooth, brush and Scotchbrite the tarnish, blow it clean, and paint.


                  A working turret, however, won't do us any good without a working spindle. And in this case, the spindle turns, but I don't like how much noise it makes. The little Hardinge is nearly silent compared to this thing.

                  Now, I've tried just the drive- and it, too, makes noise. But the spindle had a definite "whirr" I didn't like. So I pondered a bit, and came up with a puller... of sorts.

                  First, I removed the lock-ring at the back, then stacked up this monstrosity out of scrap and leftovers.


                  That let me smoothly "winch" the spindle assembly out- you don't want to hammer it out, that WILL ruin the bearings.


                  Unfortunately, to disassemble, there's this inner locking ring, that's going to need a pin-spanner wrench, which I don't have. It'll also have to be a pretty beefy one, as the nut has been staked into place.


                  There's no easy way to undo that staking, so I'll have to put some muscle to that nut, with a suitably beefy spanner wrench.

                  Rather than getting into that now- I saw how 'dry' the rear bearing looked, and turning the spindle by hand, it seemed that was the one that "whirred".

                  Other thing to note: Right above the staking? See that gunk line on the shaft? Seems the locking ring I took off, which was intended to hold the pulley in place... didn't. The nut tightened against the end of the thread, with the pulley still almost a quarter inch from seated against the spindle step.

                  Remember my mentioning the nonfunctional "spindle lock" from earlier? I suspected back then that the pulley had been replaced for some reason- this may kind of confirm it. The pulley is too thin- the nut literally cannot tighten it.

                  Anyway, I decided not to dig into the spindle just yet- but I recorded the bearing numbers, and checked for replacements online. Name brand and "super precision", they go for around $200 each. That's steep, and I'm sure not gonna swap 'em just on a whim, now, but it's not an absurd price if I indeed have to. And, moreover, they're not 'unobtainable', as they are for some machines.

                  So, since the rear bearing looked relatively clean, just kind of dry, I packed a mix of a light, and a heavy, sticky grease in there:


                  Why that? Because that's what I had on hand. I used up my last tube of Lucas on the horizontal mill a year or two ago, and the gun of moly high-pressure stuff is running dry. And it may not be too long before I revisit this spindle anyway, so any grease is better than none.

                  After cleaning up the threads and whatnot, I reversed that monstrosity and 'winched' the spindle back into place.


                  Which left me the pulley. The spacing is wrong to make a spacer that would fit with the "spindle lock" pin- I'm not sure I grok that yet. But no matter what, I needed a spacer so the nut would tighten it into place as it's supposed to.

                  I found a big galvanized washer in my parts bins (packrat! ) and bored it out and faced it down into something that kind of looks spacery.


                  Since I couldn't hold a ring that thin exactly precisely, I got it close, and then took it for a ride through the surface grinder, so that the two faces would be exactly parallel.


                  Double-checked with a micrometer, four separate points measured 0.2322", with one outlier, by inferring from the vernier, may have been 0.23225"

                  The actual dimension didn't matter- it just needed to be about that to take up the gap, and it needed to be as parallel as I can get it, so the pulley will run true. This is potentially a 4+K RPM spindle, and such things matter at those speeds.

                  Anyway, installed, tightened- with a brass drift, but gently- and locked.


                  I threw one belt back on and took it for a spin. It seemed a little quieter, but the lower drive jackshaft bearing is making a great deal of noise, so it's hard to tell.

                  I'm thinking since there's not much to do on the turret except paint, my next task might be to pop that jackshaft assembly out- which I'm afraid is going to take some nontrivial disassembly- and swap those bearings.

                  Doc.​
                  Doc's Machine & Airsmith Services: Creating the Strange and Wonderful since 1998!
                  The Whiteboard: Daily, occasionally paintball-related webcomic mayhem!
                  Paintball in the Movies!

                  Comment


                    While I really need this thing done and working, and to move on to other projects, the noise in the drivetrain has me kind of annoyed. As with so many other things in life, if I'm going to do this, it's worth doing it right.

                    Just to get a couple of things out of the way, I got the second coat on the turret ram, and a first coat on a couple of the other bits. Since the weather was amazing- 70-ish and mild wind- I got out some patented lead-free solvent and scrubbed all the turret guts clean:


                    Thankfully nothing needs repair, though I ran the threaded stop rods through a die, as some of the threads had been dinged and dented over the years. Once the ram is dry, I should just have to slather everything with oil and grease, and screw it all back together.

                    I then spent the rest of the morning trying to determine which bearings in the system were making noise- and the answer was 'most of them'.


                    Figured I'd start at the bottom and work my way up, and to do that, I removed the motor:


                    And the simple phrase "removed the motor" kind of skips over a bit. It's like saying "I built a 4,000 square foot house" or "I moved the piano up to the third floor". It was heavy and awkward, the fasteners almost inaccessible, and I had no help.

                    Anyway, with it loose, the unloaded motor made a little noise, but not as much as I'd thought when it was in place. But the main thing was that the bearings didn't seem bad. I pulled the pulley, as shown, and as I thought I'd heard a slight 'tick' from the fan bell, I removed that too. The bare motor was damn near silent, ramping up to an expected "hum' as we approached top speed. (2400 RPM according to the tag.)

                    The fan bell was caked with oily dust- half an inch thick in places- which I thought kind of interesting because the fan itself was basically clean and dry. Did somebody clean it but not the bell, at some point?

                    I scraped out and cleaned the bell, scrubbed the pulley and fitted a fresh key, and bolted it all back together. The re-assembled motor made a little more noise than bare, which was to be expected, but I did NOT hear any bearing whirr or other unwanted noise.


                    With the motor out of the way, I managed to get the jackshaft assembly out as well:


                    Which itself was akin to saying "I ate the entire sofa".

                    The bearings are flanged and the shaft held in by snap rings, but with those out, the shaft pressed out easily.


                    And there, I think, was a bunch of my noise. Assembled, with the pulleys, they felt smooth enough, not obviously bad- but loose, on their own? Yeah, they're worn. You can feel they're mildly brinelled in there, and probably a little dry.

                    Found a supplier for some duplicates, and ordered a set. I expect that should make a difference right there.

                    In the meantime, I scrubbed and pressure washed the casting...


                    And cleaned and Scotchbrited the shaft, so I can throw those right together once the bearings arrive.

                    One interesting bit on that casting? Somebody replaced what were probably originally rubber antivibration bushings... with chunks of heater hose.


                    I'm wondering if there was originally something like a rigid rubber, or even a harder bushing, like teflon. The jackshaft tries to twist- the motor pulls down on one end, and the headstock pulls up on the other. Trying to decide if I want to try fitting a Delrin, teflon or high-durometer urethane bushing in there instead.

                    Doc.​
                    Doc's Machine & Airsmith Services: Creating the Strange and Wonderful since 1998!
                    The Whiteboard: Daily, occasionally paintball-related webcomic mayhem!
                    Paintball in the Movies!

                    Comment

                    Working...
                    X