Now were talking! I would have been much more patient had I known they weren't finished! I thought you were sitting on a pile of finished ones that hadn't been sent to anno yet!
-
-
What? I may not be the world's greatest businessman, but if I have finished, ready-to-go product, I tend to try and get it sold.
This is the second, or possibly the third small batch of these I've run since around last Thanksgiving. Only one of which I got annoed. I really do need to sit down and crank out a good sized batch of these, but time is just so short these days.
Doc.
-
-
Hey doc, it's a bit off topic but any chance you have any of those pgp fast changers that's raw rather than annodized?Comment
-
Today's Major Accomplishment:
I received two of the five bearings I need.
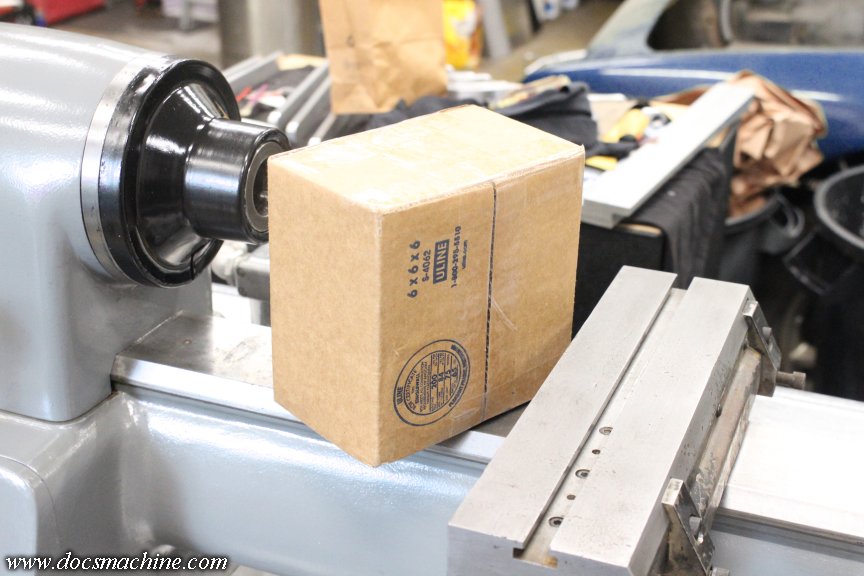
Stand by for more exciting updates!
Doc.Doc's Machine & Airsmith Services: Creating the Strange and Wonderful since 1998!
The Whiteboard: Daily, occasionally paintball-related webcomic mayhem!
Paintball in the Movies!Comment
-
Regarding Doc's Fastchangers vs. others on the market;
I happen to own both a TASO fast-changer (which Doc used as his model) and one that came from either Palmer's or PMI, so I tried screwing the Palmers/PMI changer into the TASO collar on my P-68SC and it fit perfectly. Now again, I don't know if the changer on my PGP was from Palmer's or PMI...I bought it in 1997 or thereabouts and cannot for the life of me remember who made it. I'm about 90 percent sure it came from Palmer's, but I don't know for certain. Does anyone know if the PMI version had a logo on it anywhere? Mine has no logo to speak of.
My test would indicate that there is in fact some cross-compatibility between fast-change designs, but I definitely wouldn't base a purchasing decision around this data point. More information is needed. Still, just thought I'd drop my data point into the conversation.Comment
-
And now, for the latest incredible installment of this amazing project!
I got two more bearings in!
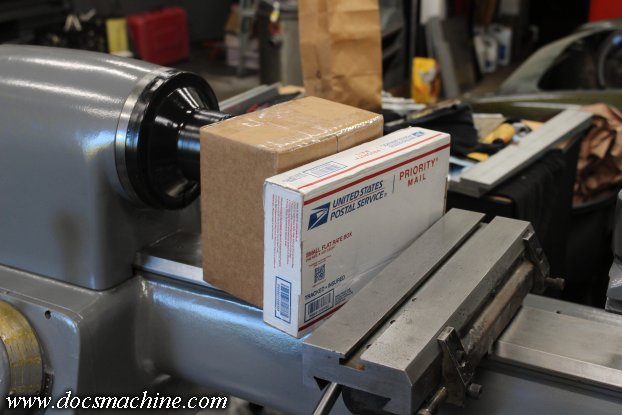
I wish I had the time to, you know, actually do something with them... but hey, they're here, at least.
What about that fifth one? That's the third on the spindle- and I can't get a number off that 'til pull that apart. Which I ought to do this weekend, so I can order said bearing on Monday, I suppose.
I just need three more clones, another dozen minions, and for somebody to add nine or ten more hours to a day.
Or to huck it all and take up stamp collecting, but that's just crazy talk.
Doc.Doc's Machine & Airsmith Services: Creating the Strange and Wonderful since 1998!
The Whiteboard: Daily, occasionally paintball-related webcomic mayhem!
Paintball in the Movies!Comment
-
Once again, trying to save time by spending time. Or at least, that's the excuse I'm using today.
Figure I won't have much time to fool with this thing this coming week, but I could still try to use that time wisely, and get that last bearing on its way in. But that, of course, meant pulling the spindle back out, and then pulling it apart- pulling it out was easy, as I still had the bits 'n bobs from doing it the last time.
The tricky bit is, now I needed that spanner wrench I mentioned, and I expected it'd need to be fairly beefy, to overcome that staking on the nut. I didn't get pics of everything, as time was short, but simply put, I mocked up a profile in thin cardboard, transferred that to a chunk of some 1/4" steel plate, and bandsawed it out.

I had the plaz the center out, and then spent all too long with the belt grinder getting the thing smooth and fit to size. I marked and drilled for the pins, cut and faced a couple bits of 3/16" rod in the lathe, and TIGged 'em in place.
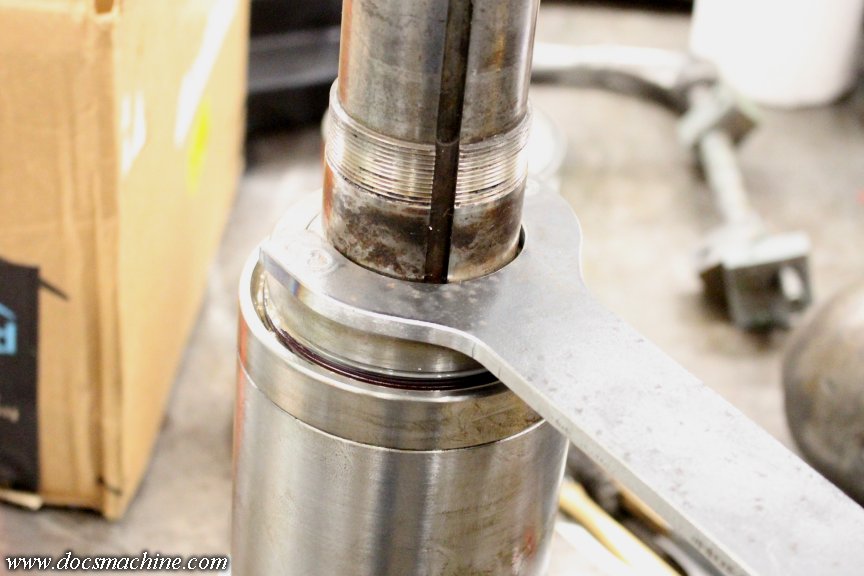
Now, the trick here was that I had no way to securely hold the spindle firmly enough to break the 'staking' on the nut. I tried grabbing it with the 3-jaw in the big lathe, but it just spun. I pondered the issue a bit, and came up with an alternate method. That method first needed a new key...
Which goes in the spindle nose like this.
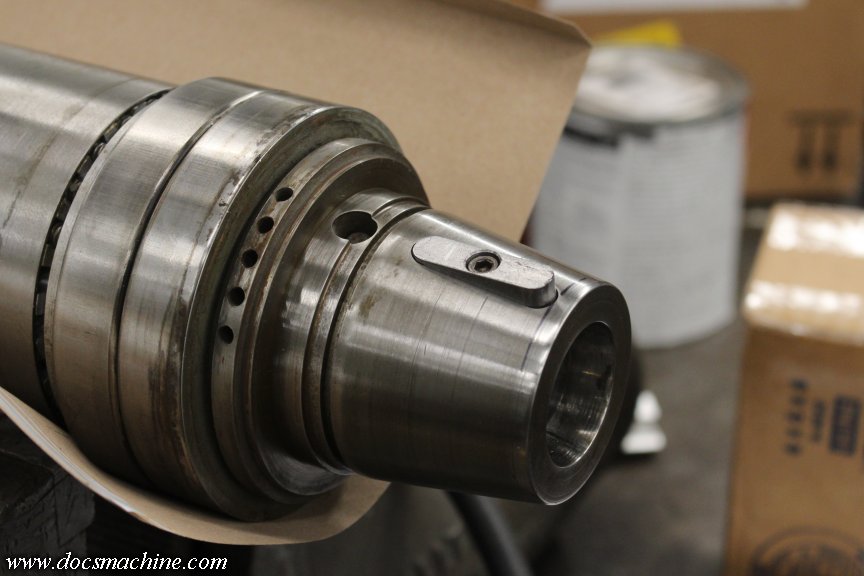
That's the drive key for the L-00 chucks, and I'd been meaning to make one anyway. This will primarily be a collet machine, but I like the idea of having the option to use a chuck.
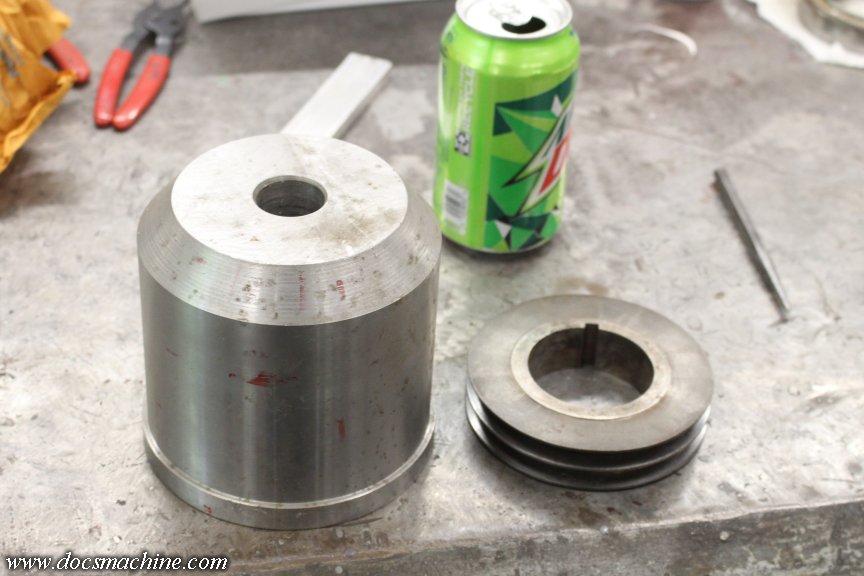
I got out the locking collar bits that came with the machine, and installed them for the first time. They're well made, and fit perfectly.
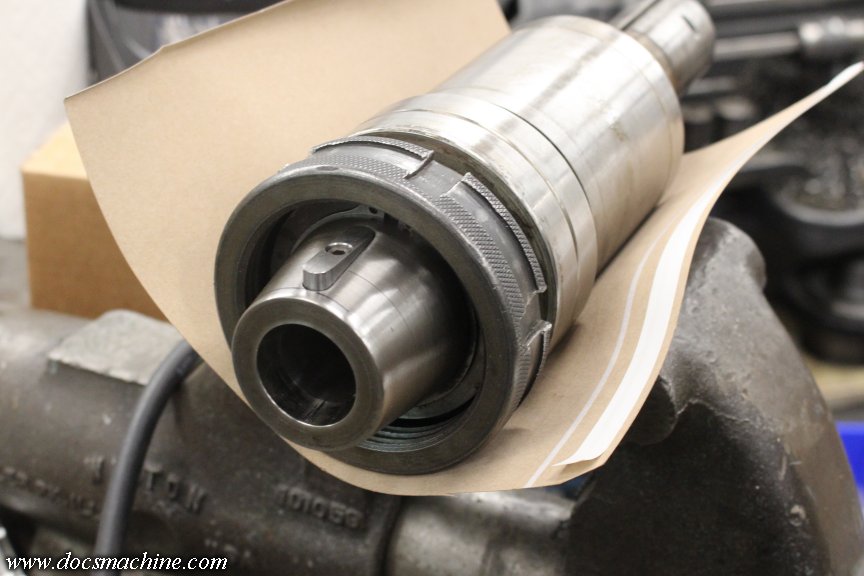
A couple of weeks back, I found an unfinished L-00 backing plate on eBay, when I was looking for some other parts. I have a 5" 3-jaw laying around, that I think will be perfect for this machine, so I picked it up.
I attached the plate to the spindle, and then bolted the spindle to my mill table. I used an aluminum plug with a taper machined into it, to help support the upper end of the spindle, and snugged it all up.
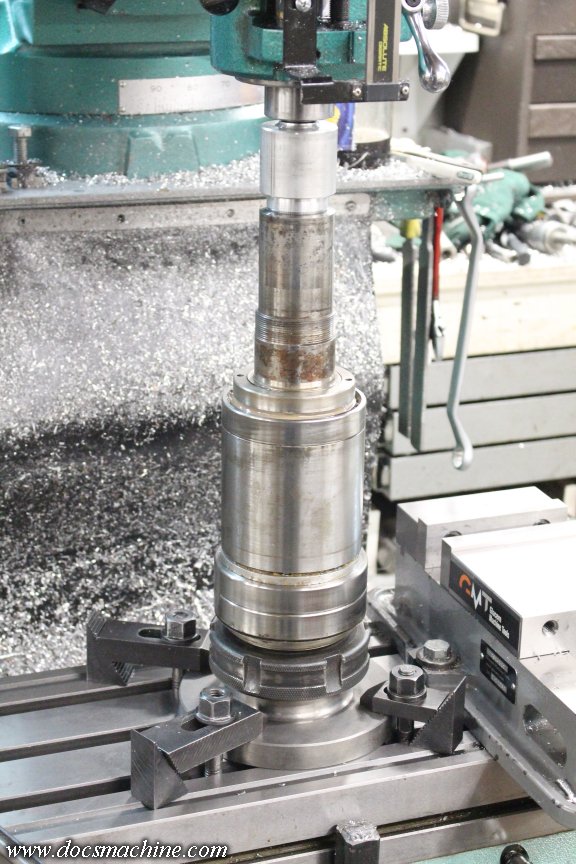
The nut did indeed take some force to overcome, but once "broken loose", it spun off the rest of the way with relative ease.
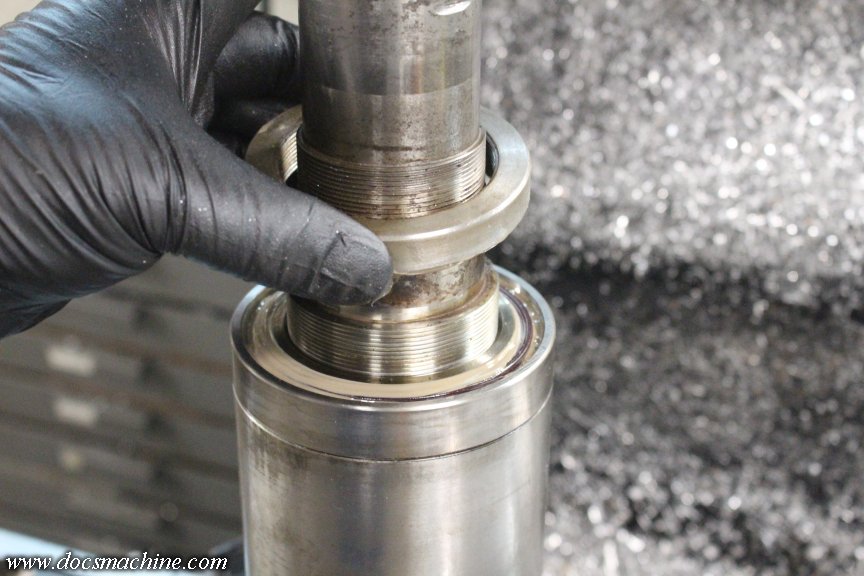
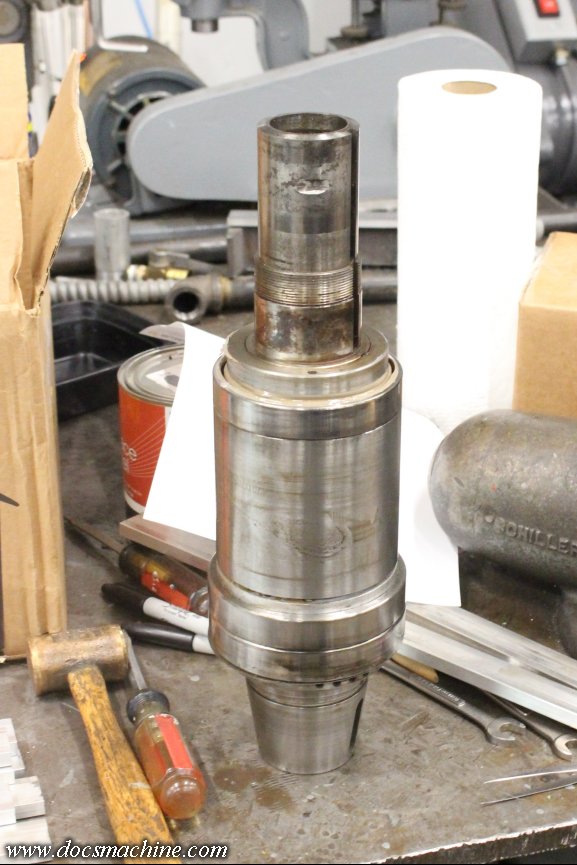
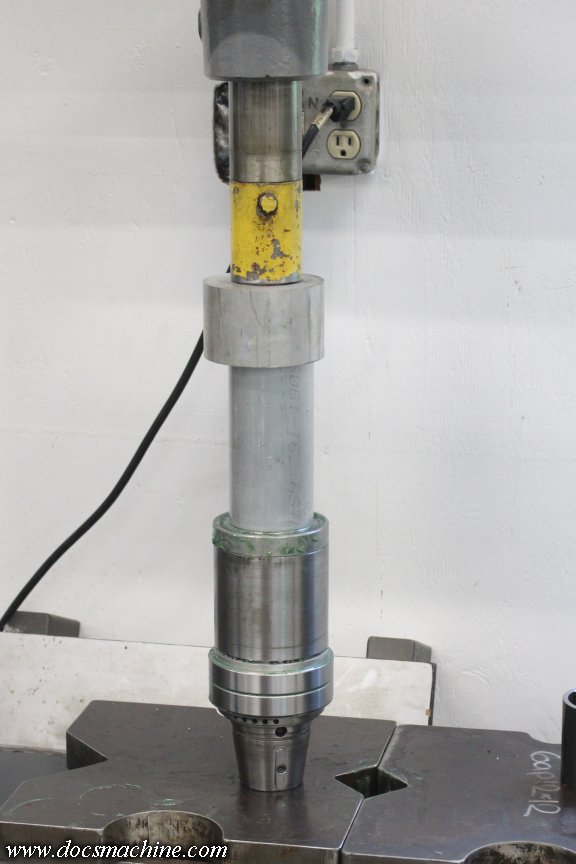
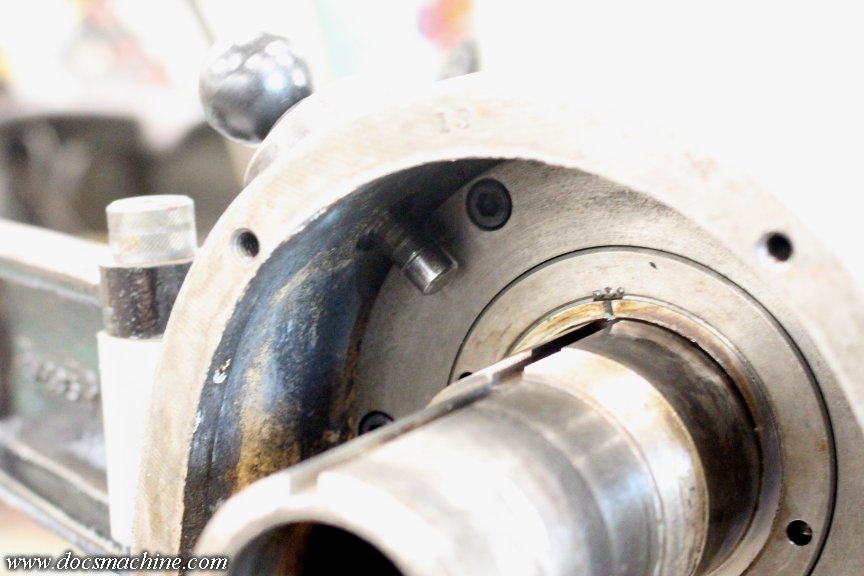
With that out of the way, I popped it off the backing plate, removed the retaining nut parts, and set it up in the press to remove the bearings.
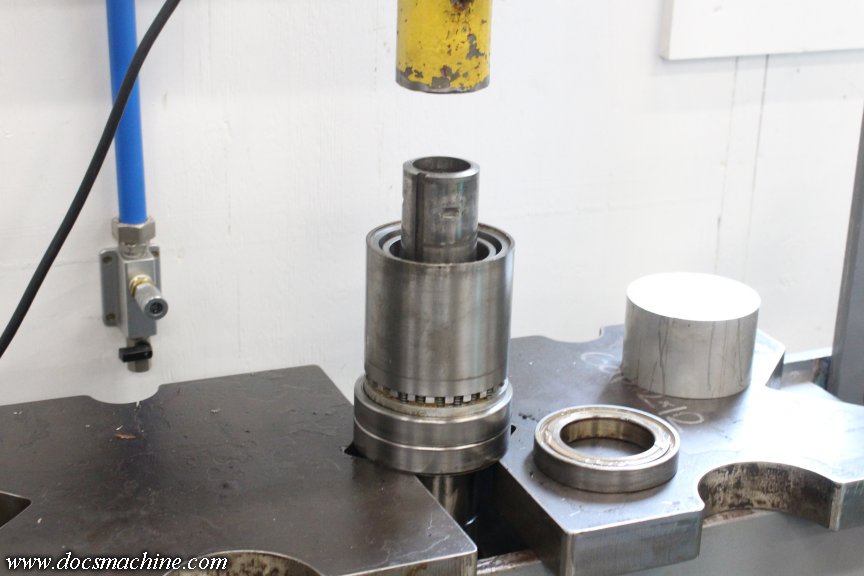
Note how this has a spring-loaded center spacer, apparently to allow the bearings to move, ever so slightly, as the machine warms up in use. (And/or warms up more at the higher spindle speeds.) I don't know why it was missing six springs- if that's a factory thing or whoever rebuilt this thing before, for some reason left those out.
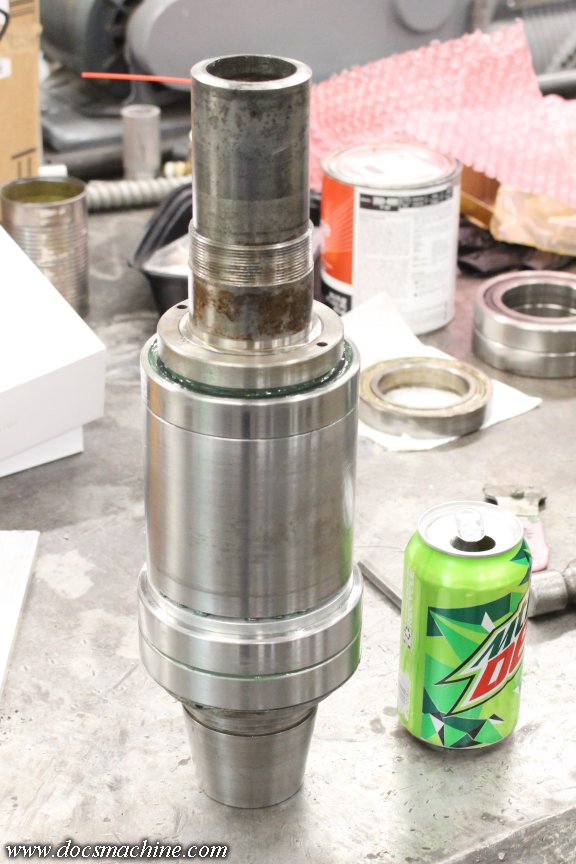
And there's the bare spindle.

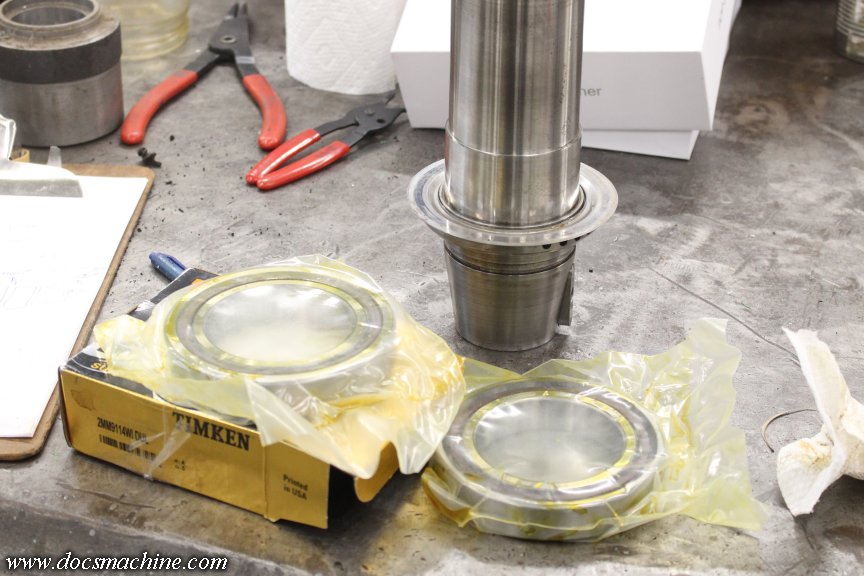
Got the number off the rear bearing, and was surprised to find that it, too, was a "super precision". Rivett didn't fool around, it seems. Looks like another $150, for a little over $550 total just in spindle bearings. Good thing I'm rich, eh?
Interestingly enough, the rear one feels the worse of the three. I may wash these out with solvent and see how they feel while clean and with some thin oil.
Yeah, I probably could have lived with the only-somewhat-noisy ones for a while, but while I have this thing apart, I might as well go all the way, before I put it into service.
Doc.Doc's Machine & Airsmith Services: Creating the Strange and Wonderful since 1998!
The Whiteboard: Daily, occasionally paintball-related webcomic mayhem!
Paintball in the Movies!Comment
-
Today's quick nibbles at the rapidly dwindling carcass:
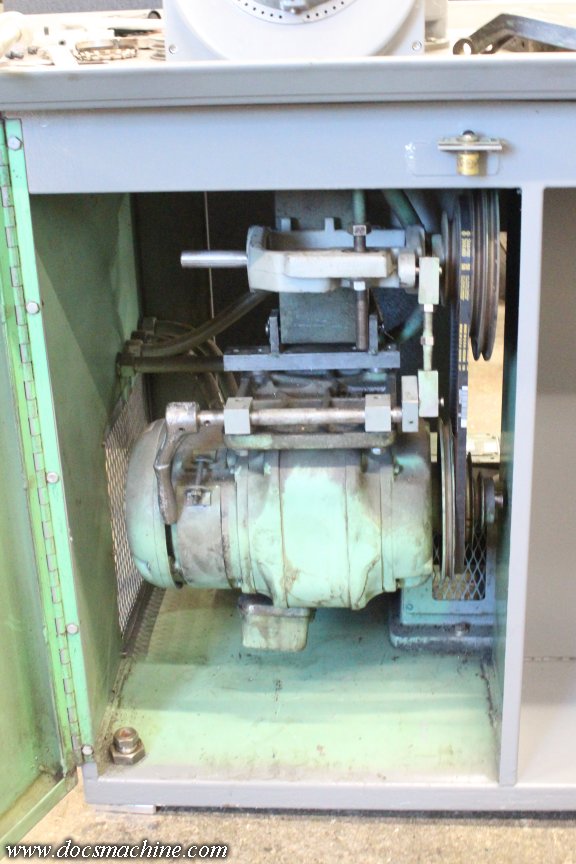
I fitted the two new bearings to the jackshaft assembly....
And got that reinstalled into the cabinet.
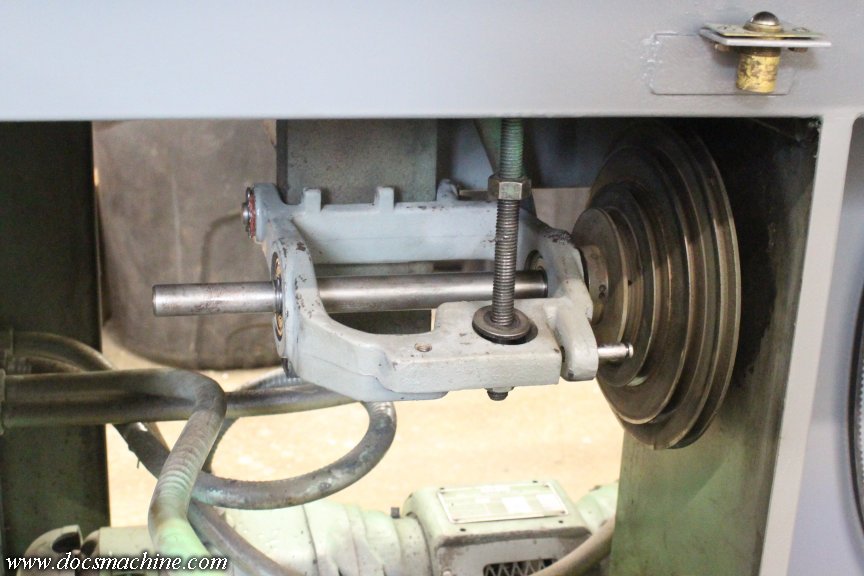
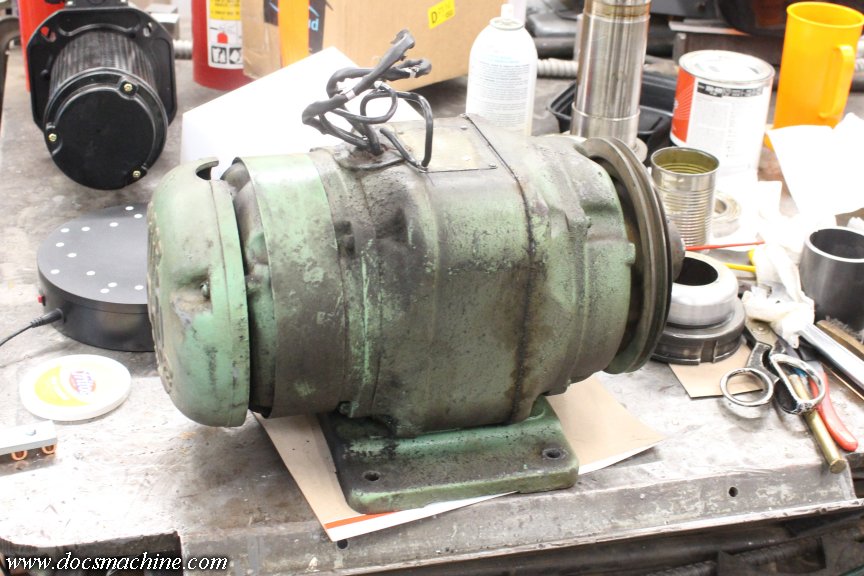
Then, with a rather considerable struggle that involved a good deal of cursing, I got the motor remounted as well.
I wanted to give it a try, to see if or how much quieter it is, but I damaged the conduit connecting the motor, as I was manhandling that nine hundred pound pig back into place. So before I power anything up, I need to make sure the wires inside are okay, and repair or replace that length of conduit.
The only other accomplishment of note today- at least on this machine- was I painted one of the last parts for the collet closer.
It was just a quick spray-job, but I wanted to get it out of the way.
Doc.Doc's Machine & Airsmith Services: Creating the Strange and Wonderful since 1998!
The Whiteboard: Daily, occasionally paintball-related webcomic mayhem!
Paintball in the Movies!Comment
-
Possible crisis, ladies and gentlemen.
I opened up the junction box on the motor- which was worryingly loose in the first place- to check to see if I'd damaged any wires yesterday.
The bad news is, I found damaged wires. The worse news is that they weren't the ones I was expecting, and are damaged in the absolute worst possible location.
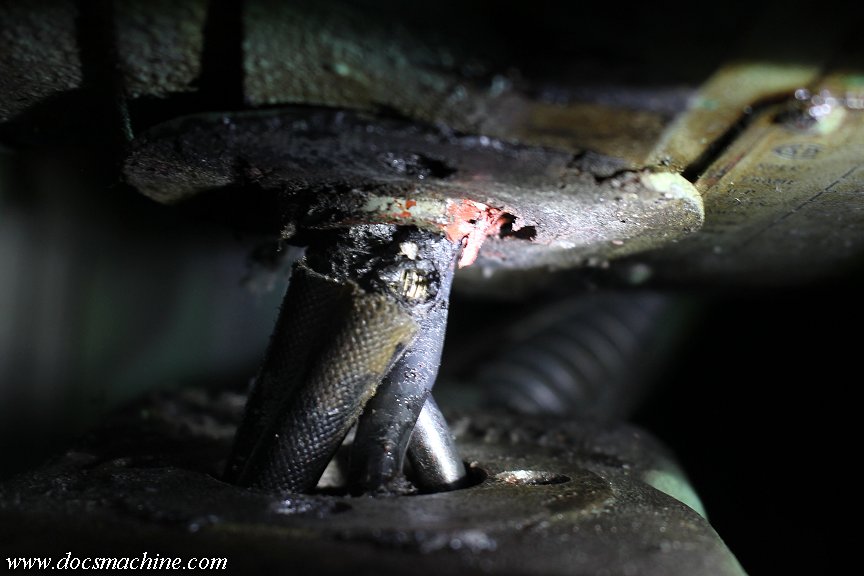
I know it's not clear, but the overhead part is the motor body, while the lower one is the junction box. And at least one, possibly two, of the main wires coming out of the motor, have broken insulation.
At the very least, I'm going to have to disconnect the motor, and remove it again. Repairs, if they're even possible, will require at least partial dismantling of the motor itself.
Best course, I may be able to splice on some fresh wire. Last ditch? The wire isn't broken, so I may be able to just smear on some liquid electrical tape and maybe cover that over with some good heat-shrink.
There's a motor-rewinding shop locally, and it's possible I could have them take a look at it- which is a last ditch before buying a replacement DC motor. Assuming I can find one rated for the same voltage ranges and speeds. Input welcome, from anyone familiar with DC motors, and/or this kind of wire repair. Gonna need help on this one.
Definitely not what I wanted to see, and I definitely don't have time for it, but it's gotta be fixed nonetheless.
Doc.Doc's Machine & Airsmith Services: Creating the Strange and Wonderful since 1998!
The Whiteboard: Daily, occasionally paintball-related webcomic mayhem!
Paintball in the Movies!Comment
-
Yep, this is one for the experts.
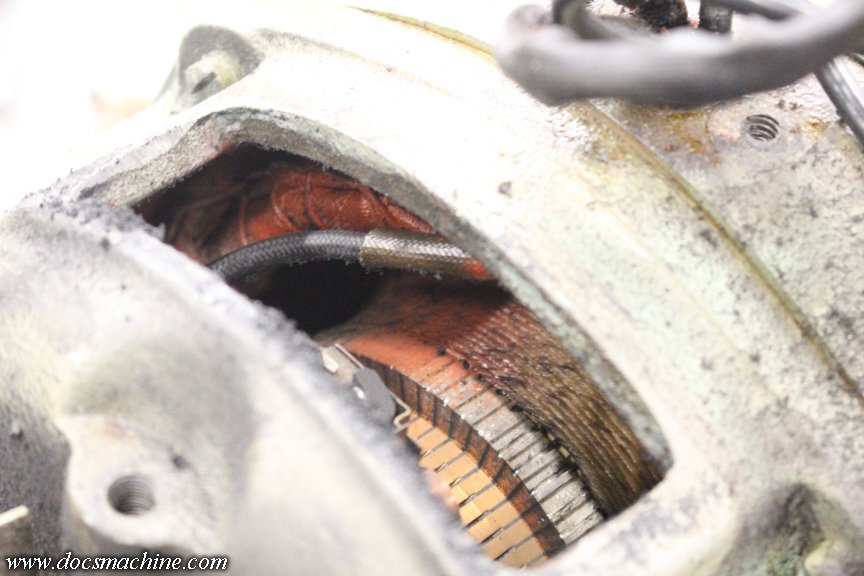
I got the wires marked, disconnected and the junction box out of the way. And the pigtails coming out of the motor body were stiff as a board... except where they go into the box. All four of them feel... for want of a better term, loose at the base. The two larger wires are definitely and visibly damaged, and the two smaller feel 'loose' enough I suspect their insulation is failing, too.
So, it had to come out.
Once on the bench, the feeling was confirmed. Worse, there is zero slack in the wires, and looking in through the brush ports, it's clear that at least two of the wires go directly into the field windings.
That is not something I'm comfortable trying to fix, so in the morning I'll be running it over to the local motor shop to see what they say.
Doc.Doc's Machine & Airsmith Services: Creating the Strange and Wonderful since 1998!
The Whiteboard: Daily, occasionally paintball-related webcomic mayhem!
Paintball in the Movies!Comment
-
Dropped the motor off at the local repair shop, and they were happy to have a look at it. Apparently their "rewinder guy" had just finished and delivered the previous job, and put mine right on the bench and started working on it. They're going to replace the leads and the bearings, and let me know if there's any other issues that we might need to attend to.
The commutator looks good- no grooving or stepping, and appears properly undercut- so I'll assume the brushes are okay too. So I should get back a pretty fresh motor good for a few more thousand miles.
I told the guy that it was part of a Ward-Leonard drive, and he showed me their setup- two gigantic 3-phase AC motors that turn a similarly gigantic DC generator (it's an easy four-plus feet in diameter and at least six long) to supply DC so they can test the big motors that come off the oil platforms and the like.
They told me it's basically antique- to took that to mean about as old as my lathe- roughly the 1960s- but works essentially the same way, and supposedly as good today as it when it was first installed.
Anyway, looking forward to getting the repaired motor back- I got the impression of less than a week, so here's hoping.
Doc.Doc's Machine & Airsmith Services: Creating the Strange and Wonderful since 1998!
The Whiteboard: Daily, occasionally paintball-related webcomic mayhem!
Paintball in the Movies!Comment
-
Lacking anything better to do, I rolled out of my comfy hammock, put down my spiced rum drink, and told the hula girls to go take five.
I had, several days ago, taken the brass dial plate off the speed control, and tried sanding some of the scuffing down.
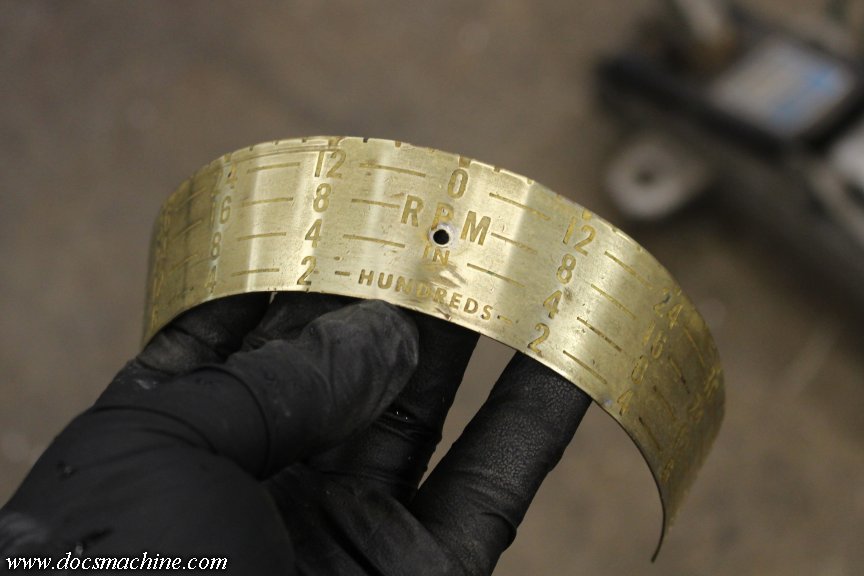
It had clearly been bent and re-bent a couple of times over its life, and the sanding kind of highlighted the "bend points", but there wasn't much I could do about that. Anyway, I thoroughly scrubbed and degreased it, and then filled in the lettering with more of that red Testor's.
I'd originally tried the old trick of then lightly wiping it off, with a cloth wetted with thinner, and wrapped around a rigid backing. That worked great on the Springfield oil-sump plate, and the W&S speed control plates, but didn't work well here. The numbers were just too shallow- or I was too ham-fisted. Probably both.
So I re-painted them, and set it aside the dry as-is.
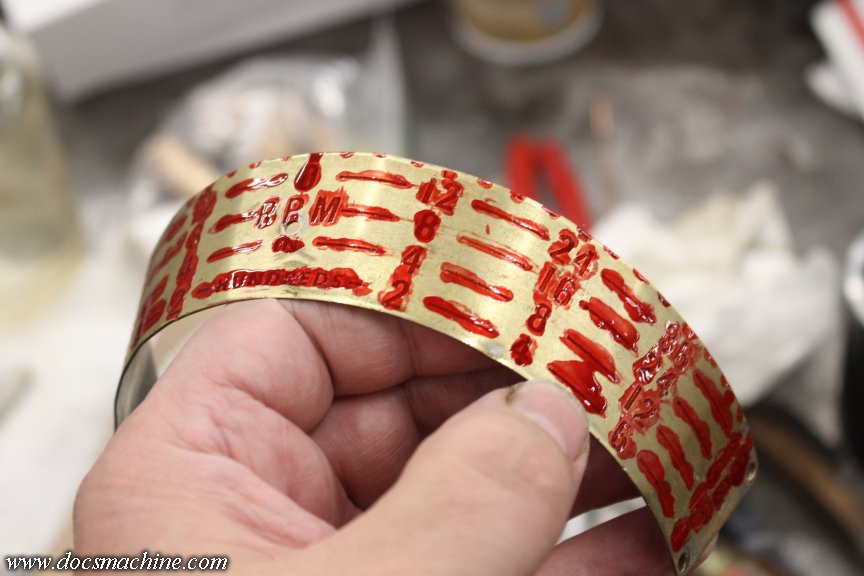
Today, I took a fresh razor blade to it, and simply carefully scraped off the excess paint.
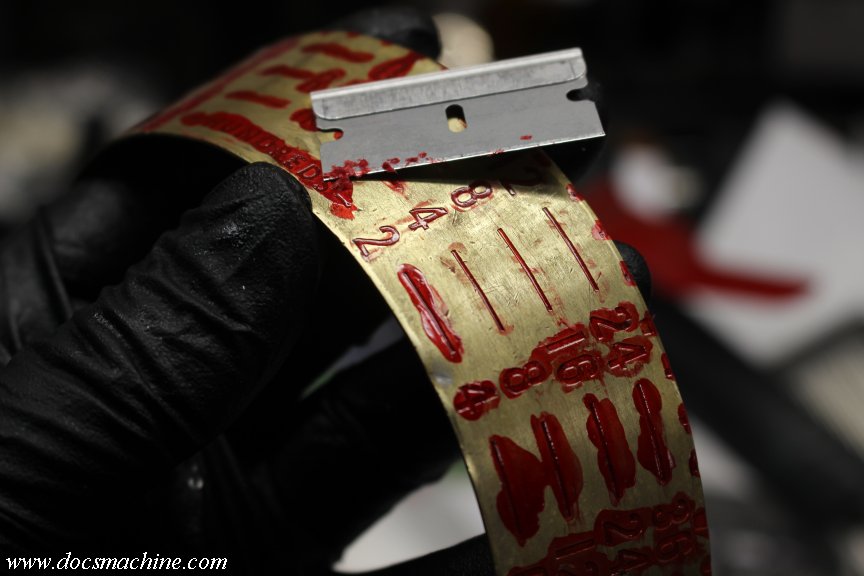
Was a bit on the tedious side, but it worked.
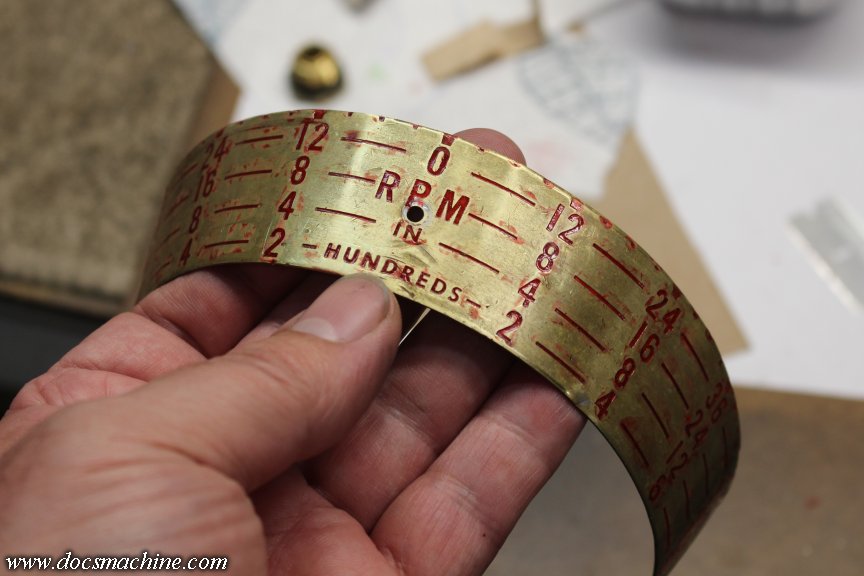
I then re-wet-sanded it with some 800 grit, and a semi-soft backing to the paper in order to knock off the residue, and hone out the minor scratching from the scraper. I think it came out quite well.
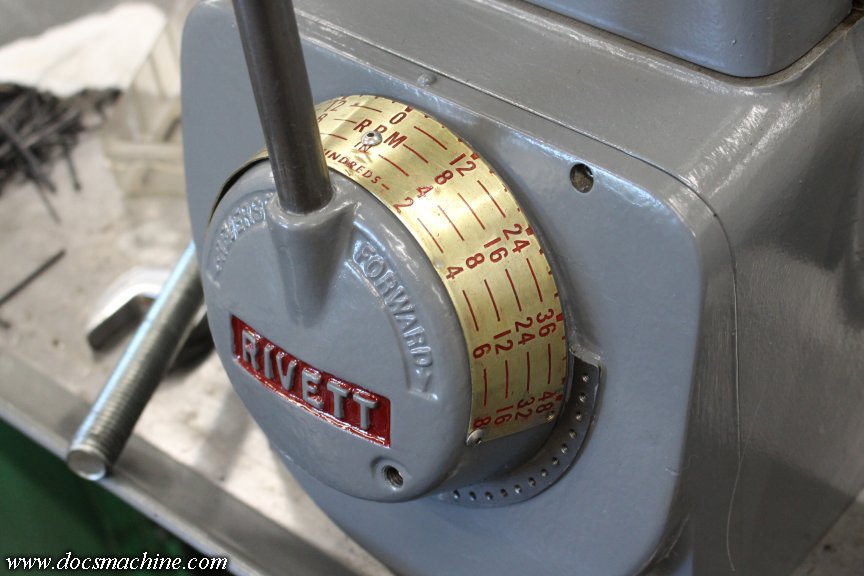
That definitely gives it a much more finished look, and makes it a lot easier to read the numbers.
Now to go lay back in my hammock 'til the motor's done.
Doc.Doc's Machine & Airsmith Services: Creating the Strange and Wonderful since 1998!
The Whiteboard: Daily, occasionally paintball-related webcomic mayhem!
Paintball in the Movies!Comment
-
Now that I had all the bearings in, I finally took a day to slap the spindle back together.
The spindle just needed a light cleaning, and then it was time to... well, get dirty again.
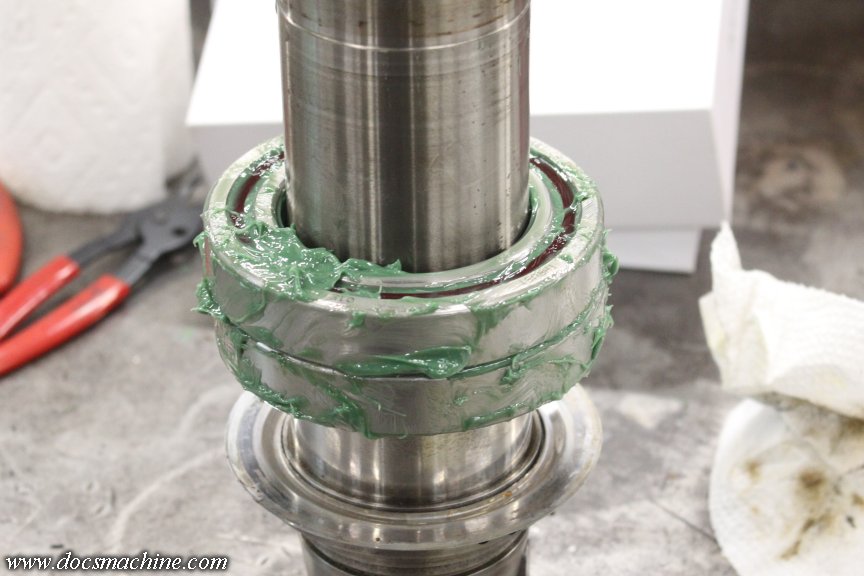
Mmmm... hand-packed bearings.
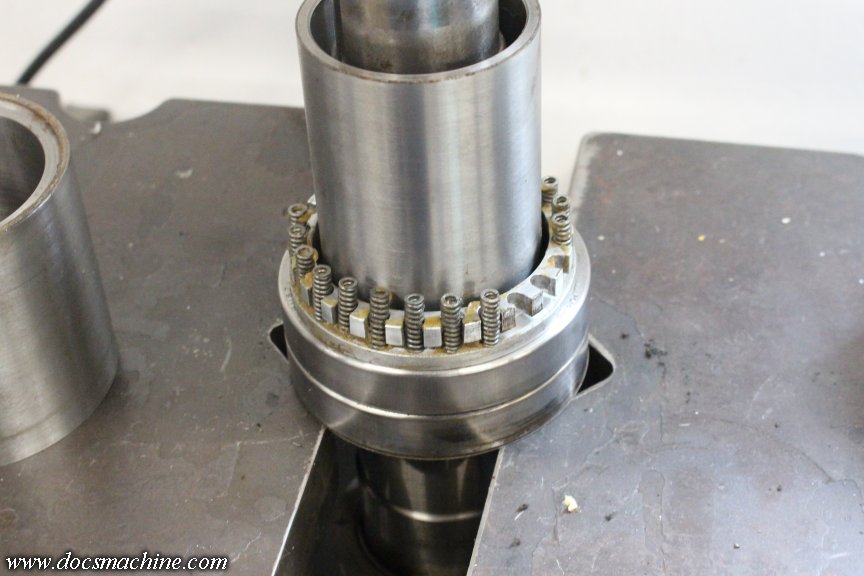
Kind of wish I had a bearing heater, but lacking that, I lightly pressed the front two into place, and then cleaned the spring spacer and the springs.
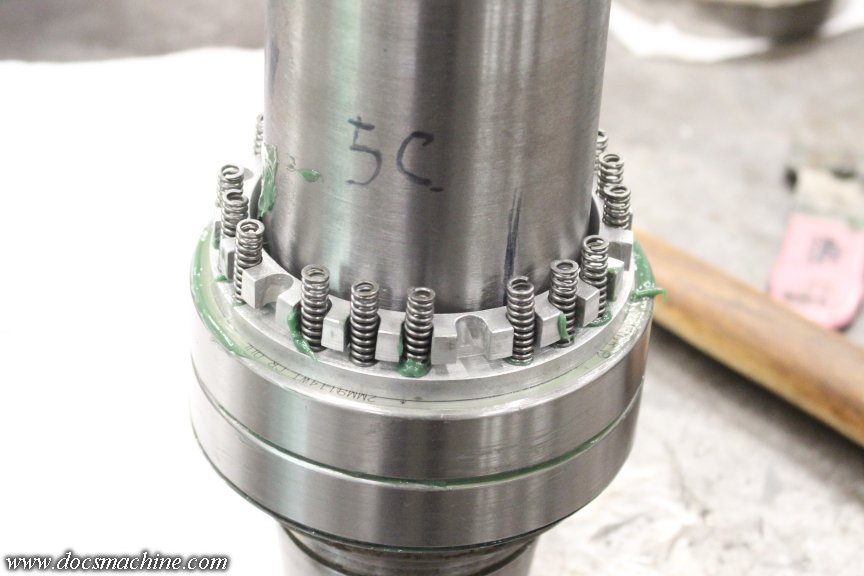
The ring has space for 24 springs, but only came with 18, in two rows of 9 each. No idea why they did it that way, and I'd toyed with the idea of finding some replacements, but hey, if it's worked and lasted this long....
I did space them out more evenly, as you can see- probably won't make the least bit of difference, but still, it assuages my OCD.
The two steel spacers are cleaned and dropped on, and the third bearing lightly pressed into place.
And finally, the locknut is tightened back into place, leaving some "preload" for the springs, and lightly re-staked.
After that, it was a case of winching it back into place, seating it, and installing both the end caps.
It rolls quite smoothy and soundlessly- of course, I suspect the old ones would have, too, if I'd cleaned and regreased 'em. We'll see once I have it back under power.
Now for my next trick: The spindle lock pin.
Making this thing functional means fabricating another, thicker spacer. Not a great deal of work, but I had to ask: Do I even need the darn thing? And, after some thought... yes, actually, I do.
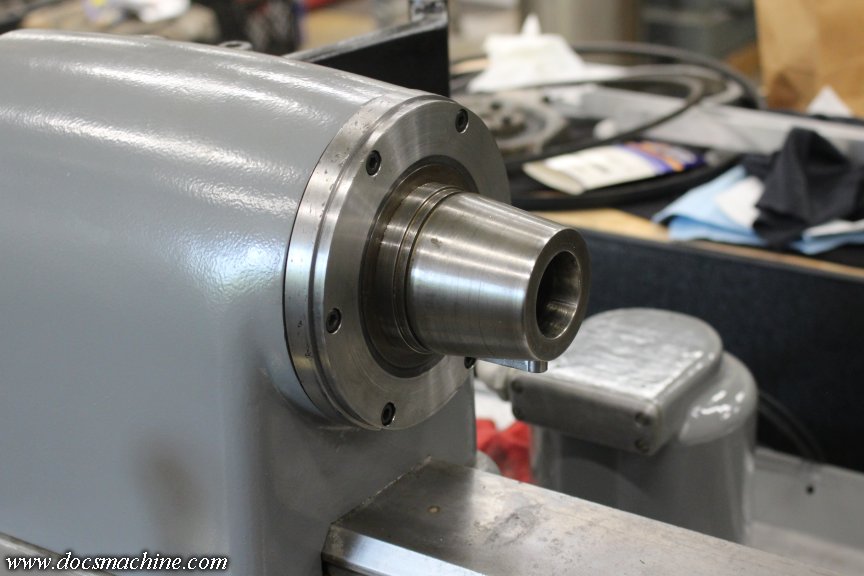
Remember this thing is equipped with an L-series "long taper" spindle. These use a threaded "retaining nut" to hold the chuck to the spindle. You can use a Crescent on a chuck jaw to hold the spindle if you're mounting or dismounting a chuck, but you can also attach a simple protective cap, to cover the outer taper, while using the inner 5C taper.
The only way to tighten, or to loosen once tightened, this cap is to have a way to hold or lock the spindle.
As I've said before, I don't expect to use a chuck much on this thing, and there's no particularly firm need to use the screw-on cap, as I can just remove the entire retaining ring assembly and use that sheetmetal slip-on cap.
BUT... I may still have a week or more before I get the motor back, and I figure while I'm here, why not? Better to have it and not need it, and all that.
The only steel I had in the shop that was big enough to pry a spacer out of, was this fifteen-some-odd pound doorstop, that has been sitting around for so long, I can no longer remember its origins.
That I chucked up in the oft-neglected Springfield, and proceeded to peel off several pounds of what turned out to be alloy steel. (It cuts like 4140 chrome-moly.)
That got a rough spacer- only rough as I wanted to use the faster Sheldon spindle to complete it, in order to get a better surface finish.
Unfortunately, while the big parting tool was easily able to slice through this stuff, it wasn't deep enough to cut it all the way through.
So I used the Portaband- at the absolute full extent of its capacity- to knife it off the rest of the way.

Switching over to the Sheldon, I turned up a set of soft jaws, squared it up, thinned it to 'bout thar, touched up the bore, and faced a 10-thou tall step on one side- so it pressed against the inner race of the bearing, and cleared the outer.
And, she slides smoothly and snugly into place. The locking pin falls put'near exactly in the middle of it, so the next trick will be to either bore a couple of holes, or mill a couple of notches to accept the pin.
The other trick is I need to broach a keyway in it- and, of course, I don't actually have a 5/16" keyway broach. I could saw and/or file one, but again, I'm still waiting on the motor anyway, so I'll probably just order one.
Hopefully it won't be too long before the motor's done!
Doc.Doc's Machine & Airsmith Services: Creating the Strange and Wonderful since 1998!
The Whiteboard: Daily, occasionally paintball-related webcomic mayhem!
Paintball in the Movies!Comment
-
For those of you that follow my webcomic, I'm putting it on a week's hiatus for the 12th to the 16th, and possibly for a week after that. I am heavily backed up in the shop, and need to do what I can to catch up a little.
I need to get this frikkin' lathe out of the way, I have no less than three batches of parts that should have been sent out to anno months ago, I have a job in the CNC lathe right now that I'm going to have to spend a full day just making a toolholder for, and I have a couple of customer jobs on the table that have been here way too damn long.
Hopefully freeing up a bit of extra time will help me catch up somewhat.
Thanks for your patience!
Doc.Doc's Machine & Airsmith Services: Creating the Strange and Wonderful since 1998!
The Whiteboard: Daily, occasionally paintball-related webcomic mayhem!
Paintball in the Movies!Comment
-
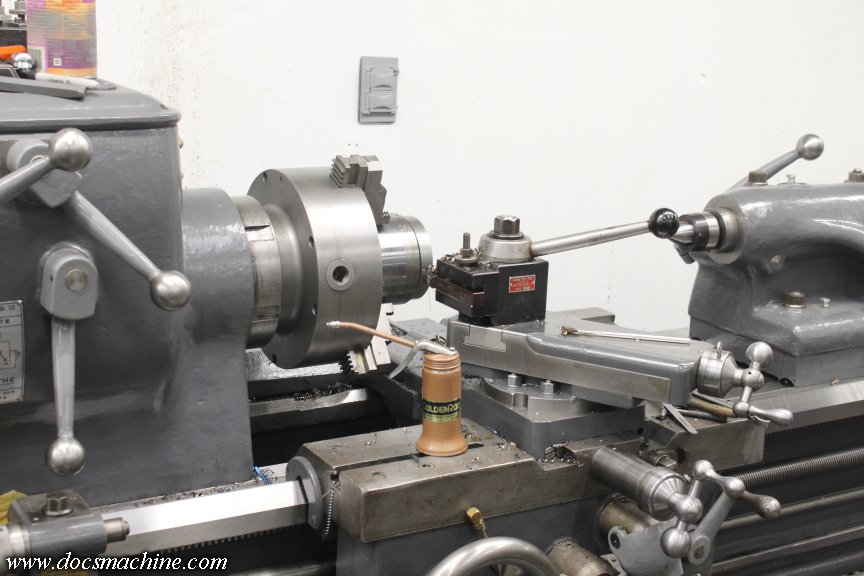
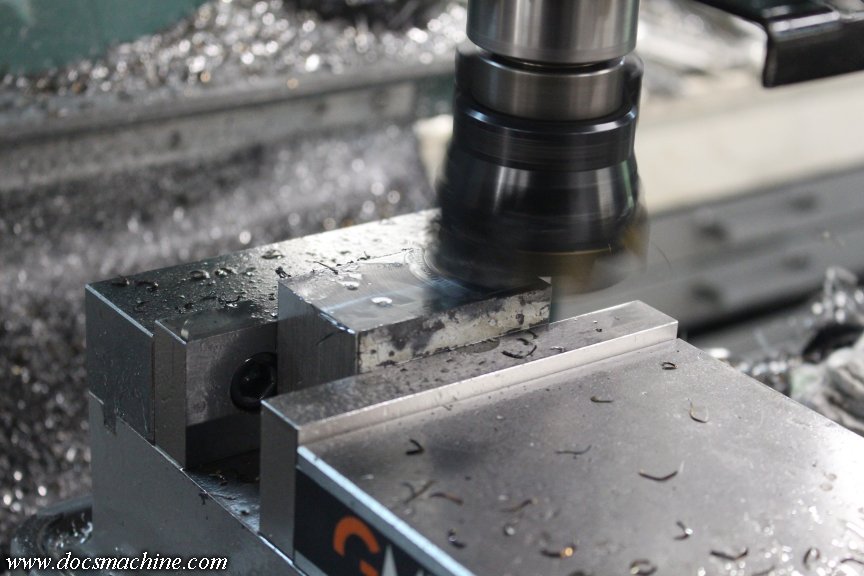
Towards the end of last week, I was able to finish up a job I had already in the turning center...
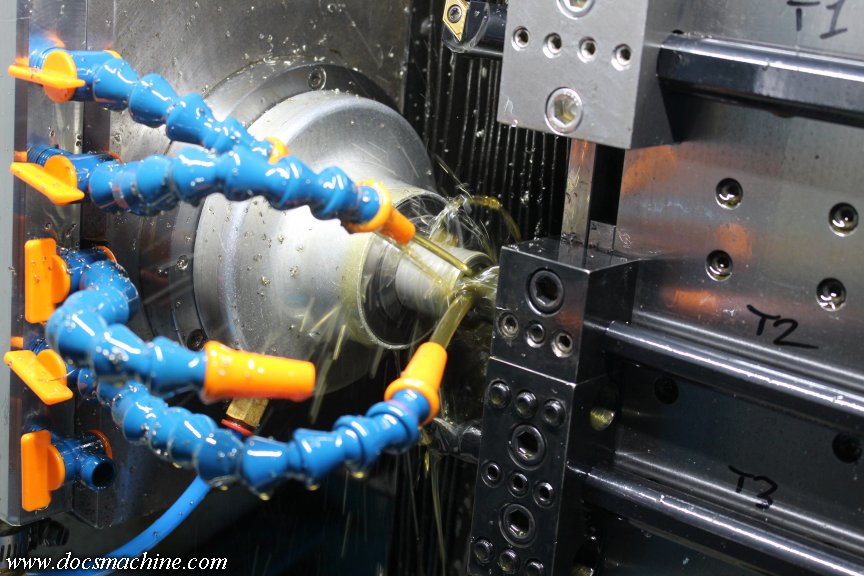
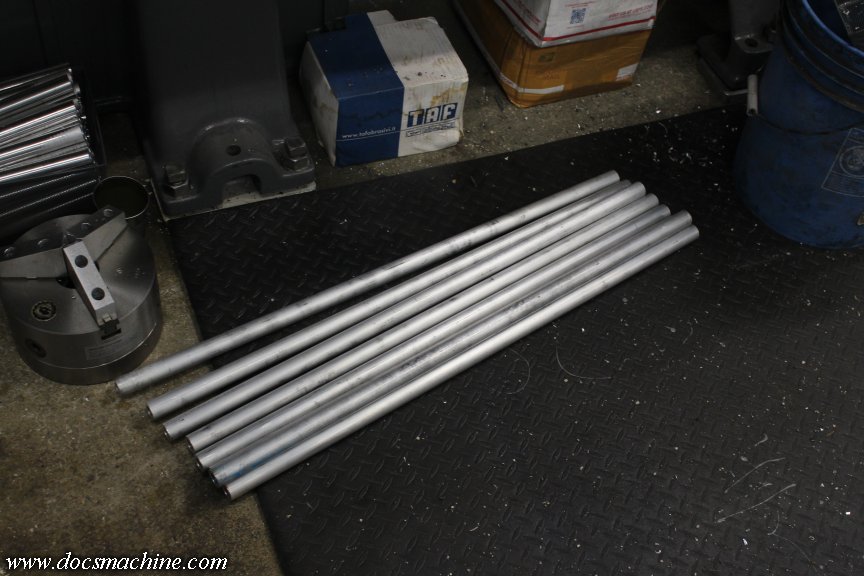
And started retooling for the next job. I'm hoping to get a big anno run sent off as soon as I can- I'd like to see two gone this month, if I can pull it off- and this piece was supposed to be a fairly easy little bit I could punch out. I got out a chunk of material, and chopped it into 32" sections- the longest single pieces I can fit in the Omni's spindle.
I then started programming. And, as I've taken to doing, I "built" the program in steps- write and prove the bore, write and prove the thread, write and prove the OD turn. Everything was going great- smoother than usual, which was, of course, a warning sign.
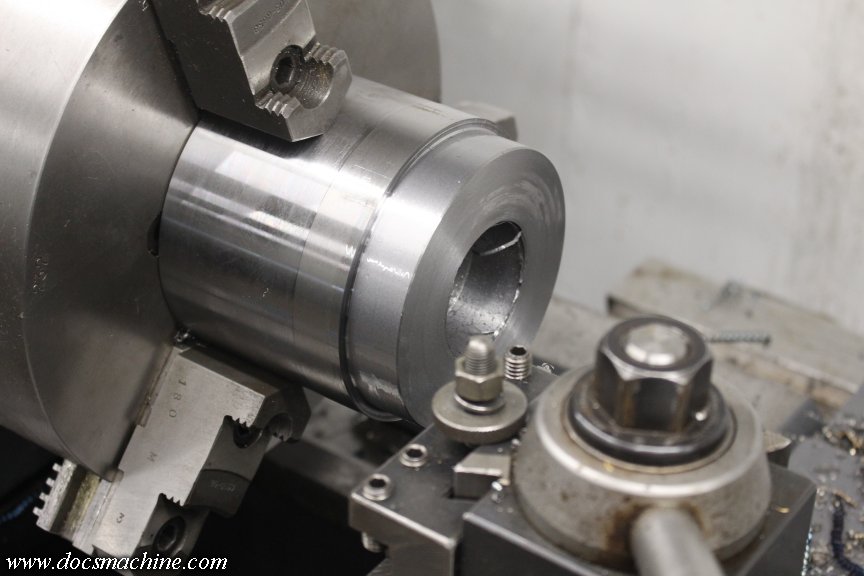
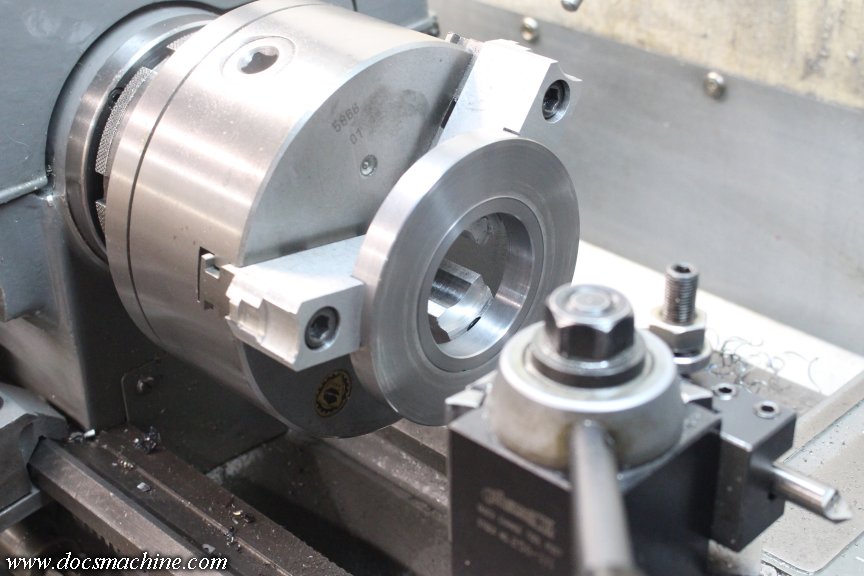
Like the steel collars for the Fasst-Changer, I wanted to part the bar stock in the spindle- easier, faster, more consistent length, all that good stuff. But, the part is just over 2" long, and a large enough diameter it won't clear the tool slide. In order to reach, I need to extend the parting tool out about yea much:
Now, at some point I wound up with an Omni toolpost extension, but it's an older one that apparently doesn't work with my newer style tool blocks. The post can clamp and hold it, but the tool block is supposed to have it's own setscrew or something.
Omni sells the extension I need... for $190.
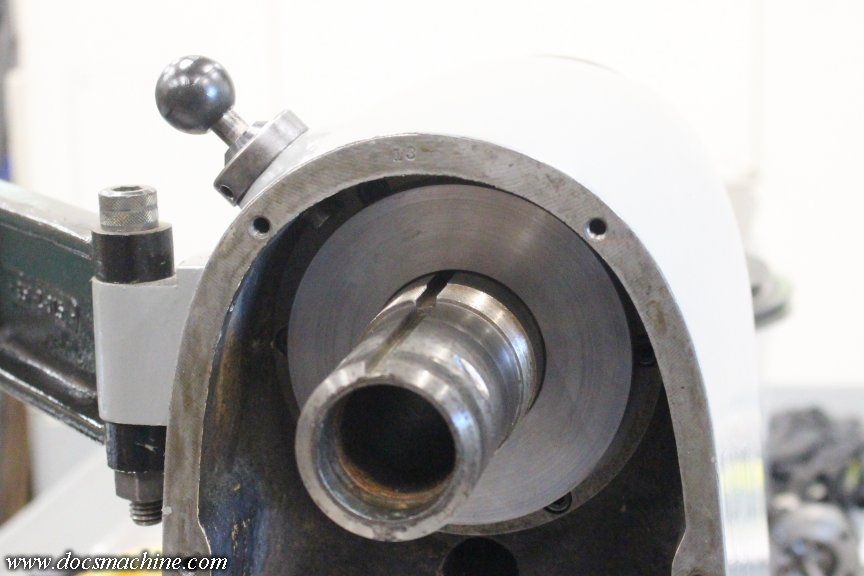
So, today, after a weekend of debauchery, I dug through the piles of scrap I have, and found a piece of mystery metal- probably mild- with sufficient volume I thought a custom extended tool post could be hiding inside. That got a slow and laborious trip through the bandsaw...
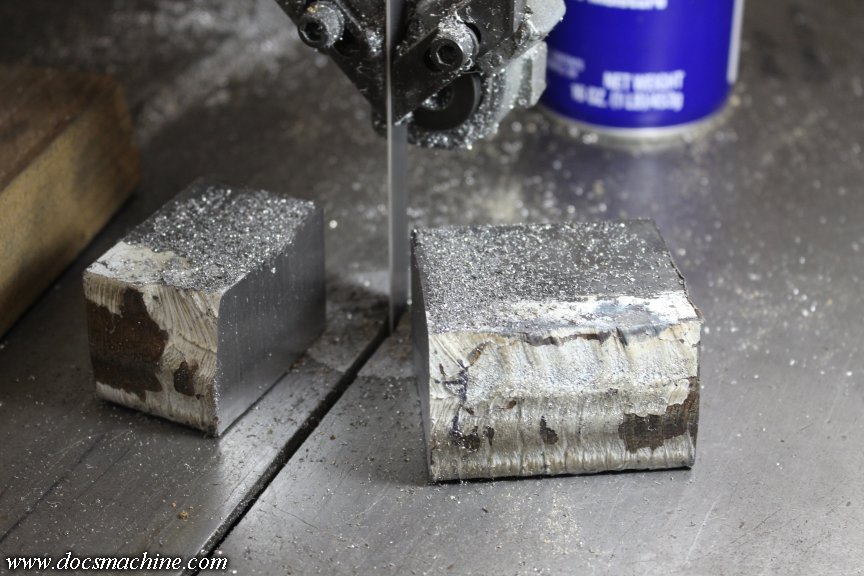
(Hey, it was an inch and a half thick!) And then a standard squaring-the-block exercise in the mill.
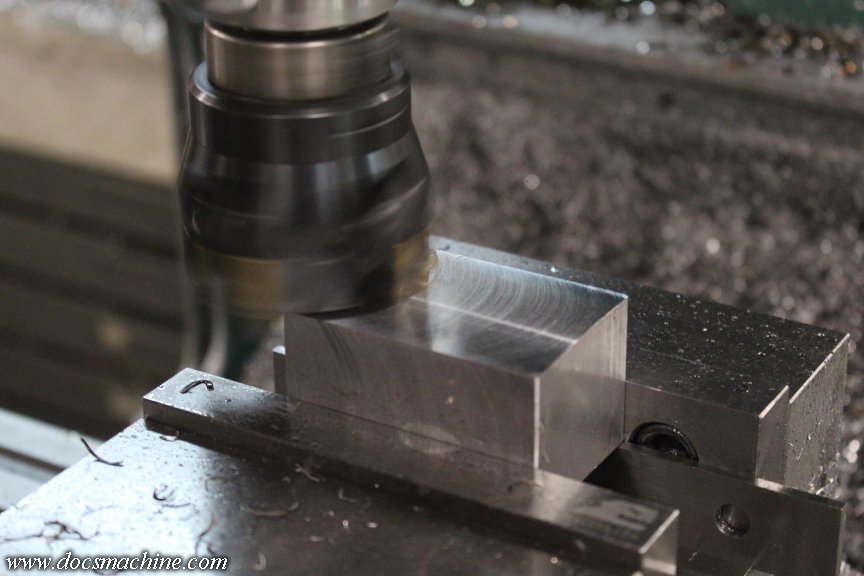
I then started carefully milling the dovetail feature....

.... And of course ran into a snag. I don't have a dovetail cutter that fits.
The one I thought I could use, turned out to be a 65 degree cutter, and I need 60 degree. All the 60 degree cutters I have are either far too tiny, or far too big.
I no longer own a shaper, and there's not really any other easy easy way to make that cut. I could make a cutter that might last long enough to finish this one part, but now I have to make a tool to make a tool so I can complete this job.
That time would be better spent on other pressing work, so I guess I have to set this aside, order a suitable cutter, and move on to some other task 'til it comes in.
Doc.Doc's Machine & Airsmith Services: Creating the Strange and Wonderful since 1998!
The Whiteboard: Daily, occasionally paintball-related webcomic mayhem!
Paintball in the Movies!Comment
-
The solution was to think up a different- and better- solution.
I do that too often- get stuck thinking of one solution, and how to implement it, and don't stop to think of other- often easier and better- solutions. The fix- detailed below- was just such a thing: It makes for a stronger toolholder, took less time to make, and wasn't as fiddly to fit. (Dovetails can be tricky.)
Doc.
-
Dammit! I've been so busy lately that I'd forgotten two very important things.
I've said before how I can't really do any welding and grinding in the shop anymore- activities that produce airborne dust and grit are not conducive to long-term machine tool health. Which means I need to do that kind of thing outside, which of course in turn means I have a narrow window of warm weather in which to do it.
Which at this point means less than six weeks. The trees will be bare of leaves in four, and statistically speaking, we'll have snow on the ground in eight. (Usually just a dusting, but the temperature is the important part at the moment. )
I've had these two things in mind since last winter, and was only waiting for the warm weather to do them. That new lathe threw all my plans into the wood chipper, and I'd completely forgotten about them.
One is to replace the coolant pump in the OmniTurn, the other is to fab a splash guard for the big turret lathe, when using the 3-jaw chuck.
The pump job is going to require draining the sump of oil, cleaning it out, cutting out the old pump mount, fabricating and welding in a new mount for the new pump, reinstalling everything, and plumbing in the new oil filter. Which will likely need an access door in the back, and other mods. The cutting and welding at the very least, need to be done right away. The plumbing and all that can be done indoors, in place. (Though I may want to plasma-cut the access door opening.)
The splash guard is simply fabricating a semicircular cover to go partway around the chuck, so that when I'm using flood oil on that, it's not "windmilling" all the oil off onto the walls, floor, ceiling and any passing nuns.
Both are tasks I want to do right- I want both of them to be good, lasting mods, and I'd hoped to be able to take my time on them over the course of the summer. But now, as per long-established procedure, I'm gonna have to do my best to get 'em done as quick as I can. 🙄
Of course, I don't have to have the comic on hiatus for any of that, but having a bunch of this other stuff out of the way will at least help take the load off...
Stand by, we'll get this sorted.
Doc.Doc's Machine & Airsmith Services: Creating the Strange and Wonderful since 1998!
The Whiteboard: Daily, occasionally paintball-related webcomic mayhem!
Paintball in the Movies!Comment
Comment