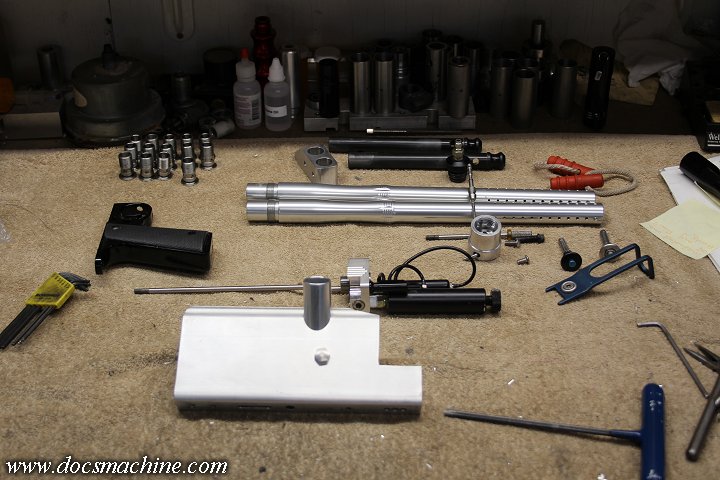
Okay, from the initial parts-box build, we had several issues.
One, the valve would stick open making it hard to first pressure up; two, the timing was not cooperating and I kept having 3-way issues; and three, there was a wild variation in velocity between the barrels. Like the top one would be near-normal, while the other would be "walk two steps over and pick the ball back up".
So, this morning, I broke it back down and took each one in turn.
The valve issue was my own ignorance. I'm using an off-the-shelf Inception 11/16" valve, and had machined the valve bore with a 'step' for the valve to seat against. Some markers don't do this (like Trilogys) while others (various Sypder clones) do. I wasn't sure, so just to be on the safe side, and to make it easier to assemble, I had a slight step there.
And Inception valves have "wings" on the cup seal, that actually very nearly touch the valve bore- and my bore was smaller than it was supposed to be- not by much, but enough the cup seal dragged. That was an easy fix- rather than bore out the body, just as a quick fix I trimmed down those "wings" by about 20 thou, and now it works great.
The timing issue was simple. The first 3-way I'd used was an older Quickswitch, that, frankly, has a lot of miles on it. I've had it on at least two dozen builds over the years.
I just threw a new set of spool O-rings at it, and it worked like a champ. The rest of the timing was easy, once the 3-way cooperated.
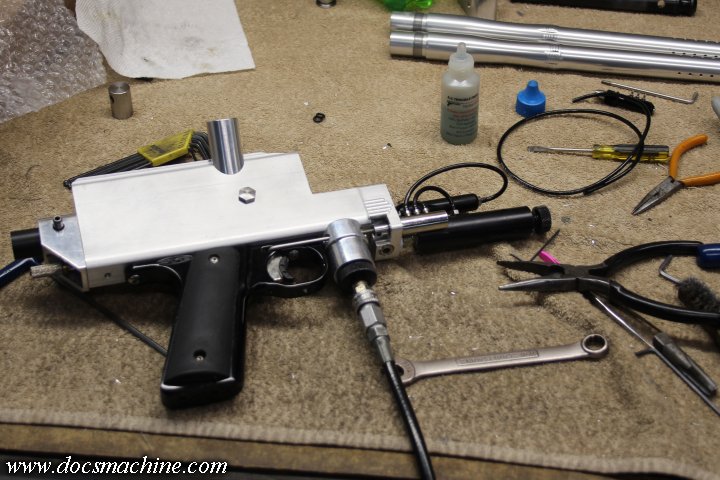
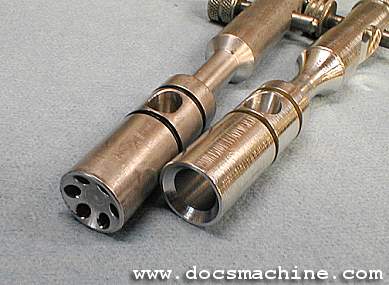
The velocity issue wasn't much harder. Clearly what was happening was the air burst sailed right through the lower bolt into the upper. So we needed a little restriction in the upper, to kind of force some of that air out the lower bolt. I got out some more Delrin, and whipped up a very rough prototype with an internal adjuster.
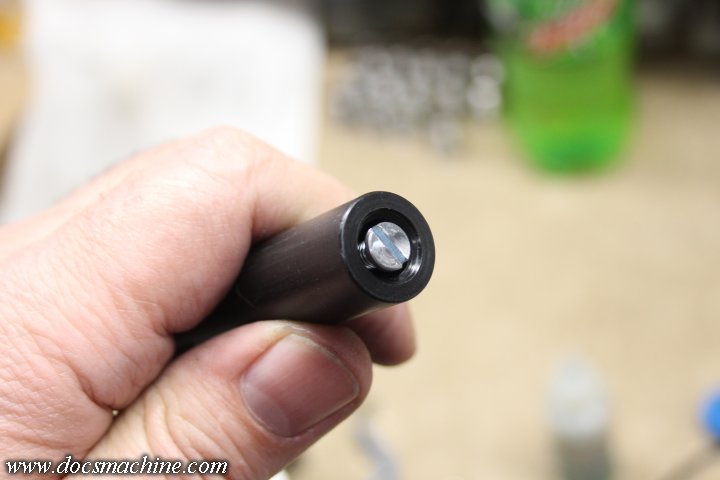
Which is simply a long flathead screw, trimmed down slightly, and with a 'step' machined into the bore of the bolt to the point where the screw head can nearly close off the airflow completely.
Ideally, a bolt with a fixed, reduced bore in the upper would be preferable, and I'll try one of those next. But for now, this got me running. A couple quick test shots and a slight tweak, got the barrels very nearly identical, and a little tweak to the velocity got up into the 260s. (Still running straight CO2, maxed out at around 600 psi. )
Finally, it was time for a proper test. I dug out a pair of old VL2000s, as I was too low on fresh 9-volts to run a pair of Revvies...
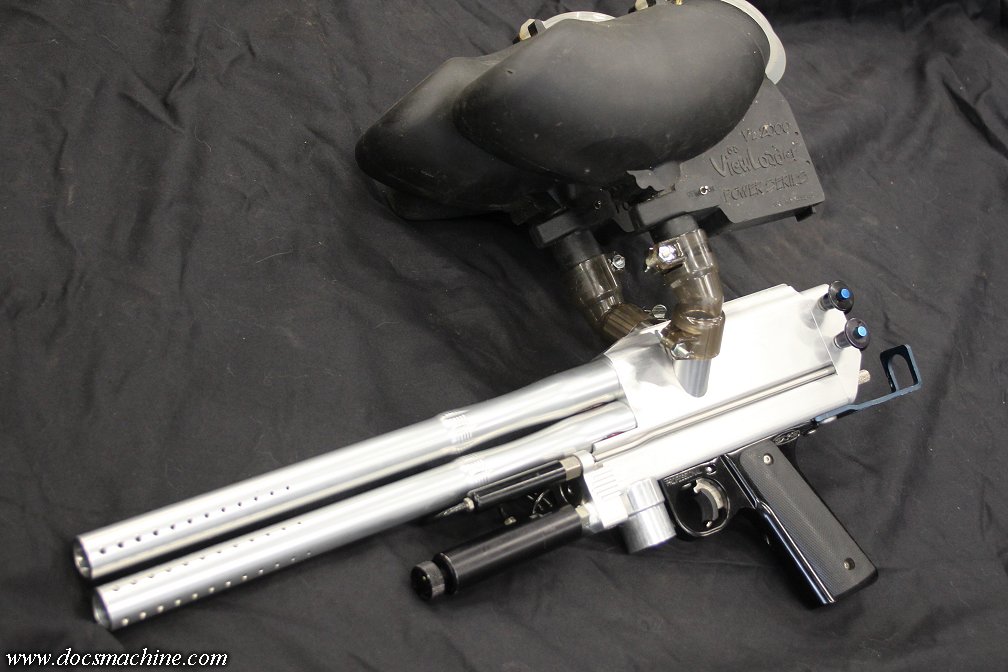
And dug out some old test paint to give 'er a try. I had half a case of Valken left from when the local field closed a couple years ago, and this was the highest and best use.
Or maybe not.
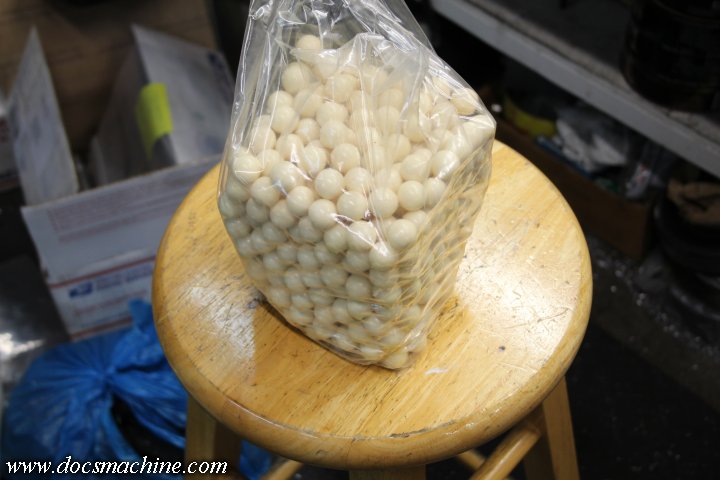
The stuff was one solid lump, even though it had been stored warm and indoors since I bought it at the field, and the bag was still completely sealed.
Just how crap IS paint getting these days?
Anyway, I had some other old paint to toss, that was in a lot better shape, and set up a video camera out my back door. For those that haven't seen it, years and years ago, I rebuilt the back door to the machine room, into a Dutch door, so I could open the top half, and had a "shelf" on top of the bottom half, to lay tools, the chrony (hanging to the right there) paint, loaders, Dew, Moose Repellent or whatever.
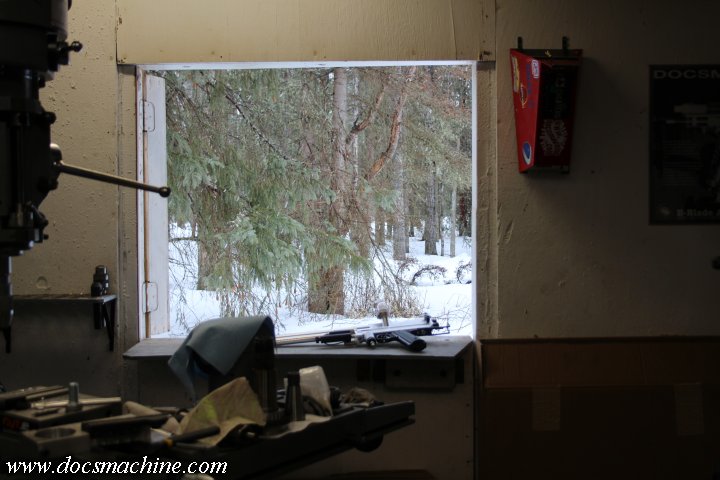
I actually have some hanging targets back there, but with all the junk in the way- like that vertical mill - I couldn't get a good angle on it.
But, without further ado, albeit with a bit of a preamble, the real, live shooting video!
As always, more to come! I need to fill my HPA tanks, set up a good inline reg and a nice rail ASA, make and test a couple more bolts...! Stand by!
Doc.
One, the valve would stick open making it hard to first pressure up; two, the timing was not cooperating and I kept having 3-way issues; and three, there was a wild variation in velocity between the barrels. Like the top one would be near-normal, while the other would be "walk two steps over and pick the ball back up".
So, this morning, I broke it back down and took each one in turn.
The valve issue was my own ignorance. I'm using an off-the-shelf Inception 11/16" valve, and had machined the valve bore with a 'step' for the valve to seat against. Some markers don't do this (like Trilogys) while others (various Sypder clones) do. I wasn't sure, so just to be on the safe side, and to make it easier to assemble, I had a slight step there.
And Inception valves have "wings" on the cup seal, that actually very nearly touch the valve bore- and my bore was smaller than it was supposed to be- not by much, but enough the cup seal dragged. That was an easy fix- rather than bore out the body, just as a quick fix I trimmed down those "wings" by about 20 thou, and now it works great.
The timing issue was simple. The first 3-way I'd used was an older Quickswitch, that, frankly, has a lot of miles on it.
I've had it on at least two dozen builds over the years.I just threw a new set of spool O-rings at it, and it worked like a champ. The rest of the timing was easy, once the 3-way cooperated.
The velocity issue wasn't much harder. Clearly what was happening was the air burst sailed right through the lower bolt into the upper. So we needed a little restriction in the upper, to kind of force some of that air out the lower bolt. I got out some more Delrin, and whipped up a very rough prototype with an internal adjuster.
Which is simply a long flathead screw, trimmed down slightly, and with a 'step' machined into the bore of the bolt to the point where the screw head can nearly close off the airflow completely.
Ideally, a bolt with a fixed, reduced bore in the upper would be preferable, and I'll try one of those next. But for now, this got me running. A couple quick test shots and a slight tweak, got the barrels very nearly identical, and a little tweak to the velocity got up into the 260s. (Still running straight CO2, maxed out at around 600 psi.
)Finally, it was time for a proper test. I dug out a pair of old VL2000s, as I was too low on fresh 9-volts to run a pair of Revvies...
And dug out some old test paint to give 'er a try. I had half a case of Valken left from when the local field closed a couple years ago, and this was the highest and best use.
Or maybe not.
The stuff was one solid lump, even though it had been stored warm and indoors since I bought it at the field, and the bag was still completely sealed.
Just how crap IS paint getting these days?
Anyway, I had some other old paint to toss, that was in a lot better shape, and set up a video camera out my back door. For those that haven't seen it, years and years ago, I rebuilt the back door to the machine room, into a Dutch door, so I could open the top half, and had a "shelf" on top of the bottom half, to lay tools, the chrony (hanging to the right there) paint, loaders, Dew, Moose Repellent or whatever.
I actually have some hanging targets back there, but with all the junk in the way- like that vertical mill
- I couldn't get a good angle on it.But, without further ado, albeit with a bit of a preamble, the real, live shooting video!
As always, more to come! I need to fill my HPA tanks, set up a good inline reg and a nice rail ASA, make and test a couple more bolts...! Stand by!
Doc.
Comment