Inside Doc's Shop 2026

Collapse
X
 
  • Time
  • Show
Clear All
new posts
  • DocsMachine
    MCB Member
    • Jul 2020
    • 2699
    • Alaska

    #1

    Inside Doc's Shop 2026

    Thought I'd switch over to yearly threads (previous 'inside' here) so each one doesn't get unusably long or cluttered.

    And to start us off, I have a sneak-peek for just you ladies and gents. I have a little project I'll hopefully be doing a video on here shortly, and figured I'd give you a teaser.

    The idea is, in a manner of speaking, to duplicate a grip frame. Now, ideally, I'd CAD this thing and feed it into my CNC mill, but I'm still learning that machine, and in this case, I'm only making one part. (Well, two- the extra both as a "just in case" and for myself if it all works out. )

    We begin with this:


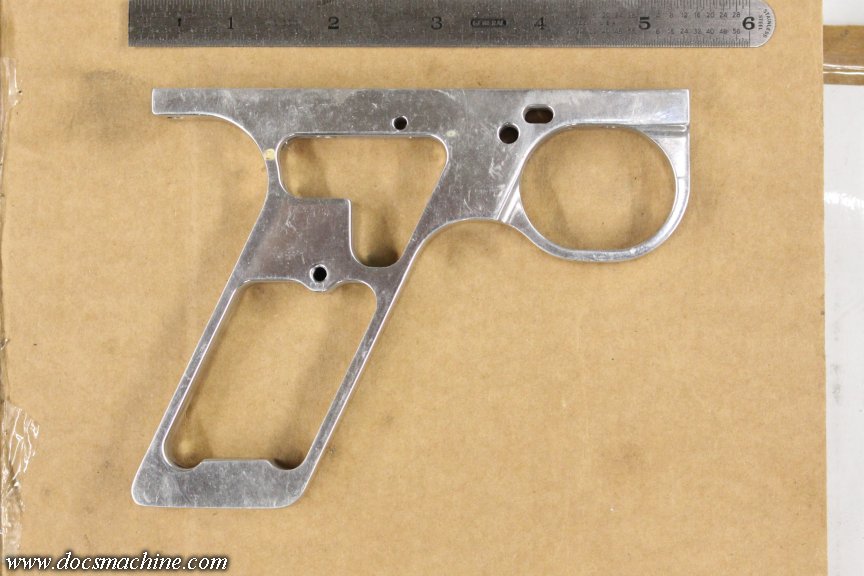
    A practically-antique Planet Eclipse 'Cocker slider trigger frame, from back around the turn of the century when Smart Parts was the US dealer for PE's "splash" kits. Somewhere around... geeze, '99 or 200, maybe? SP fire-saled off some of their excess PE hardware, and I bought two of these unanodized singlescrew slider frames... and have been sitting on them for a quarter-century.

    One's been in a box with some MiniCocker parts, that I paid to have the anno stripped from back in 1996, and still have yet to reassemble. The cobbler's kids have no shoes and all that.

    I'll be both duplicating and adapting it to a different gun, but the overall profile remains unchanged. So, I shot that photo with a reasonably contrasting background, a ruler for scale, and as few shadows as I could manage.

    Then, cropped and rotated to level....


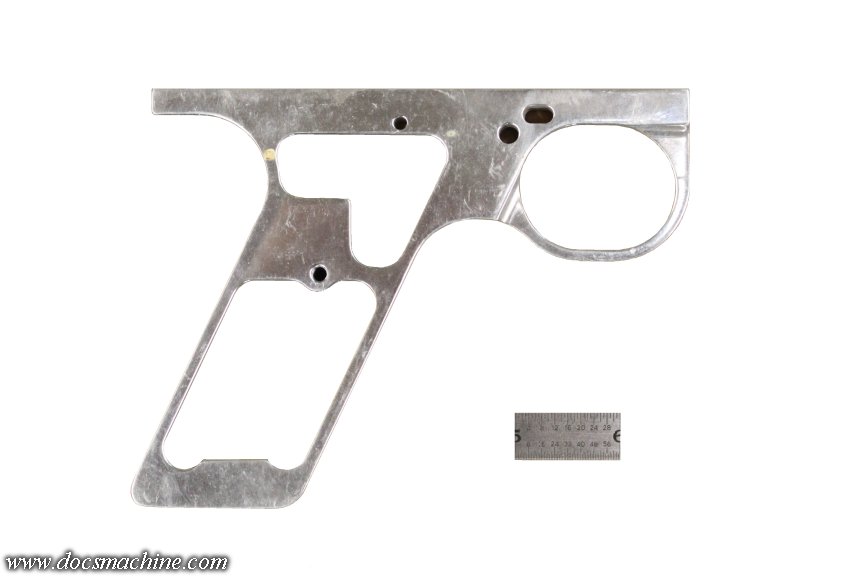
    And the background digitally erased. That part's kind of time consuming, depending on what you have for graphics software, but it's not bad.


    In my graphic program, I then used the vector line and shapes tools to outline everything...


    Delete the extraneous...


    And finally delete the image itself, leaving only a to-scale outline.


    The ruler was there to give... well, a scale, and the line below is nominally an inch. That way, when it's printed...


    I can simply measure that line, and see how close to the correct size it is.


    There's a tiny error, but acceptable. Laying the grip frame itself over the pattern, shows that same slight error. I could try scaling it up very slightly and reprinting, but for the purpose, this is plenty close.


    What's that purpose? Anyone who's watched Clickspring can probably guess.

    Stand by, more coming soon.

    Doc.


    Doc's Machine & Airsmith Services: Creating the Strange and Wonderful since 1998!
    The Whiteboard: Daily, occasionally paintball-related webcomic mayhem!
    Paintball in the Movies!
  • superman
    MCB Member
    • Jul 2020
    • 3348
    • Mount Pleasant, SC

    #2
    May want to add the timing rod hole and hole too.
    BeardedWorks.com (Your Inception Designs and Shocktech Dealer)
    BW Youtube
    BW Ebay

    BW Email
    I buy Automags and Mag Parts also.

    Comment

    • DocsMachine
      MCB Member
      • Jul 2020
      • 2699
      • Alaska

      #3
      Unnecessary in this case.

      Doc.
      Doc's Machine & Airsmith Services: Creating the Strange and Wonderful since 1998!
      The Whiteboard: Daily, occasionally paintball-related webcomic mayhem!
      Paintball in the Movies!

      Comment

      • RPP
        You even shooty ball Bro?
        • Dec 2023
        • 399

        #4
        Nice. Looking forward to seeing the outcome.

        Comment

        • DocsMachine
          MCB Member
          • Jul 2020
          • 2699
          • Alaska

          #5
          The Crate of Happiness®!

          Regular reader, fan and malcontent Mark-T, hallowed be thy name, bestowed upon me the gift of true happiness. Happiness in the form of a crate of brass!


          Of course, in the local context, brass has but one connotation, doesn't it. You would probably not be wrong were you to guess what all of those are...

          Unfortunately, due to the usual and chronic time constraints, I am unable to leap right in and start modding and fixing and fobbing and bandsawing and soldering and occasionally defenestrating, but suffice to say I'm dusting off old lists and making fresh plans.

          Stand by.

          Doc.
          Doc's Machine & Airsmith Services: Creating the Strange and Wonderful since 1998!
          The Whiteboard: Daily, occasionally paintball-related webcomic mayhem!
          Paintball in the Movies!

          Comment


          • Drunkscriblerian
            Drunkscriblerian commented
            Editing a comment
            Holy crap and other comments!

            If what's in that box is what I'm pretty sure it is, your friend must really love you.
        • Ecapnation
          MCB Member
          • Jul 2020
          • 4209
          • South Central Long Island

          #6
          If you ever need cad done fast I get board at lunch often and we could always work something out.

          Pretty sure at this point i digitized most of a cocker

          Comment

          • DocsMachine
            MCB Member
            • Jul 2020
            • 2699
            • Alaska

            #7
            Well crap- like others have said, they don't make things like they used to.

            Longtime readers will know that my main machine in the shop is my Grizzly mill- a Bridgeport clone I bought back in 2002. I've used this thing close to every day since then, putting many, many thousands of hours on it.

            And today, for the first time, it broke. I only got 24 years out of it!

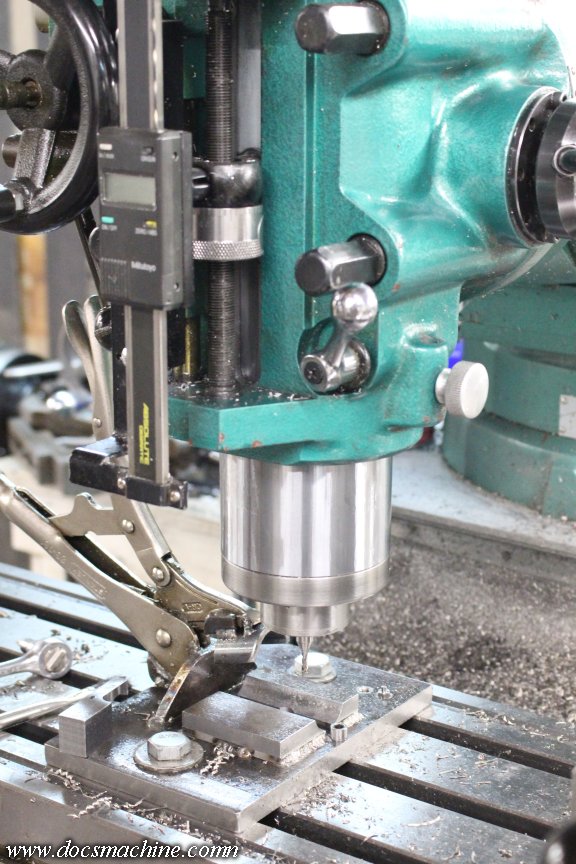
            I'd been doing a repetitive job using a fixture, that was a counterbore operation, using the quill like a drill press. I'd been noticing the quill didn't want to return all the way to the top of the stroke each time, and I was thinking the oil in there was maybe getting a little sticky. Since I was almost done, I figured I'd finish the job, clear off the table, clean the quill, etc.

            Nope, I was setting up the last cutter and as I ran the quill down, something went "CRACK!" and the quill fell to the depth stop.


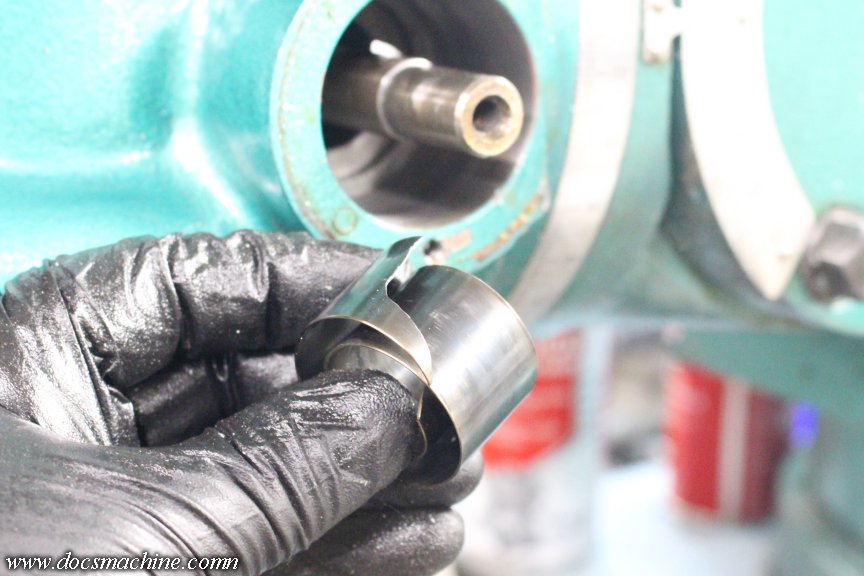
            Quill still moved freely, but no spring return, so clearly the 'clockspring' in the quill handle decided to take the day off. I opened it up and... sure 'nuff:


            I figure it'd been cracked for at least part of this run, which probably explained why the quill wouldn't fully return. That last pull popped it the rest of the way.

            I could finish the run without it, but it'd be tricky. I leave the spindle turning while I swap the part, and this way I'd have to rely on the quill lock. I may wait 'til I get a replacement in.

            And that part, at least, isn't bad- this mill is a bolt-for-bolt copy of a Bridgeport, made in the same Taiwanese factory that used to make Bridgeports for... well, Bridgeport. (Now Hardinge.) As such, replacement parts are both common and ubiquitous. The new spring should be here by the end of the week, and I should be back up and running by then.

            I suppose I'll just have to sit here and twiddle my thumbs 'til it arrives.

            Doc.​
            Doc's Machine & Airsmith Services: Creating the Strange and Wonderful since 1998!
            The Whiteboard: Daily, occasionally paintball-related webcomic mayhem!
            Paintball in the Movies!

            Comment


            • Drunkscriblerian
              Drunkscriblerian commented
              Editing a comment
              Grizzly tools can be weirdly tough like that. At my old job we had a Grizzly 24 inch planer that was purchased in 2003, it ran until 2018 and then the ON/OFF switch finally gave out after who knows how many button pushes. After replacing the balky switch, the thing ran fine for another year until the business closed and we sold the machine. As far as I know, the planer's still running fine in 2026.

              I've also seen Grizzly stuff catastrophically fail after a comically short amount of time. I guess their QA is a little wanting, but the designs are not bad.

            • DocsMachine
              DocsMachine commented
              Editing a comment
              Grizzly got stuff- and may still- from both Mainland China and Taiwan. Generally speaking, the Taiwanese (which is where this one's from) is better quality, easily up there with Western makes. Mainland can make the same quality, but they're also more than happy to cut corners if that's what the manufacturer wants. (Take the ubiquitous 9x20 lathe- JET, Grizzly, Harbor Freight and Busy Bee all come out of the same factory and the same production lines. Jet and Griz get the 'cream of the crop', HF gets the stuff that didn't pass QC for those, and Bee gets whatever's left, regardless of quality.

              But at the same time, Jet and Griz don't always have one of their own QC guys in the factory, and so yeah, sometimes "didn't quite pass QC" slips through.

              Doc.
          • Spaghetti Overdrive
            YeloSno Rehydrated
            • Oct 2025
            • 260

            #8
            Do you happen to archive/digitize things in general, or just doing it as you need it for projects?

            Comment

            • DocsMachine
              MCB Member
              • Jul 2020
              • 2699
              • Alaska

              #9
              You mean make something like a blueprint, or a dimensioned CAD drawing?

              If so, yeah, I've been doing that for years. When I started out, everything was the proverbial cocktail-napkin sketch. As I eased more and more into production- even if it was still just on the manual machines- I started working up proper dimensioned drawings. At this point I have hundreds or parts drawn up.

              Last few years, since about the time I got my CNC mill, I've been starting to work things up in CAD, specifically Fusion 360. I'm still a really green novice at it, and since it's a bit of a booger to take a 3D model and make a dimensioned drawing out of it, I don't really have many of those.

              If you mean just drawing random parts, like Phantom bodies or 'Cocker back blocks, no. I don't have the spare time for something like that, although a library of such things would have some use.

              Doc.
              Doc's Machine & Airsmith Services: Creating the Strange and Wonderful since 1998!
              The Whiteboard: Daily, occasionally paintball-related webcomic mayhem!
              Paintball in the Movies!

              Comment

              • DocsMachine
                MCB Member
                • Jul 2020
                • 2699
                • Alaska

                #10
                Mill's back up to full speed!

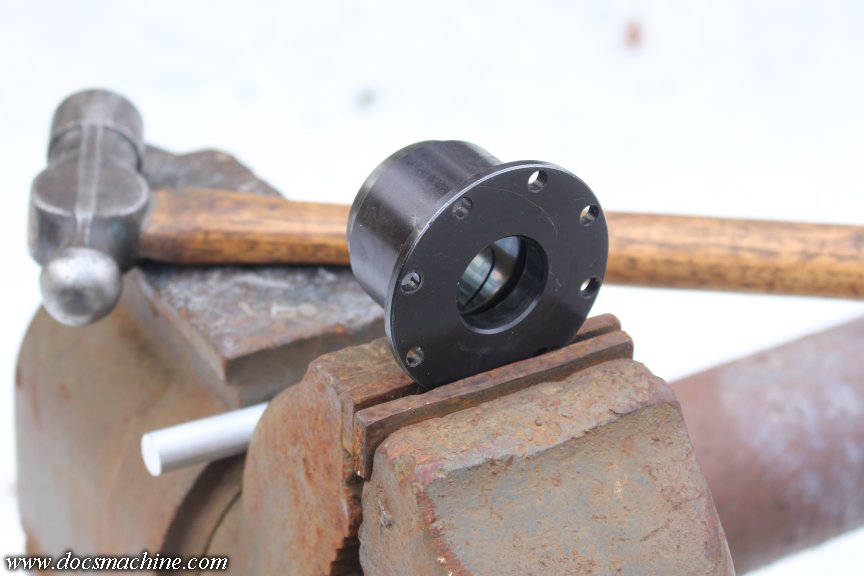
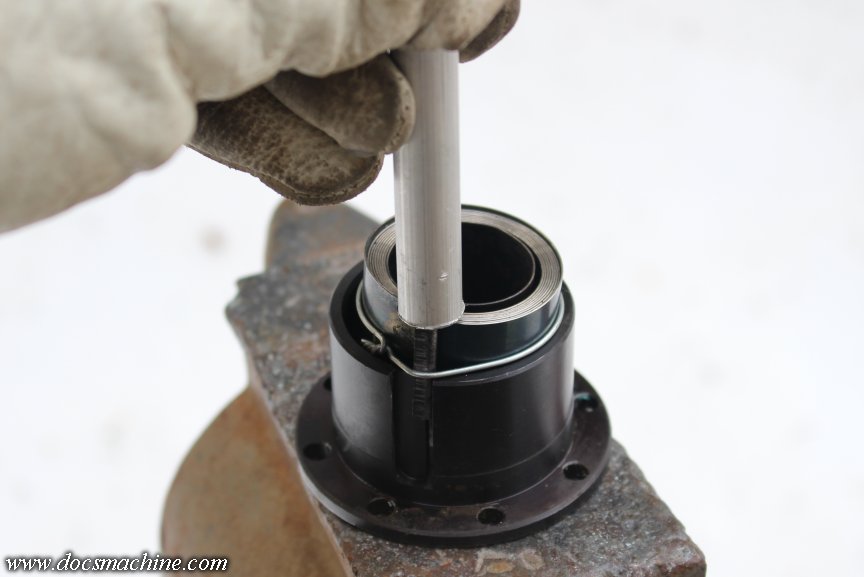
                The new spring came in Friday, and I took a moment this afternoon to slip 'er in place. But first, I had to get rid of the old one:


                I set it up in the outside vise, and used a chunk of aluminum rod as a drift to tap it out. That way, when it inevitably exploded, it wouldn't break three windows, sever an important vein or two, and possibly startle the cat.

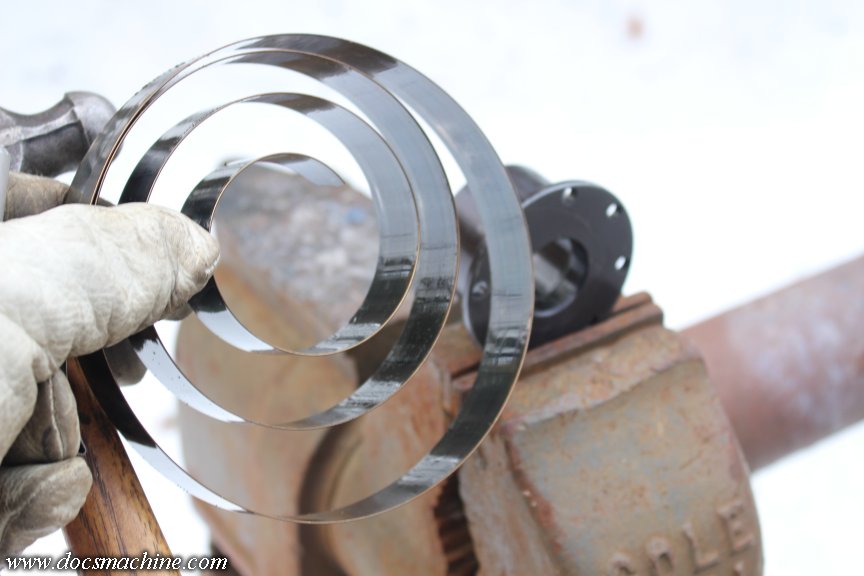
                And explode it did:


                I guess I was expecting to unwind more, but either way, when it did, it did so with alacrity.

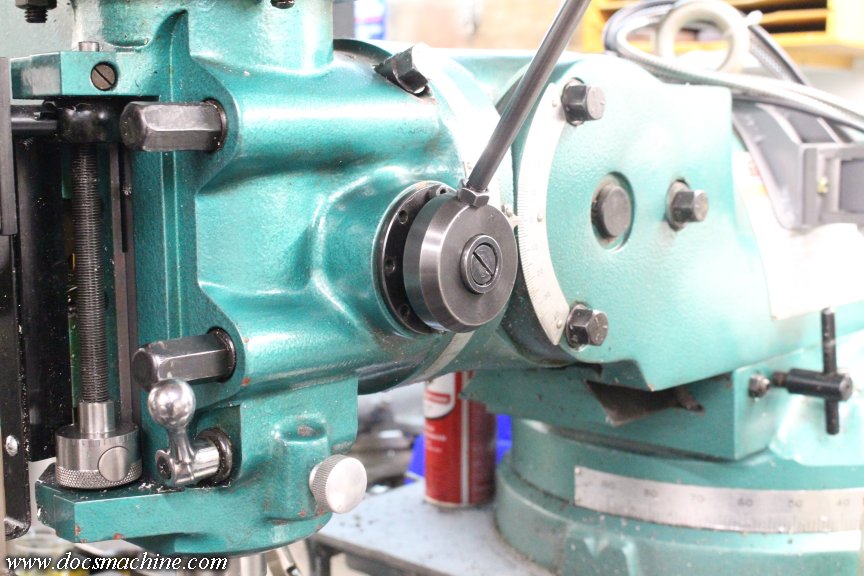
                The new one arrived safely tied up and wired, so I set it back in the adjuster collar, and used the same drift to tap it into place- sliding the wire off as it went.


                Et voilá.


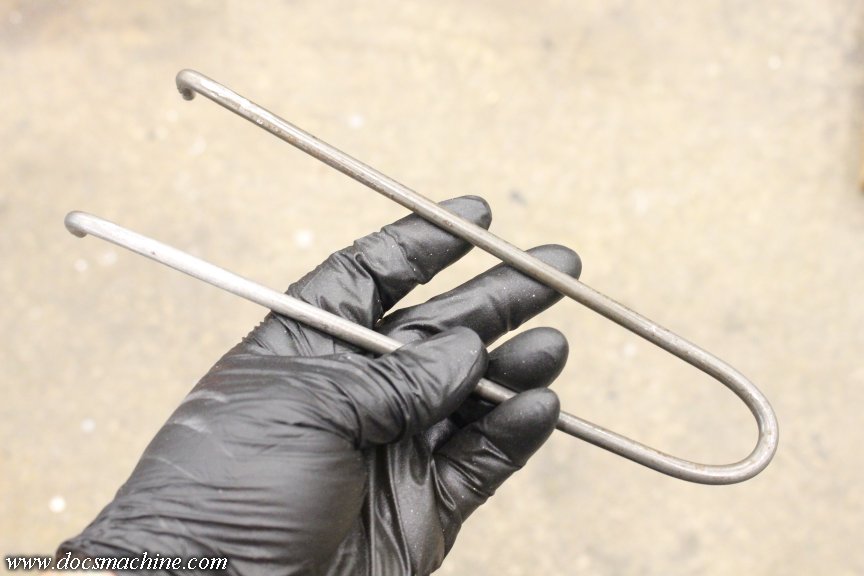
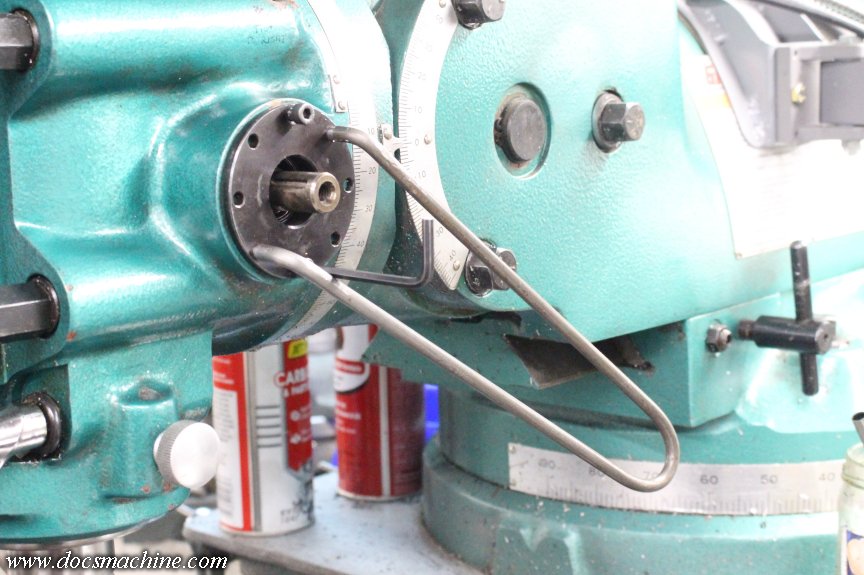
                Now, the trick is, that mounting collar is also an adjuster, you have to "wind" it to preload the spring. That is usually done with a pin spanner, except I don't have one- at least, not one that fit this application. I was also feeling a little lazy today, so I made a quick-and-dirty one. First, by turning a .210" spud on the end of a longish bit of 1/4" mild steel rod.


                With some aluminum pads, I bent the ends in the vise....


                And then bent the whole mess in half.


                That let me hold and 'wind' the collar easily- which is a good thing, as it took a surprising lot of trial and error.


                This spring, unfortunately, apparently isn't as strong as the old one, and by the time I got enough tension on it to actually retract the quill as the old one did, it ended up going into coil bind halfway through the quill travel.

                So I had to do a lot of back-and-forth to get the most tension, but not to the point it binds. And I eventually got there, but while there's enough spring tension to help the quill raise back up, it won't slide back up on its own anymore.


                Anyway, it's back together, and works fine, I'll just have to get used to manually raising the quill from now on.

                And, with that buttoned back up, I was able to finish up the delayed project that was in the fixture, clean the table, re-check the tram, and move on to the next project.

                Doc.​
                Doc's Machine & Airsmith Services: Creating the Strange and Wonderful since 1998!
                The Whiteboard: Daily, occasionally paintball-related webcomic mayhem!
                Paintball in the Movies!

                Comment

                • DocsMachine
                  MCB Member
                  • Jul 2020
                  • 2699
                  • Alaska

                  #11
                  And a sneak peek for those of you who aren't watching the StuporBowl: The World's First properly Freaked SL-68!


                  The drawback is it's not a drop-in, the body does have to be machined. But after that, you can use any Phantom barrel, Freaked or not, and you can still disassemble the gun (removing the bolt and hammer) normally.

                  More info on Monday.

                  Doc.
                  Doc's Machine & Airsmith Services: Creating the Strange and Wonderful since 1998!
                  The Whiteboard: Daily, occasionally paintball-related webcomic mayhem!
                  Paintball in the Movies!

                  Comment

                  • DocsMachine
                    MCB Member
                    • Jul 2020
                    • 2699
                    • Alaska

                    #12
                    Finally made a tool that I've been needing for years; a sliding adjustable fence for my bandsaw.

                    I use said saw a lot, with one of the primary uses being to slice up sticks of bar stock into smaller chunks to feed into the machines. For years I've measured and marked with a Sharpie, but this isn't terribly precise, and sometimes the cuts aren't all that square as I'm trying to wrestle a longish section getting cut. (That part I need a roller stand for, and that's coming.)

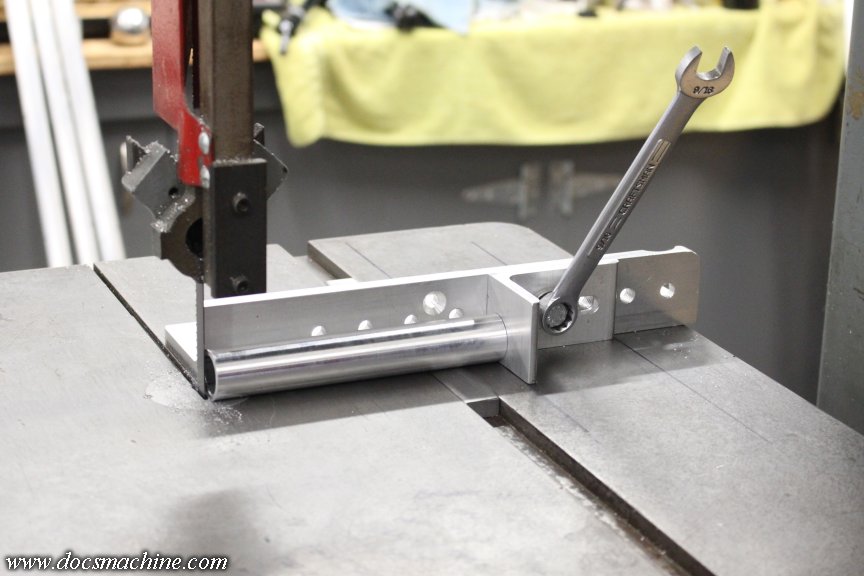
                    It's simply a cutting guide- it both helps keep the part square to the blade, and in this case, has a stop so you can cut repeatable lengths. Common stuff, they've been around since the advent of the tablesaw.

                    I'd been looking for a factory one for my DoAll saw, and it turns out there ain't no such thing. Well, there is, but what I wanted, doesn't really exist. There's fences (static walls a board or longer piece can ride against) and there's miter gauges (a sliding guide that can be set at a specific angle) and for a tablesaw, a sled (a sliding guide, often with a part stop) but I never found what I was looking for, for my specific saw.

                    I just needed a sliding fence with an adjustable stop on it, no need for the angle mitering, etc. If DoAll- or really, anyone else- made one to fit this saw, I never found it. Lots of shopmade versions, though.

                    I've been working on a largish run of parts, which has included cutting up a lot of material. I still had 20-30 feet to go (into nominally 6" sections) so I dropped what I was doing and finally made the damned thing.

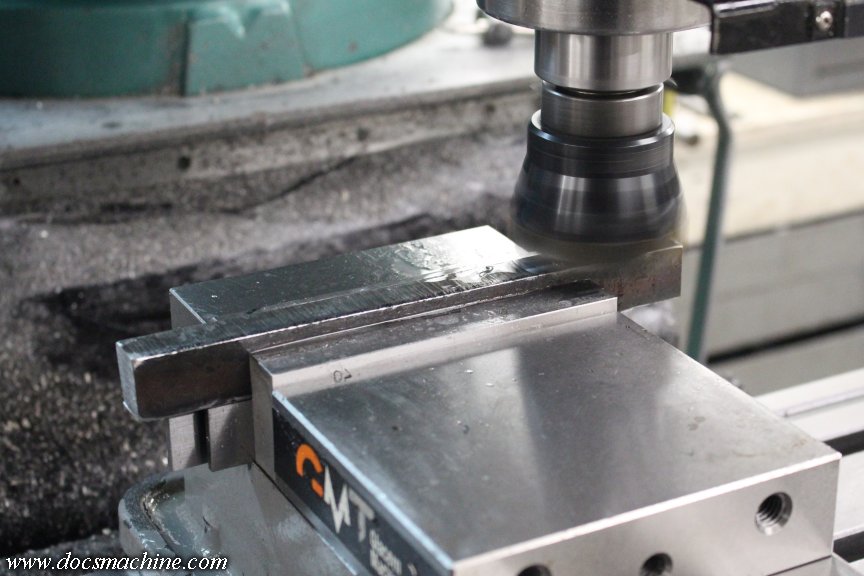
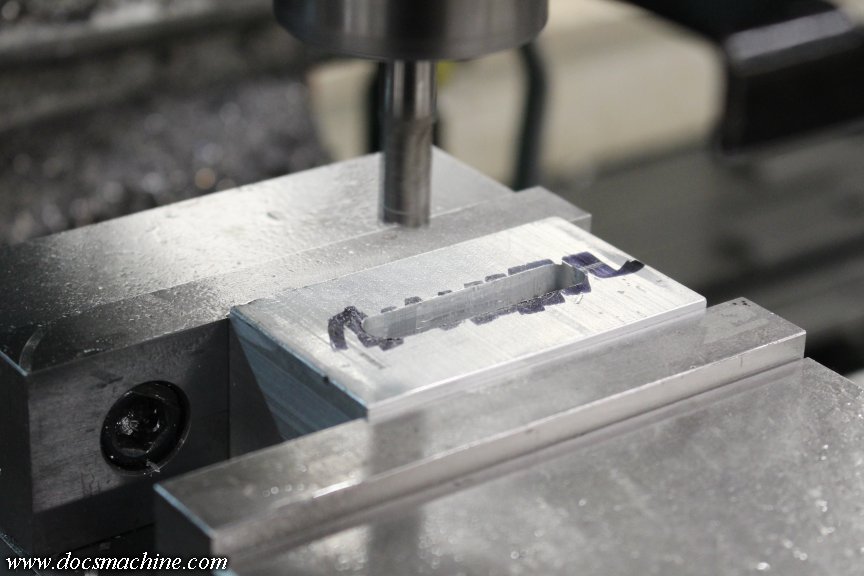
                    I dug through the scrap pile and found a chunk of flame-cut steel that had enough meat to it, sawed off a section and proceeded to mill it into shape.


                    It was, as I said, flame cut (automatic acetylene torch) so it moved as it was cut- as stressed areas from unequal cooling were milled away, the part wanted to curve slightly. So I simply kept flipping it side for side, and eventually got a fairly straight bar. Then I faced the ends...


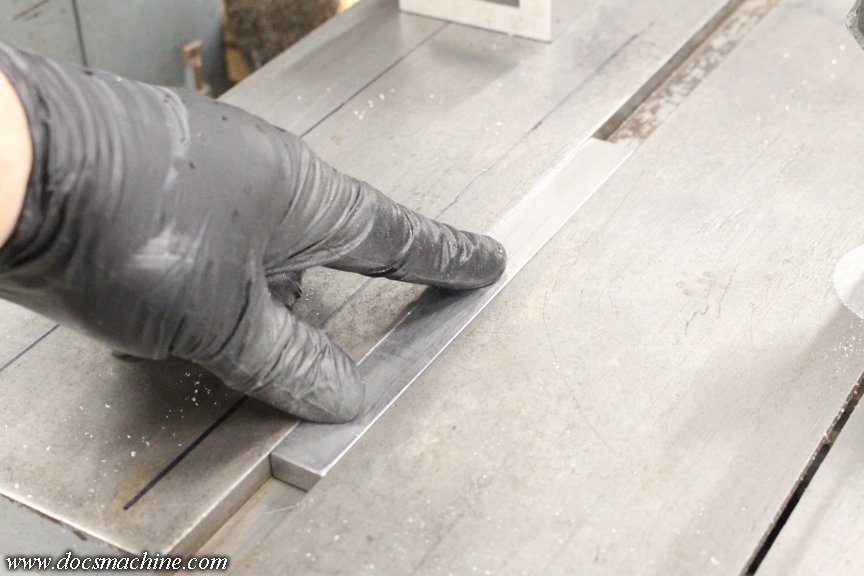
                    And checked it for a smooth sliding fit in the groove in the saw table:


                    I had a now-scrap part made out of some heavy angle aluminum, that was actually part of a table saw guide I'd made for a buddy of mine a number of years ago. He'd switched to a larger and more capable commercial unit, and so gave it back to me. The angle was an ideal piece for the fence itself:


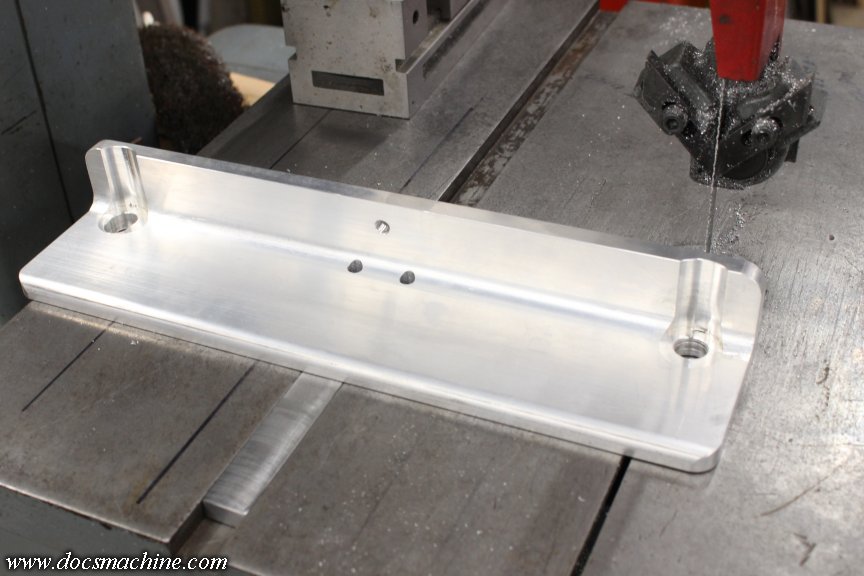
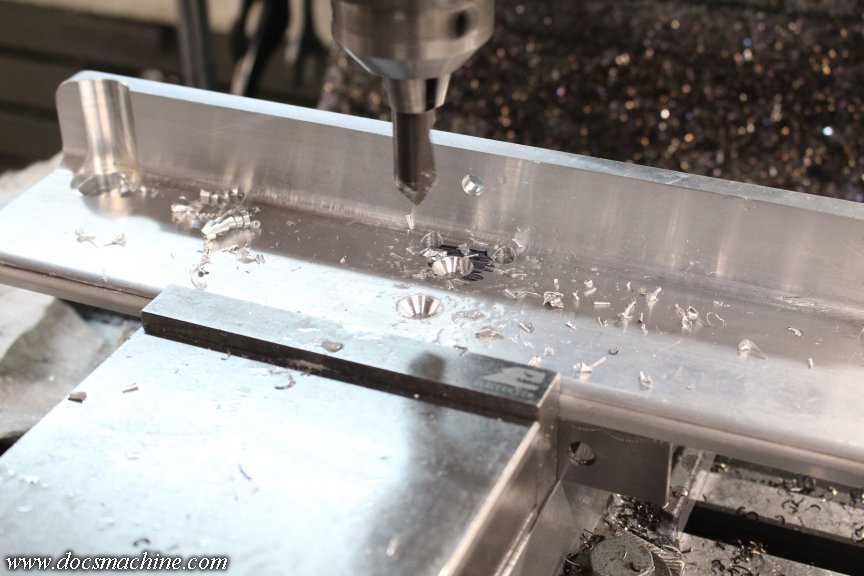
                    So I drilled and countersunk a couple holes right about 'thar...


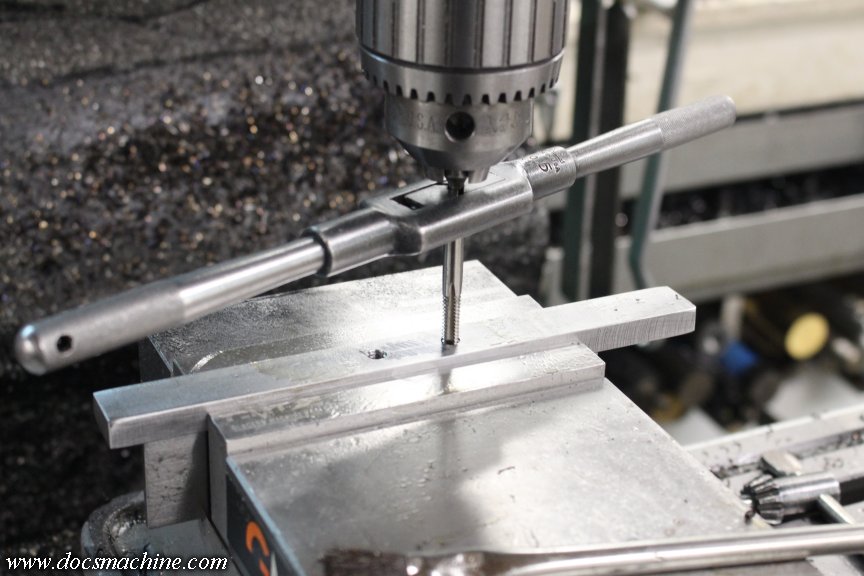
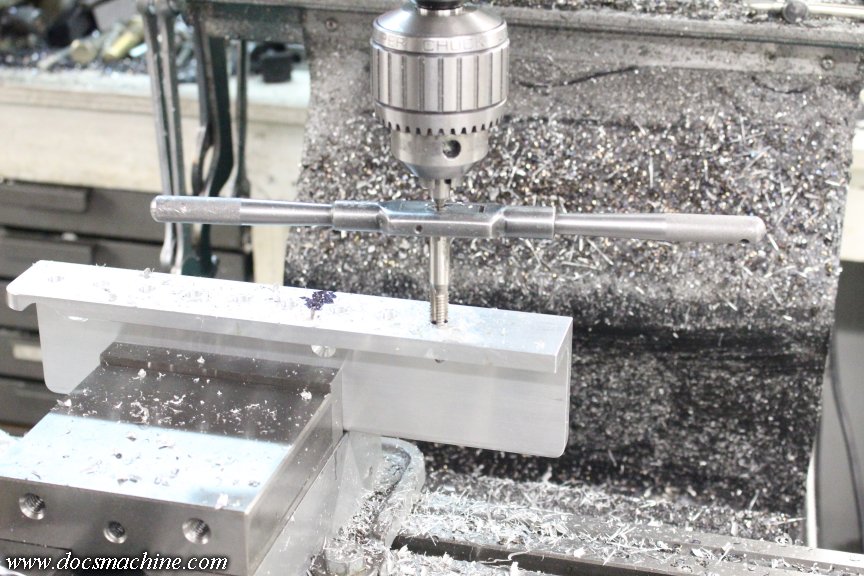
                    Drilled and tapped matching threaded holes in the steel guide bar...


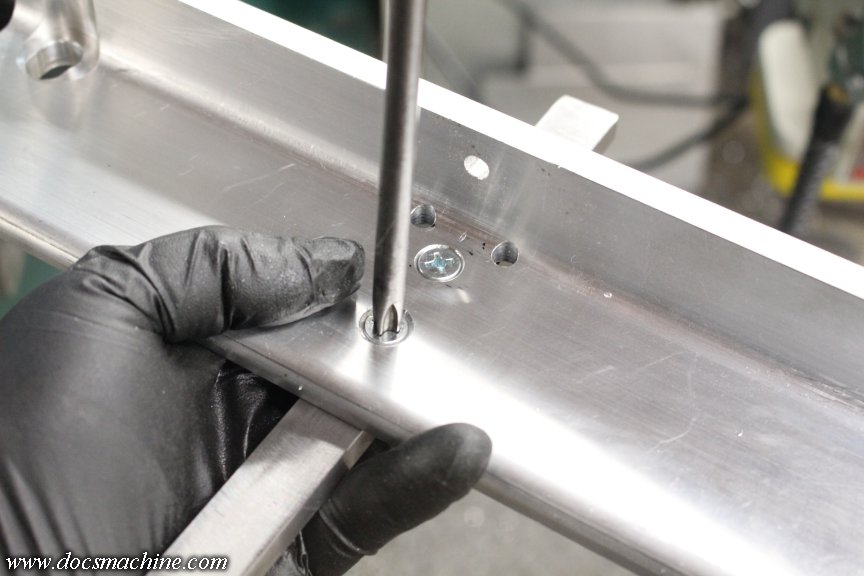
                    And screwed 'em up.


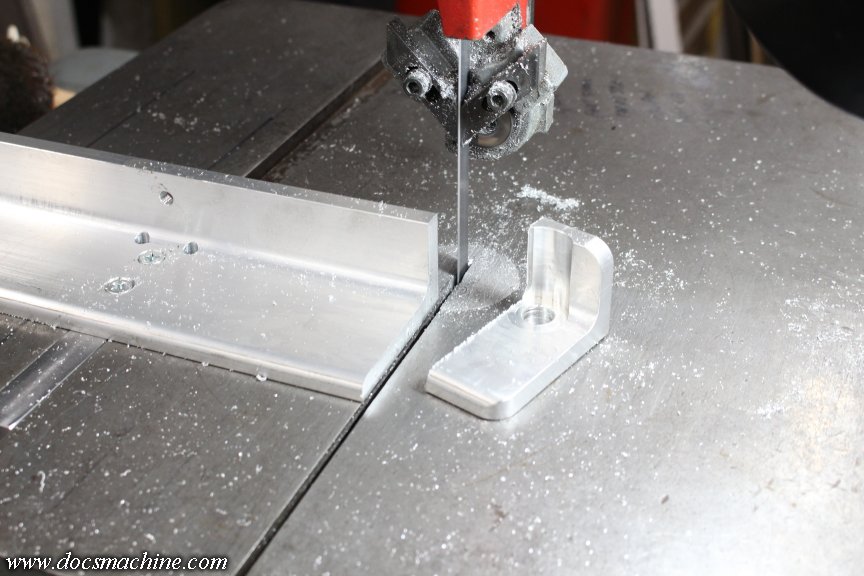
                    With that assembled, I sawed the end off of the fence, in place to get the length right...


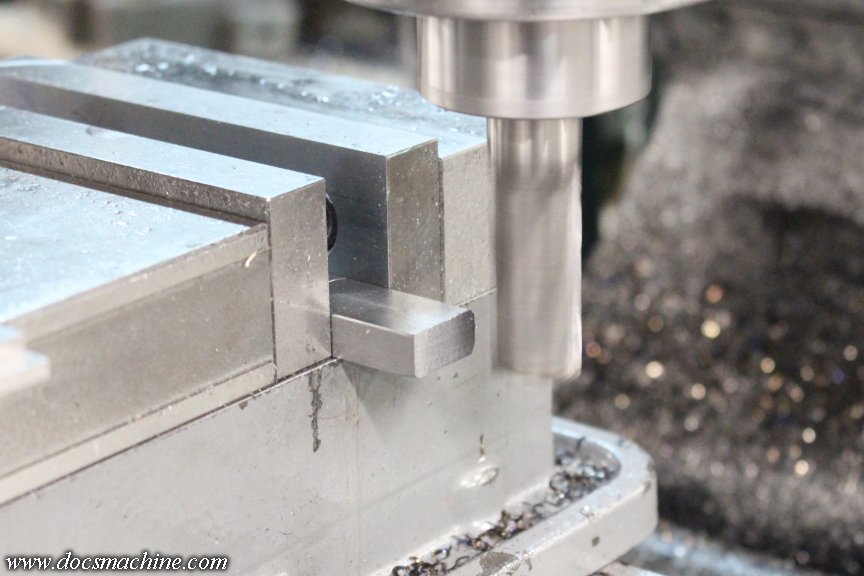
                    And then milled the cut edge smooth, which also added a touch more clearance to the blade.


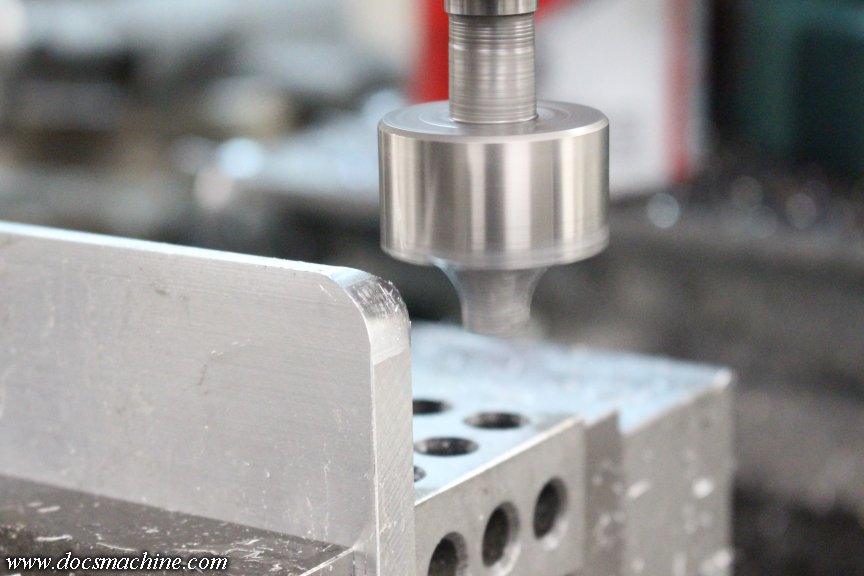
                    Since the rest of the fence had had the corners rounded, I did so to the new bottom corner as well.


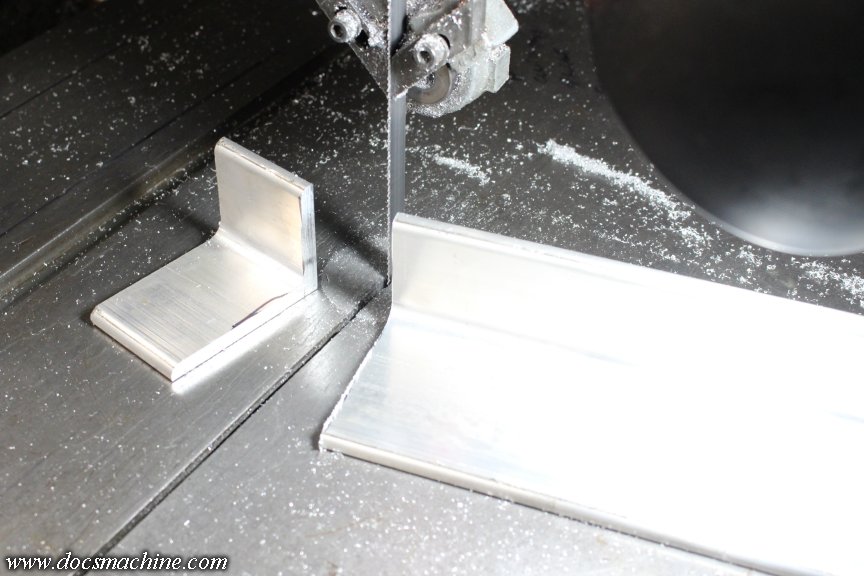
                    I then found a chunk of thinner angle and sawed off a section of that.


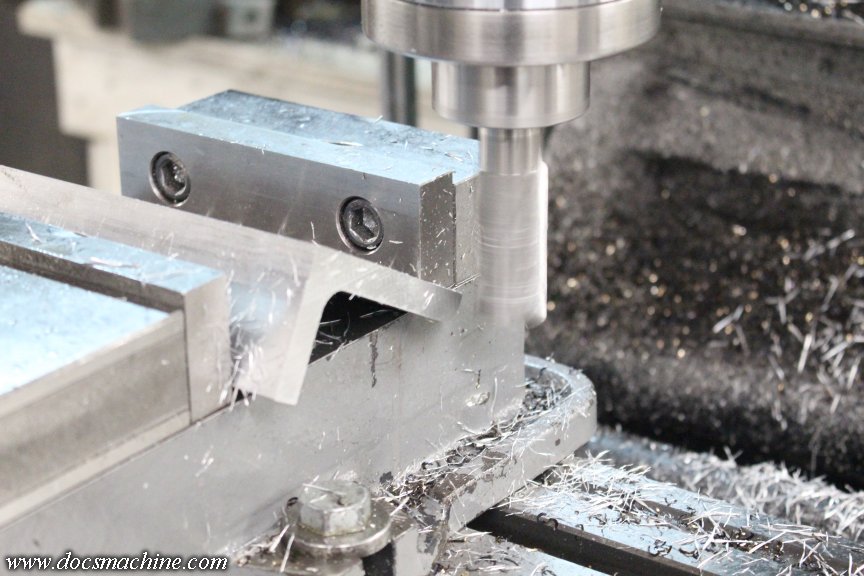
                    That got milled to height and slotted....


                    And then the fence drilled and tapped with a matching row of 3/8"-16 holes along the front face.


                    That of course gives me a place to bolt the length stop pretty much anywhere along the face- the holes are on 1" centers, and the slot in the stop is 1-1/2" long.


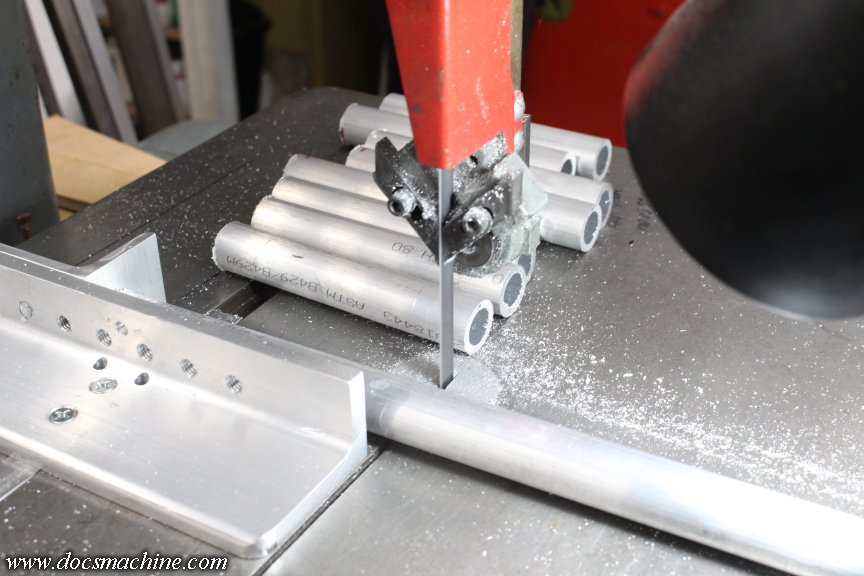
                    And with that, I set the length for the part in question, and proceeded to slice them into blanks of- for once- very uniform lengths.


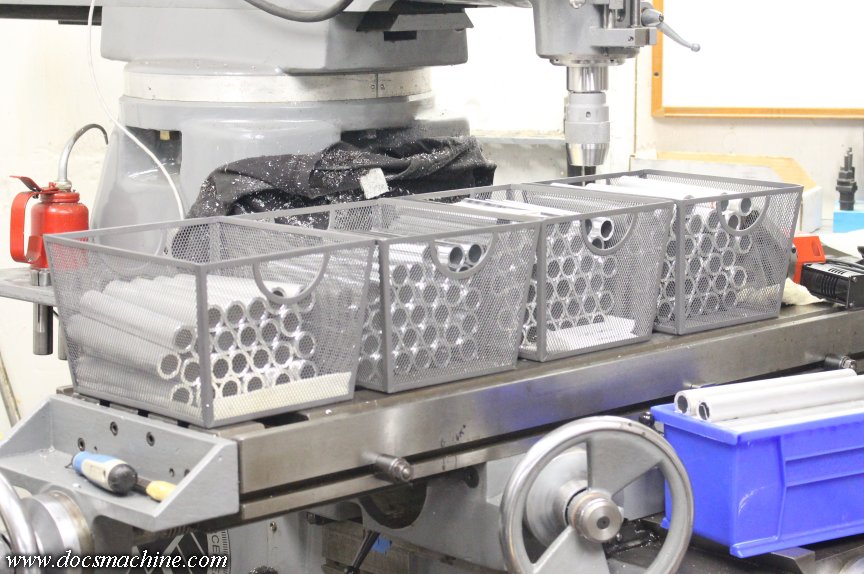
                    And this is about 2/3rds of what I'm currently working on:


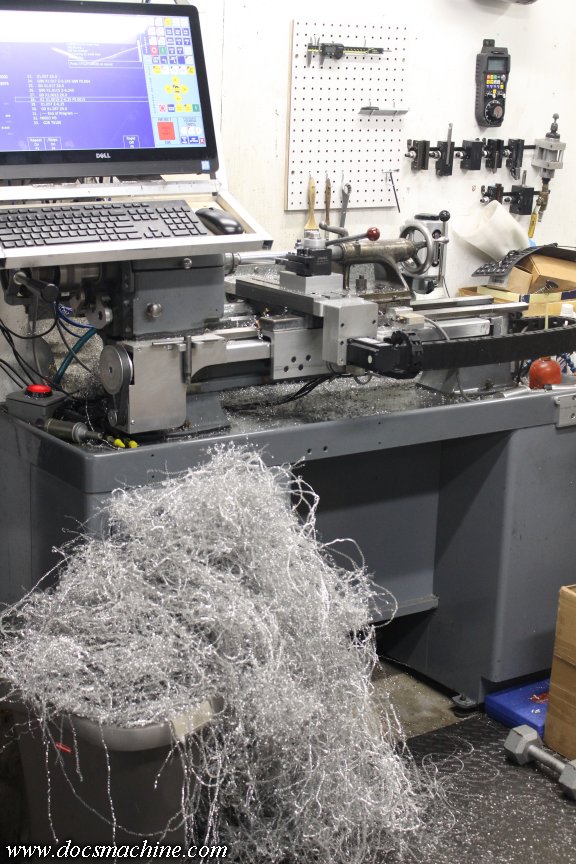
                    (They're stacked on the big mill since the Logan- the first machining step- is just to the left in that pic.)

                    Yeah, I should have made this thing years ago, but I've got it now, and I have no doubt I'll be getting a lot of use out it it from here on out.

                    Doc.​
                    Doc's Machine & Airsmith Services: Creating the Strange and Wonderful since 1998!
                    The Whiteboard: Daily, occasionally paintball-related webcomic mayhem!
                    Paintball in the Movies!

                    Comment

                    • Rolling Thunder 67
                      Old Mech Warrior
                      • Jul 2020
                      • 216
                      • Cobourg,Ontario,Canada

                      #13
                      https://youtu.be/4OLWJ1TMuNE?si=8lngEC7c4SqbTJ3-

                      Comment


                      • DocsMachine
                        DocsMachine commented
                        Editing a comment
                        There's a blast from the past. I'm not sure I've seen that since I was ten.

                        Doc.
                    • DocsMachine
                      MCB Member
                      • Jul 2020
                      • 2699
                      • Alaska

                      #14
                      Quickie project from this morning, but first, my take on a meme, from breakfast:


                      :green:

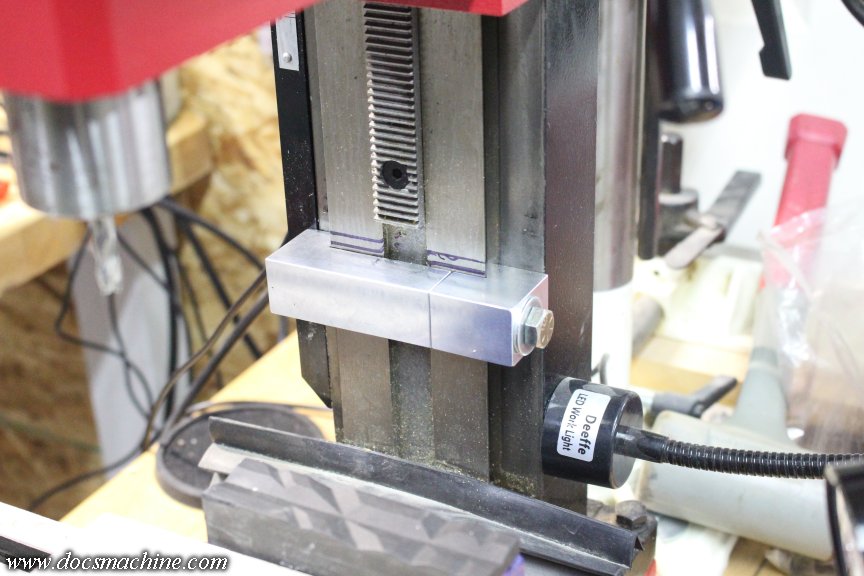
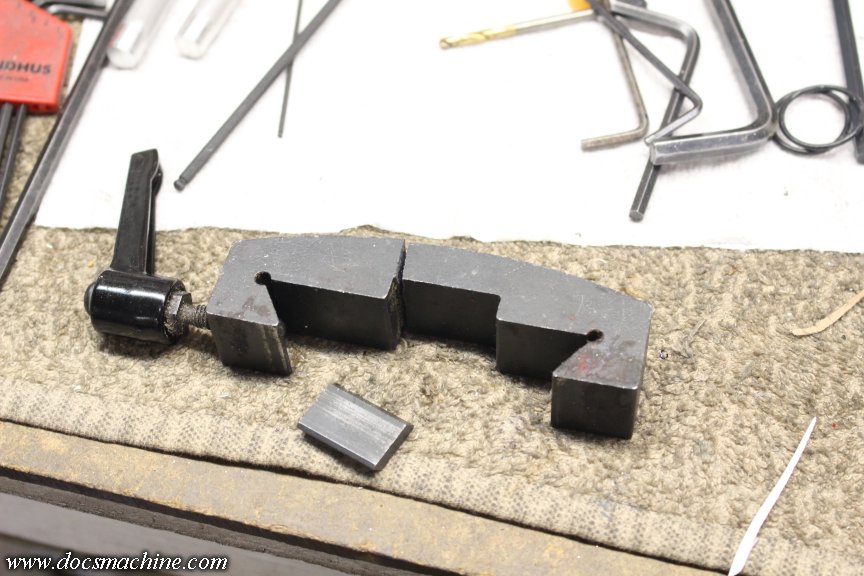
                      Buddy of mine has a couple of the typical Asian minimills- one's a Little Machine Shop, the other I think... like a Busy Bee? Either way, they're square column mills, that raise and lower the head on a dovetail, either for milling or with a typical spider handle for drilling.
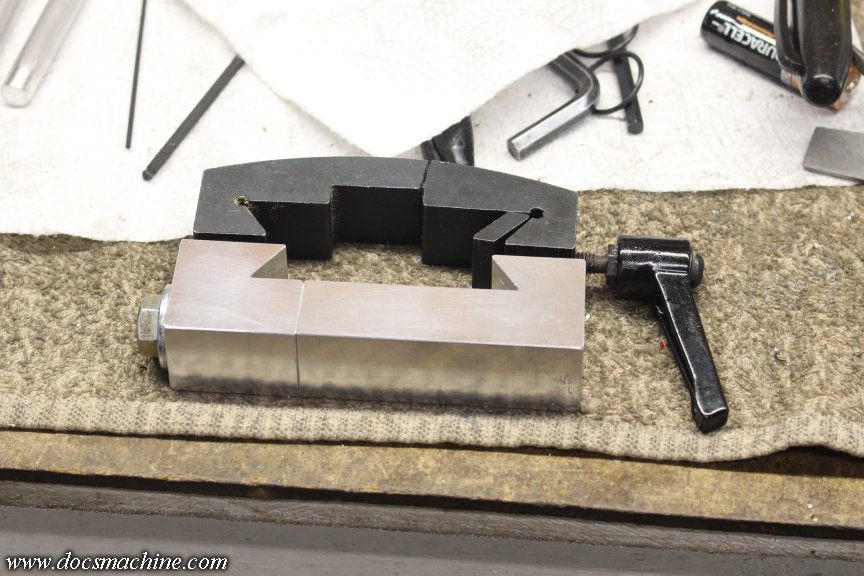
                      These come equipped with a clamp on the dovetail, which acts as a depth stop. In this case, the owner managed to break not one, but both. They're cast iron, and not ideally suited for that sort of stress, but also not available separately- the tech at LMS says he's never even heard of anyone breaking one.


                      He needed one to help with a repetitive project, so I whipped up a quick replacement.


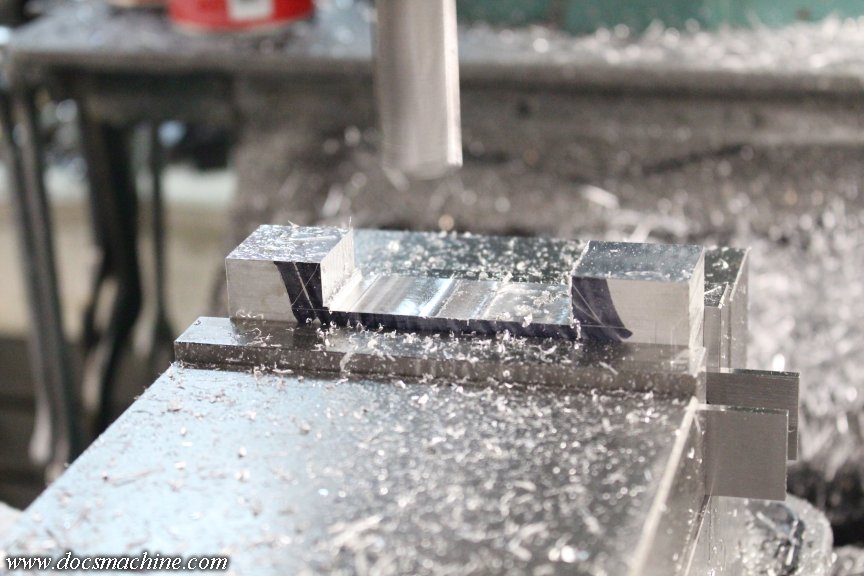
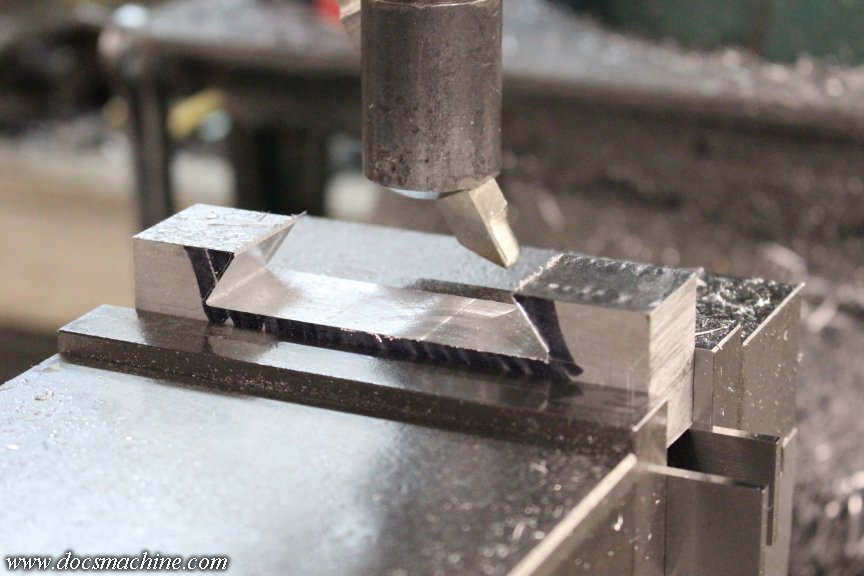
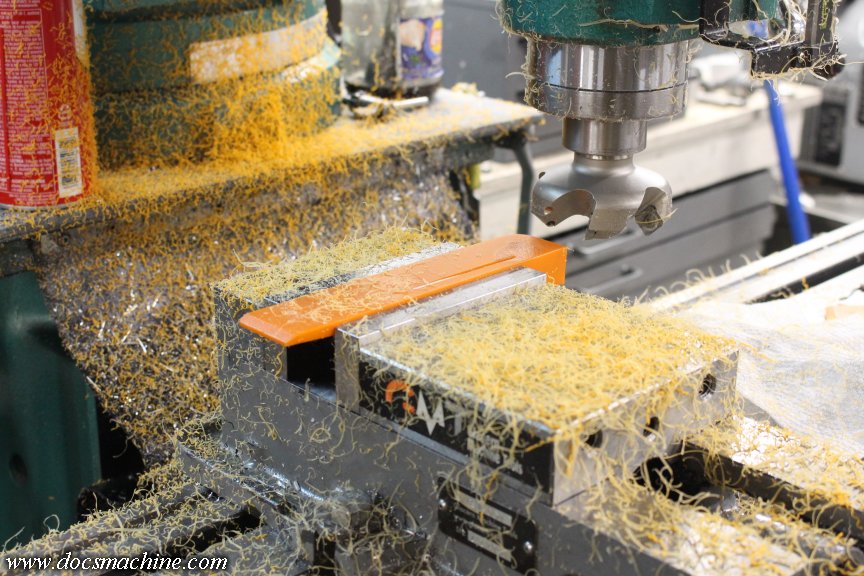
                      Now, the only tricky part of the whole thing being the mills have a 65-degree dovetail, and all my cutters have a much more common 60 degrees. McMaster has no 65 degree cutters, and every eBay listing is for a Chinese dupplier- which would make sense.

                      Rather than waiting three weeks for a Chinese part, or ordering a $40 one-use tool from a US supplier if I can even find one, I dug into my collection of fly cutters, to see if maybe I could grind a workable substitute. As luck would have it, I found that some homebrew/shopbuilt thing, that I think came with a random mess of scrap from a garage sale years ago, held the stick of HSS at 65 degrees.

                      So I just had to grind the bottom edge and the backside for clearance. It's far from ideal- the cutter body puts the bar of HSS in the center of the axis, when it should have the leading edge on center. (Which, of course, depends on how you grind the tool.)

                      But it did the job, no waiting, no cash outlay.


                      I reworked the clamp to bolt together, rather than use the pinch screw.


                      The notch in the original was clearance for the rack, but in this case, he's using the stop near the bottom of the column, so for the sake of expediency, I left it off.


                      I'll probably make another with that notch when I have time, but this gets him back up and running.

                      Any other progress? Still just churning out blanks at the moment... There's two more bags behind me.


                      Doc.​
                      Doc's Machine & Airsmith Services: Creating the Strange and Wonderful since 1998!
                      The Whiteboard: Daily, occasionally paintball-related webcomic mayhem!
                      Paintball in the Movies!

                      Comment

                      • DocsMachine
                        MCB Member
                        • Jul 2020
                        • 2699
                        • Alaska

                        #15
                        What's the proper SFM for carbide on sharp Cheddar?


                        Doc.​
                        Doc's Machine & Airsmith Services: Creating the Strange and Wonderful since 1998!
                        The Whiteboard: Daily, occasionally paintball-related webcomic mayhem!
                        Paintball in the Movies!

                        Comment

                        Working...