Inside Doc's Shop 2026

Collapse
X
 
  • Time
  • Show
Clear All
new posts
  • DocsMachine
    MCB Member
    • Jul 2020
    • 2699
    • Alaska

    #46
    Another entry in the old-paper-photos series! (As a reminder, I went digital in 2005, so before that I of course used a 35mm film camera, and still have several boxes of paper photos and negatives.)

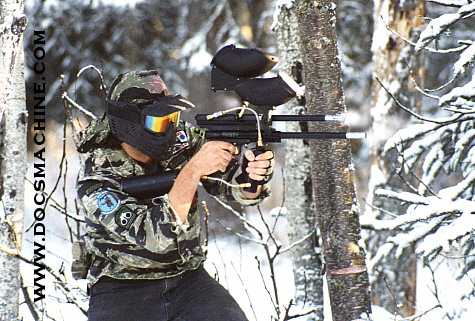
    I haven't had too much time to dig through those boxes, but by chance found this photo mixed in with some other old papers I ran across:
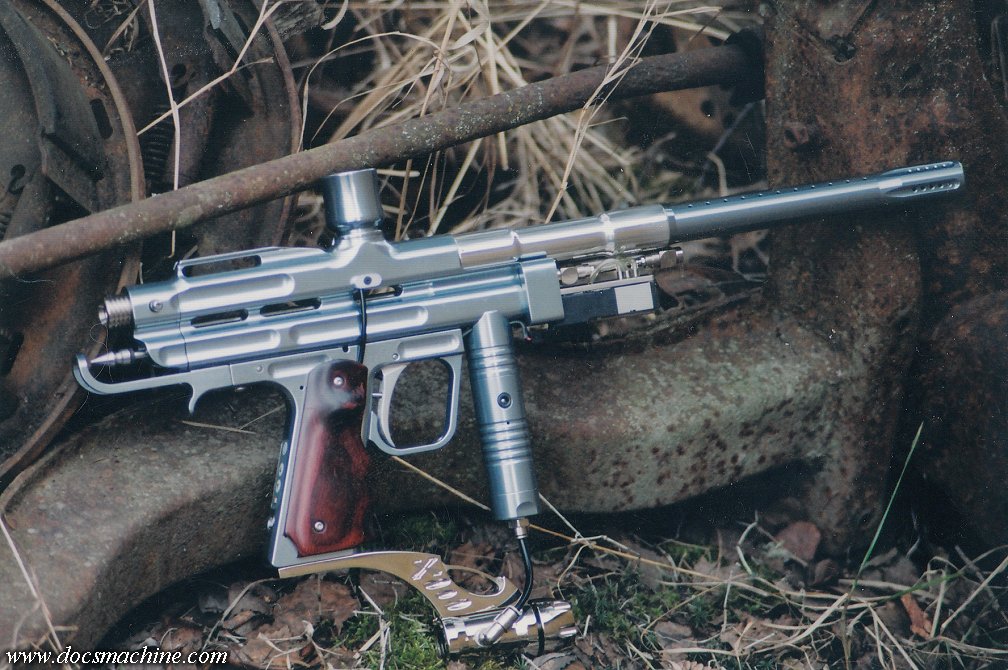


    That is an AutoCocker I built for one of the local players, I want to say around 2002? The RaceGun E-Frames were still a thing, but I think RG closed down between my starting on this gun, and finishing it.

    The basic specs are a post-2K centerfeed body (I honestly don't recall the origins) which I converted to Angel thread for the feed necks (which, as Grandpa Simpson says, was the style at the time ) a nickeled Lightning bolt and pull pin, a basic RaceGun "computer grip", SP wood grips, a Gladiator reg, I believe that's a first-gen QuickRam. and Clippard, I think, QEVs.

    I will admit I wasn't 100% happy with the milling, but what you see is exactly what the client wanted and how he ordered it.

    I made, from scratch, the backblock, the beavertail, the trigger, the eye covers, the Freak back that took DYE screw-in tips (or... was that a White Wolf DYE-style Freak tip? ) the ASA, which was made to match the Gladiator- and note it has no timing rod passage- the front block and the custom manifold that takes "Shoebox" Shocker Parker/Humphries solenoids.

    I don't recall which valve it had, though I was on a Tornado kick back then, and the Lightning suggests that, too.

    We powered it up again about ten-twelve years ago, and it still worked and sealed perfectly. At this point I'd want to give it a full rebuild before we did anything with it again, and gods only know if the battery will still hold a charge. Still has the data cable (serial) the charger and even a mini-CD with the manual on it.

    Even a second matching-anno feed neck- I made two, of different sizes, since that was before clamping necks really got going.

    And I still have it, it's been hanging on my display wall for a good many years now.
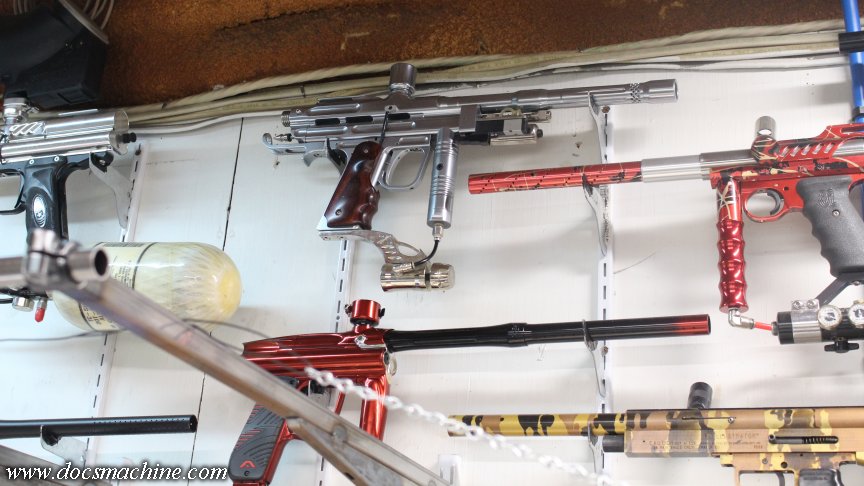


    Or rather, I got it back. When we last fired it up, the client wanted me to hang on to it for a while. I got the impression he was, as they say, "going through some stuff", and I suspect he wanted me to hold on to it so nothing happened to it while he sorted said 'stuff' out. Could have been as simple as just starting out and may have had a hard time keeping the rent paid, or it might have been... well, maybe drugs. I dunno, he didn't say, I didn't ask. Either way it definitely wasn't a case of "I'll swing back by next week", and it wasn't a case of anything being owed on it.

    At that same time, that was 10-12 years ago, as I said. I have no contact information for him, and haven't run into him in at least 5-6 years.

    Hope he comes back for it.

    Doc.​
    Doc's Machine & Airsmith Services: Creating the Strange and Wonderful since 1998!
    The Whiteboard: Daily, occasionally paintball-related webcomic mayhem!
    Paintball in the Movies!

    Comment


    • Swedgin!!
      Swedgin!! commented
      Editing a comment
      That’s solid of you to hold it for him after all these years 💯
  • DocsMachine
    MCB Member
    • Jul 2020
    • 2699
    • Alaska

    #47
    As of July 1st, Doc's Machine & Airsmith Services has been in operation for twenty eight years. Officially started July 1, 1998.

    I attribute my longevity to skill, determination, dedication, obstinacy, stubborness, sheer ignorance, misplaced optimism and just plain pig-headed obstreperousness.

    And I couldn't have done any of it without you lot. Customers past, present and future, supporters, readers, Patrons, fans, friends and even those that simply don't wish me any specific harm.

    I'm arguably the longest-running paintball machinist/airsmith, if we add the qualifiers of being always under the same shingle and in the same shop, and I hope to keep going for a long time to come.

    Thank you all for your support, and I hope to have more to show you all in the near future!

    Doc.

    https://www.docsmachine.com/
    https://www.the-whiteboard.com/
    https://www.ebay.com/usr/docsmachine
    https://docsshop.storenvy.com/
    https://www.patreon.com/c/TheWhiteboard
    https://www.patreon.com/c/DocsMachineShop

    Doc's Machine & Airsmith Services: Creating the Strange and Wonderful since 1998!
    The Whiteboard: Daily, occasionally paintball-related webcomic mayhem!
    Paintball in the Movies!

    Comment


    • Str1x
      Str1x commented
      Editing a comment
      I've been admiring your work for 26 of those years, I believe I first found your site around 2000 or so. Bought quite a few of your products over the years... I've got your detents in my markers, your AC threaded adapter in my mag, traccer spacers, and most recently you saved my butt with a lower tube CO2 cart rod for a KP2. I'm super glad you're planning on being around for a long time to come, we need you. Thanks for doing what you do Doc.
  • DocsMachine
    MCB Member
    • Jul 2020
    • 2699
    • Alaska

    #48
    In my earlier days as a car-guy, I was a bit of the local carburetor expert. The cheap cars us snot-nosed kids could actually afford often still had carbs, and were even back then old enough said carburetors always needed a good cleaning and rebuild. I was one of the few people that dared delve into the pits of those boxes of Black Magic- and also weird enough to actually own and read books about them.

    As you might imagine, the interest and need of such dark arts has somewhat waned over the years, and the last rebuild I did was on the Quadrajet on my Cutlass, back around 2011-2012.

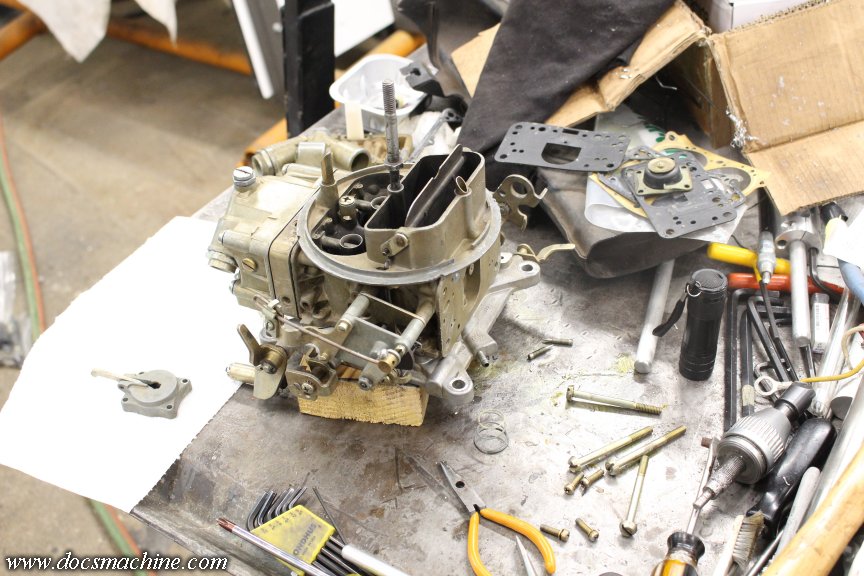
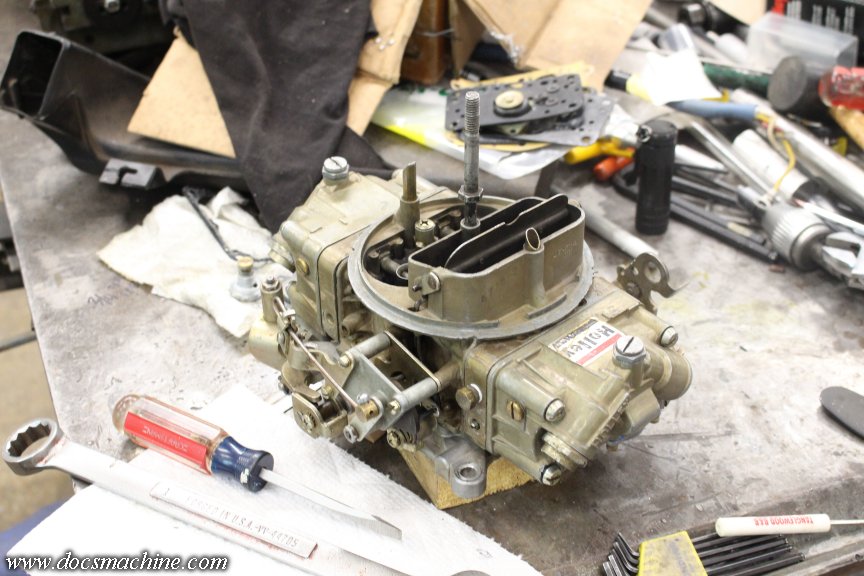
    But, a friend of a friend heard through the grapevine I handled such matters, and he brought me a truly old-school hot-rod Holley last week.


    I haven't rebuilt a double-pumper in several dogs' ages, but these things are fairly simple, and this particular one, as it turns out, was only in need of a cleaning. The guy clearly has some really old gas in it- it was urine yellow and when some spilled out onto the workbench, it literally took half a day to evaporate. You can see the faint stains to the right of the carb:


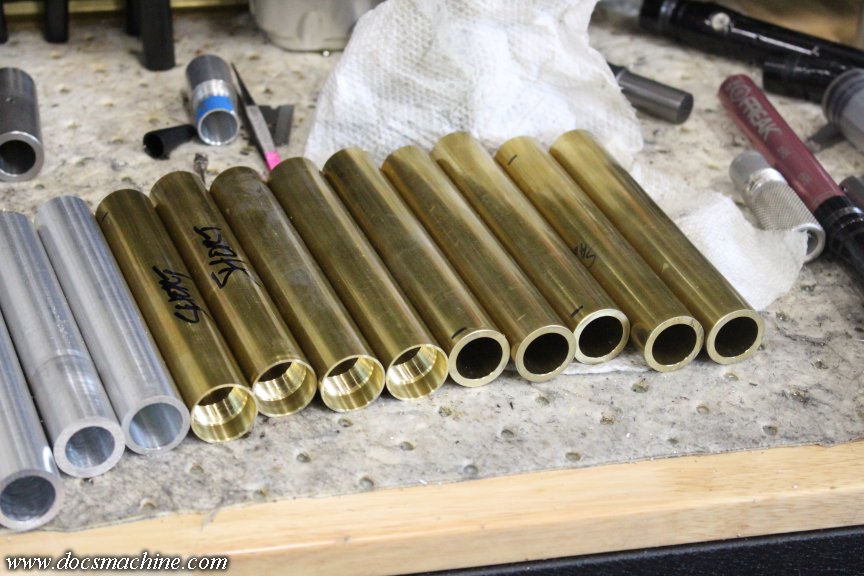
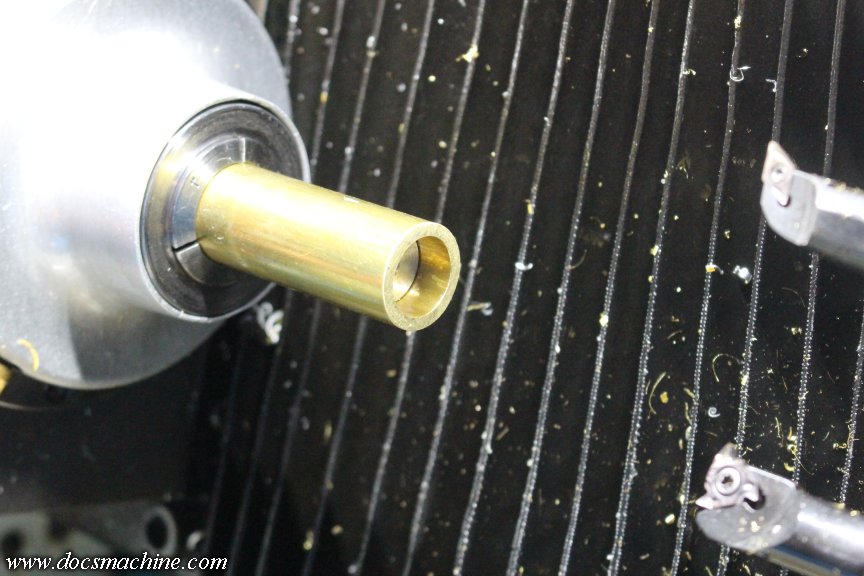
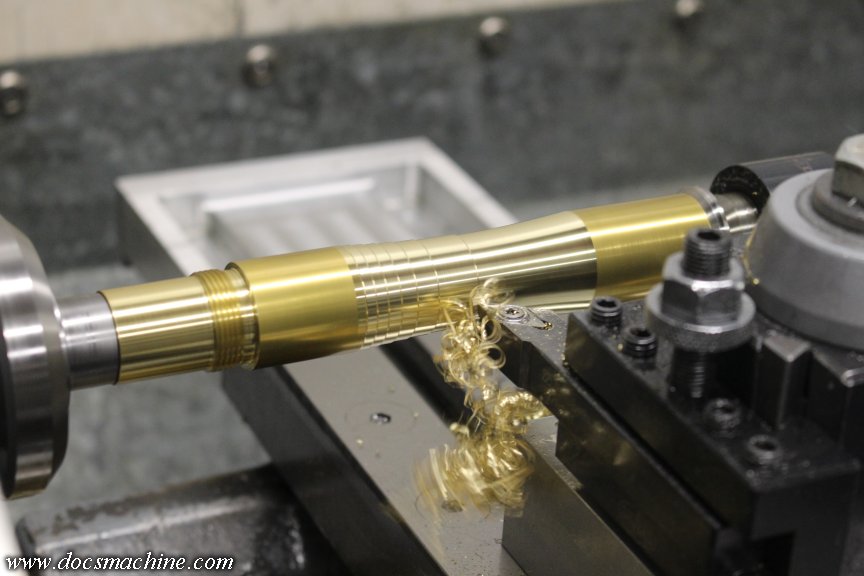
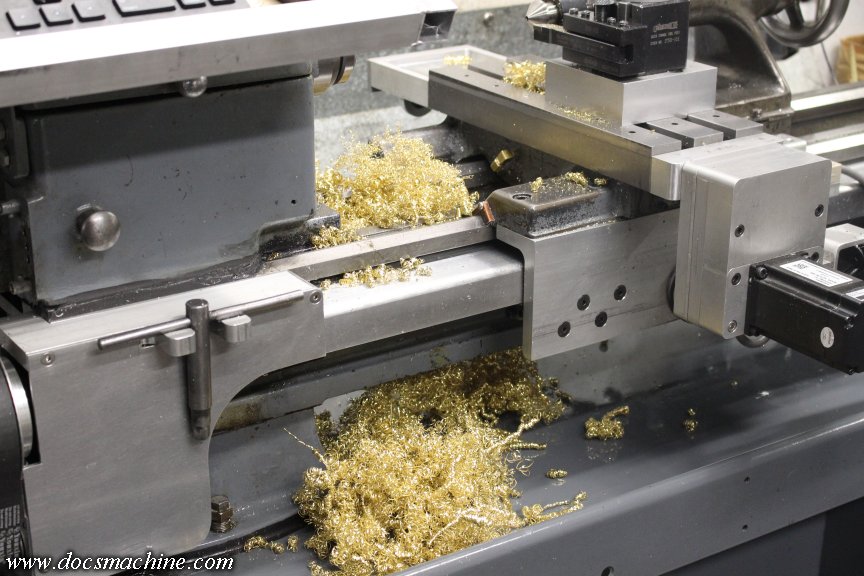
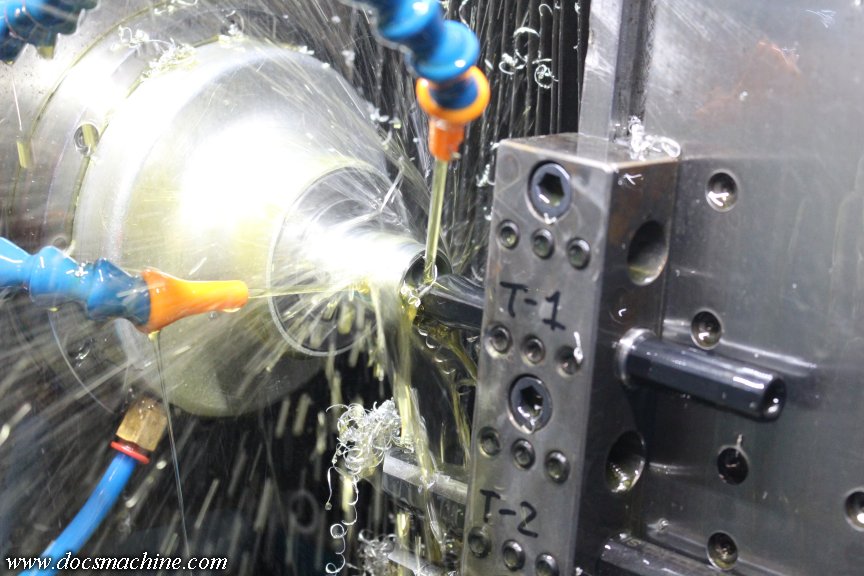
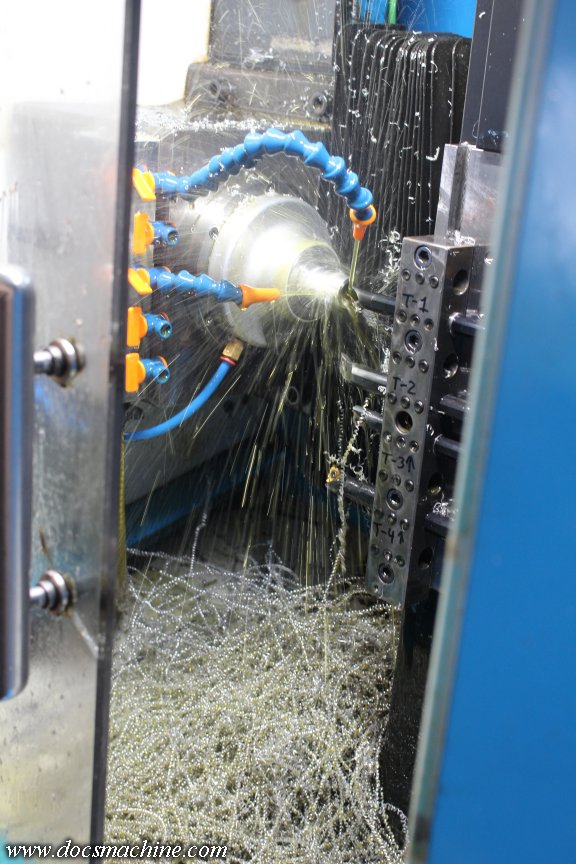
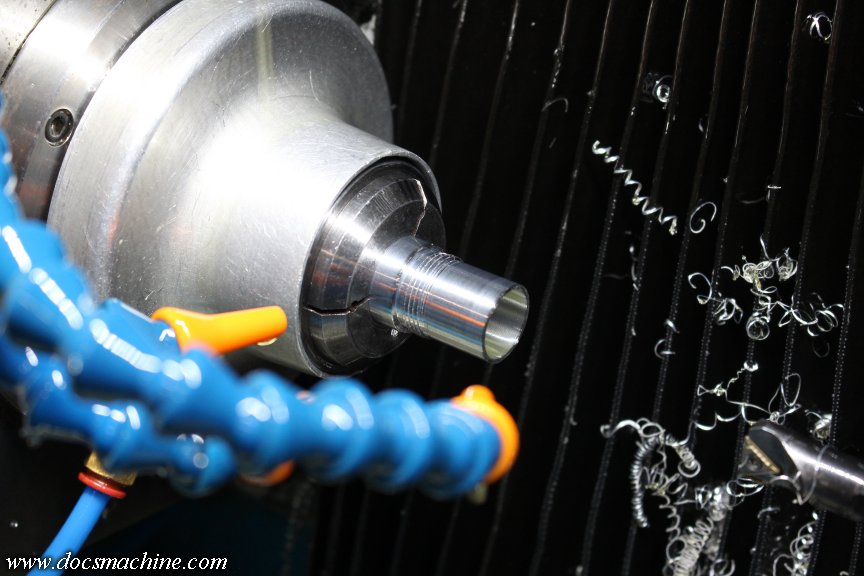
    In other news, past few days I've been pushing parts through the Omniturn again- new YT video for ya- including a somewhat overdue batch of brass.


    Problem is, I've been having issues with chatter, which is partly due to the tools- the cutting inserts- not being optimized in shape or angle for brass.


    In the past I've been able to tweak the speeds & feeds to eliminate it, but in this case, I'm working to try and standardize a small library of programs. That lets me run another batch of parts later, with minimal setup. I want to keep the program dialed in for the usual aluminum parts, so that meant taking alternative steps.

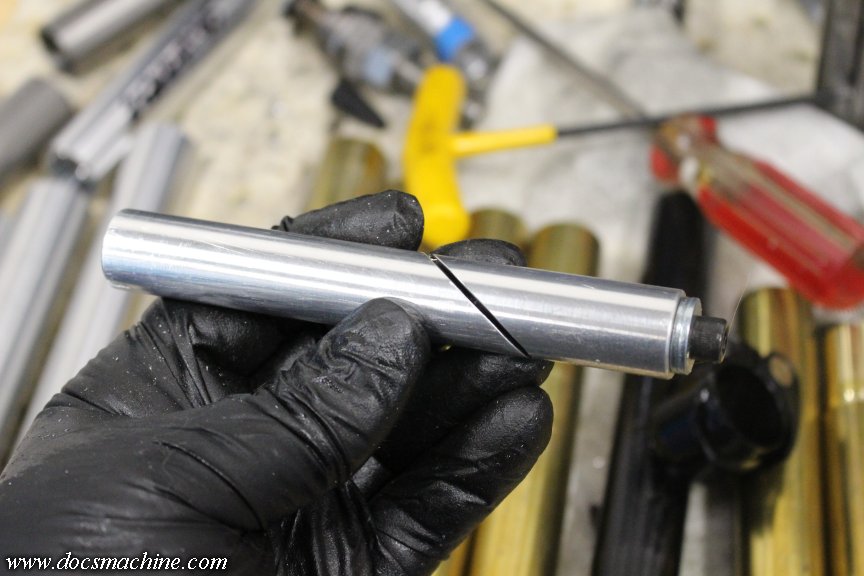
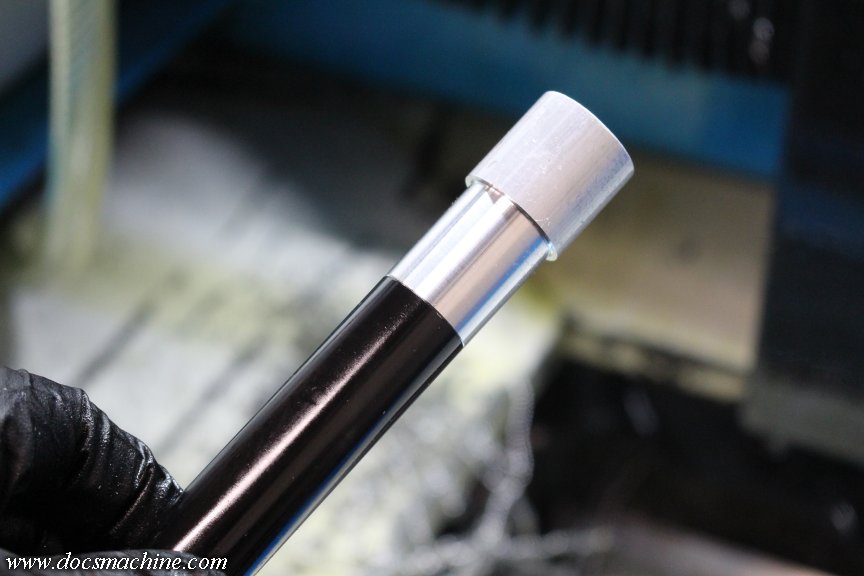
    Chatter is of course simply a harmonic, and brass "rings" nicely- which is why they make bells and cymbals and things out of it- I simply needed to dampen those harmonics. So, after a little thought and some lathe time, I came up with this:


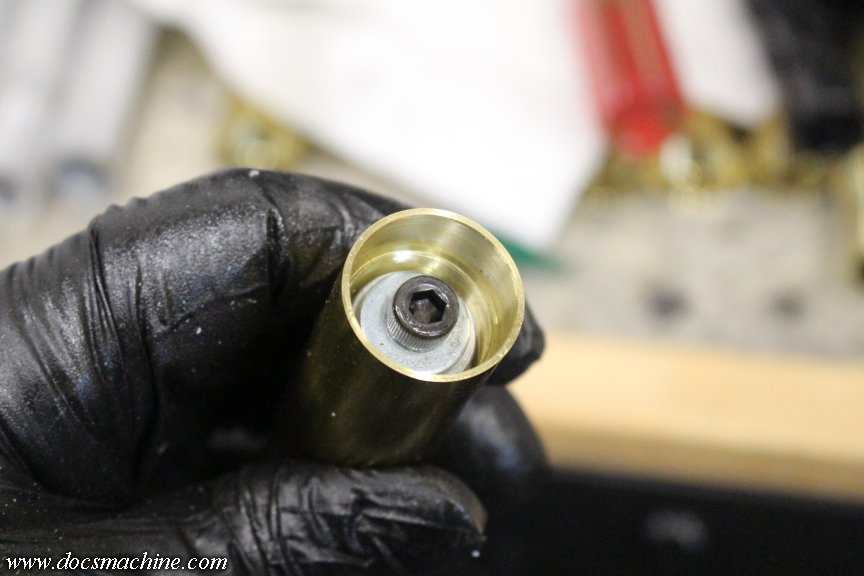
    It's just an aluminum rod, turned to fit loosely in the brass material bore, with a bolt and a bandsawed wedge. When tightened into the bore, it adds mass and dampens the vibration.


    And that solved the issue. No change in feeds and speeds, and as you can see in the above video, no chatter whatsoever.


    Should have the rest of the brass done by this evening, and start on the profiling tomorrow.

    Doc.​
    Doc's Machine & Airsmith Services: Creating the Strange and Wonderful since 1998!
    The Whiteboard: Daily, occasionally paintball-related webcomic mayhem!
    Paintball in the Movies!

    Comment

    • DocsMachine
      MCB Member
      • Jul 2020
      • 2699
      • Alaska

      #49
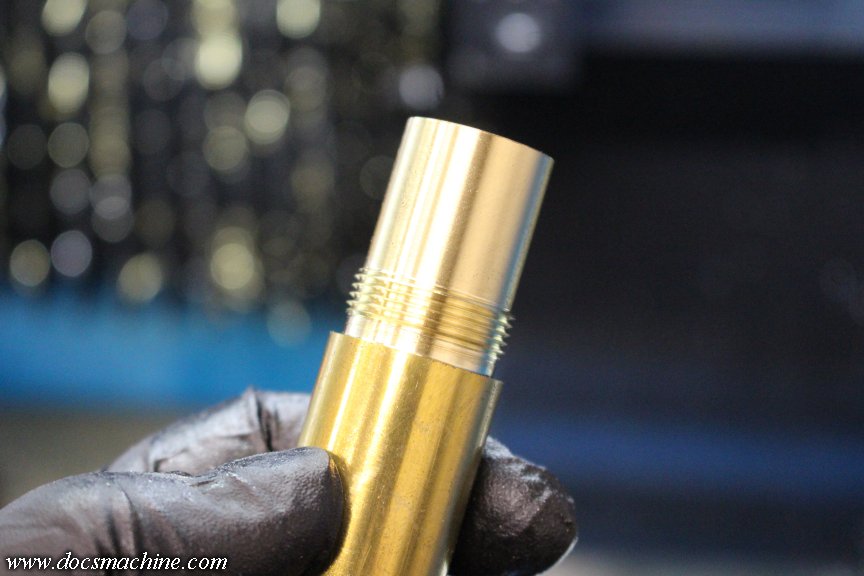
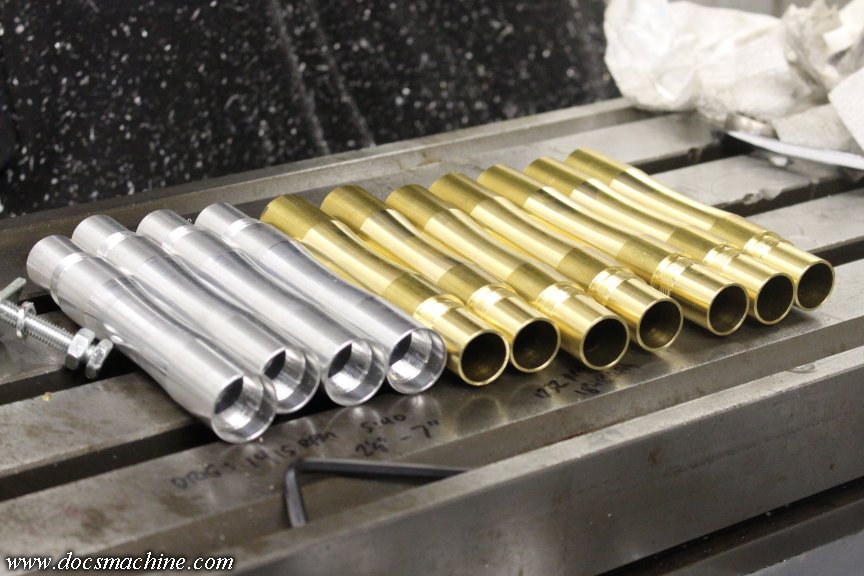
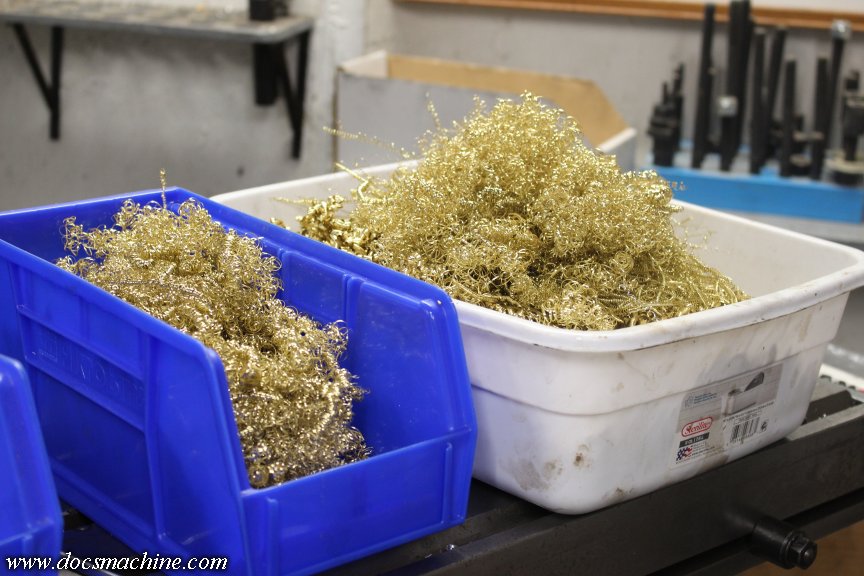
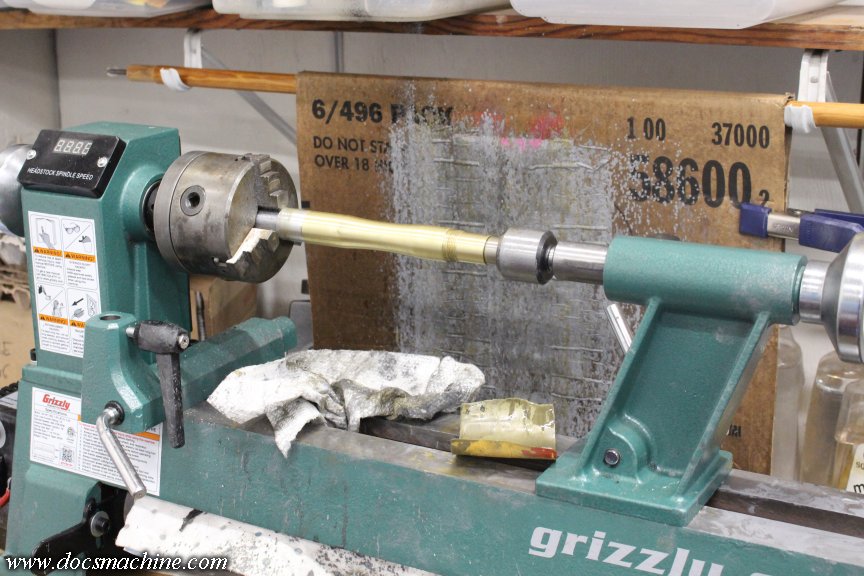
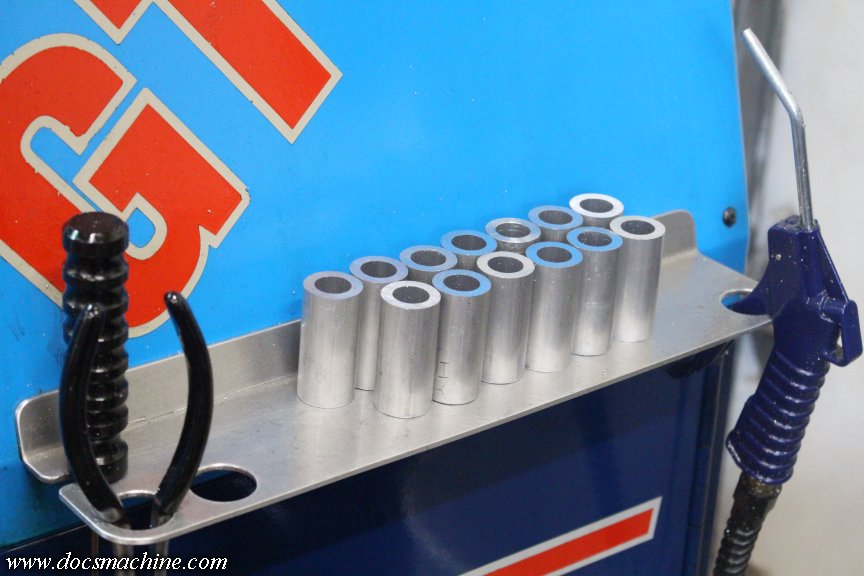
      Brass!


      (And a little bit of not-brass. )

      Doc.​
      Doc's Machine & Airsmith Services: Creating the Strange and Wonderful since 1998!
      The Whiteboard: Daily, occasionally paintball-related webcomic mayhem!
      Paintball in the Movies!

      Comment

      • DocsMachine
        MCB Member
        • Jul 2020
        • 2699
        • Alaska

        #50
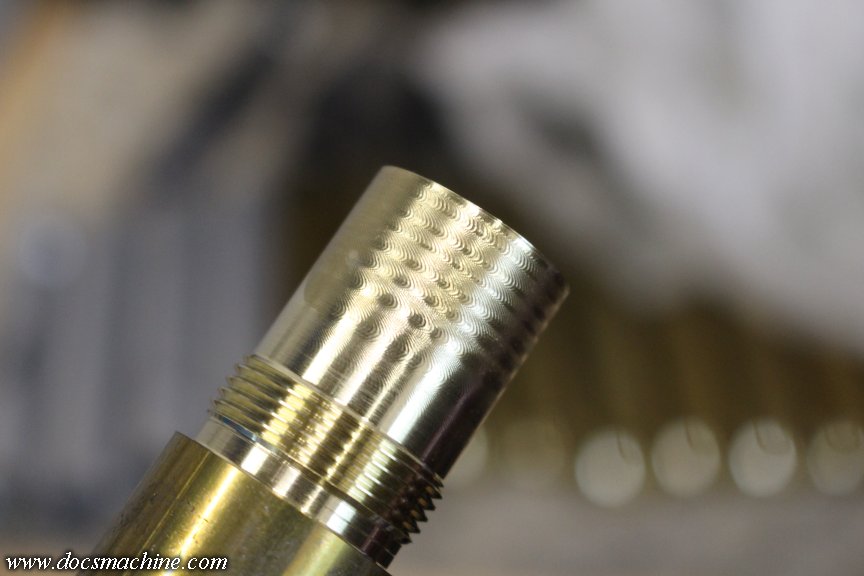
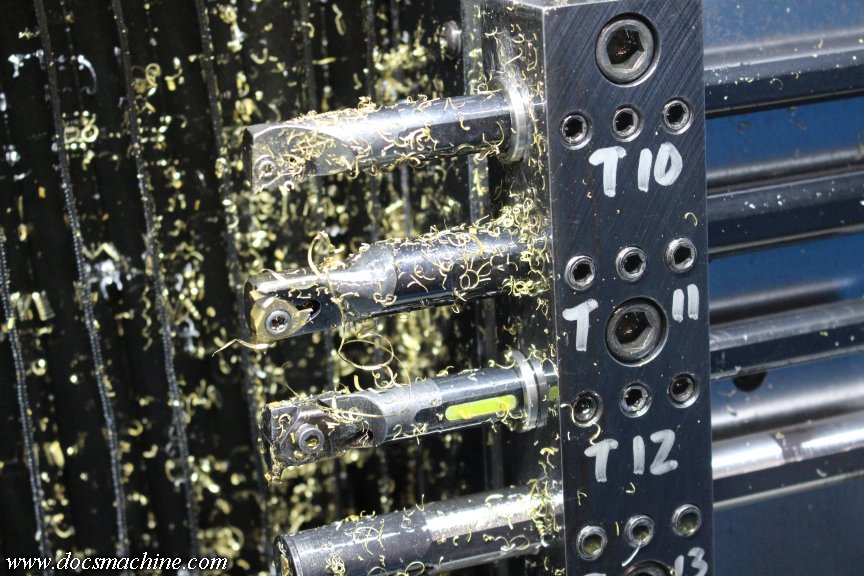
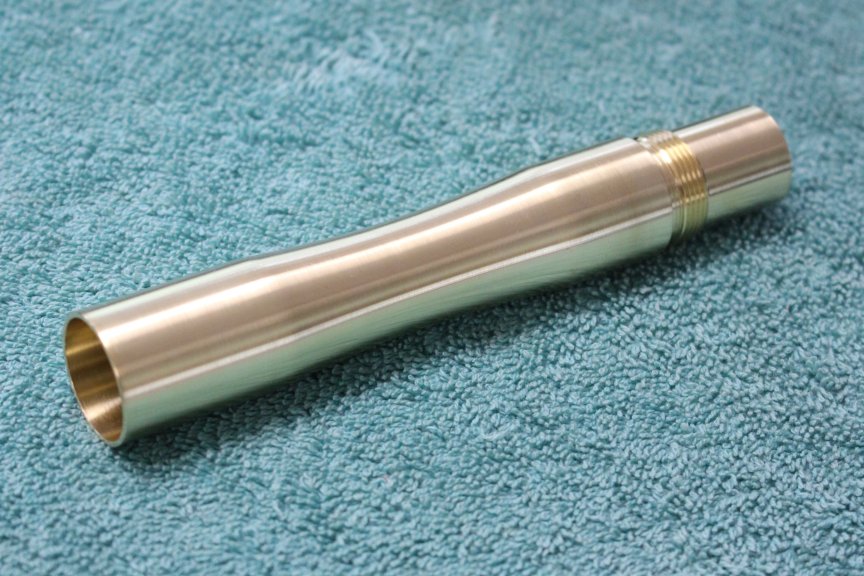
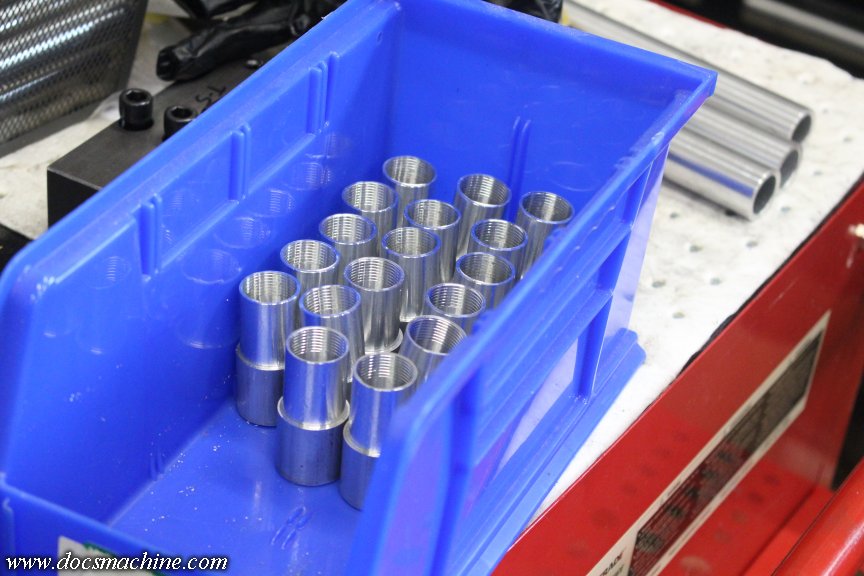
        I needed to get a couple of jobs off the table while I had this tool group set up and adjusted, and one of them was the rest of this brassy goodness.


        All in all, finished up another baker's dozen of these barrel backs- almost all of my on-hand material- and got 'em buffed and scrubbed and ready to head out the door.

        Doc.​
        Doc's Machine & Airsmith Services: Creating the Strange and Wonderful since 1998!
        The Whiteboard: Daily, occasionally paintball-related webcomic mayhem!
        Paintball in the Movies!

        Comment

        • DocsMachine
          MCB Member
          • Jul 2020
          • 2699
          • Alaska

          #51
          Heh. Had a recent customer email me after receiving his package, thanking me for it. He also mentioned- very tongue in cheek - that he wasn't sure if a simple Freak barrel back really qualified as "Mad Science".

          For those not following the gist, I've been using the phrase "The Mad Science of Paintball" as a catchphrase for a number of years now, including on business cards and a "thank you" card I include in each order.

          That made me think- most of my website is... to be frank, "not well organized" would be an understatement. I have over 5,000 photos on my site, going back some 28 years now, and it occurred to me that not everyone has seen some of the old stuff. I'd hazard a guess that many haven't seen any of it.

          Which made me think further that I ought to put up a "mad science" page- some might call it a "museum" page - to better showcase some of it. Heck, my main website could use the occasional freshening either way!

          There's the infamous Doc9000 (and Doc himself...)


          The Empire Intimidator modified to work with a Warp Feed:


          My Angel DynaBolt, which mostly cured a major feed geometry issue with the early Angels, a mod which WDP themselves implemented not that long after...


          Stainless hardlines with no fittings...


          A right-hand-feed Angel LCD body...


          Pneumatic-Assist Phantom pumps...


          The infamous Rocking Trigger, about which Larry Cossio himself contacted me to let me know that it wasn't tourney-legal according to at-the-time NPPL rules...


          And of course the world-famous Vee-Twin, the first double-barrel Autococker...


          I could fill an infinite-scroll page with pics like that- especially if we include minor inventions, unique products and one-off custom mods.

          I was gonna spend some seat time this weekend refreshing some/all of my eBay listings, and if I have time, start doing the same to Storenvy, maybe I'll root through my archives and put together a "this is Mad Science" page.

          Doc.​
          Last edited by DocsMachine; 07-17-2026, 01:22 AM.
          Doc's Machine & Airsmith Services: Creating the Strange and Wonderful since 1998!
          The Whiteboard: Daily, occasionally paintball-related webcomic mayhem!
          Paintball in the Movies!

          Comment

          • DocsMachine
            MCB Member
            • Jul 2020
            • 2699
            • Alaska

            #52
            Today was the day! I'd been holding off a couple of multi-hundred-part runs while I try to catch up on a handful of smaller ones, and finally caught up enough to start.

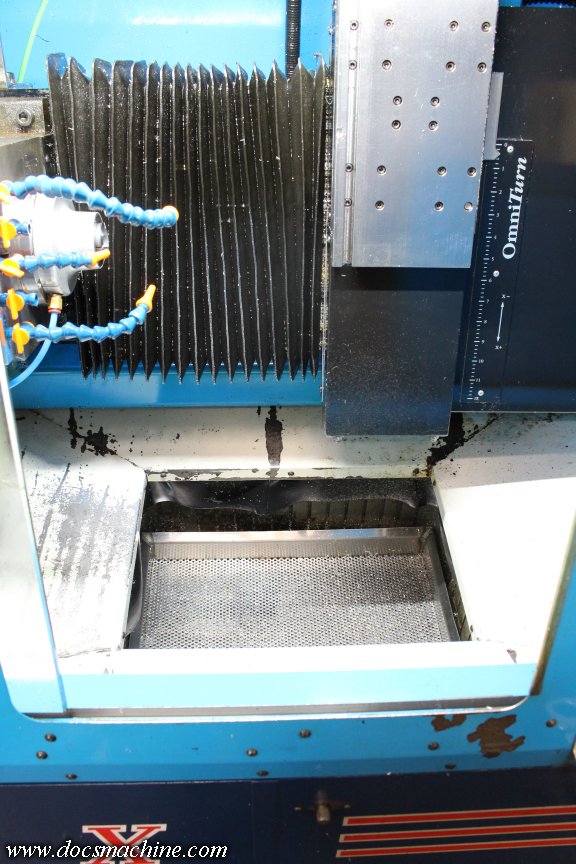
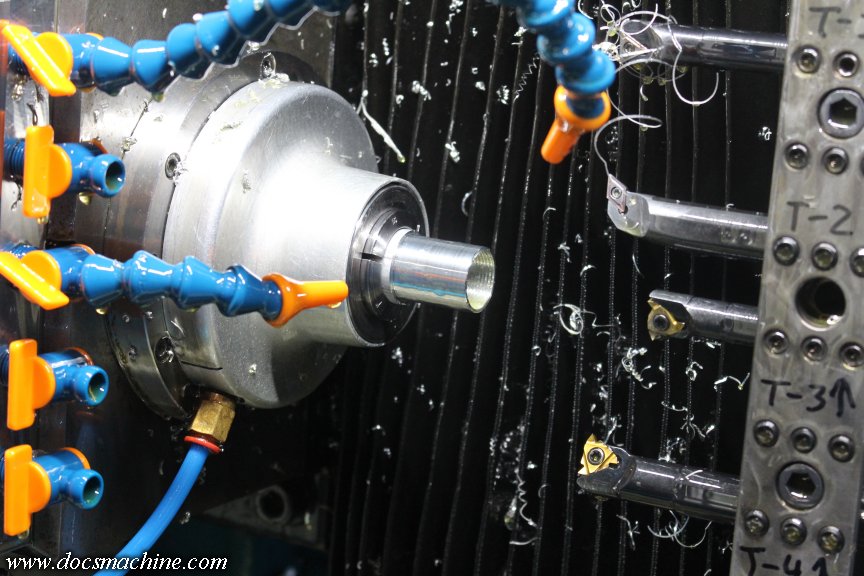
            The trick here was that I needed to swap to a new tool set, since the one I'd been running these past few months didn't have the right ones. So I stripped out the previous set, and spent a solid half hour cleaning out the machine.


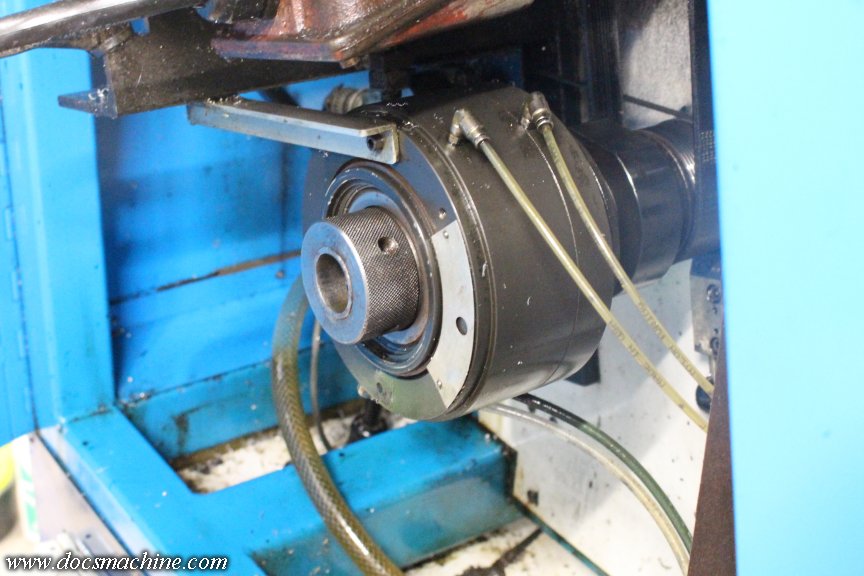
            I then set up the necessary tools, and, since I'll be using bar stock rather than pre-cut pieces, I pulled the collet stops and looked again at the outboard end of the spindle.


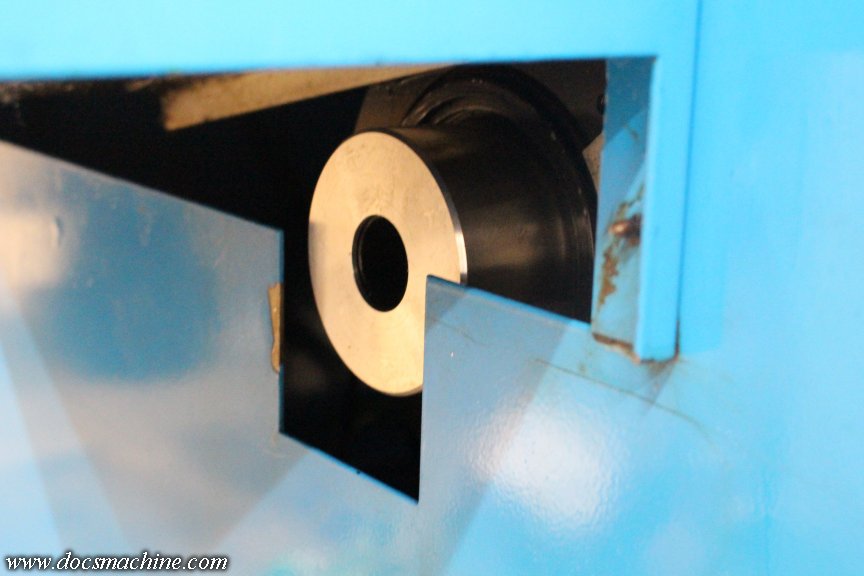
            The issue here is that I want extra support for the long bars (cut to 36") at the left end of the spindle, so they don't "whip" and cause vibration. The correct solution for something like this is called a spindle liner- a plastic sleeve that slips into the spindle bore, that more closely fits the OD of the stock.

            The problem is, first, the factory-made spindle liners are over $200 each, and second, only go up to 7/8". And I'm using nominally 1" stock.

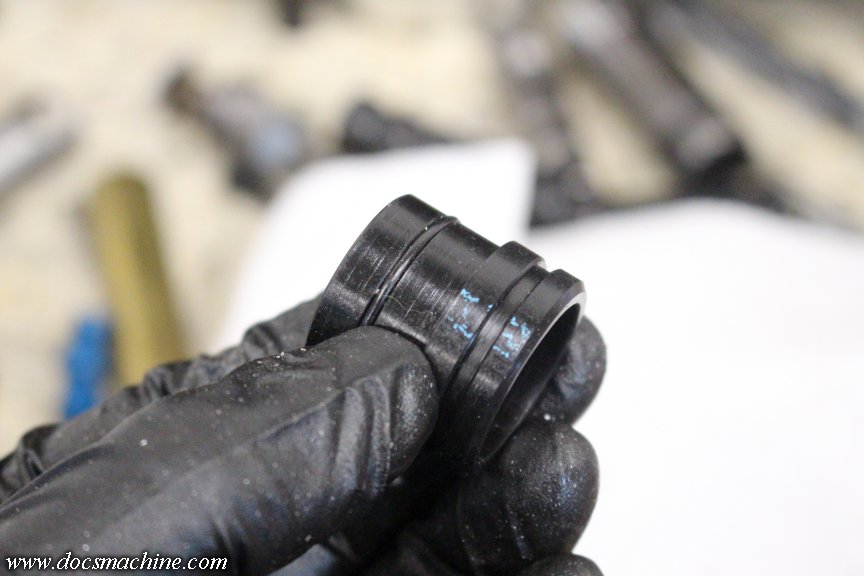
            The last time I ran this part, I made up this little plug...


            But it was only retained by that O-ring. The fresh batch of stock is very slightly larger diameter, and that collar no longer fit. And I didn't want to bore it out, since the thickness at the bottom of that O-ring groove was already very thin. What I needed was a way to hold the collar in, without that O-ring.

            What I wanted to do was pull the drawtube and drill and tap the end face for a pattern of three holes or so, so a "top hat" shaped collar could be bolted in place, or a small cap/washer sort of thing could retain it.

            Unfortunately I don't have snap-ring pliers big enough or powerful enough to remove the retainer. I need to buy a pair, since these pneumatic collet closers need periodic servicing, but for now, I need to get this ball rolling. I should have been running these parts months ago.

            The only other option is those radial screw holes, meant to either retain a cap or plug (I use 'em to hold an adjustable collet stop in place) or to retain a long thin rod like a 4-jaw chuck.

            Why not just use those to hold the bar stock? The end cap/plug/support also helps control some of the oil that travels down the drawtube.

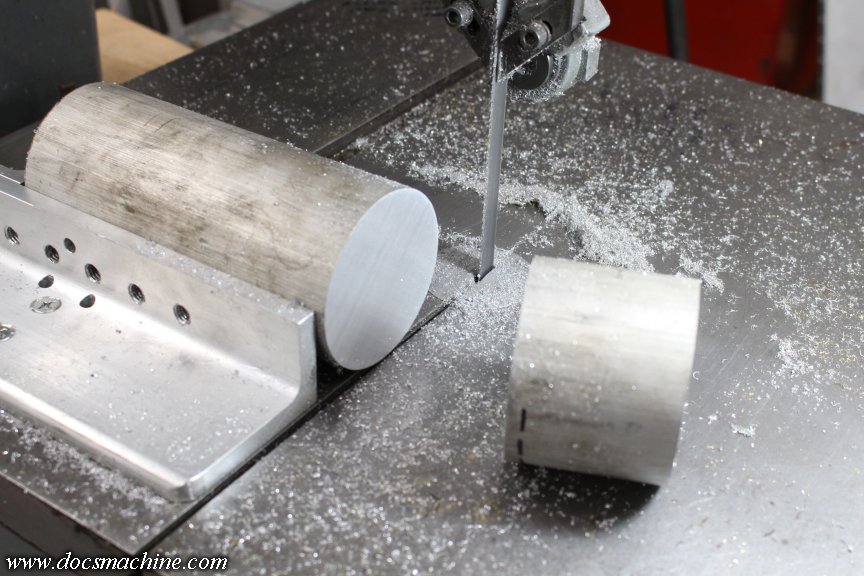
            So, while I will at some point pull that drawtube and drill and tap the end, for the time being I'll just throw a bodge at it. To that end, after almost three minutes of noodle time, I found a likely looking hunk of 3" aluminum round, and sawed off a hunk about yea long.


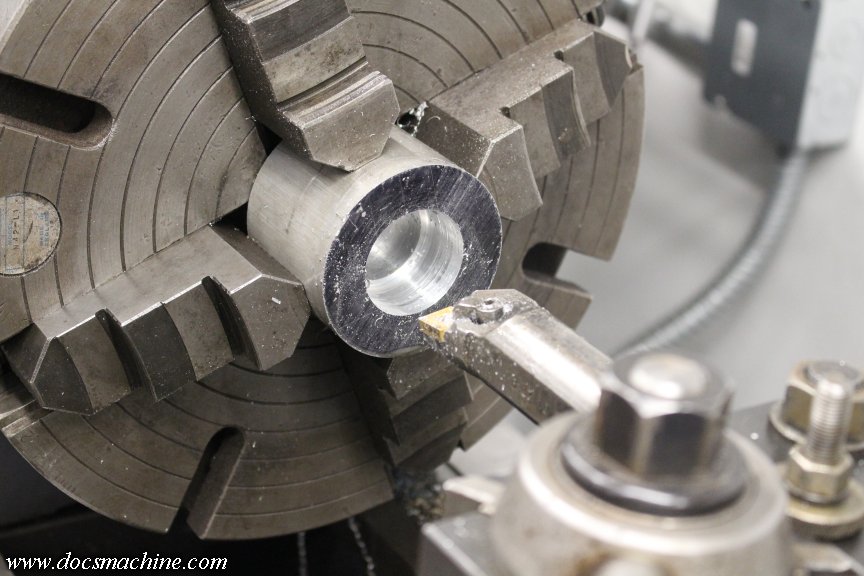
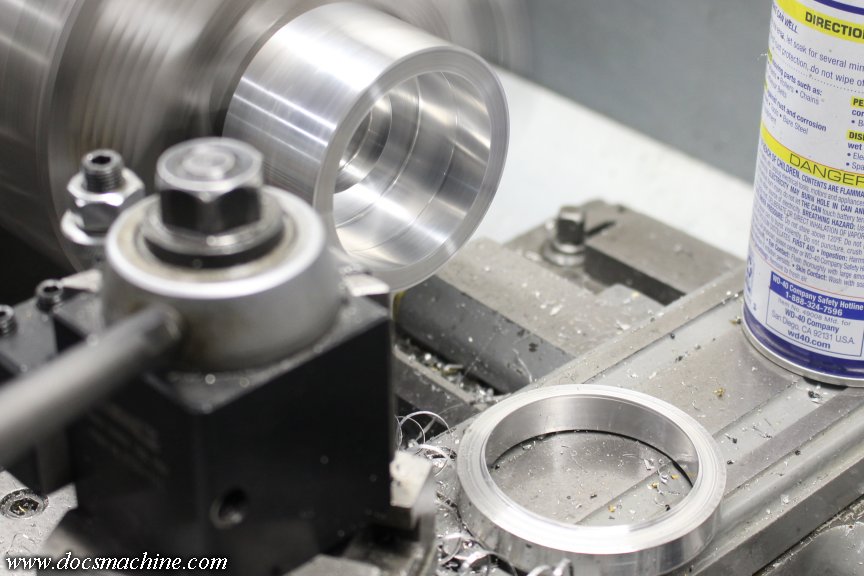
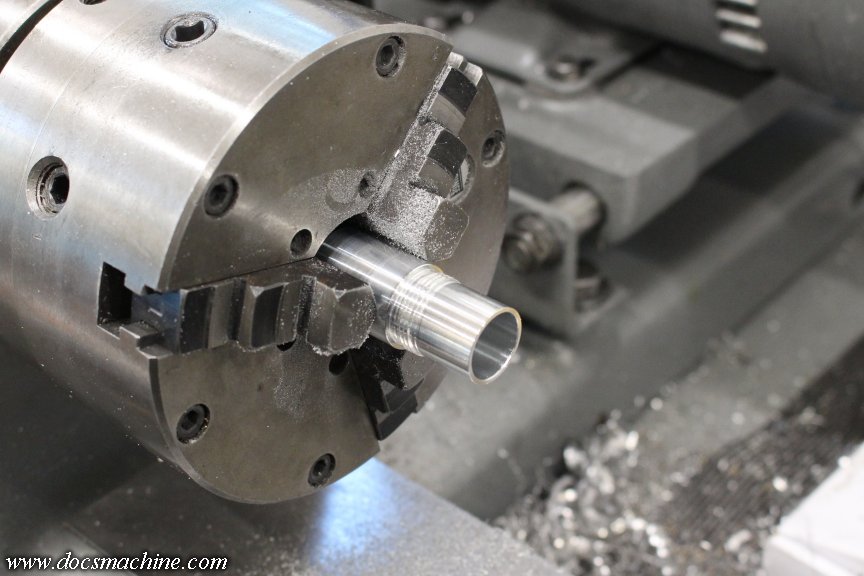
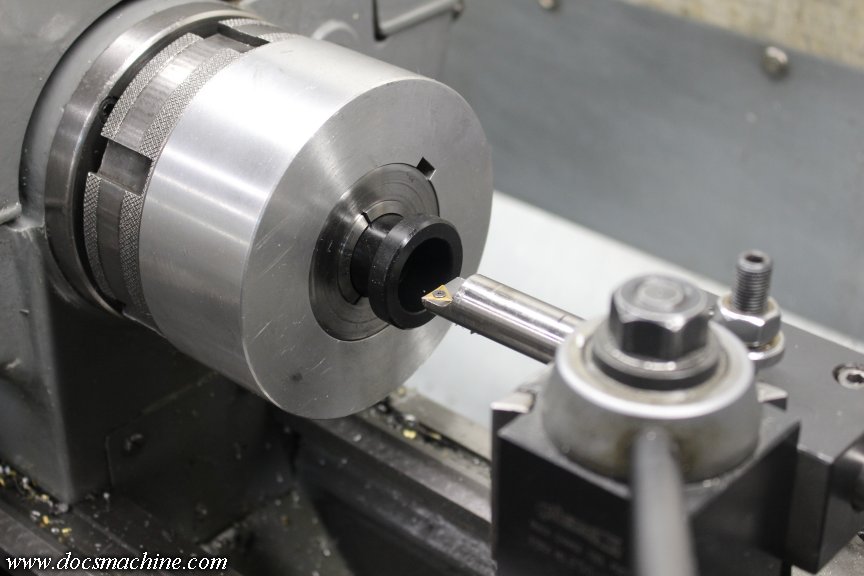
            That I chucked up in the Monster and hogged out a bunch of the extraneous meat...


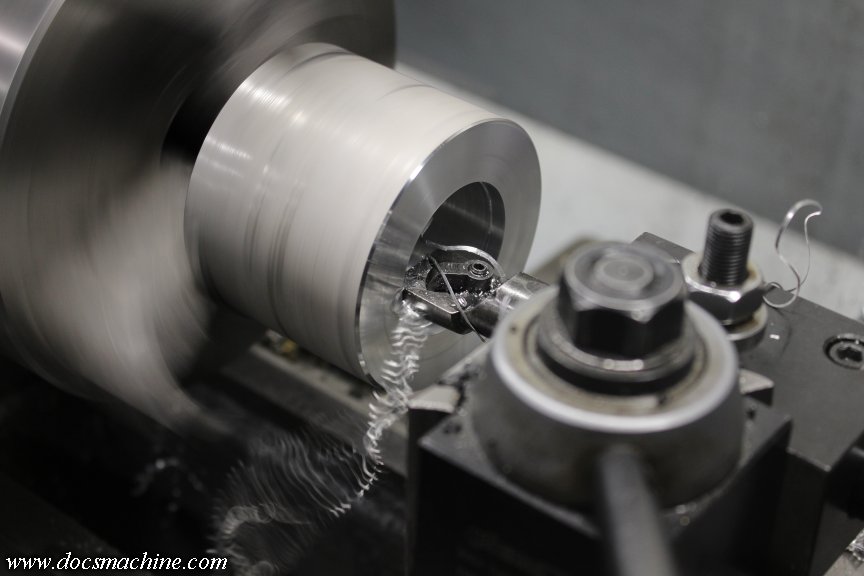
            And then switched it over to the Sheldon for the fine tuning.


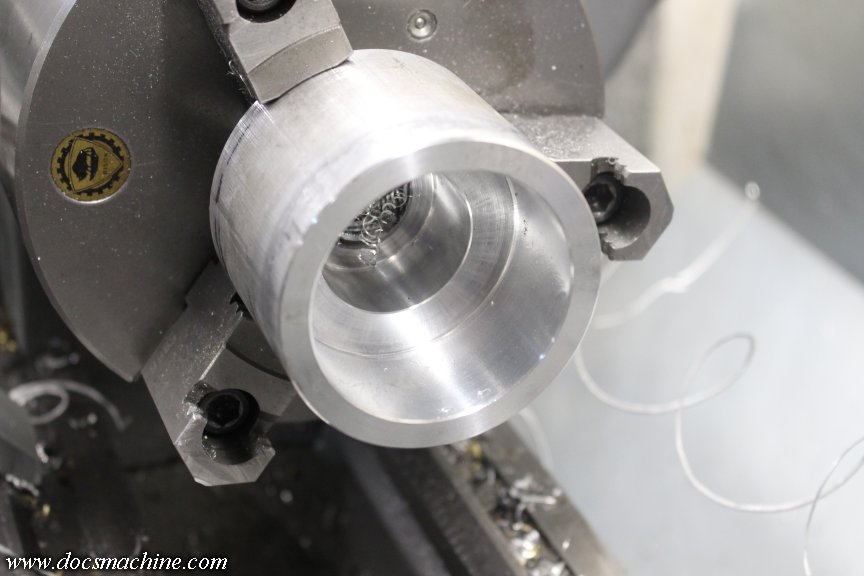
            I was playing it by ear, and after a quick test fit, realized something was minorly wrong, and adjusted my dimensions slightly.


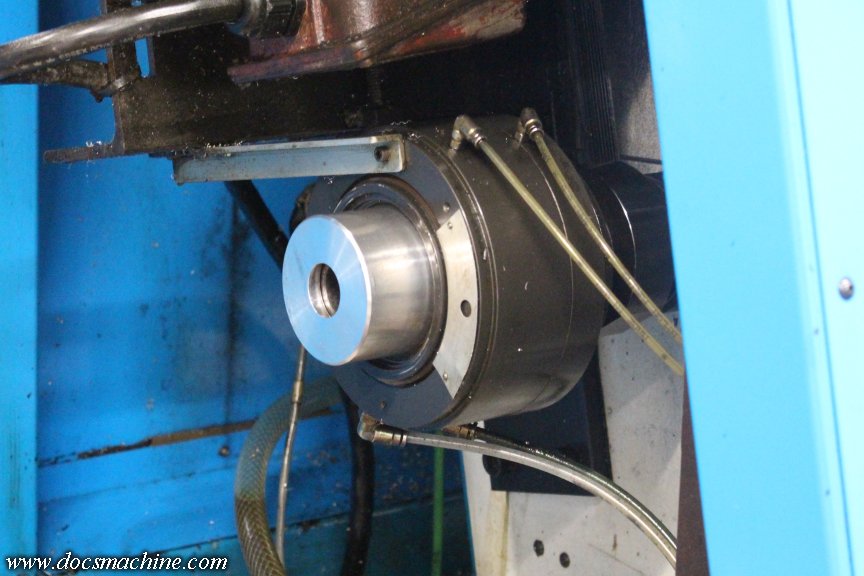
            That bit will fit over the end of the drawbar like so...


            And when we close the access cover, you'll see why we needed that adjustment.


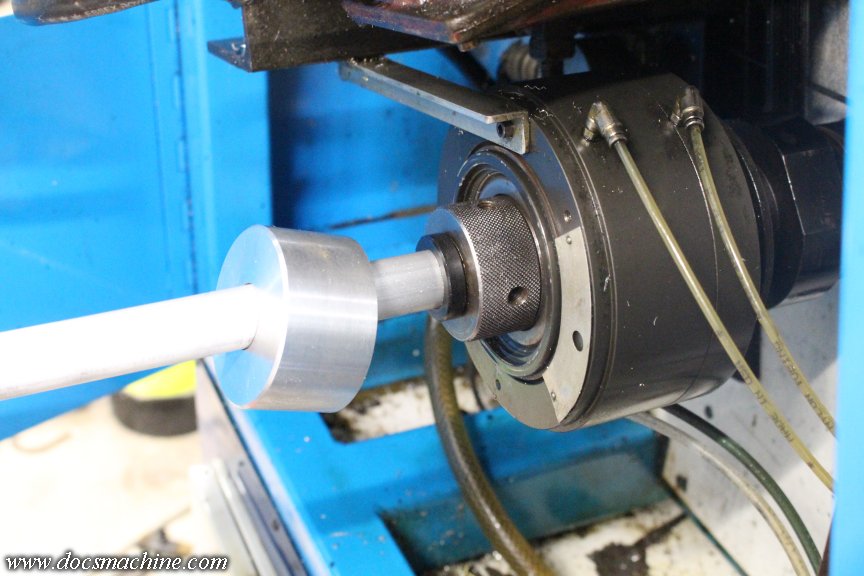
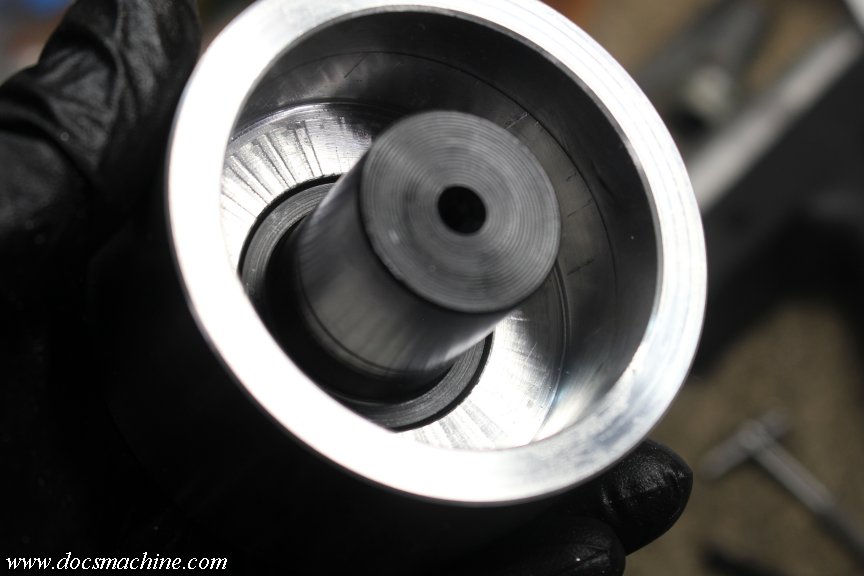
            The inner bore of the cap was recessed to take a piece of 1/5" Delrin round...


            Which was itself turned on the OD to fit the ID of the drawtube, and then bored out to snugly fit the OD of the bar stock.


            That slides into the end of the drawbar, the stock fitted through that...


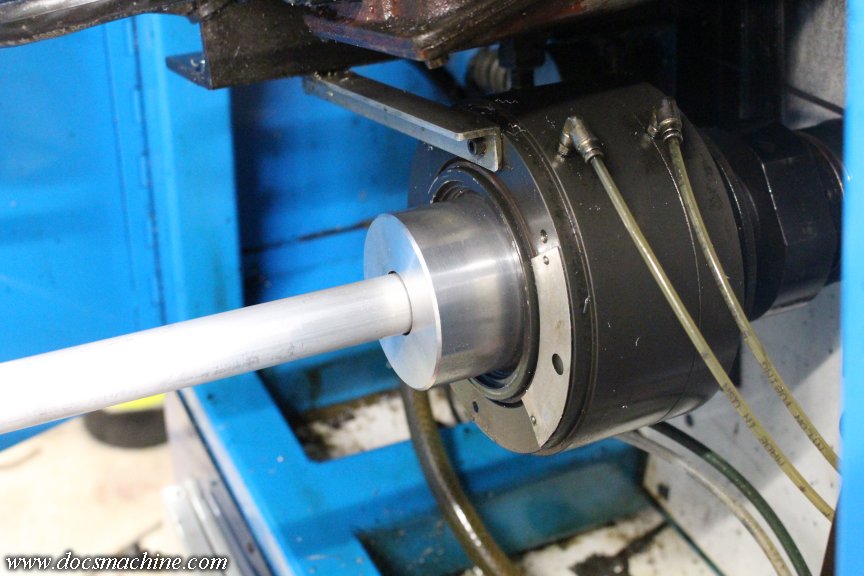
            And the cap slid over the whole works.


            Yeah, it's a bodge and convoluted, but it should work to get this job done. I still need to set up the indexing head and drill the bolt pattern, and dig up a set of matching screws that should hold 'er in place- as well as drill a couple of oil-drainage ports.

            And somewhere along here I'll pick up a good set of snap-ring pliers, and re-do the whole thing, but right now, I got parts to cut!

            Doc.​
            Doc's Machine & Airsmith Services: Creating the Strange and Wonderful since 1998!
            The Whiteboard: Daily, occasionally paintball-related webcomic mayhem!
            Paintball in the Movies!

            Comment

            • DocsMachine
              MCB Member
              • Jul 2020
              • 2699
              • Alaska

              #53
              Yep, wasted time.

              I was going to have the machine turn the piece, then part it off. That saves the time of having to cut the blanks myself, and can often use the material a little more efficiently. (That is, less material is wasted in cuts, especially crooked ones, and I can often get one or even two extra pieces per bar of raw material.

              That's what I did the last time I ran this part, and that's why I was making the end cap- to help support the long end of the bar. But this time, I'm making two similar parts, one longer than the other- and my parting tool holder doesn't have the depth for the longer of the two.

              So I either make a new tool holder, or just go back to hand-cutting the blanks like I usually do.

              One improvement from before, is the 'sled' I made for the bandsaw- that lets me make straighter and much more consistent cuts to the bar stock, so... yeah, I went with that.

              I abandoned the end cap idea (for now) and just plugged the spindle bore against the flood oil. Fit it with the usual collet and collet stop, and just... run like usual.


              I'll be running a lot of these, so I spent a little extra time making sure I had everything spot-on.


              Each part will need to be turned at both ends- so two setups each, for a total of four setups.


              Stand by, this may take a while.


              Doc.​
              Doc's Machine & Airsmith Services: Creating the Strange and Wonderful since 1998!
              The Whiteboard: Daily, occasionally paintball-related webcomic mayhem!
              Paintball in the Movies!

              Comment

              • DocsMachine
                MCB Member
                • Jul 2020
                • 2699
                • Alaska

                #54
                Submitted without comment.


                Doc.​
                Doc's Machine & Airsmith Services: Creating the Strange and Wonderful since 1998!
                The Whiteboard: Daily, occasionally paintball-related webcomic mayhem!
                Paintball in the Movies!

                Comment

                • DocsMachine
                  MCB Member
                  • Jul 2020
                  • 2699
                  • Alaska

                  #55
                  Still busy! I got the first half of the current part- that I've posted about recently- finished, at least the first 210 of them. I was going to start on the other end, the more complex one, but I was halfway through setting up up, had a minor crash- a test crash if you will - that basically undid an hour's work.

                  As I had other thing to do, I... well, went and did them, lest I break something.

                  This afternoon, I sat back down with the machine, re-set the tools, rewrote what I had of the program, re-tested it- no crash! - and went on from there. After a few very minor hiccups, I started producing workable parts at about 4 PM, and ran what I could 'til hunger drove me into the house in search of sustenance.


                  Only 144 left to go! ... in this batch.... with a roughly three-minute cycle time... which is over seven hours...

                  Doc.
                  Doc's Machine & Airsmith Services: Creating the Strange and Wonderful since 1998!
                  The Whiteboard: Daily, occasionally paintball-related webcomic mayhem!
                  Paintball in the Movies!

                  Comment

                  • DocsMachine
                    MCB Member
                    • Jul 2020
                    • 2699
                    • Alaska

                    #56
                    Ran another third of these parts today- with luck, I can have these off to the anodizers by Friday. Fortunately they fall out of the machine ready to go save for cleaning, and that should just be a couple batches through the ultrasonics.

                    Thing is, as much as I like watching this machine run, yeah, it wears a bit thin after the tenth or twelfth part. With a slightly-over-two-minute cycle time (I've been going by nominally three, including part changes) that gives me a bit of time to do other things.

                    It was a really nice day, so I opened the garage doors, got out the buffer, and finished polishing up the handful of stainless 'Cocker detents I'd assembled a couple months back. I could do three per cycle, so it didn't take long to do the bin. No pics I was just tryin' to get stuff done.

                    But, once I had that done... most anything else couldn't easily be broken up into two-minute bites. I've got some bandsawing to do, but I didn't want to keep starting and stopping the saw, I did a little cleanup and put some tools away, didn't want to start anything big...

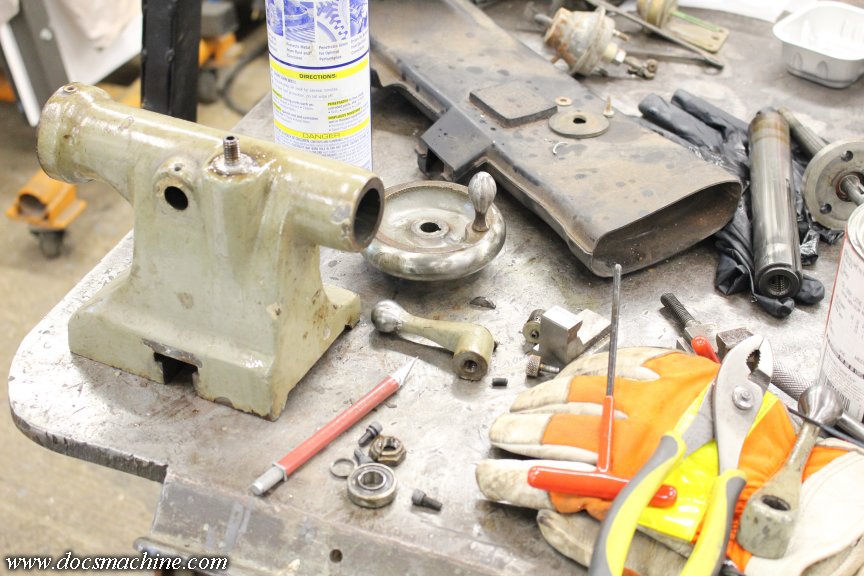
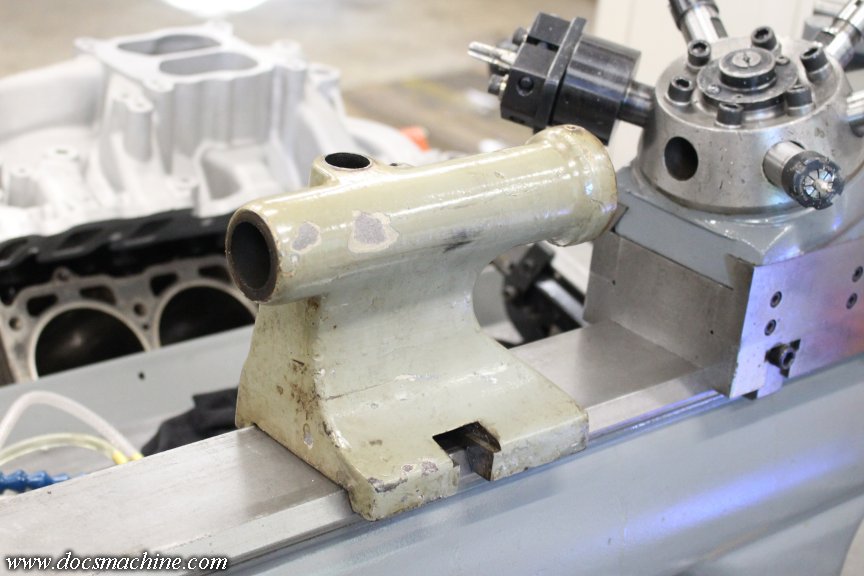
                    But, my eye fell upon the tailstock I'd gotten a while back for the Rivett. It really could have just been cleaned and lubed a bit and put to work (although I admittedly don't really need a tailstock for that particular machine... *) but you all know that's not how I work.

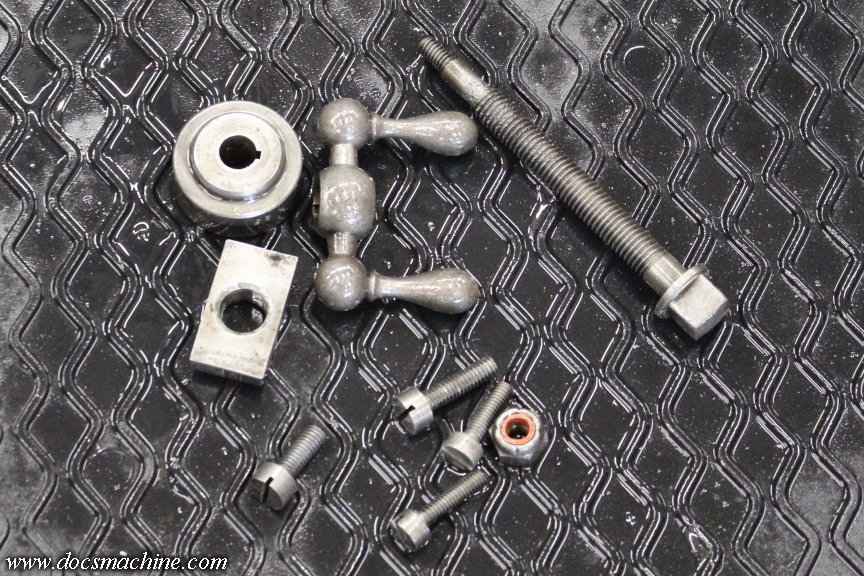
                    So, a bit at a time, I got it dismantled...


                    And since I had the buffer already out, I hit a couple of the parts with the burnishing wheel. (Like the handwheel, in the center.) Some of the smaller bits I want to hit with some paint stripper, but the body, I think I'm just going to thoroughly degrease, sand, fill in some of the chipped original filler, and paint.


                    I'll probably do a little more on that tomorrow when I run the hopefully-last third of these aluminum bits, maybe paint it this weekend.

                    Doc.
                    (*While I wanted it just to increase the capability of the machine, for some unforseen future job, I mainly wanted it to improve the resalability of the lathe. If it's a pure turret lathe, hardly anybody to nobody will want it. If it's a "plain turning" metalcutting lathe, then there's at least some value to it.)


                    Doc's Machine & Airsmith Services: Creating the Strange and Wonderful since 1998!
                    The Whiteboard: Daily, occasionally paintball-related webcomic mayhem!
                    Paintball in the Movies!

                    Comment

                    • hardingebros
                      Rockin and Cockin
                      • Nov 2023
                      • 35

                      #57
                      This is awesome

                      Comment

                      • DocsMachine
                        MCB Member
                        • Jul 2020
                        • 2699
                        • Alaska

                        #58
                        I thought I was done!

                        Had a busy day, and couldn't get the machine lit up 'til later in the afternoon, but I persevered and got the last third of these parts run.


                        BUT...! I managed to screw up my count slightly, forgetting a small detail. So, I got out a bit more material, lit up the bandsaw and...


                        The plan is actually to run quite a few more of these, but I'd wanted to get a smaller batch finished up and off to the anodizer, letting me finish up another chunk of them at a more leisurely pace. So no real big to crank out a couple dozen more... I just thought I was done!

                        And, while I was running today's batch, while I didn't want to break out the Bondo and patch up the Rivett tailstock, I had these two bits for the big Springfield lathe.


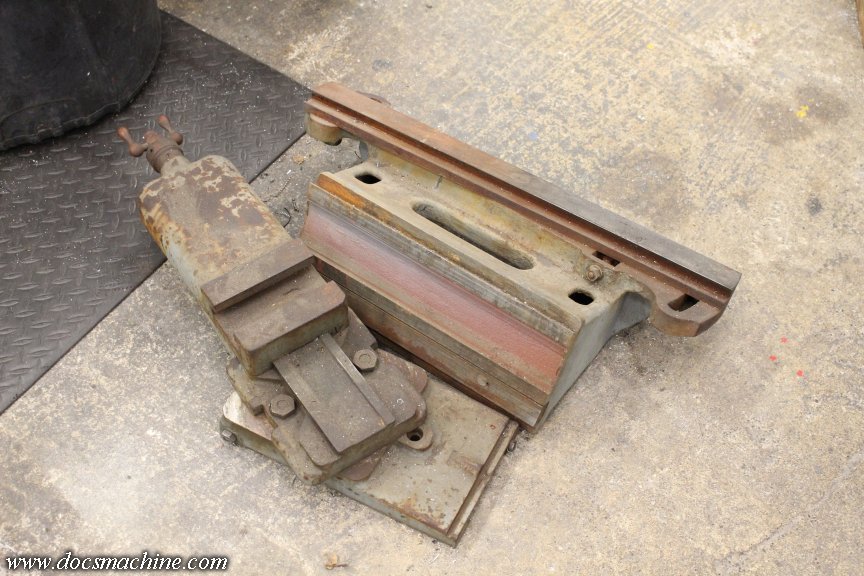
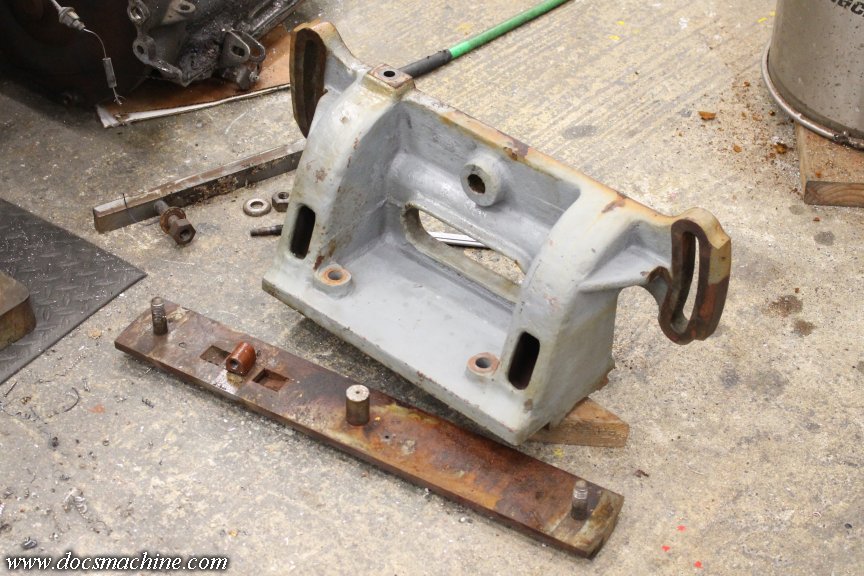
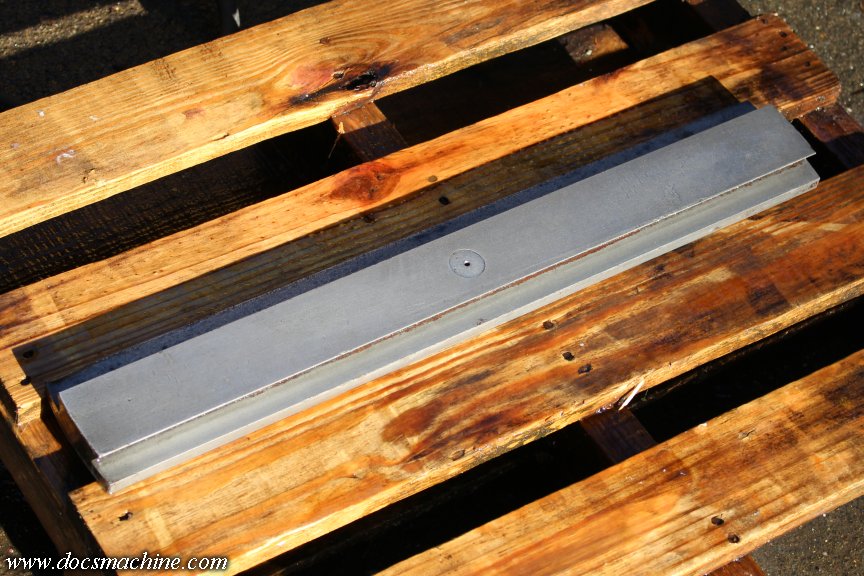
                        That's a spare cross slide and compound, and proper taper attachment, for my machine. (For those of you that didn't follow that build, the lathe when I got it had the wrong compound and taper attachment. I swapped the compound with a modified one, but the taper was a bit of a mongrel. I found a guy parting out a literal sister to my machine [the serial numbers were only like 37 apart] and managed to acquire the parts. A year and a half ago. )

                        I've been wanting to get these cleaned up ever since- and no better time than when I have, well, fifty instances of two minutes at a time.

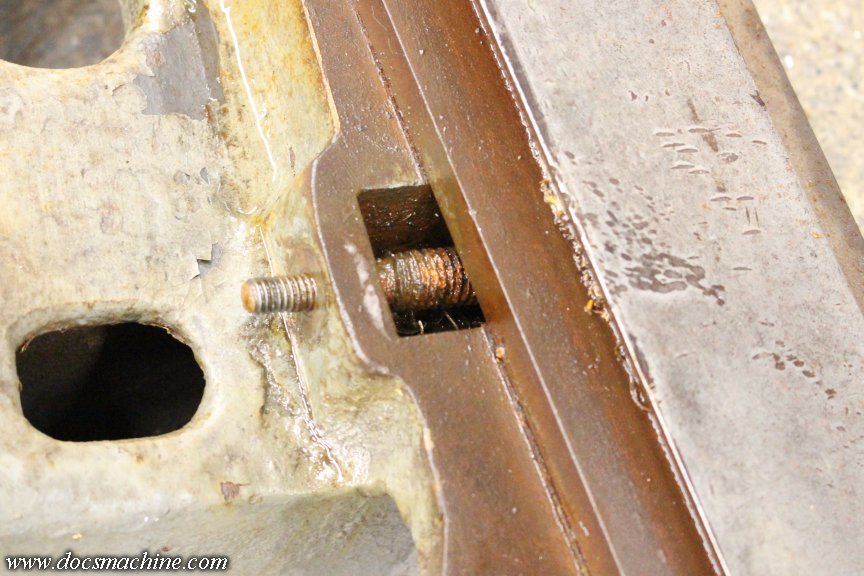
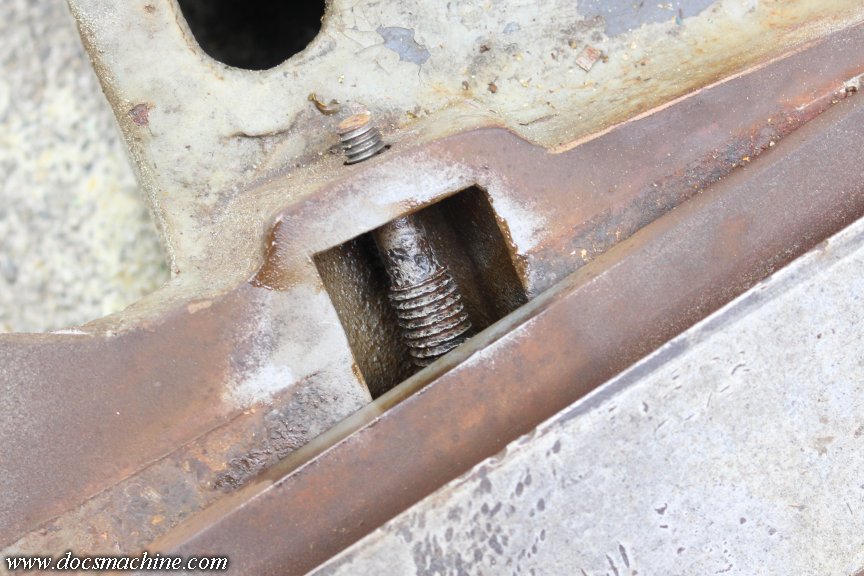
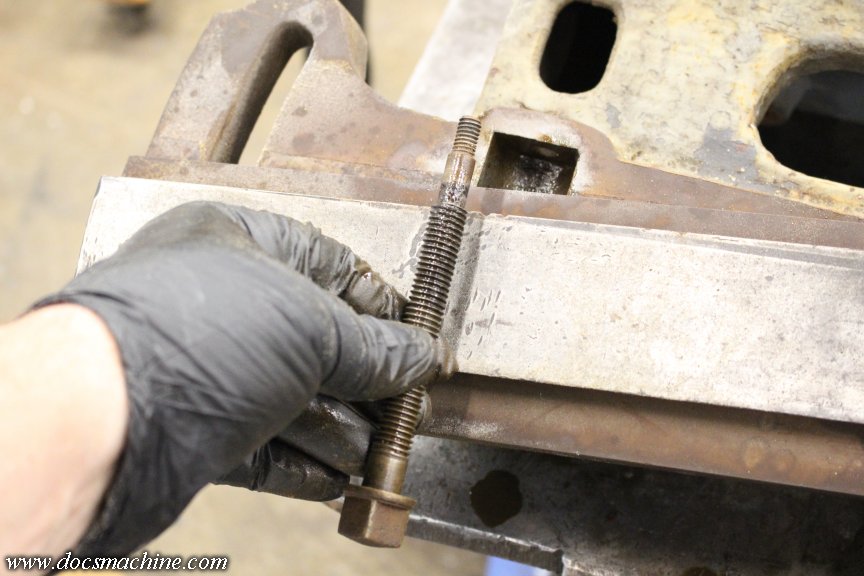
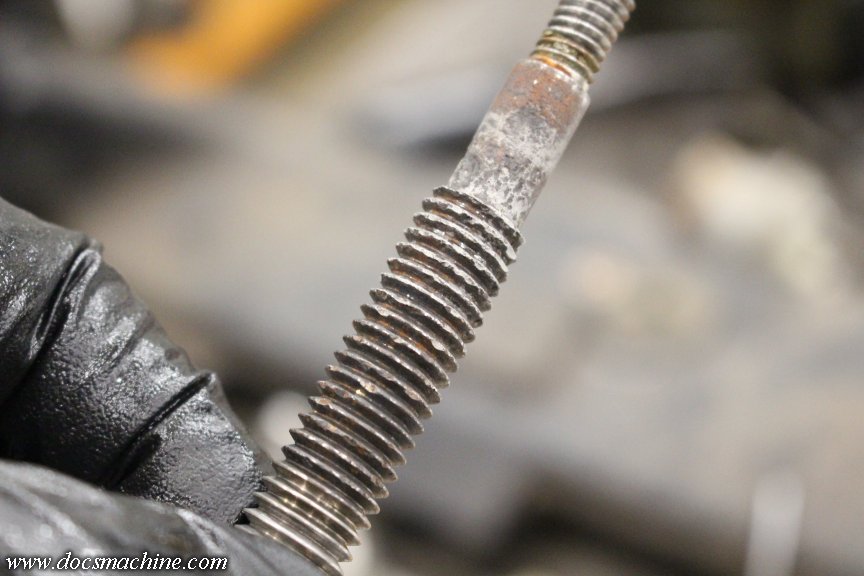
                        The only real trick is that the donor machine spent a couple years out in the weather- it didn't get too rusty, but the adjuster screw for the taper kind of got hit pretty hard.


                        Rather than try and winch that thing out with an impact and a bunch of WD, I set up my little sandblaster-pistol, and hosed off as much rust as I could.


                        After that, with a little lube, it came right out. She struggled a bit at the nastiest part of the threads, but not as bad as if I'd left the rust- and I was mainly worried about damaging the nut inside.


                        I've got it soaking in some Evap-O-Rust now, and once I pull it out, I'll run a die down it. It'll never be perfect, but it'll do the job.


                        With that, the dovetail rail came out with only minor complaints, and she's ready for cleaning.


                        Thinking I'll take a me-day this weekend, and spend some time pressure-washing, prepping and painting these things. Maybe tomorrow when I'm running the other parts, I'll pull the steady rest apart too...

                        Doc.​
                        Doc's Machine & Airsmith Services: Creating the Strange and Wonderful since 1998!
                        The Whiteboard: Daily, occasionally paintball-related webcomic mayhem!
                        Paintball in the Movies!

                        Comment


                        • sonixr7
                          sonixr7 commented
                          Editing a comment
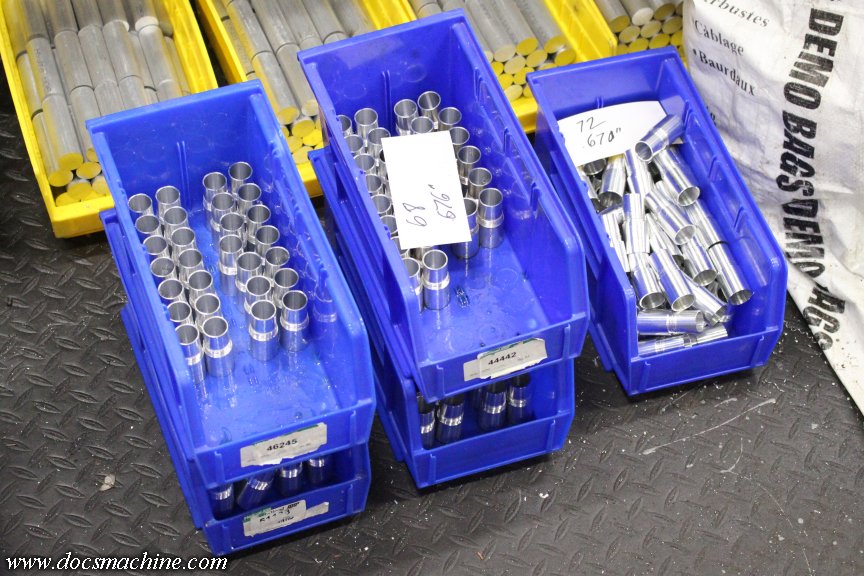
                          Are those Trracer Spacers in .670?

                        • DocsMachine
                          DocsMachine commented
                          Editing a comment
                          A sharp eye you have! Yep, more Trracer-Spacers in .681, .676, and .670. Once this batch is back from anno, and suitably lasered, I'll have sets of the three available, plus a handful of the .670's for those of you that may already have the first-run pair.
                          Doc.
                        • sonixr7
                          sonixr7 commented
                          Editing a comment
                          Nice. I’ll be ordering a couple.
                          Dare I ask. Would .665 be in the works? I would also be in line for .670 in Autococker threading and Phantom threading.
                      • DocsMachine
                        MCB Member
                        • Jul 2020
                        • 2699
                        • Alaska

                        #59
                        And done, Ladies and Gentlemen! Done and gone!

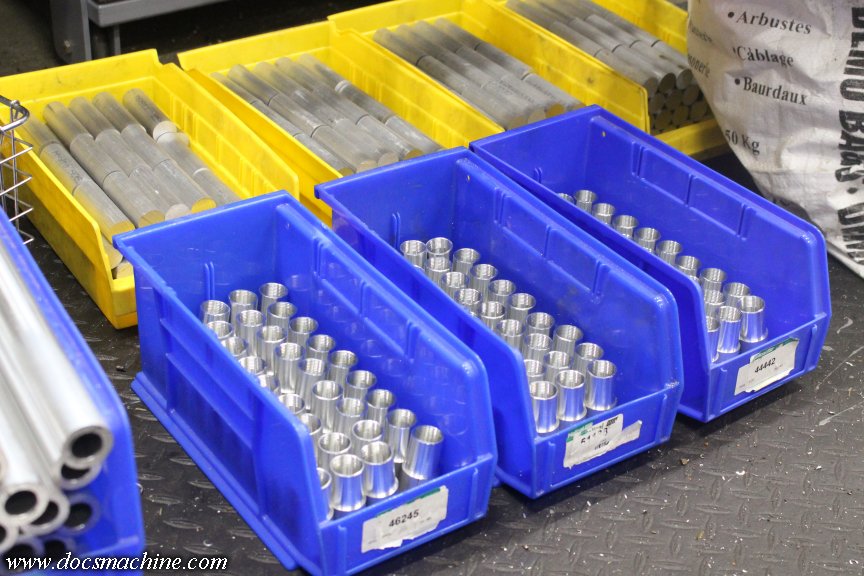
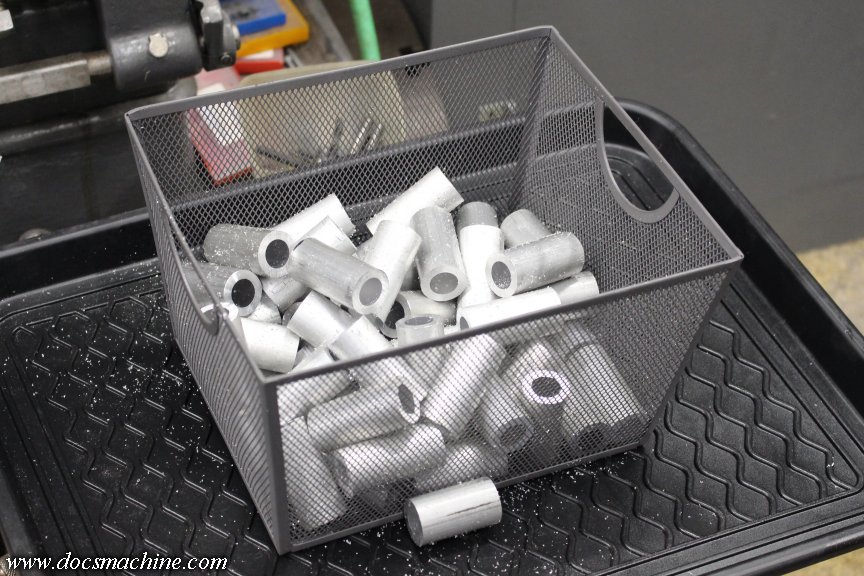
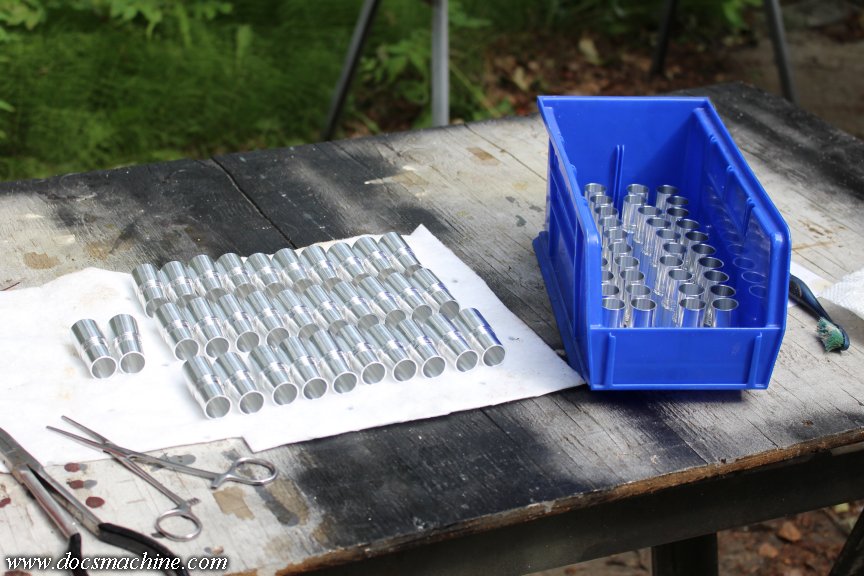
                        Thursday I ran a small additional batch, bringing the total count for this particular part up to 237. Nice round number? Again, I'll be running more in the near future, and don't want to cut more material just yet.

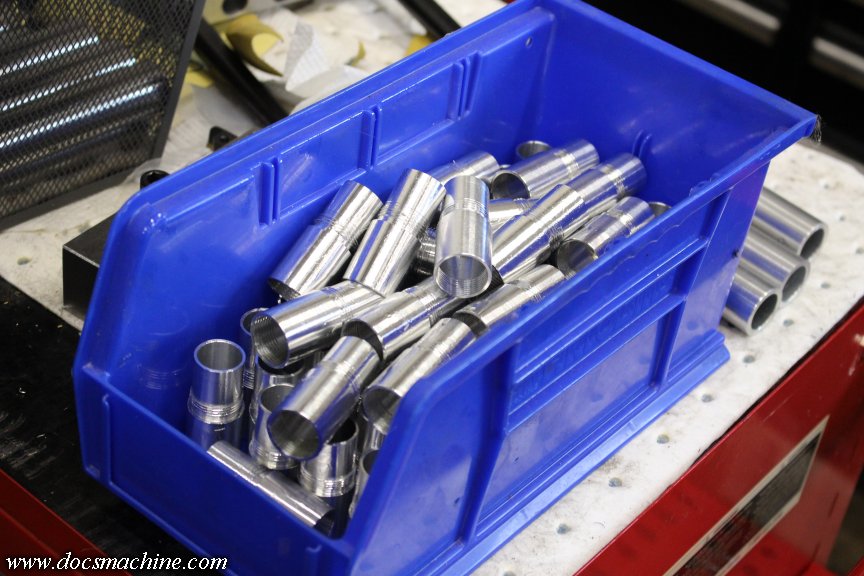
                        Anyway, the machining didn't take too long, and while that was going on, I was washing the bulk of the oil off the previous parts with some of my patented lead-free solvent...


                        At which point I noticed a number of them had lightly burred threads. That won't do for a retail product, so while the CNC was doin' it's thing, I ran all the rest of them- over 200- through the little speed lathe, to give the threads a quick lick with a fine file to smooth them up a touch.


                        And finally, when I was thoroughly sick and tired of handling these things, I ran 'em all through the ultrasonics, a few fistfuls at a time.

                        Friday morning, I packed 'em all up, along with a few other parts I had ready to go, and finally shipped 'em off to the anodizers!

                        So that's finally out of the way (at least for a couple of weeks) and despite there being about 27,000 other things I need to jump right back into... I think I'm gonna take a me-day or two this weekend.

                        Doc.​
                        Doc's Machine & Airsmith Services: Creating the Strange and Wonderful since 1998!
                        The Whiteboard: Daily, occasionally paintball-related webcomic mayhem!
                        Paintball in the Movies!

                        Comment

                        • DocsMachine
                          MCB Member
                          • Jul 2020
                          • 2699
                          • Alaska

                          #60
                          So, I took a break from workin' in the shop by.... workin' in the shop.

                          Doc is indeed a dull boy.

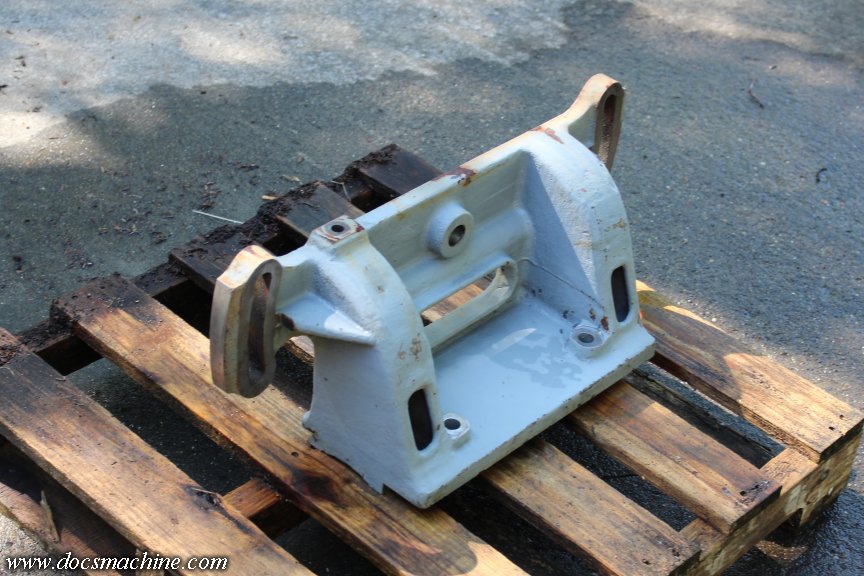
                          I'd been meaning to clean up these Springfield parts ever since I got them... in January of '25... and since I started on 'em last week, I figured I ought to finish. The taper attachment was the big one- that is, the part I most wanted for the machine. And, a fairly straightforward job, not much more than a cleanup, rust removal, and paint.

                          All of this didn't necessarily happen in the order shown- it was more concurrent actually- but I reordered it a bit to make it a better read.

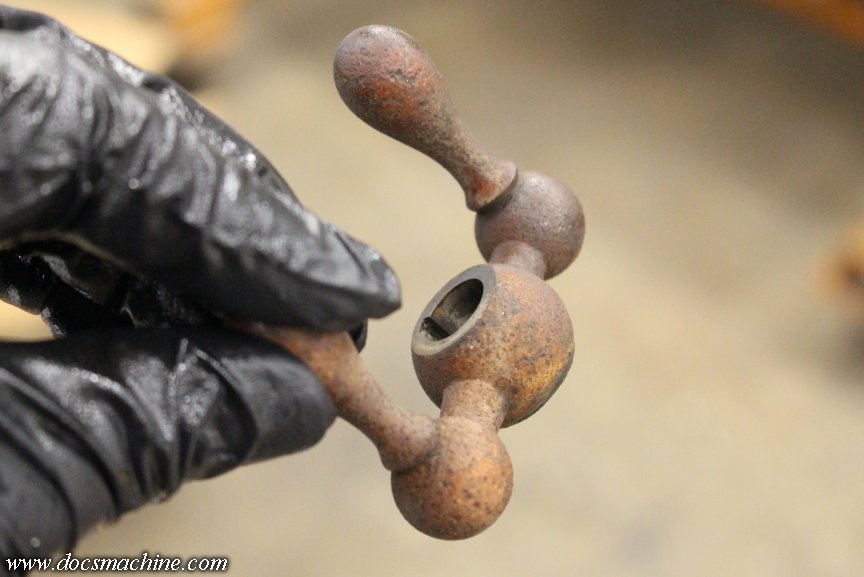
                          One thing I did several days ago, was dunk some parts in Evap-O-Rust. My bottle is getting a little towards the used-up side, so I left it all to soak for two or three days. The worst offender was the handle and dial off the compound:


                          Evap can't fill the pits back in, but it got the rust pretty well removed:


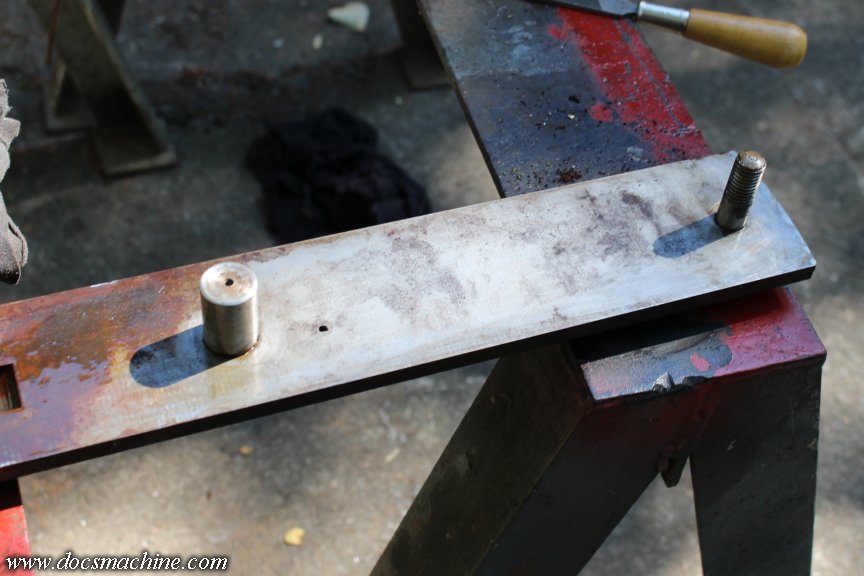
                          The slightly-less-cooperative part was the slide swivel from the taper attachment.


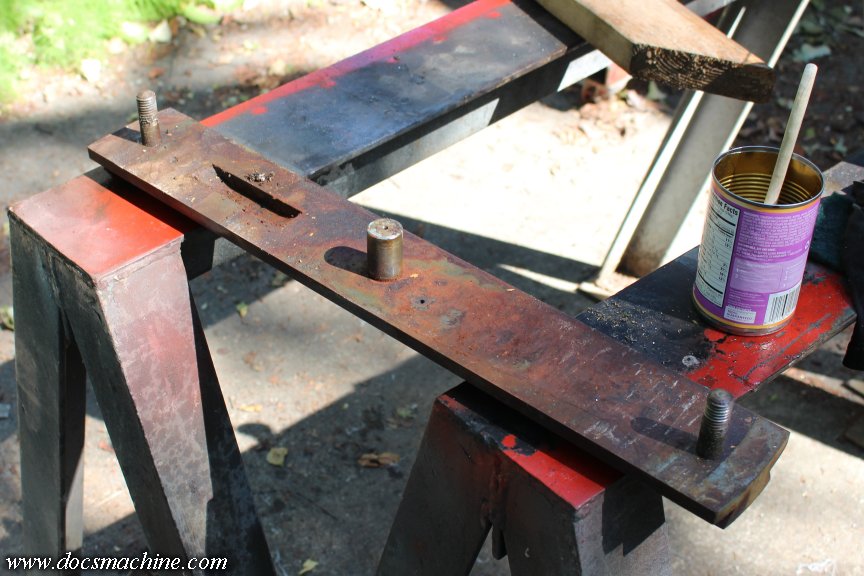
                          Some of the rust came right off with the old trick of a razor blade scraper, some Scotchbrite, and some WD-40...


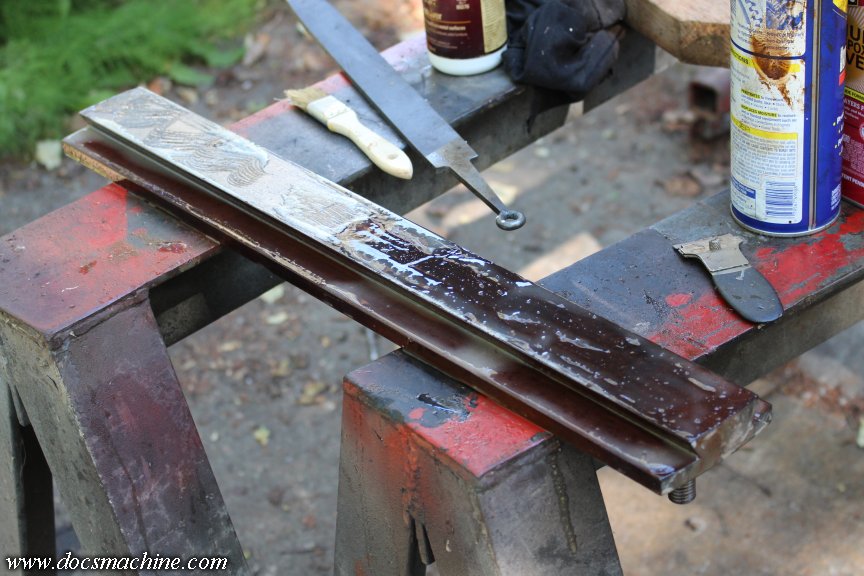
                          But quite a bit of it turned out to be fairly stubborn. This is a semi-precision slideway, so I didn't just want to light into it with a wire wheel or worse, a sandblaster, so I found a bottle of Naval Jelly and tried that.


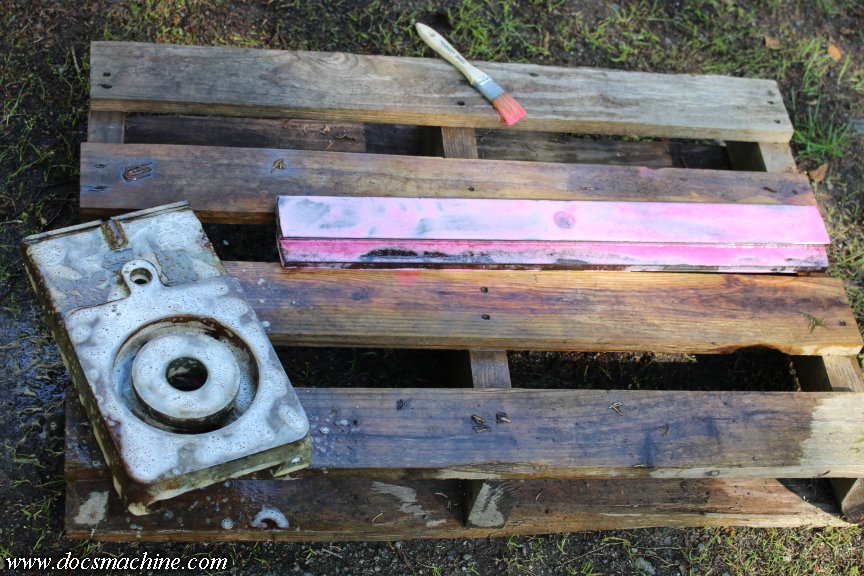
                          Turns out the bottle was pretty old, with half of the contents... like, solidified, somehow. The rest of the liquid, which I seem to recall was originally a bright pink color, and was now a light cream, seemed to work, however, and removed quite a bit of the rust.

                          The liquid ran out before the rust did, to I jogged up to the auto parts store and grabbed another- which is what reminded me the stuff was supposed to be pink.


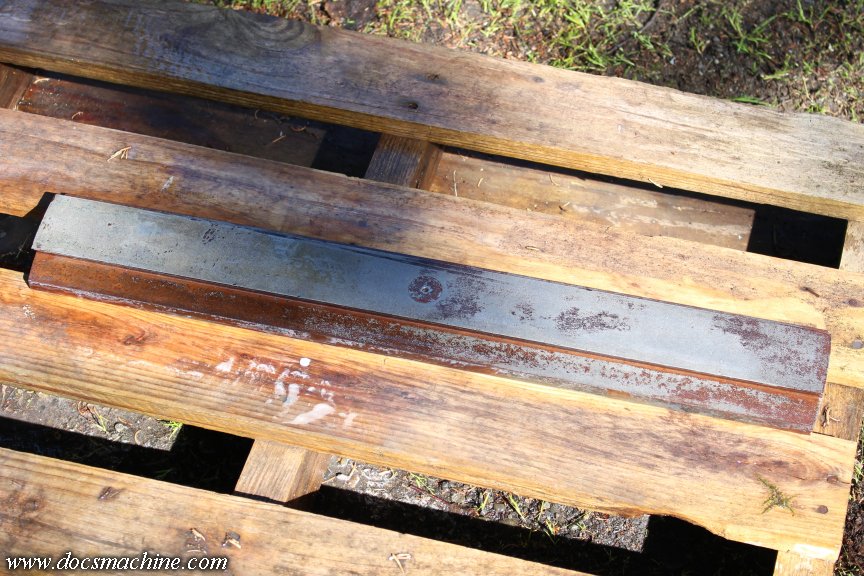
                          Lather, wait, rinse and repeat....


                          Along with some (hand) wire brushing and a little Scotchbrite, and it eventually came out pretty clean.


                          Still need to reach down into the deep Vee of the dovetail, but I can do that before I finally install it.

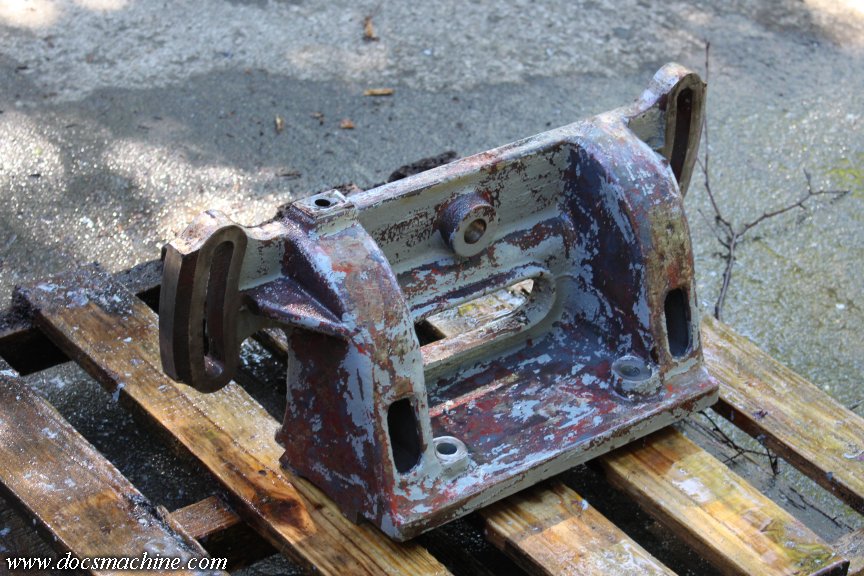
                          As for the main taper casting, I first scrubbed and degreased it...


                          And had originally hoped I could just paint it, but too much was flaking, so I hit it with a couple cycles of paint stripper.


                          And, got lightly bit again. A couple years ago, when I was rebuilding/painting the Rivett, since I was at Sherman-Williams getting some fresh paint mixed up, I bought a quart can of their "professional strength" paint stripper. When I was prepping for this job, I found it, and used it for the first run on this casting.

                          And, I was immediately reminded why I still had a nearly-full can: I'm not sure this stuff can strip watercolors off a countertop. I think the last time I used it, I complained in a thread like this, that I doubted the stuff could get dry-erase marker off of a whiteboard.

                          I brushed it on, and yeah, it softened the paint slightly. It would have made it easier to scrape off with a razorblade, if I wasn't trying to get it off cast iron that was rougher than a pine cone.

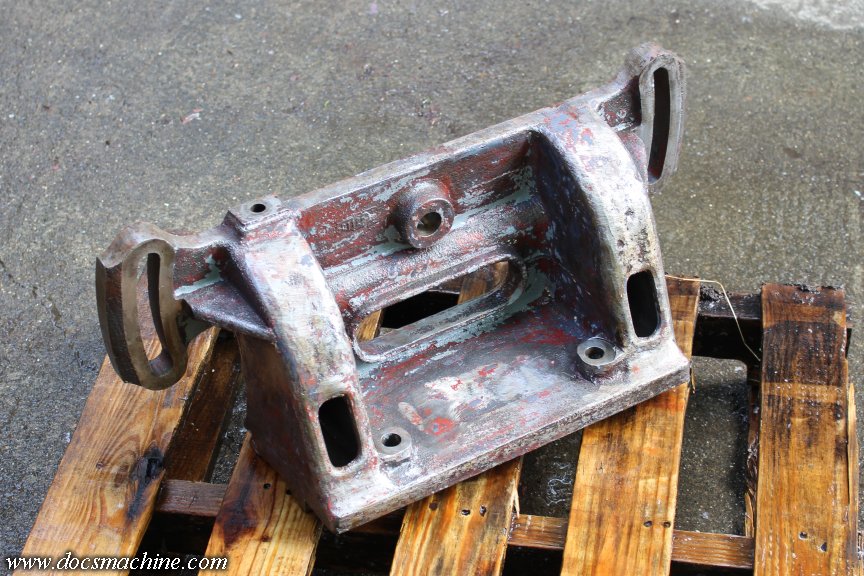
                          Do, I jogged back into town and bought a can of Jabsco premium from Homey-Dee, and it still took a couple cycles, but that did the trick.


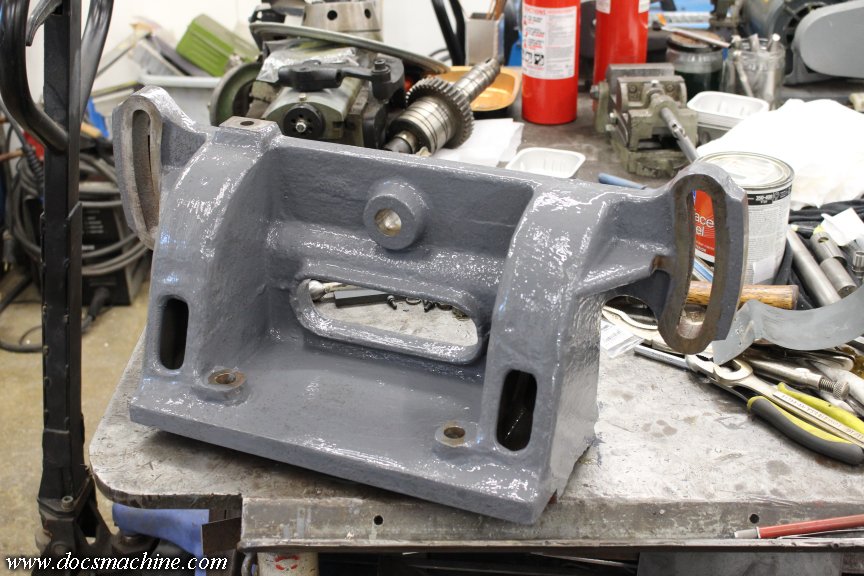
                          After the last cycle, assisted by the wire brush and a scraper, I scrubbed it again thoroughly, blew it dry, and plunked it on the welding table. An hour or so later- I was still doing some of the above stuff- I gave it a coat of freshly-mixed "all surface" enamel. (Same stuff, but a slightly different shade, as what I used on the Rivett.)


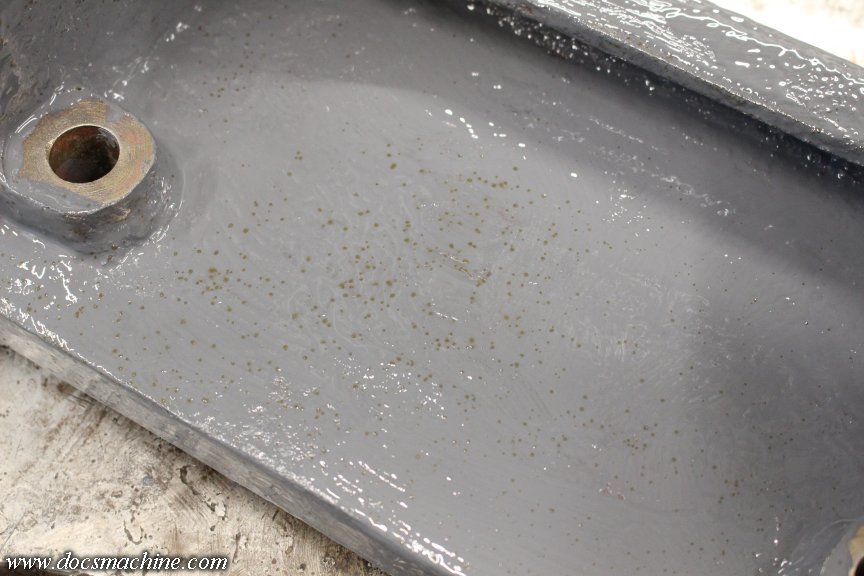
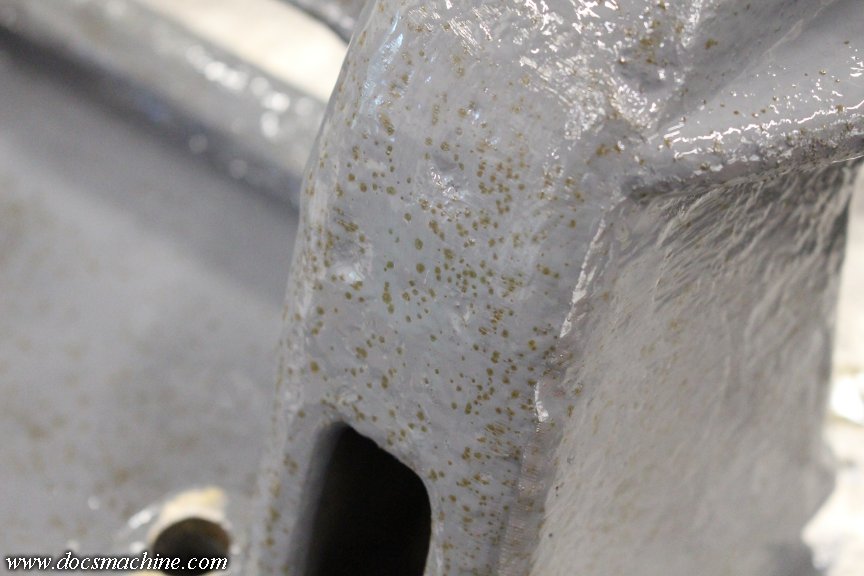
                          Except, when I checked on it about half an hour later, it had apparently contracted measles.


                          I think I probably should have let the casting dry a little longer- like overnight- before painting. Checking several hours later, the paint's basically dry to the touch, and each spot looks like rust- or a spot of dirty water- and it doesn't wipe off.

                          I'm not sure if i should re-strip the new paint, re-scrub the casting, then let it dry for a couple of days... or just give it the planned second coat, and see if the spots bleed through again. Maybe hit it with some self-etching primer as a 'sealer' and then give it two coats on top of that?

                          That's what I get for being in a rush to get the job done...

                          Doc.​
                          Doc's Machine & Airsmith Services: Creating the Strange and Wonderful since 1998!
                          The Whiteboard: Daily, occasionally paintball-related webcomic mayhem!
                          Paintball in the Movies!

                          Comment

                          Working...