Inside Doc's Shop 2026

Collapse
X
 
  • Time
  • Show
Clear All
new posts
  • DocsMachine
    MCB Member
    • Jul 2020
    • 2773
    • Alaska

    #76
    I'd fixed up the X/Y slide for the Rivett lathe the other day, and that's been a nice little improvement. I needed the turret yesterday, so I was able to just pull the slide off, move the turret up, and get the job done.

    But, that put a bit of a spotlight on the only other thing about this machine that's annoyed me, which is the collet closer. It works fine, holds solidly, and in the grand scheme, there's nothing wrong with it- especially if the machine's being used for hundreds of parts in a run.

    The issue comes from doing one-off jobs. It's very handy to have a lathe with a conventional 3-jaw, and one with a collet already set up, so you don't have to do so much switching back and forth. For Saturday's project, I used four different collets in order to hold some tiny parts.


    The Rivett closer has a sliding collar- the dark puplish part...
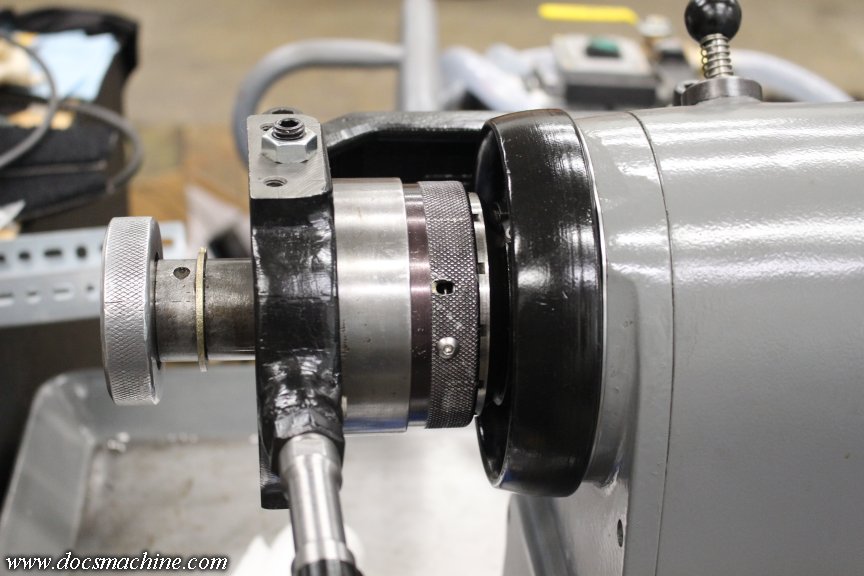


    To disengage from the notched wheel so it can turn, in order to adjust where the collet locks. That collar is spring loaded, and usually, when getting right to the point the collet is set right, the locking lugs are skipping on those notches. There's nothing wrong with it, it's just kind of frustrating to use if you're having to swap pretty often.

    The Royal style closers are much more user friendly in my opinion. They have a little latch that you flip like a lightswitch, and they're unlocked. Adjusting and swapping is fast and easy.

    And, I actually have a spare Royal, that I picked up at one of the Borough auctions some 15+ years ago. It's nearly new- I suspected it came from the local community college machine shop, and having extensive experience there, I can tell you that hardly anyone ever used collets.

    The drawbar is much too long, but that's fixable. The tricky part is adapting the locking collar. Said collar is on the right, the handwheel from my Rivett on the left:
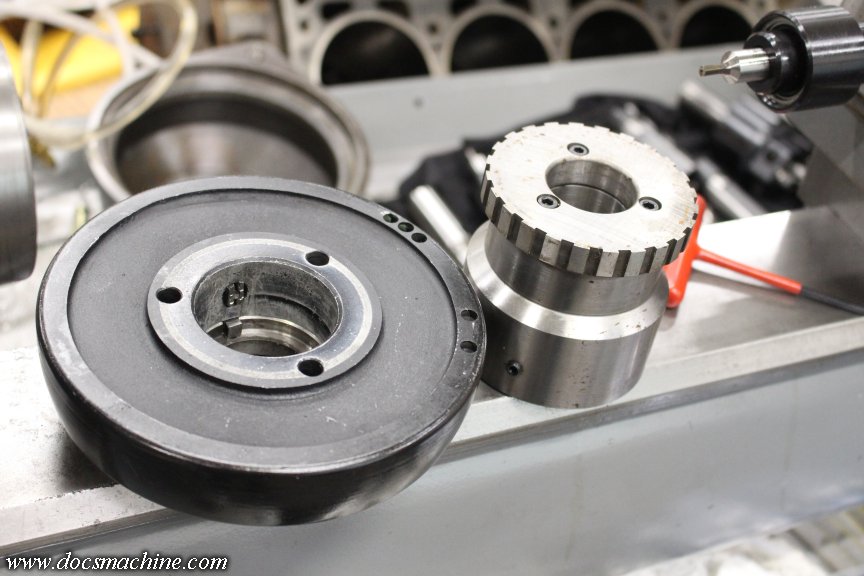


    Basically I have to figure out how to glue those two together, and as concentrically as possible.

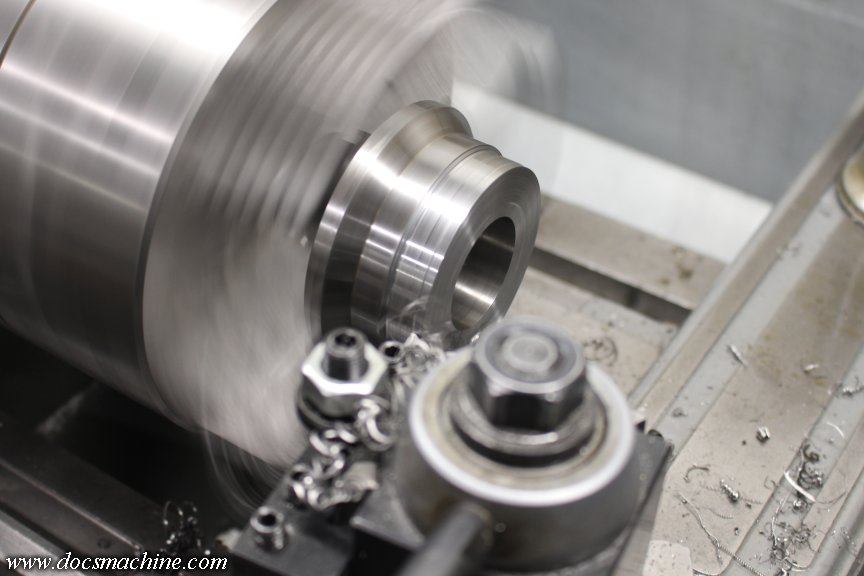
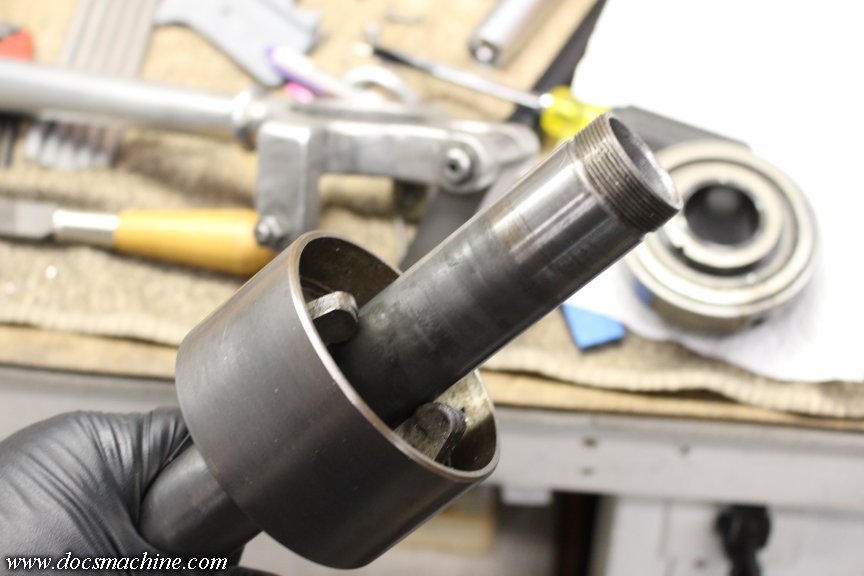
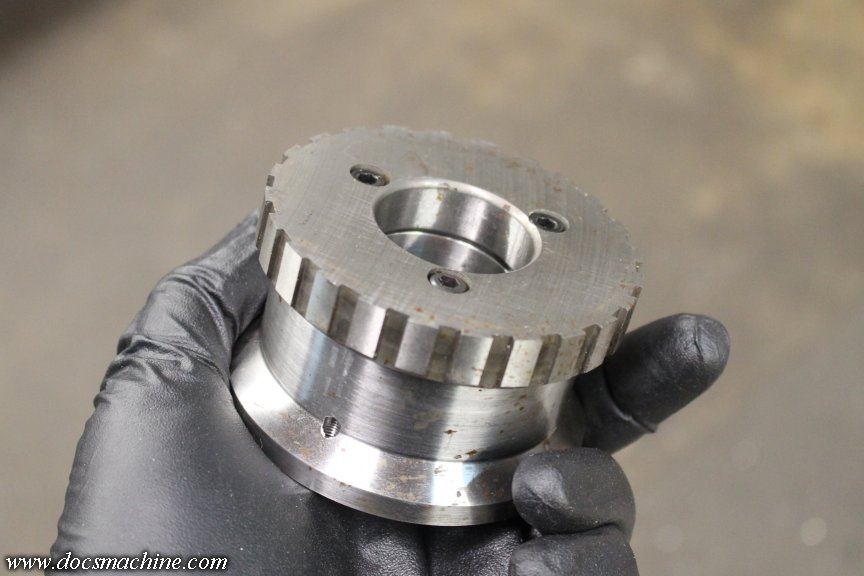
    So I popped the serrated part off the "adapter" body, chucked the latter up in the Sheldon and dialed it in.
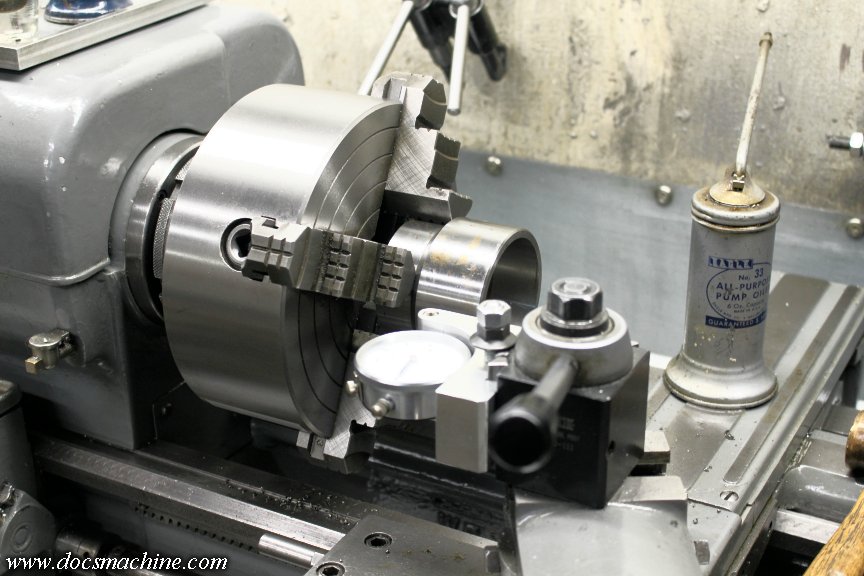


    I parted off the now-unnecessary portion...
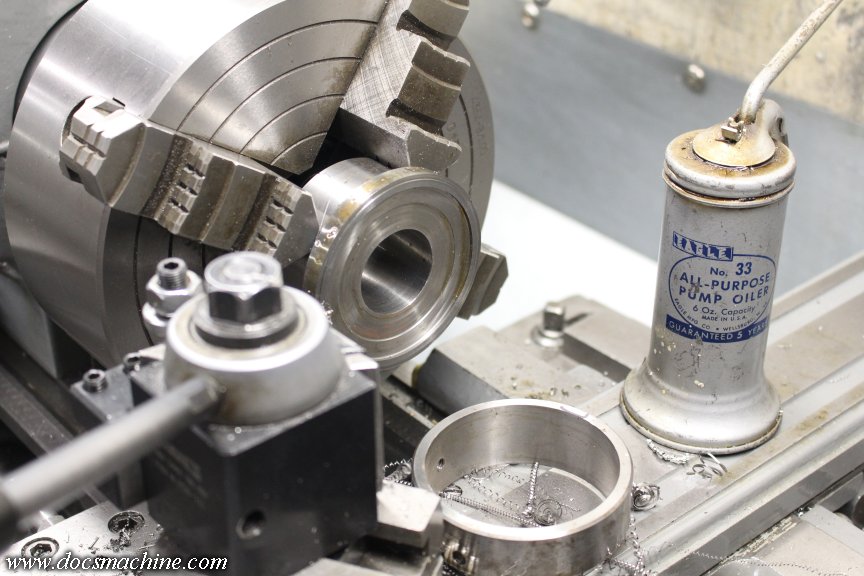


    Faced it...
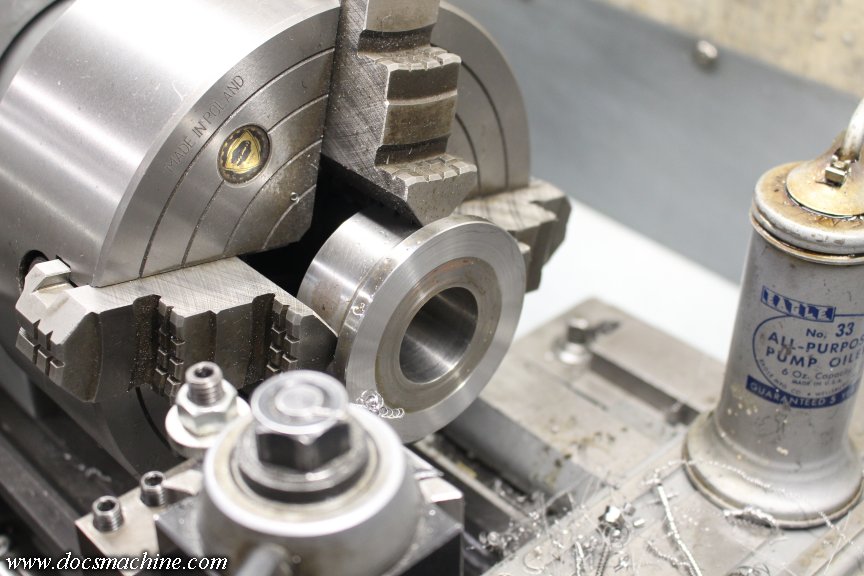


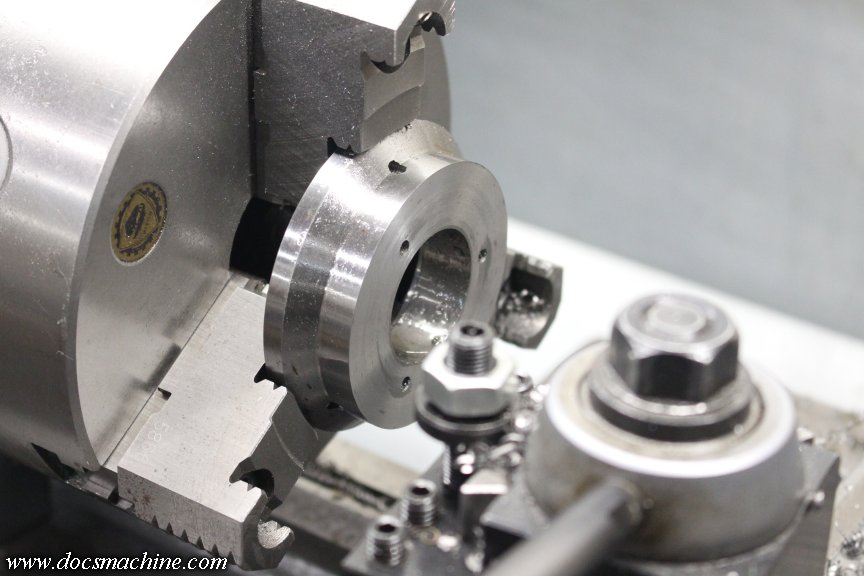
    And counterbored it to slip over the end of the spindle with only .002" to spare.
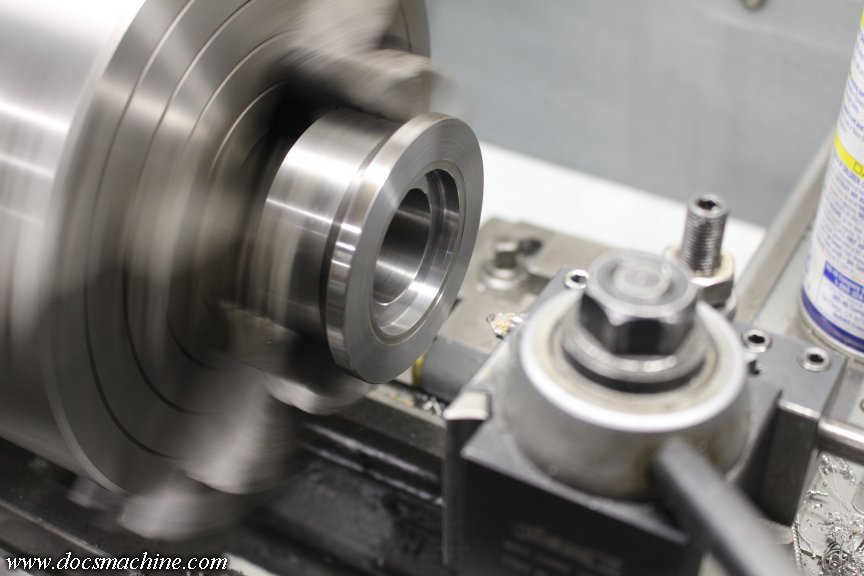


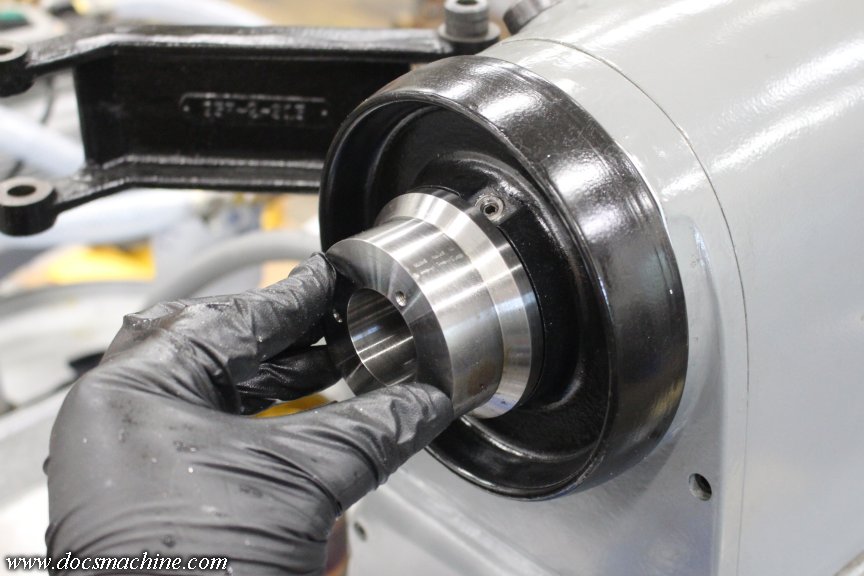
    That fits on and mates up with the handwheel, like so:


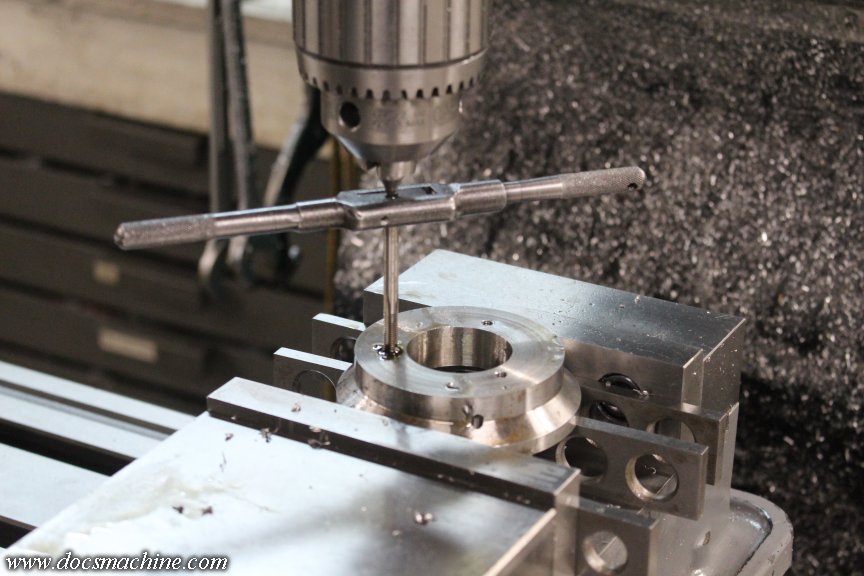
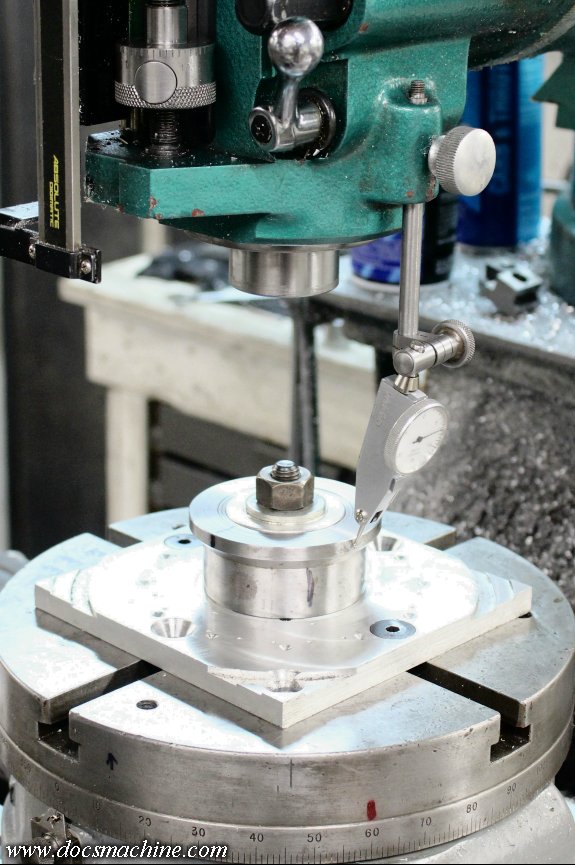
    To make sure the mounting holes are well-centered, I plunked the rotary table on the mill, centered it, and then centered the adapter so it's concentric with the rotation of the table.


    And, here was the first example of why knowing how machinists like round numbers came in handy. I measured the "bolt circle" as best I could, and used an online calculator to find the center- the radius to the bolt circle centerline. Given my numbers, the calculator came up with 1.346".

    Nope, no machinist on earth- especially one in the 1960s, the era of this lathe- is going to use an odd number like that unless they absolutely have to. It wouldn't be 1.345", and I know my measurements weren't so far off as to be 1.375" (1-3/16", since metric really wasn't a thing in the 60's ) so chances were good it was 1.350" even.

    So I drilled it to that number...
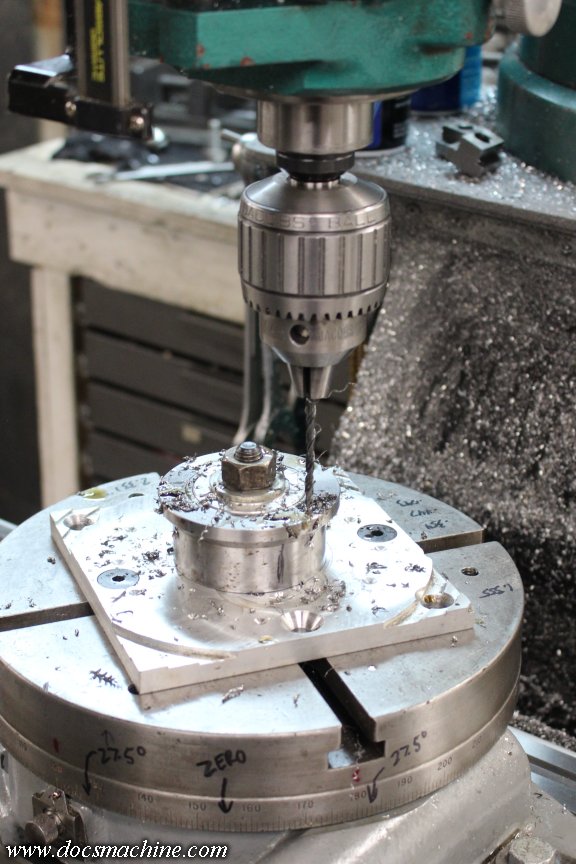


    Tapped it...
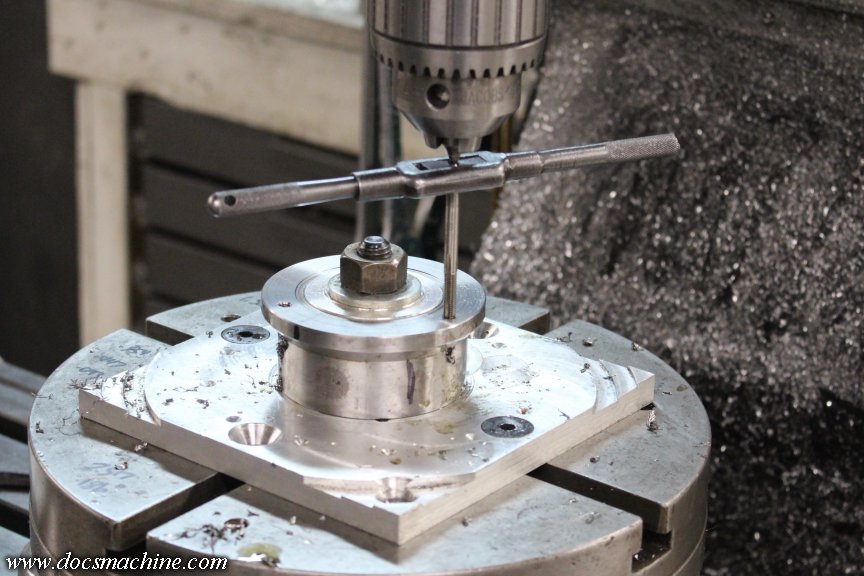


    And the handwheel fit perfectly.
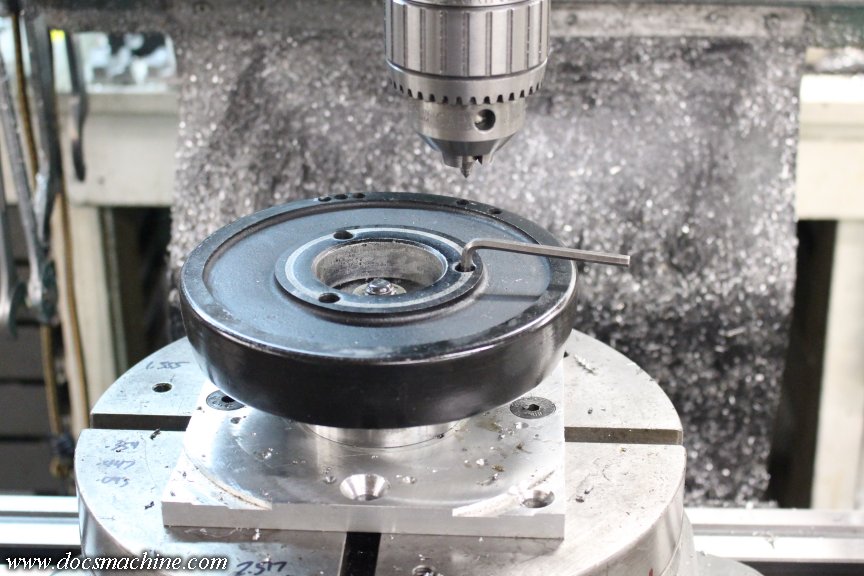


    The second example was a wild stroke of luck. I needed to mill a notch for a small antirotation key, and I wanted it kind of midway between the handwheel screw holes, and the locking ring holes. After the drilling and tapping cycle, the table was back at zero, so I simply rotated it fifty degrees back to 300, and milled the notch.
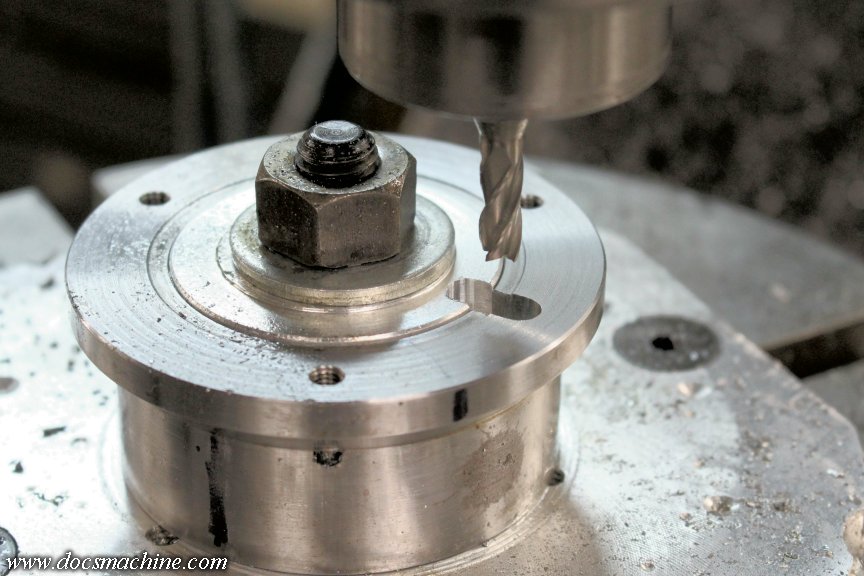


    The part I'd completely forgotten was the handwheel itself has a sort of locking keyway... and by absolute absurd blind luck, the keyway I milled was in precisely the right place.
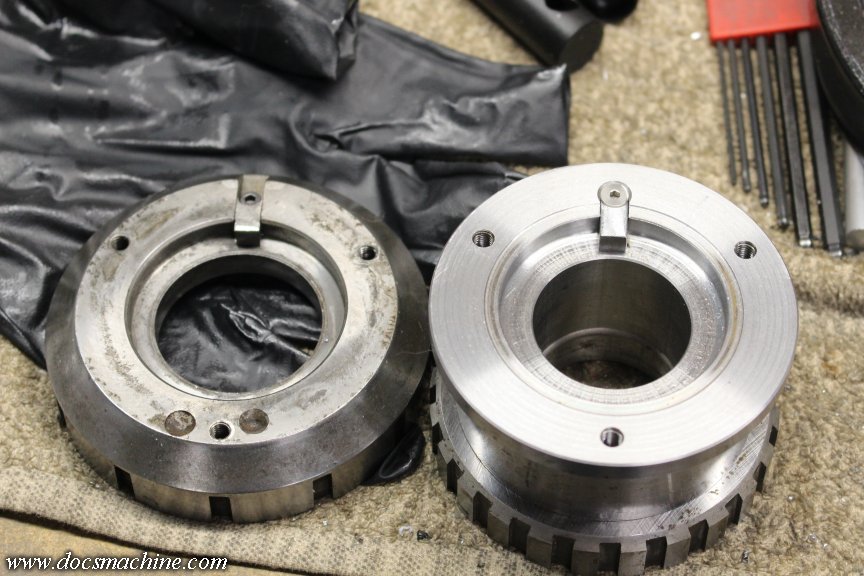


    I fabbed a key, cleaned everything and final assembled it, and it plunked right into place- both keys and all- like I'd friggin' planned it that way.
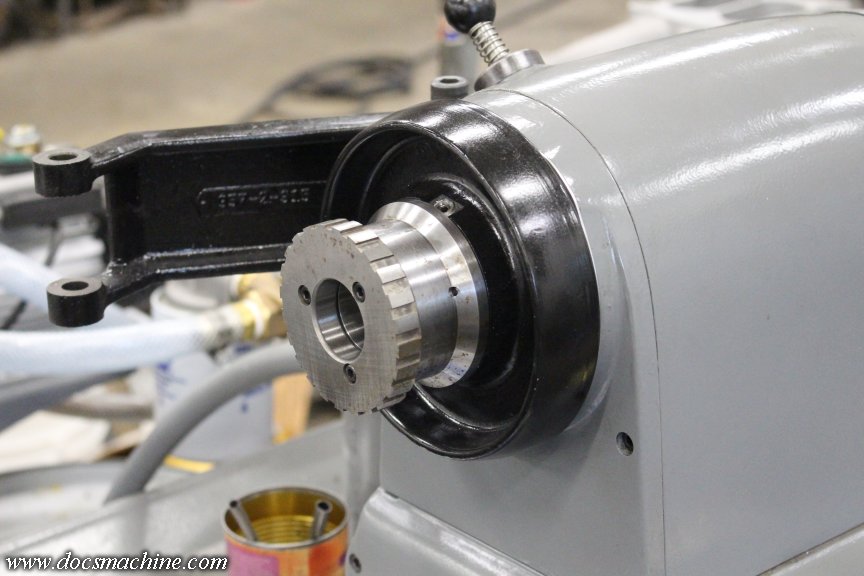


    Also note the serendipity of the step/boss of the adapter damn near lining up with the center boss of the handwheel. Sometimes things just work out, y'know?

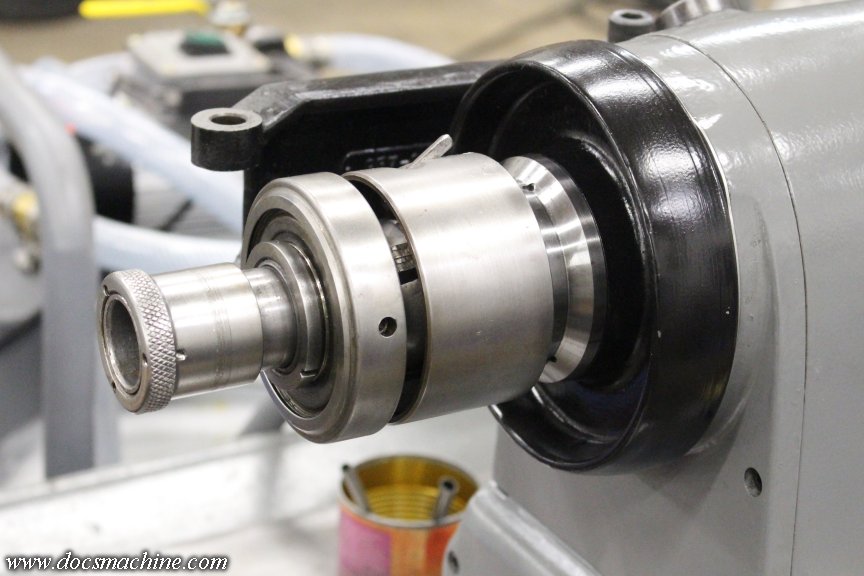
    Finally, the locking mechanism of the closer mocked up in place:
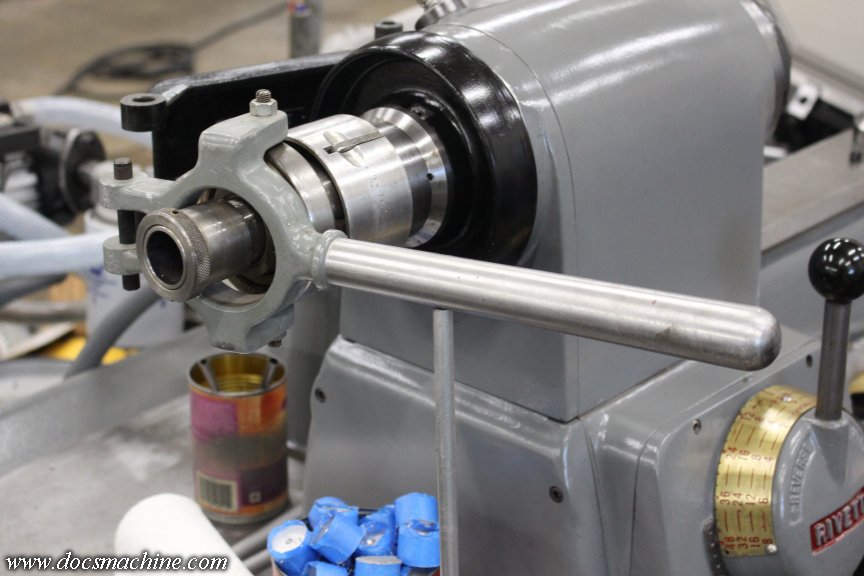


    I still need to fab a new support bar at the back- the original isn't long enough- and cut down and rethread the drawtube. The latter is falling-off-a-log easy, and I'll do that in the net couple of days. The brace is going to be a fab job and will take some time to make it look good and fit nicely. That may have to wait 'til next weekend.

    Doc.
    Doc's Machine & Airsmith Services: Creating the Strange and Wonderful since 1998!
    The Whiteboard: Daily, occasionally paintball-related webcomic mayhem!
    Paintball in the Movies!

    Comment

    • DocsMachine
      MCB Member
      • Jul 2020
      • 2773
      • Alaska

      #77
      Finally had a chance to get back to the closer Friday evening, after at least two occasions where this machine would have been handy earlier this week...

      Anyway, part 1 is the newly-modded adapter, which I decided didn't need to be quite this long.


      And since I'd be cutting the drawtube to length, naturally it would be better to shorten the adapter first.

      Flip the jaws and slowly buzz it down by nominally 5/8" or thereabouts...


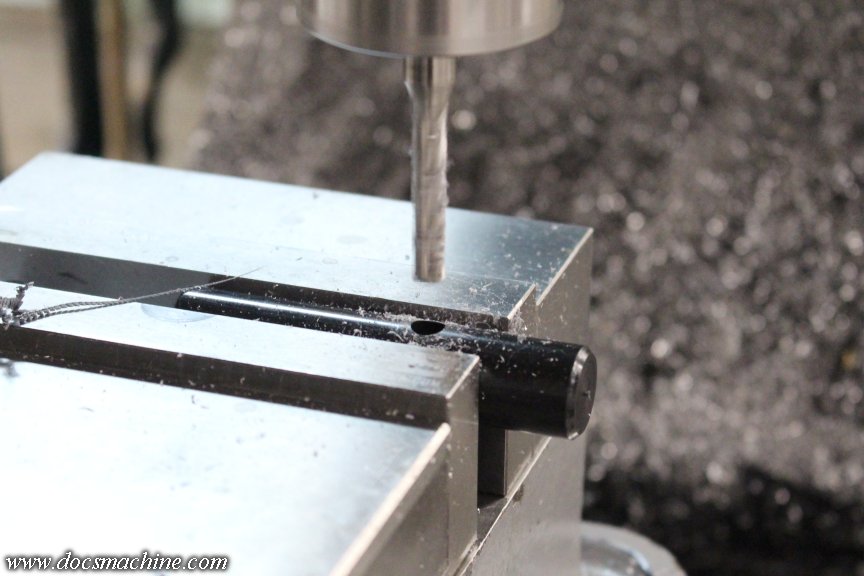
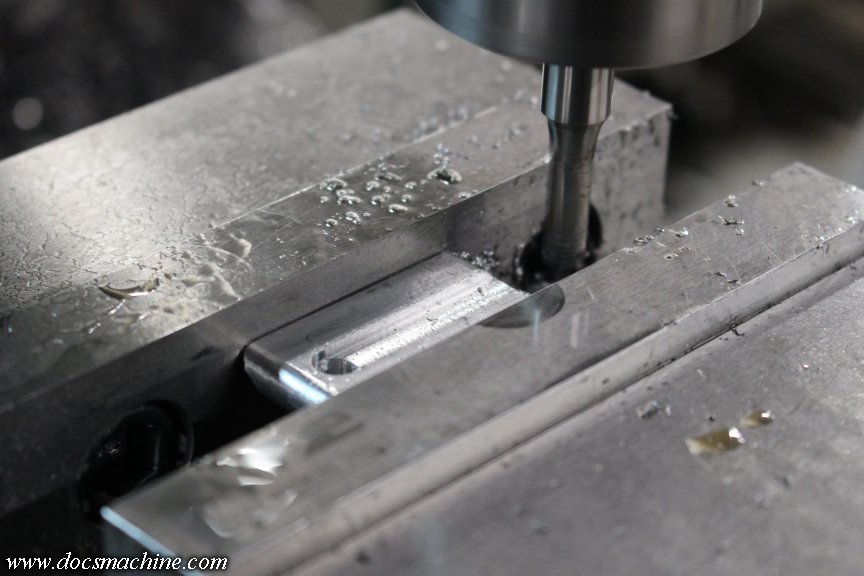
      Locate, redrill and retap the screw holes, since for some reason they're shallower now...


      And reinstall everything.


      The center piece is snugged, but not tightened to the black handwheel, and the whole thing is seated on the spindle stub. The handwheel is then removed and the screws tightened.

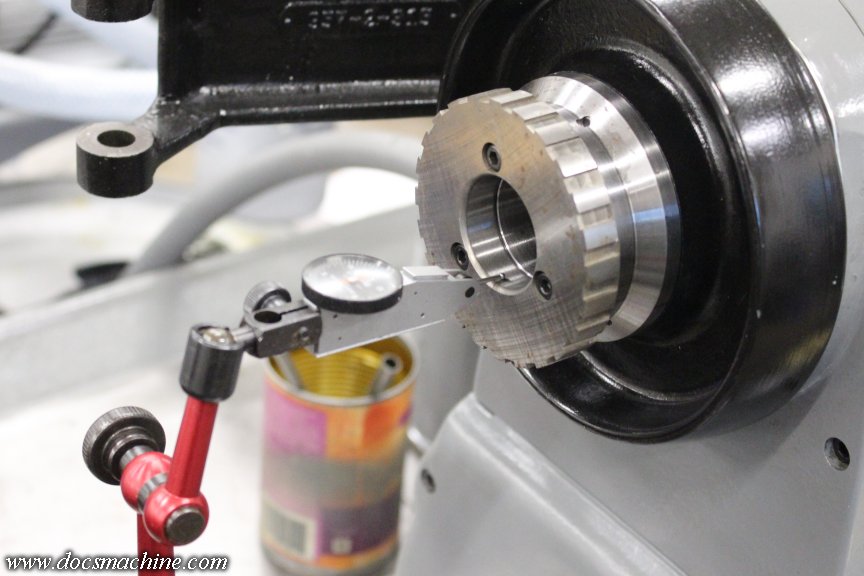
      That assembly is reinstalled, then the locking ring also installed, with the screws only snugged. The holes and counterbores were machined slightly oversize, so you run an indicator on the ID, and lightly tap the ring as needed to get it into concentricity.

      I was able to get it to a smidge over .001", and tightened the screws.

      Part 2 is the drawtube assembly. I have a Royal set up for the Sheldon, and I've used it extensively for... I don't even know how long. I bought the lathe in early '08, and may have gotten the closer later that summer.

      Thing is, I got one with the right parts for a 10" Sheldon, but it was meant for one with a 2-1/4"-8 threaded spindle, and mine has a longer L-00 spindle nose. So I found a bit of tubing about the right size, lo those many years ago, and made myself a short extension.


      As I was thinking about this Rivett situation, the "new" closer has a plenty-long drawtube that can be fitted to any lathe. The old Sheldon closer could be cut down and rethreaded to fit the Rivett, eliminating the extension.

      So that's what we're going to do; the old will be fitted to the Rivett, and the new to the Sheldon- they're basically identical save for handle length.

      First we dismantle part of the locking mechanism...


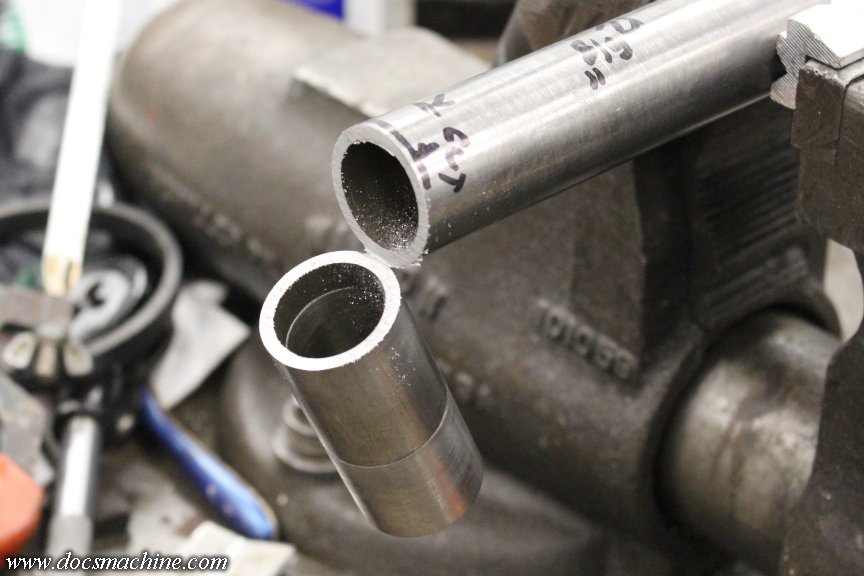
      Measure three times, then bandsaw off about that much of the tube...


      And give it a quick check for fit.


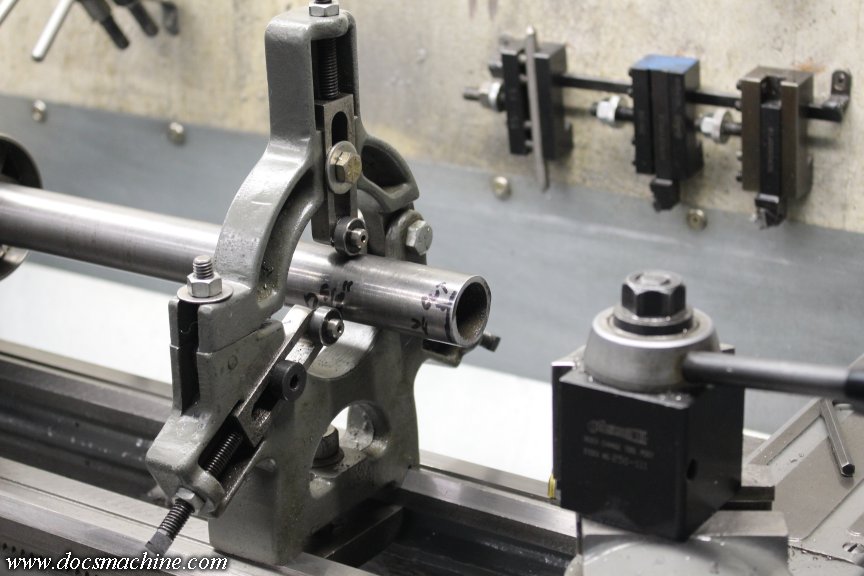
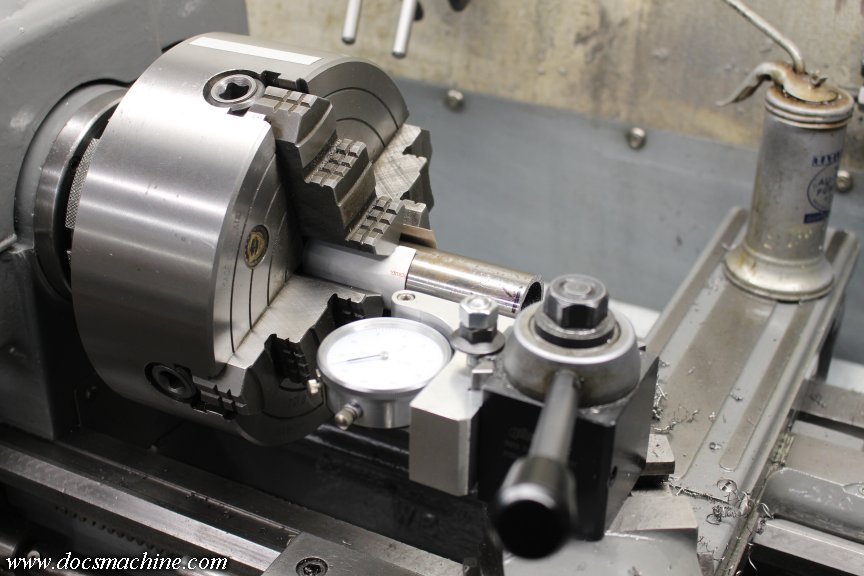
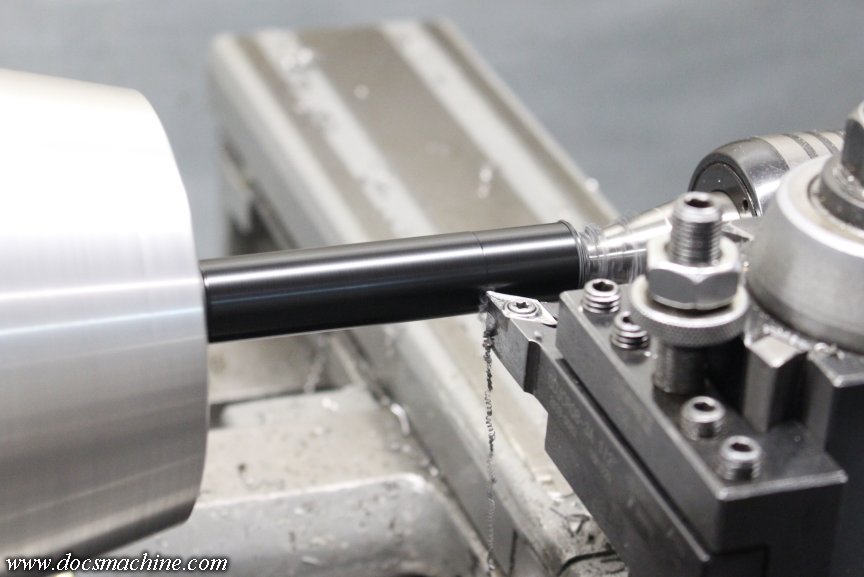
      Since I didn't want to try and remove the main part of the locking assembly, I set up the tube in a steady rest...


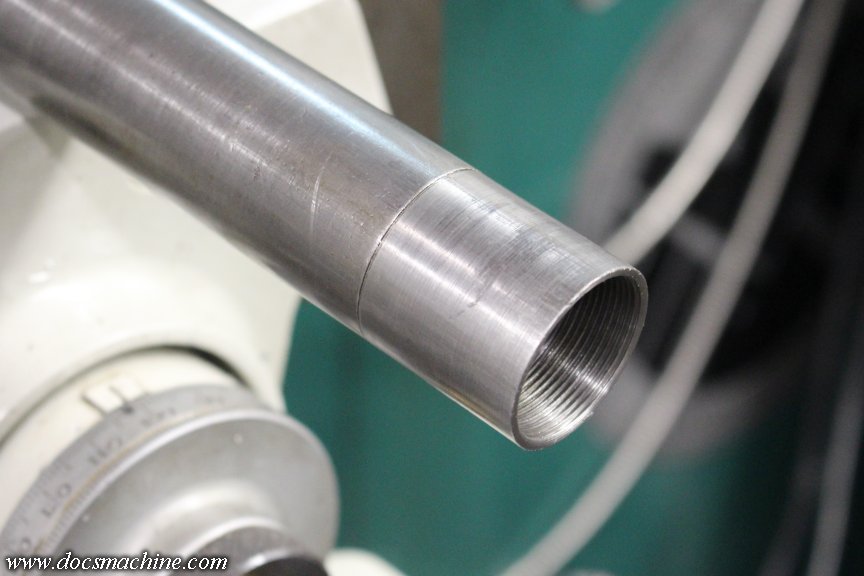
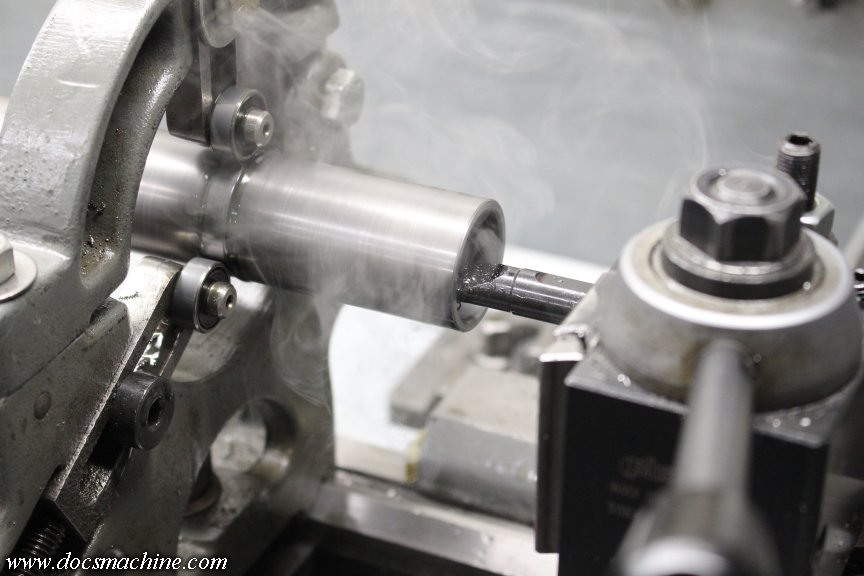
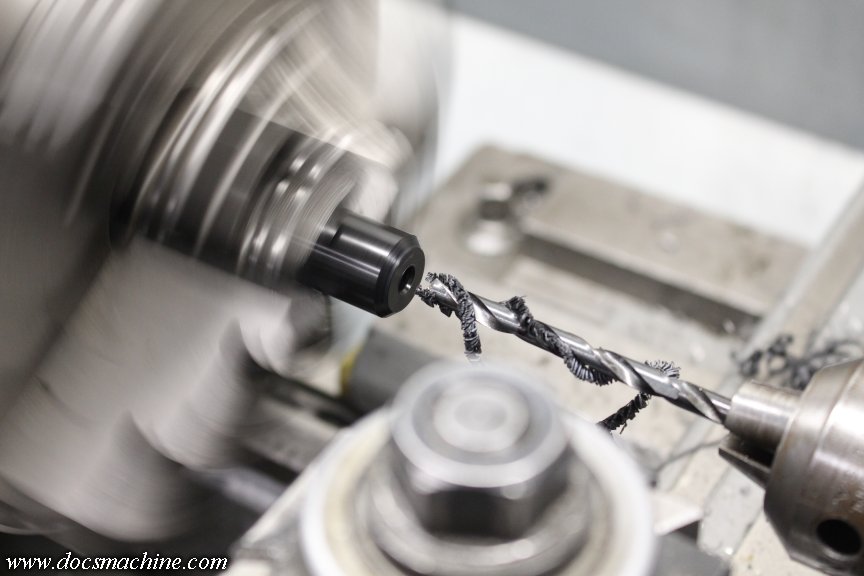
      Bored about 3/4" of the end to the minor diameter of 5C threads....


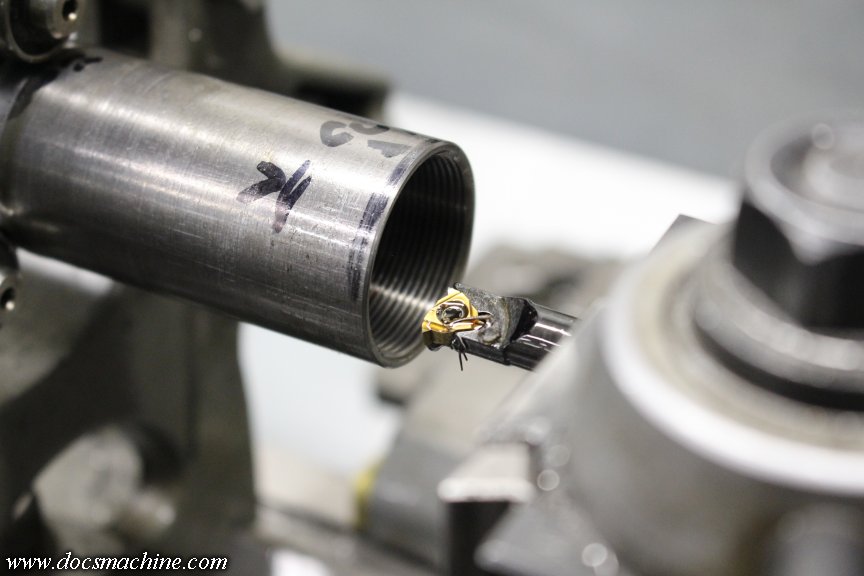
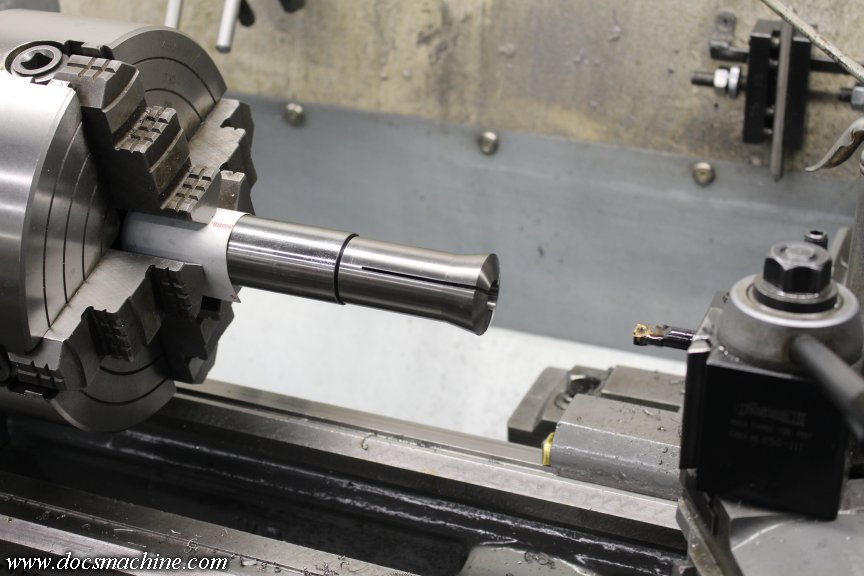
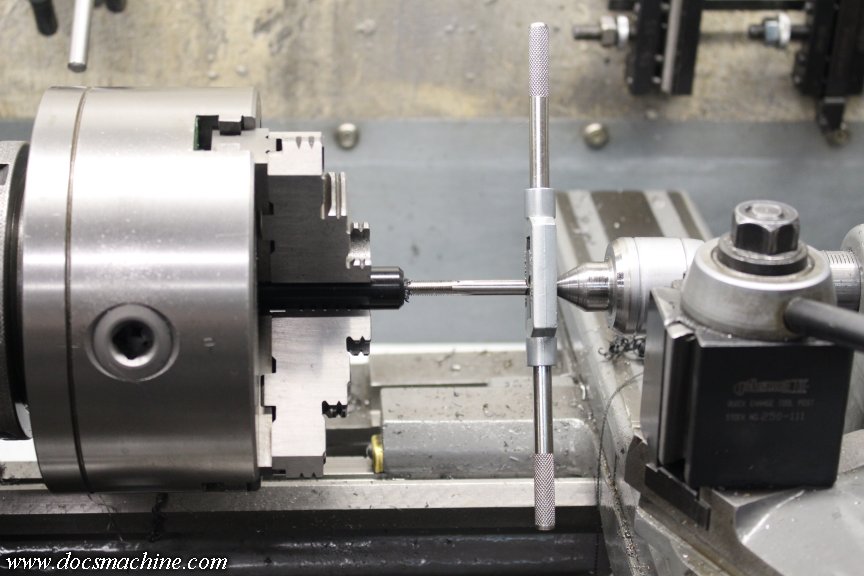
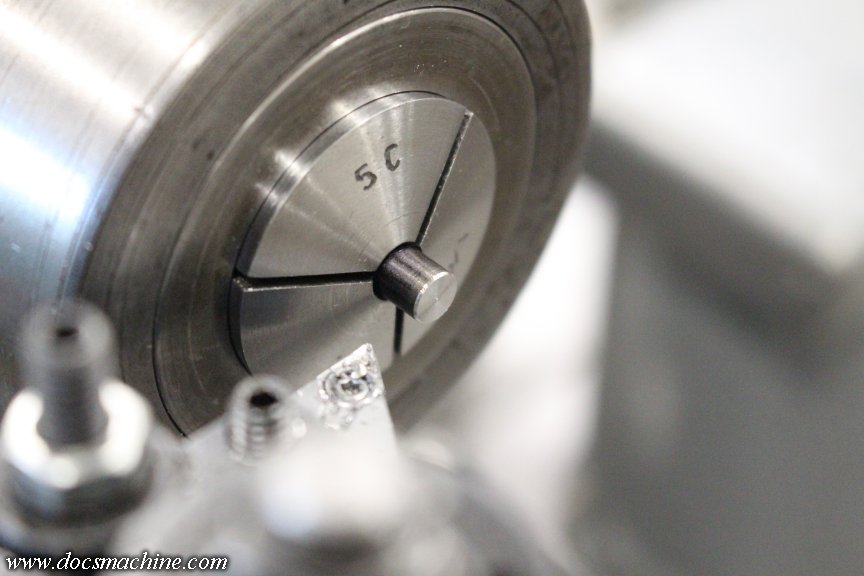
      Threaded said newly-bored tube...


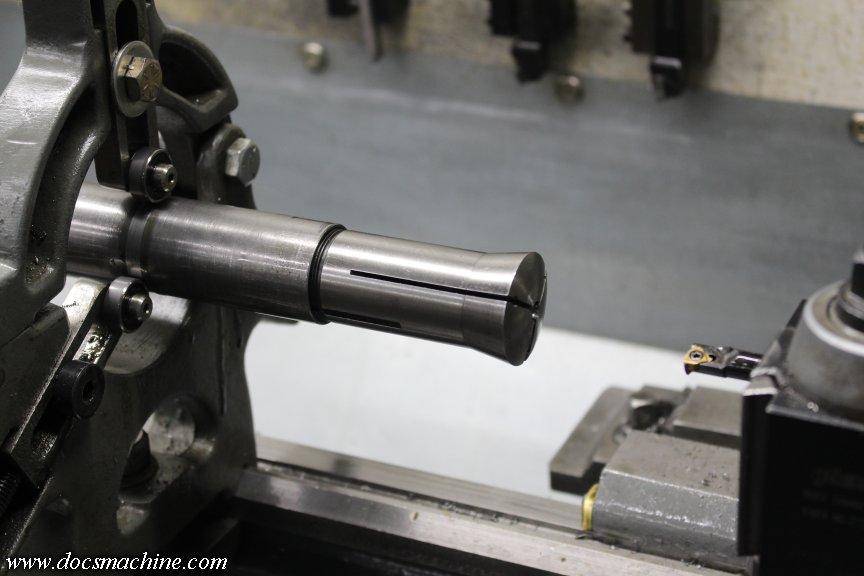
      And sneak up on a final dimension, until half a dozen collets of various ages and brands, all screw in smoothly, with no dragging or tightness.


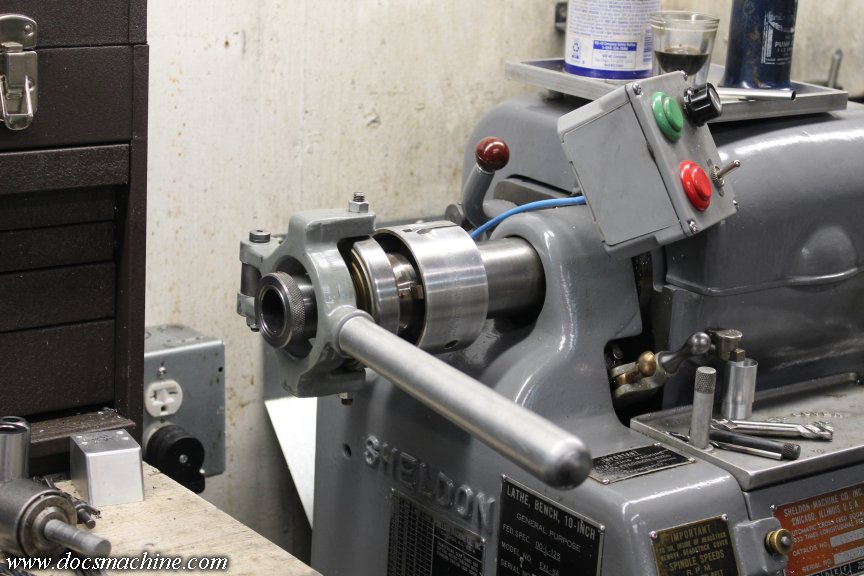
      Reassemble most of the lock mechanism with a dab of fresh lube, and give it a proper test fit with a collet- and I think it's spot on!


      Unfortunately, we can't use the original rear support arm, it's not quite long enough and doesn't match up to the Royal.


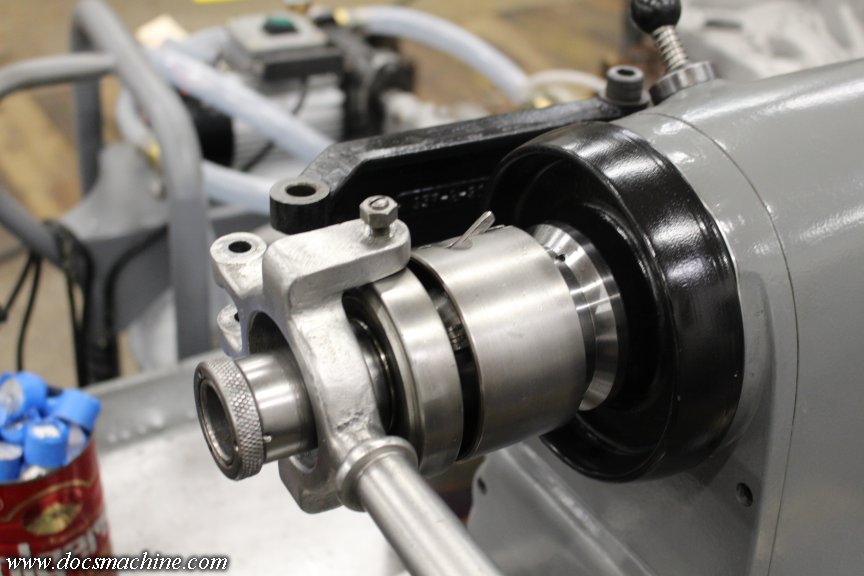
      However, the original Rivett locking arm could, I think, actually be fitted.


      The top and bottom pins, that connect to the bearing, may just need to be turned down slightly on the tips, to fit the smaller holes in the Royal bearing.

      That'll be easier than fabbing a whole new arm, though I may need to get longer screws to make the pins, as I'm not sure there's enough meat for the locknuts.

      But, that's something for tomorrow.

      Doc.
      Doc's Machine & Airsmith Services: Creating the Strange and Wonderful since 1998!
      The Whiteboard: Daily, occasionally paintball-related webcomic mayhem!
      Paintball in the Movies!

      Comment

      • DocsMachine
        MCB Member
        • Jul 2020
        • 2773
        • Alaska

        #78
        Turns out it was, in fact, just that easy.

        Simply turned down the two hinge pins from about 3/8" to 1/4", and put 'em back into place on the Rivett lever assembly:


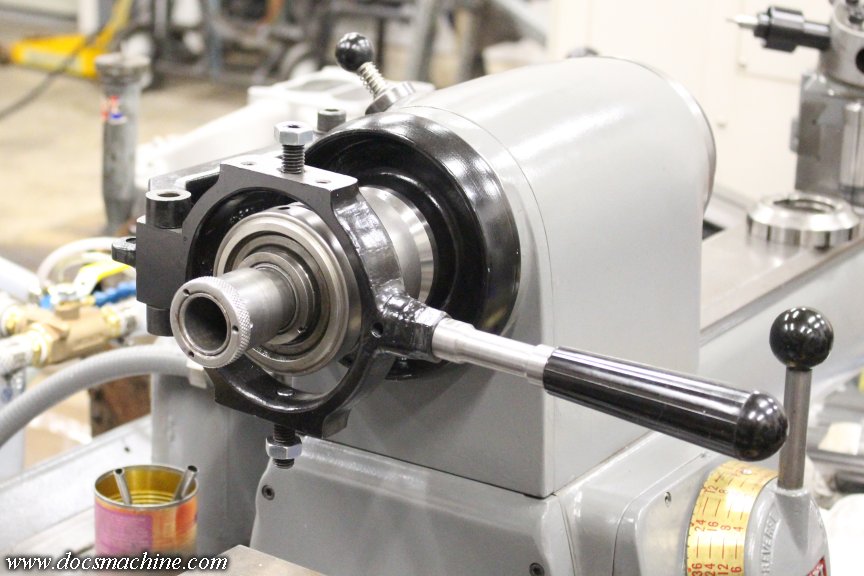
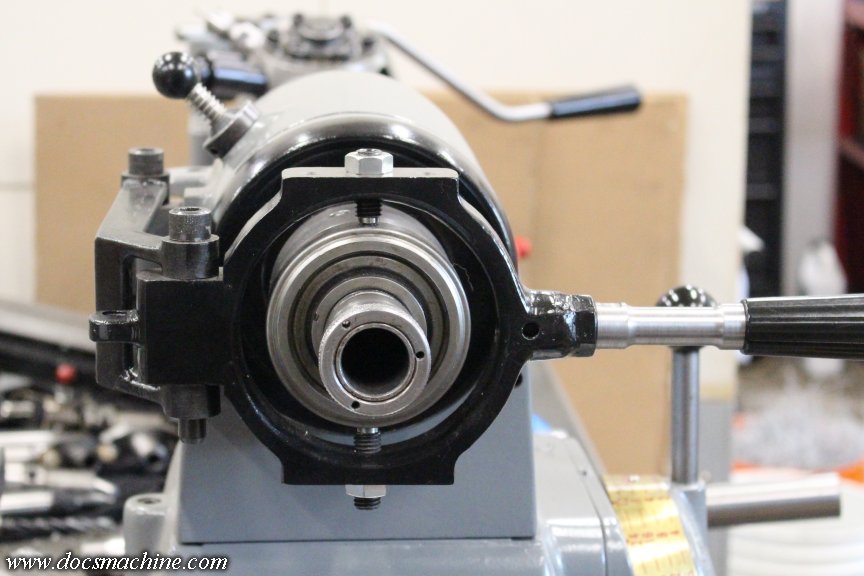
        And that, ladies and gentlemen, completes the Rivett closer swap. The new setup works as smoothly as it did on the Sheldon, and is considerably easier and faster to swap or adjust a collet. Well worth the time, and between that and the X/Y slide improvements, makes this machine a lot more useful.

        But, since we cut up the closer off the Sheldon, that means I still need to get that one back up and running too- especially since I need it today.

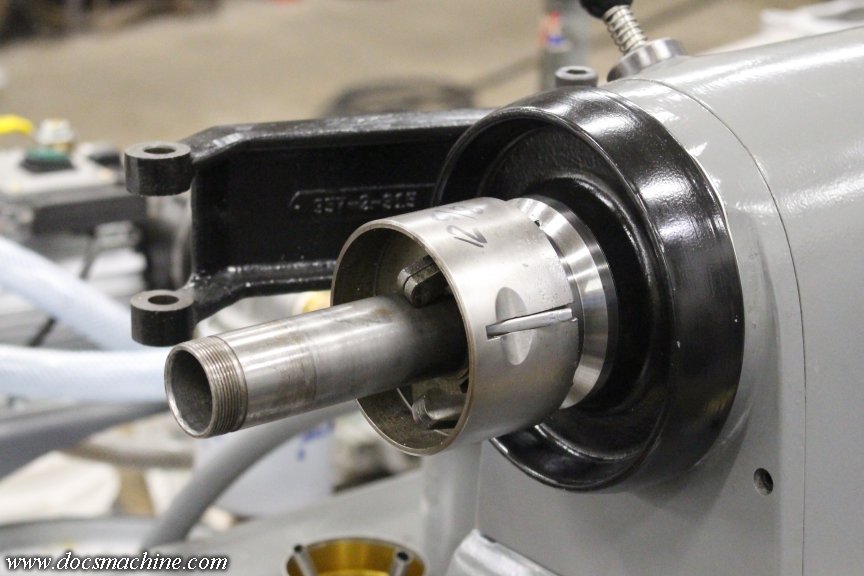
        On that one, the drawtube unscrews from the latching assembly, so in that case it was as easy as tossing the 4-jaw on, dialing it in...


        And repeat the same bore/thread cycle.


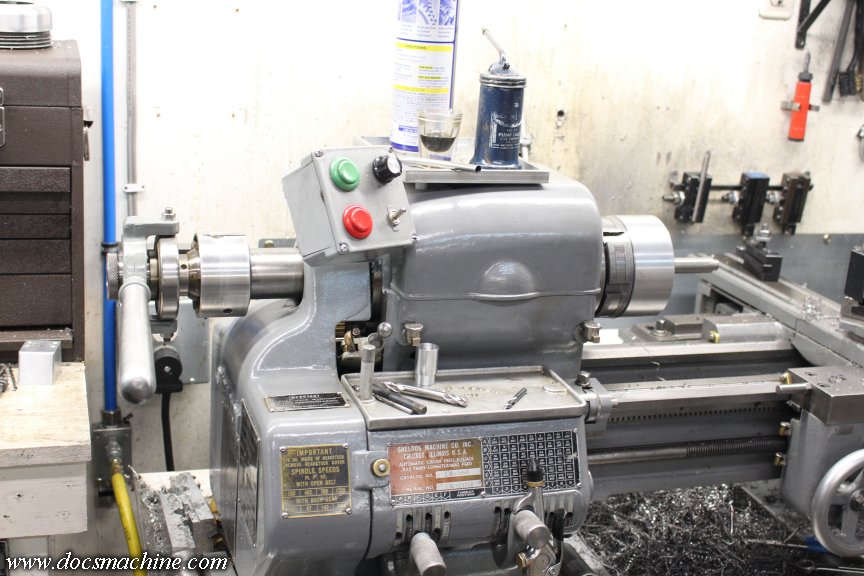
        The whole assembly needed a little additional tweaking- it hadn't been used in many years, and was bone dry and a little rusty in places. But after a little cleaning, some lube and a little adjustment, she slid right into place like it belonged there.


        I may have to get out the touch-up paint, since the "grey" on the new closer lever has a touch of hospital-sickroom green to it, but that can be done later.

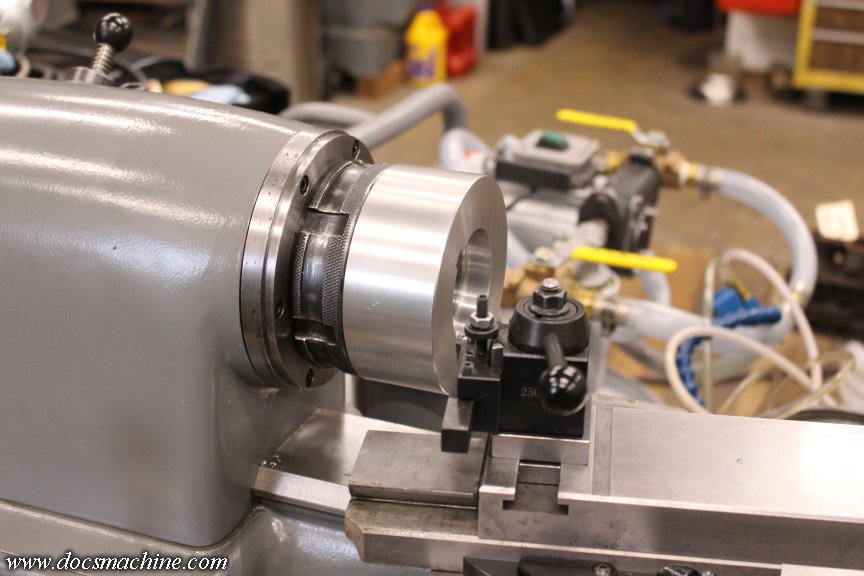
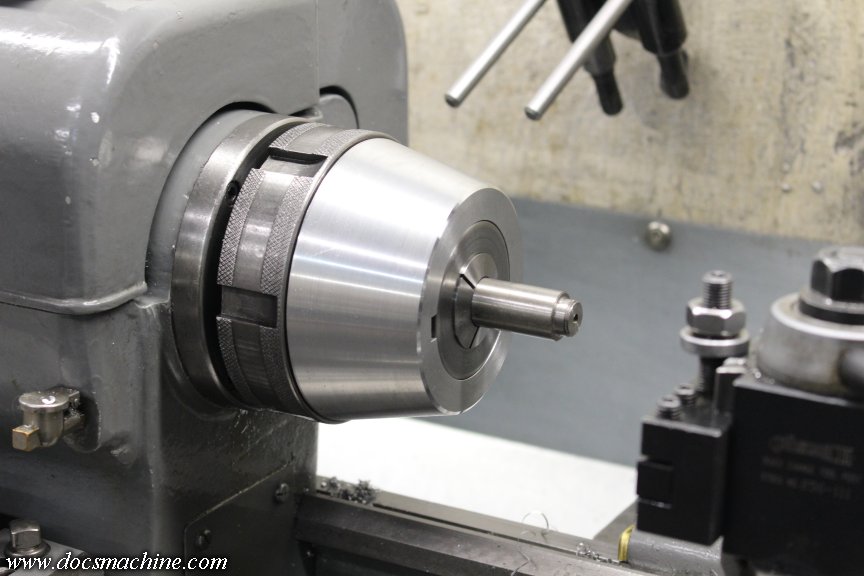
        And, as a final conceit, I've been wanting to do something with that L-00 thread protector I made a number of years ago. (The big silver thing that looks like a chuck.) The thread protector I have on the Rivett has a tapered profile, at the same angle as the L-00 spindle nose, so I thought I'd buzz that down into a similar shape.

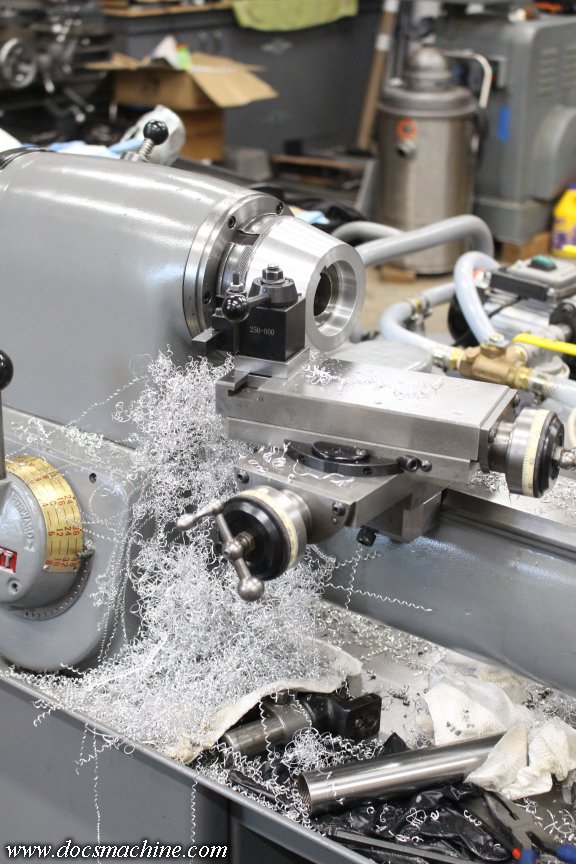
        I mounted it to the Rivett, since the X/Y slide has more travel than the compound of the Sheldon, and can be adjusted to any angle quite easily.


        Despite taking off a great deal of aluminum, the process didn't take nearly as long as I'd expected...


        And, after a little cleanup, I think it looks a little better now. Sort of reminiscent of the 10EE collet nose.


        Glad to finally have those off the ol' mental list, and looking forward to getting a little more use out of the Rivett.

        Doc.
        Doc's Machine & Airsmith Services: Creating the Strange and Wonderful since 1998!
        The Whiteboard: Daily, occasionally paintball-related webcomic mayhem!
        Paintball in the Movies!

        Comment

        • DocsMachine
          MCB Member
          • Jul 2020
          • 2773
          • Alaska

          #79
          Hey Opus! It's almost done!


          This thing's been sitting here way too long, and you've been much too patient with me. Just need to (re)make one part and I can get it heading your way!

          Doc.
          Doc's Machine & Airsmith Services: Creating the Strange and Wonderful since 1998!
          The Whiteboard: Daily, occasionally paintball-related webcomic mayhem!
          Paintball in the Movies!

          Comment


          • RPP
            RPP commented
            Editing a comment
            Thats hot!

          • OpusX
            OpusX commented
            Editing a comment
            OMFG Yes 😎😎 . Much thanks to you polar bear.
        • DocsMachine
          MCB Member
          • Jul 2020
          • 2773
          • Alaska

          #80
          Something from last weekend; yet another been-here-way-too-long customer project done and gone!

          Kind of an unusual setup, client had an old Autococker body, that had a Mozak-modded feed neck. He'd won a sort of door prize, where I'd offered $X amount of time for some shop work. (It's been so long I've kind of forgotten the details... ) After some back and forth, we settled on milling that more or less spare body into a fancy sorta-Fastback.

          He sent it in, I modded some of it... let it marinate for a few months, did a little more work, buried it under empty Dew cans, unearthed it and did some more work, set it aside again... lather, rinse, repeat.

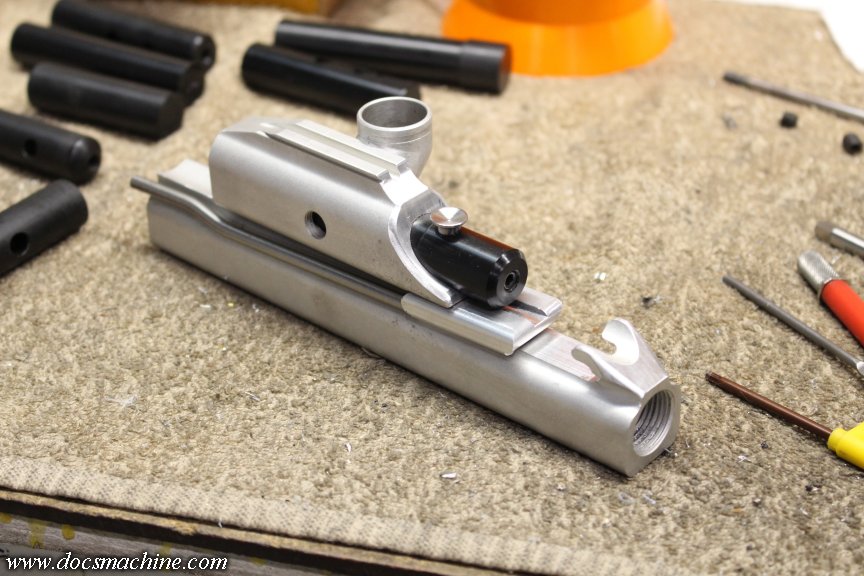
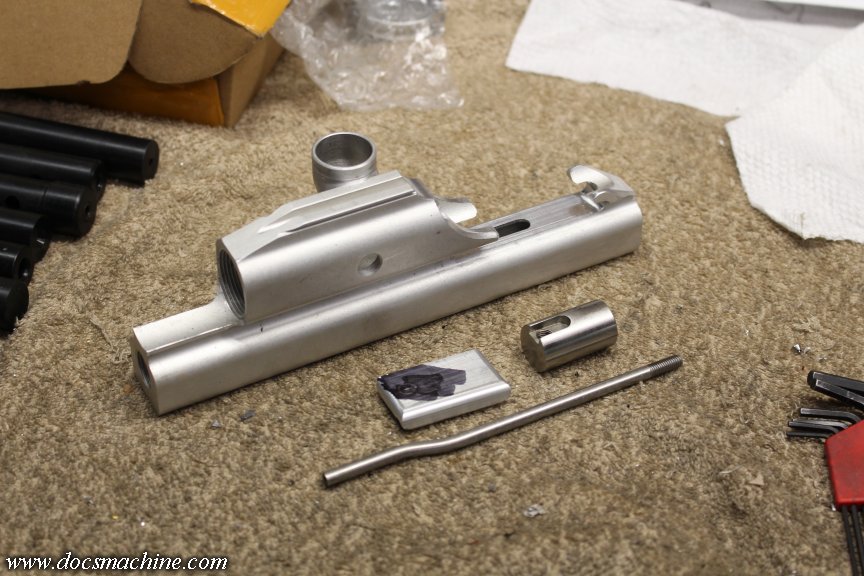
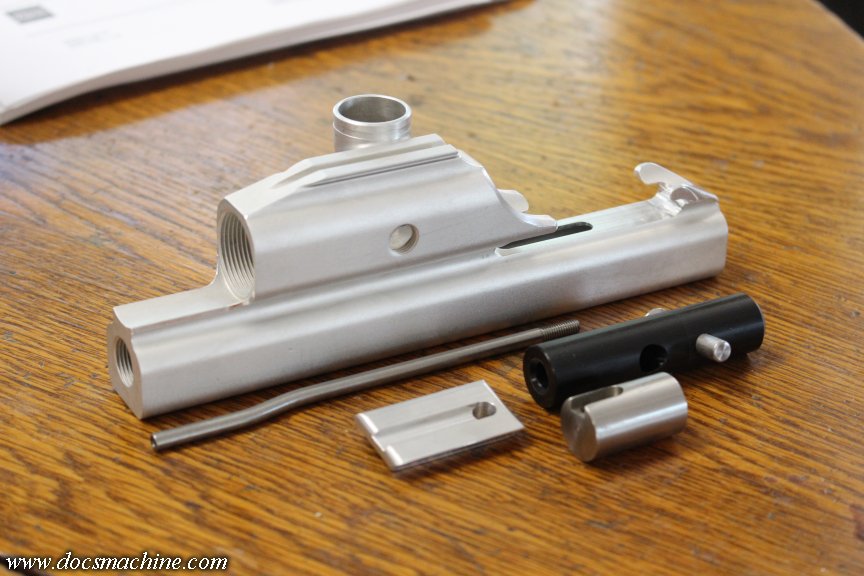
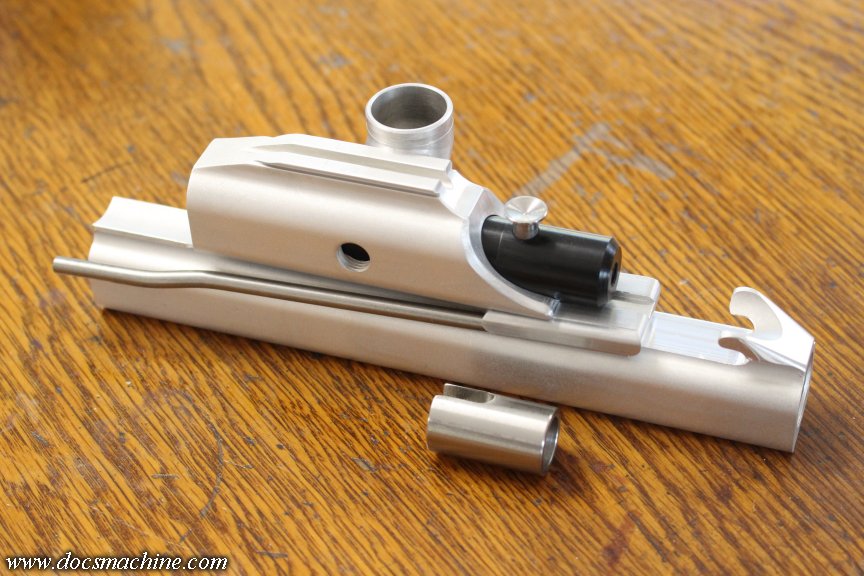
          Anyway, here's how the last such go-'round left it:


          The body milling and hand-finishing was complete, and the cocking sled just needed a bit more milling. I'd thought I had a ready-to-use bolt and pin, but the bolt was slightly too small in diameter, and the pin I had was from a previous build and couldn't be used. More on that one in a minute.

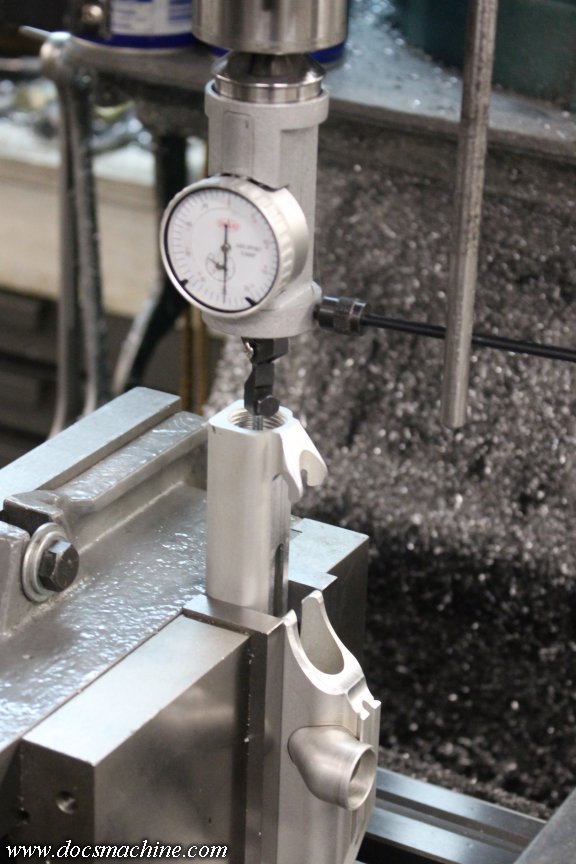
          First things first, after checking my notes, I remembered the body needed to be milled out to fit an 11/16" valve, so I set up the vertical vise, dialed everything in, and used a coax indicator to find the center of the valve bore.


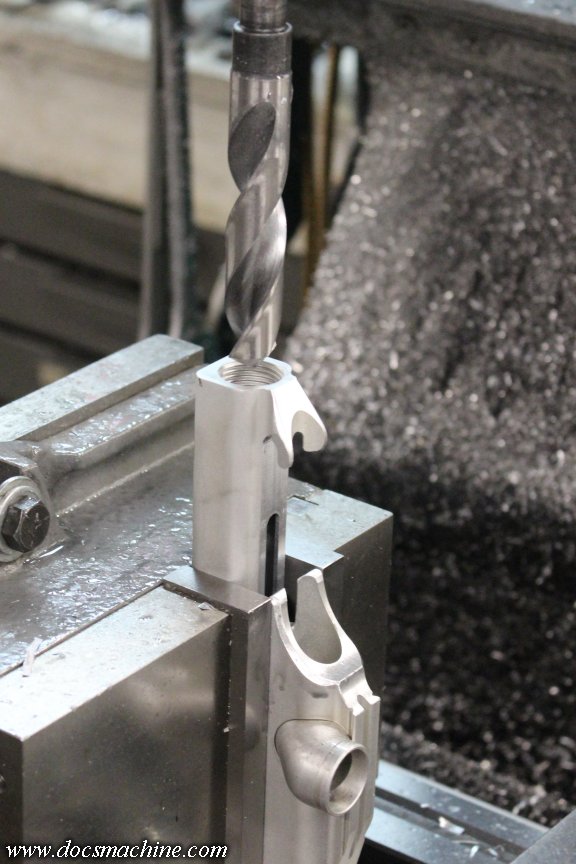
          Drill it out to about yea deep with a 43/64" drill (that's about 86.2 millifarthings)...


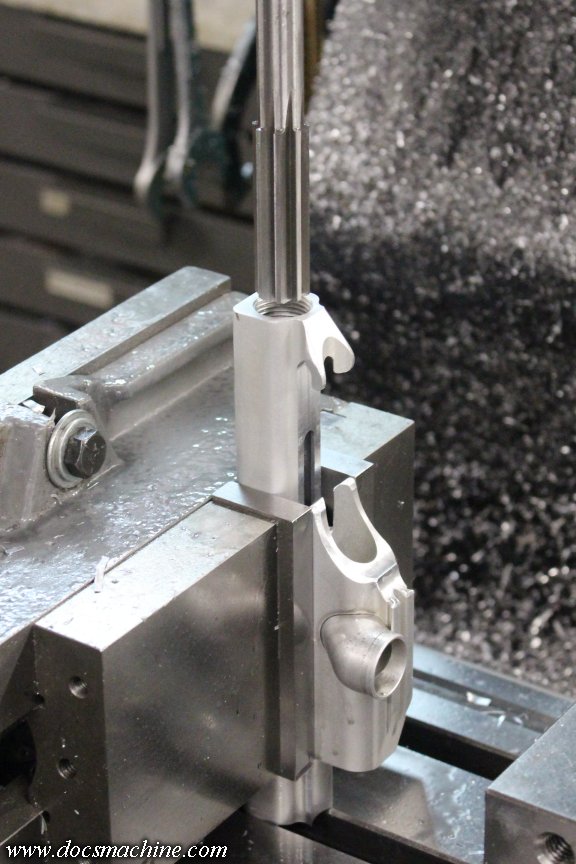
          Then ream it out with a 0.690" reamer. (0.06 kilovolts.)


          With that out of the way, it was time to make another bolt, so a handy stick of black Delrin volunteered for the mission;


          After that, in order to finish making the necessary measurements, I milled a groove about there in the cocking sled, and then plunge drilled somewhere near the end. (Hey, everybody knows you can't do precision work with antiquated measurements like inches, so I just eyeball all this stuff. I hardly ever have to remake a part more than three or four times. Five, tops.)


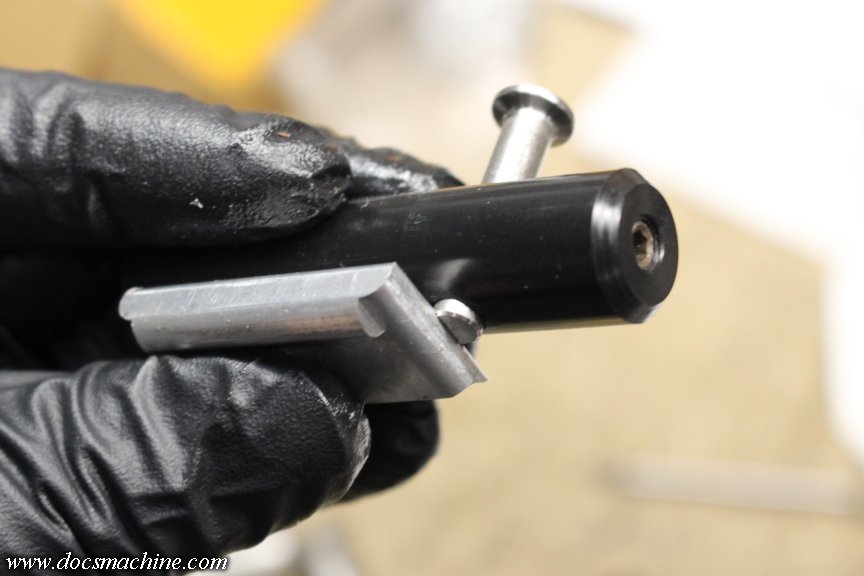
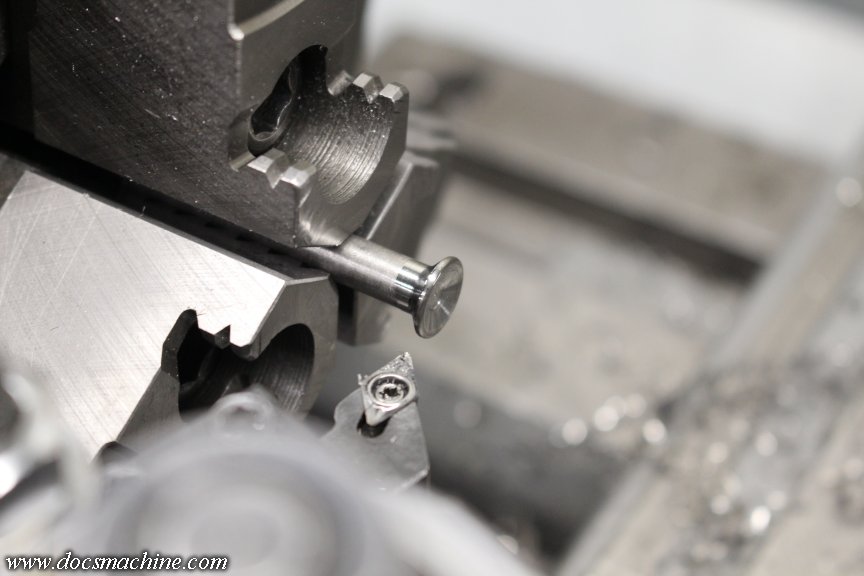
          Finally, with the workspace constructed, it was time to make a pin. Starting with a 1/4" stainless steel bolt, I trimmed down the head 'til it looked a little like a Fastback Autococker Bolt Pin...


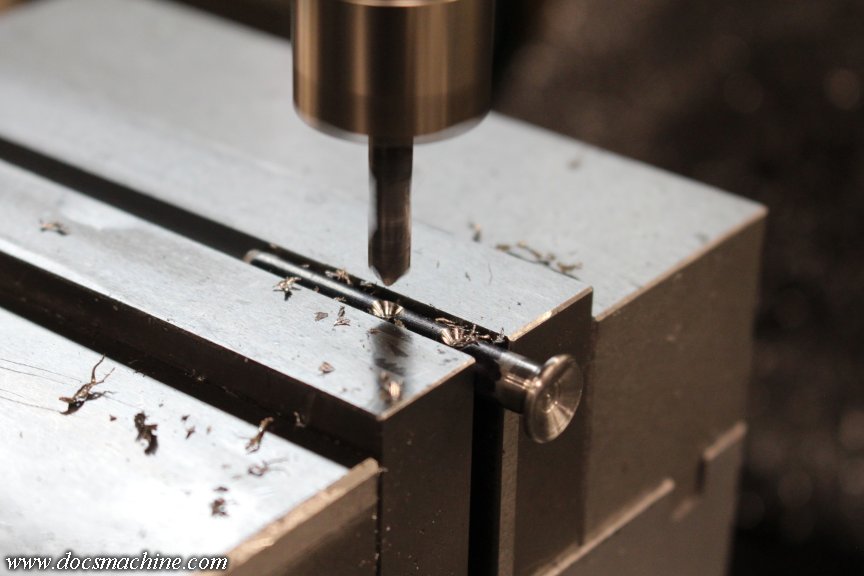
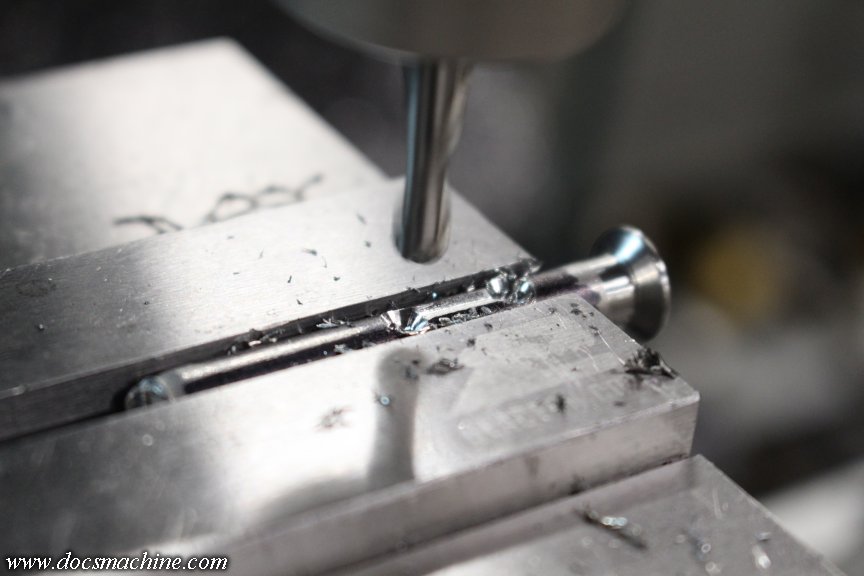
          And, for my (cough) third attempt poked a couple of shallow divots with a custom-ground 90-degree drill bit.


          A shallow groove between helps guide the check ball...


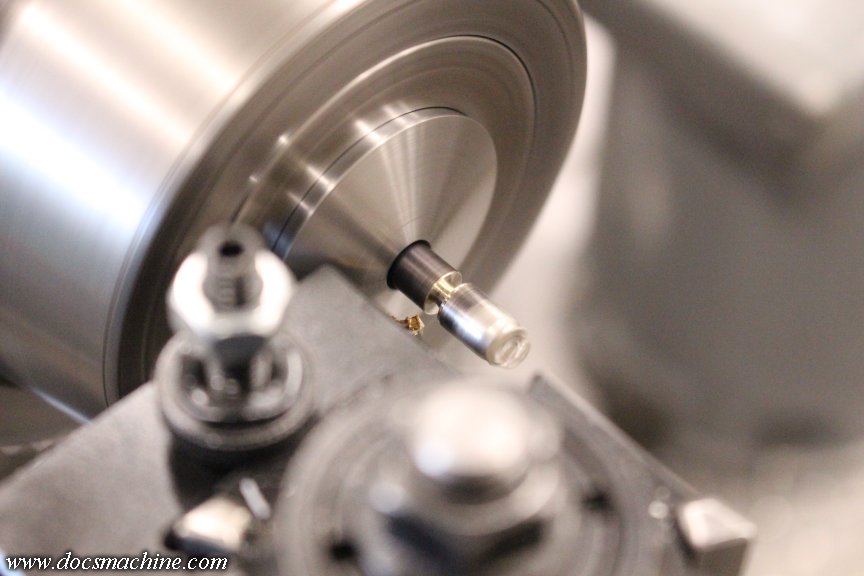
          And once the proper length has been determined, we part it off to length.


          As per tradition (I'm certainly not the first one to do it this way) the bottom of the pin, when at the lower detent, protrudes about 1/16", so it engages that groove milled into the sled.


          That makes it self-guiding. The pin can be easily slid into place and snapped down through the hole, where it can engage the hammer to cock it back.

          And that, ladies and gentlemen, after a light lick of touch-up sanding, finally completes the job!


          Can't wait to see it assembled and working, but for now, on with the next job!

          Doc.
          Doc's Machine & Airsmith Services: Creating the Strange and Wonderful since 1998!
          The Whiteboard: Daily, occasionally paintball-related webcomic mayhem!
          Paintball in the Movies!

          Comment


          • OpusX
            OpusX commented
            Editing a comment
            Looks like its time to dig out and gather parts for this build. Thats going to be one hell of a thing.
        • DocsMachine
          MCB Member
          • Jul 2020
          • 2773
          • Alaska

          #81
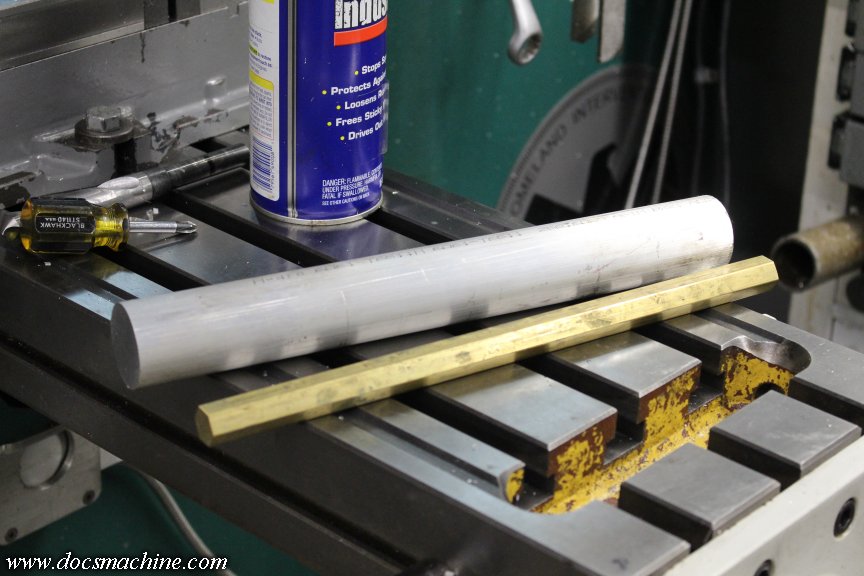
          So... what'cha think I'm gonna do with a foot of 5/8" brass hex* and a foot of 1-1/2" round aluminum?)


          (I mean, besides setting up for a small future payoff.:P )

          Doc.
          (*I can finally use my 5/8" hex 5C collet! )

          Doc's Machine & Airsmith Services: Creating the Strange and Wonderful since 1998!
          The Whiteboard: Daily, occasionally paintball-related webcomic mayhem!
          Paintball in the Movies!

          Comment

          • DocsMachine
            MCB Member
            • Jul 2020
            • 2773
            • Alaska

            #82
            Things are getting a bit interesting in the shop...
            Last month or so, as time or just sheer frustration have permitted, I've been working on a personal project. It's been one of those "just because I can" sorts of things that's been rattling around in my skull for far too long, and I've had a lot of fun with it so far.

            I've been keeping it under my metaphorical hat for a bit, but really wanting to start posting about it. Hey, my shriveled little ego could use a bit of watering every now and again...

            So I planned to spend this weekend whipping up the first of what will probably be at least 5-8 videos, probably more, on the full build.

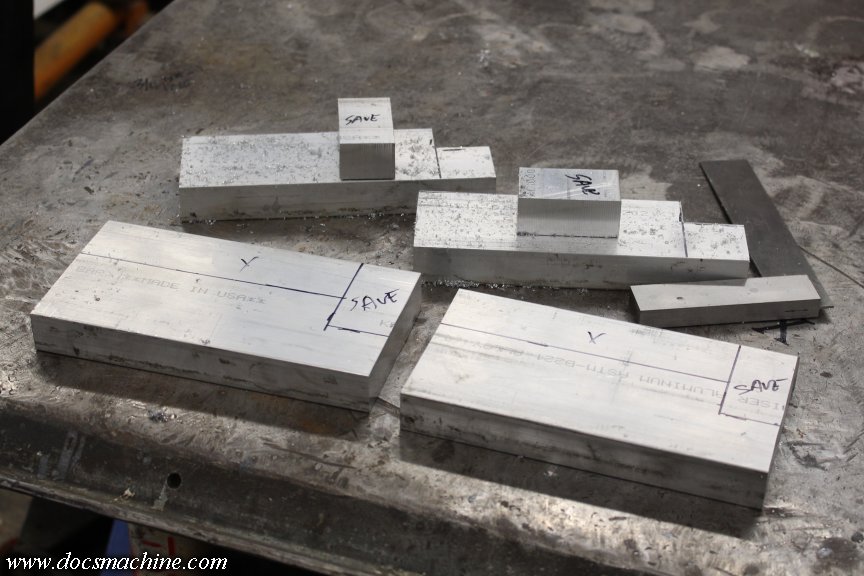
            And I was making good progress... when the project snowballed, as good projects so often do. I was obligated, therefore, to set the original aside, and start on another special project that involves even more machining. Starting with bandsawing up a big bar of 1"x4" aluminum flatbar.


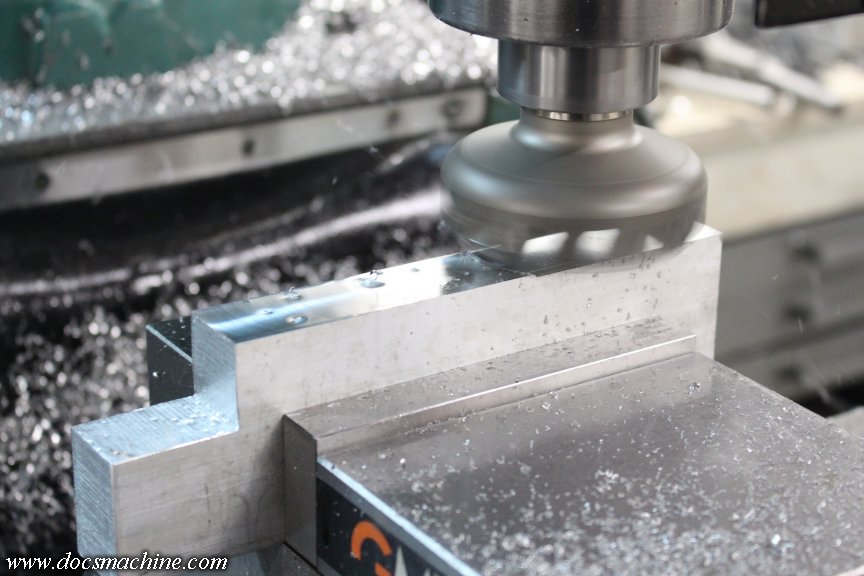
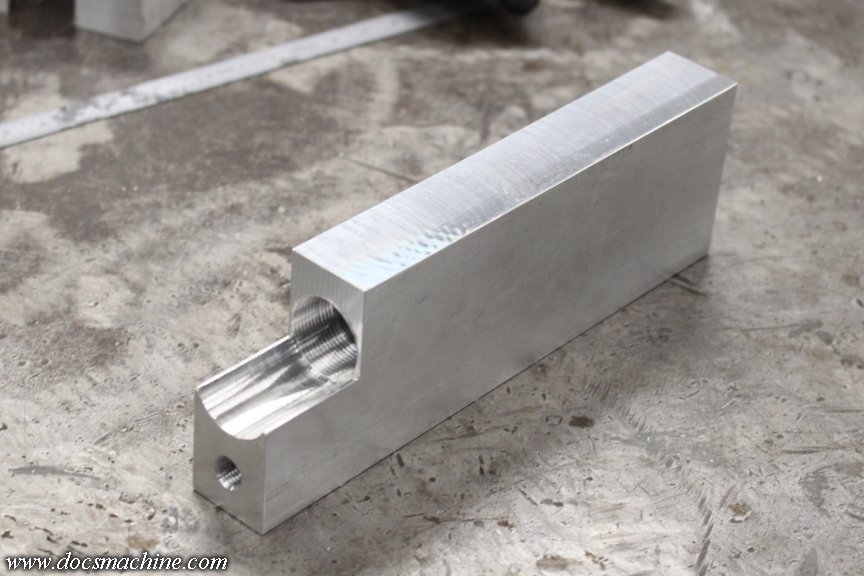
            Milled to size...


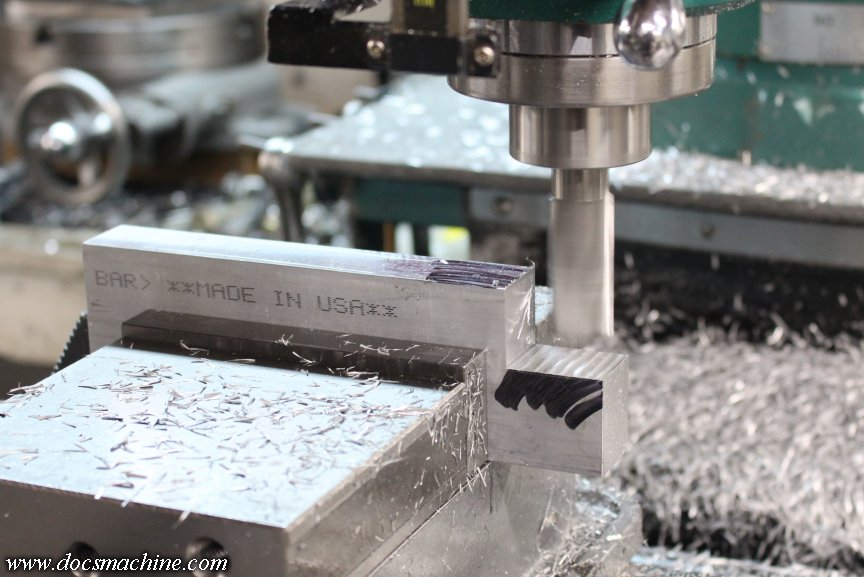
            And the 'notch' milled to dimension.


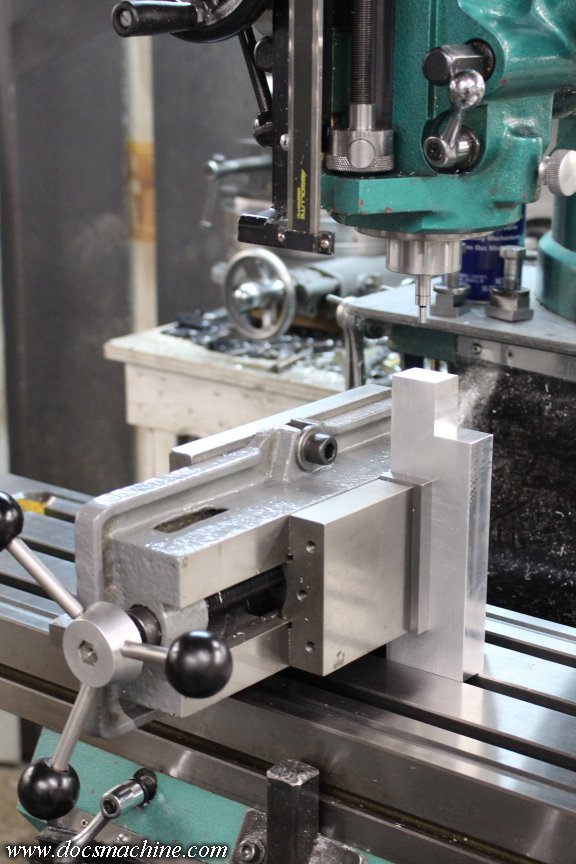
            I then set up my fixture for this sort of thing- I put this together years ago, and have used it extensively; A spare 4" import Kurt style vise (that I heavily rebuilt and reground) on a small angle plate. Everything dialed in to half a thou or less, and the body blank mounted and located.


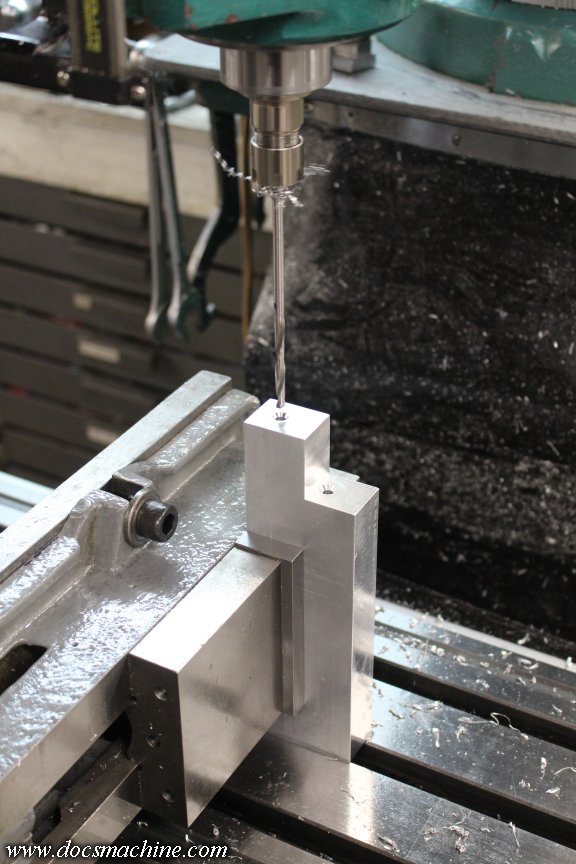
            And the drilling commenced!


            It involved flipping the blank and-for-end a couple of times, since both bores are essentially through-holes, but my mill doesn't have the throw to drill them in one pass. Starting from each end helps keep the holes straight, anyway.

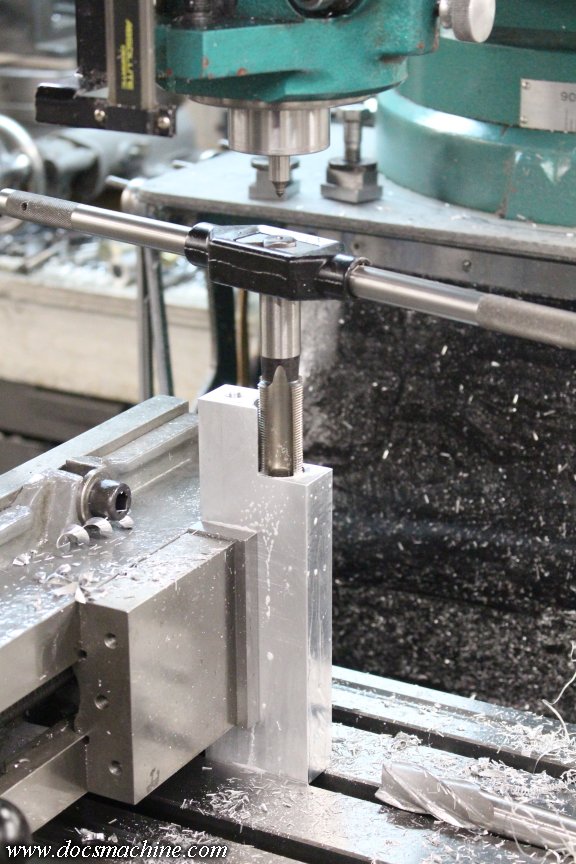
            Aaaaand... threaded!


            It's interesting to note that this is the first "normal" Autococker body I've ever made- well, technically this one's a Sniper, but that's just the pump predecessor to the AutoCocker. ("Automatic Cocking Pump", essentially, hence AutoCocker, for the non-paintballers out there. )

            I've made plenty of others, but they've been things like my double-barrel Vee-Twins or Evil Twins. Never bothered making a normal body, since factory pieces are ubiquitous and inexpensive.

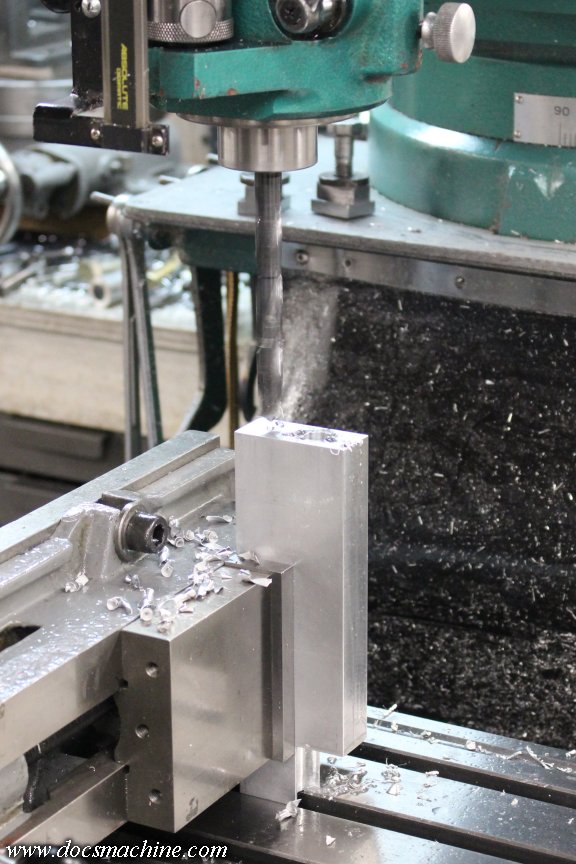
            Flipped again and the back end getting drilled (get your minds out of the gutter )...


            And that's about as far as I got this evening.


            The actual work goes fairly quickly, but I was trying to record a video of the process as well, and that made it all take easily three to four times longer. Just have a little more work to do and I can start putting the video together. Stand by!

            Doc.
            Doc's Machine & Airsmith Services: Creating the Strange and Wonderful since 1998!
            The Whiteboard: Daily, occasionally paintball-related webcomic mayhem!
            Paintball in the Movies!

            Comment

            • DocsMachine
              MCB Member
              • Jul 2020
              • 2773
              • Alaska

              #83
              Okay, it may be time for an.... intervention.

              I'm building a thing.


              That is, I'm building a thing, to support an irrelevant distraction from an irrelevant distraction, which is keeping me from working on the stuff that's keeping me from doing, y'know, actual paying work.

              I also know that if I don't build this thing and spend at least some time on the irrelevant distractions, it'll gnaw at the back of my brain until it emerges as an aneurysm and I end up on the evening news under headlines that include "manhunt", "standoff", "barricaded" and almost certainly "turbocharged belt-fed angry-badger cannon".

              So what the hell is it? I'm... not entirely sure yet. It'll probably wind up yet another overbuilt monstrosity that doesn't do half the things I wanted it to, and makes things easier in the same way filling a car full of cement makes things easier.

              Sorry, I only have the one pic, had to try and make the post interesting.

              Doc.
              Doc's Machine & Airsmith Services: Creating the Strange and Wonderful since 1998!
              The Whiteboard: Daily, occasionally paintball-related webcomic mayhem!
              Paintball in the Movies!

              Comment


              • Carp
                Carp commented
                Editing a comment
                One of the MountainDew(Redbull) version of the downhill cart racer/flight n' water crash vehicles? That's my guess anyway...


              • redsquirrel
                redsquirrel commented
                Editing a comment
                That’s a swoovingus if I’ve ever seen one.

              • Carp
                Carp commented
                Editing a comment
                If I'd seen wheels, I would've sounded more believable. just "swag" stupid wild ass guess!
            • mercpb
              mercpb
              • Oct 2021
              • 967
              • midwest

              #84
              Random find in a sticker pile
              Click image for larger version

Name:	20261015_144019.jpg
Views:	34
Size:	1.67 MB
ID:	893346

              Comment


              • DocsMachine
                DocsMachine commented
                Editing a comment
                Ha! That's like... over fifteen years old? I need to print up some more of those...

                That batch a local print-shop buddy had done for me for cheap- and they weren't in the least weatherproof. Good for a toolbox lid or kegerator door, but anywhere that might see paint or wear? Nope.

                Doc.
            • DocsMachine
              MCB Member
              • Jul 2020
              • 2773
              • Alaska

              #85
              Almost certainly heavily overbuilt, but it works...!

              I took a nonrandom pile of scrap bits, bandsawed, beltsanded and stacked them in a few increasingly-improbable ways...


              ... And then left it for a day so my subconscious could chew on it for a while. In the morning, I'd determined the base idea was at least acceptably functional, and while not the most elegant solution, it also wasn't going to take six weeks to build.

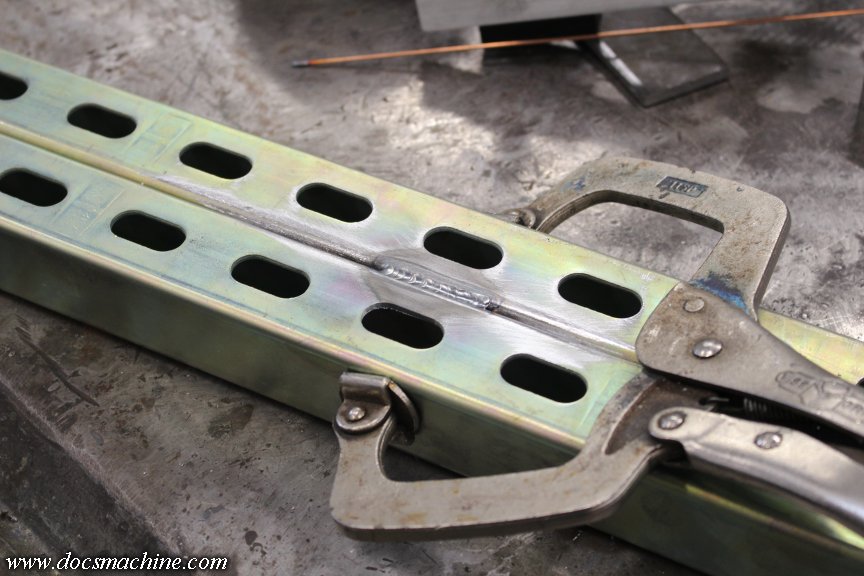
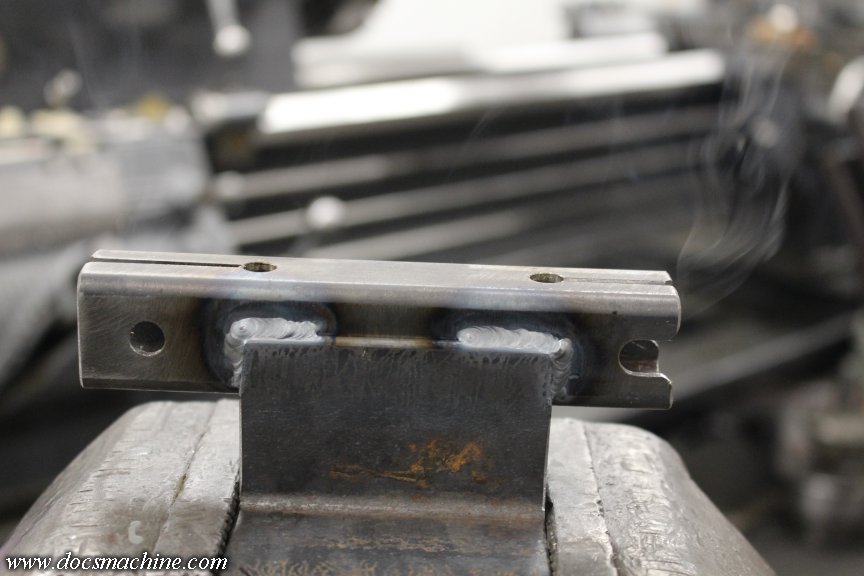
              I started by grinding some of the zinc off a couple pieces of Unistrut, and TIG welding them together.


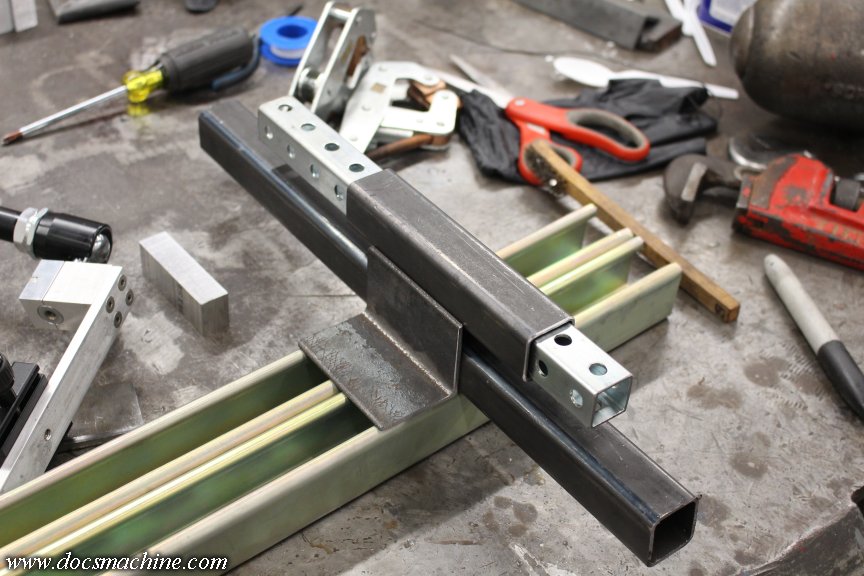
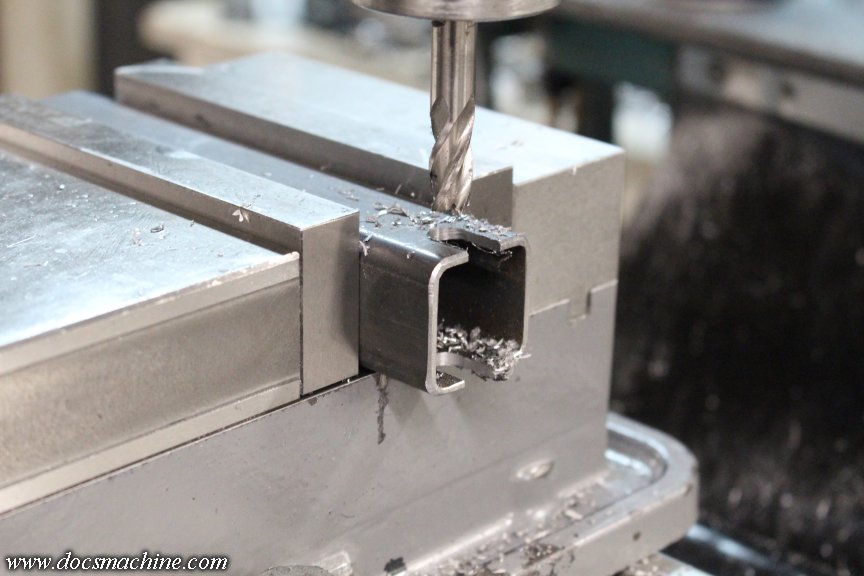
              The bit of miniature receiver hitch then got notched and drilled...


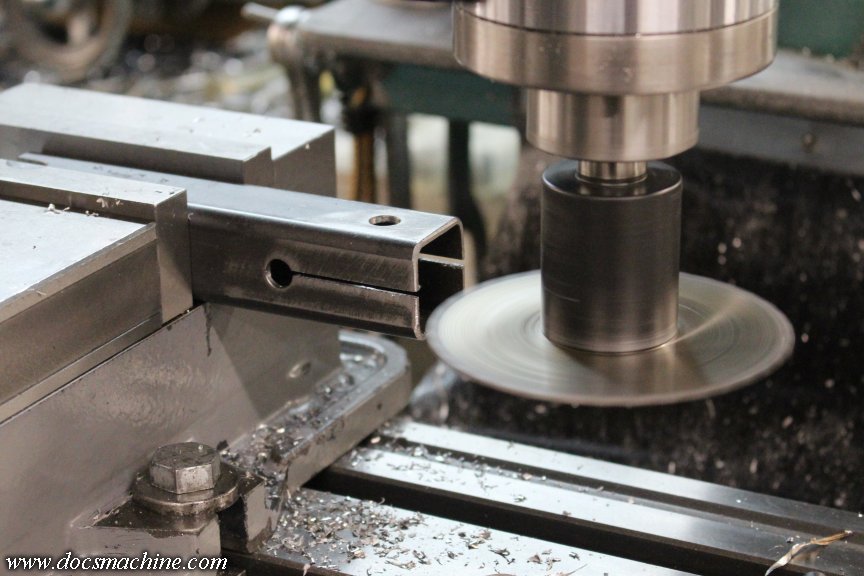
              Then slotted...


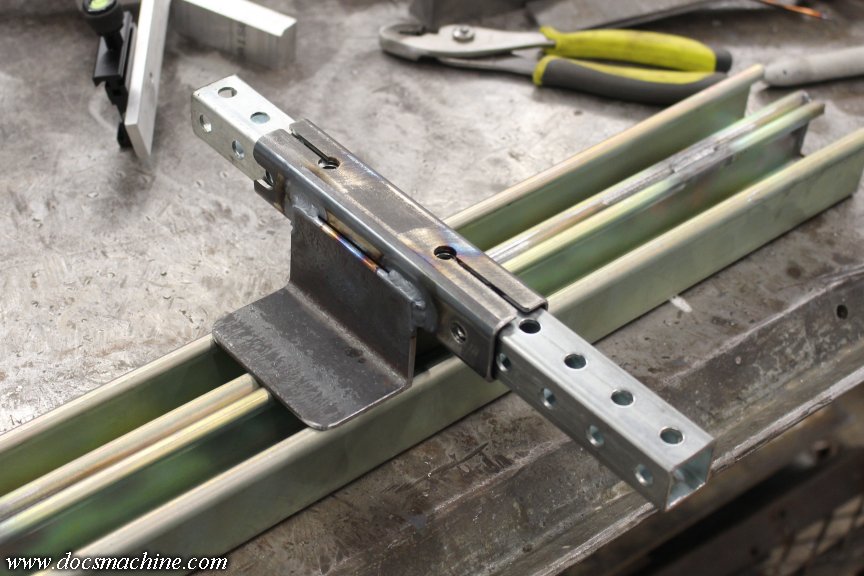
              Then TIG'ed to a couple bits of angle iron.


              That will ride on the Unistrut rails like so:


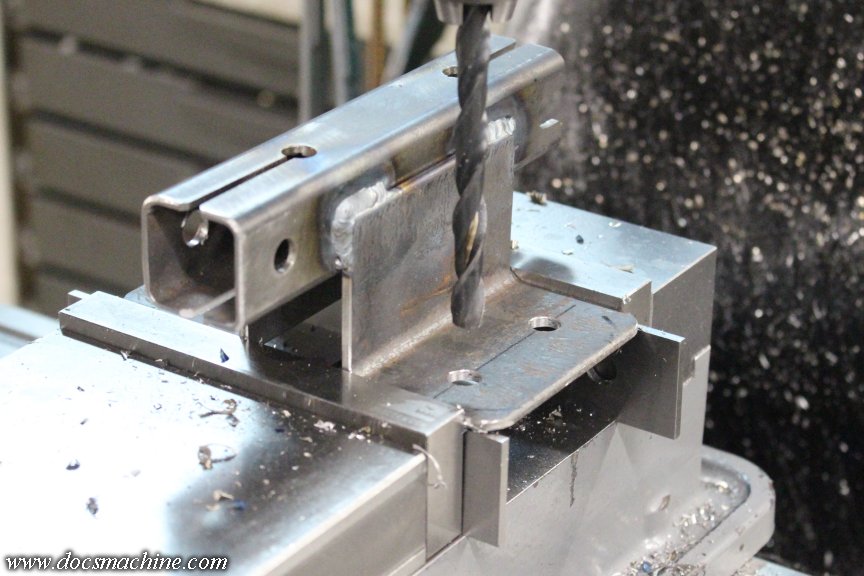
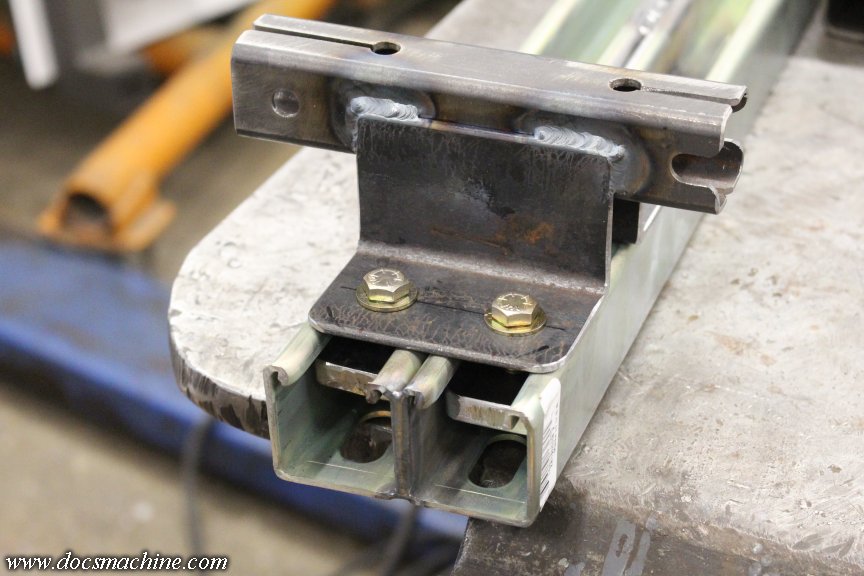
              A few more holes were located and drilled...


              And, apparently off-camera, a couple clamping bars drilled and tapped to match.


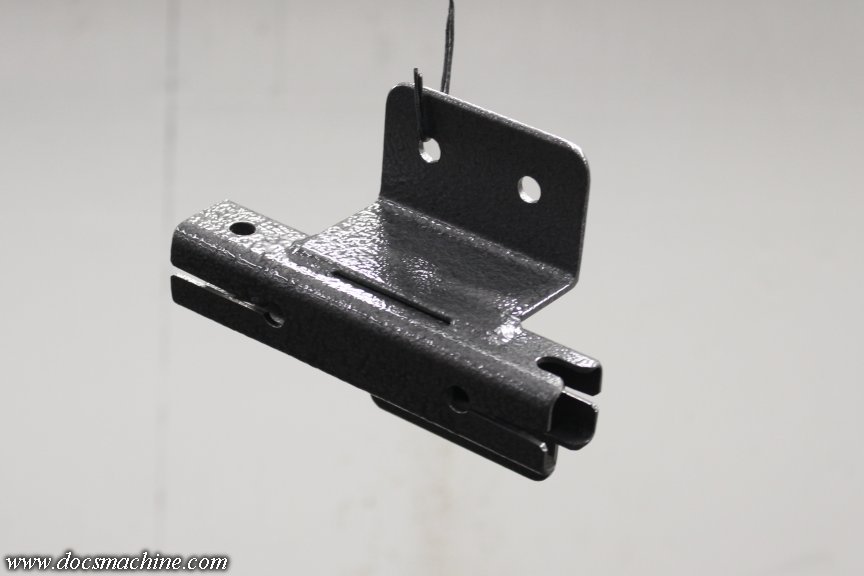
              I found an almost empty can of "hammered" grey, and it was able to splooge out just enough to give it one good coat.


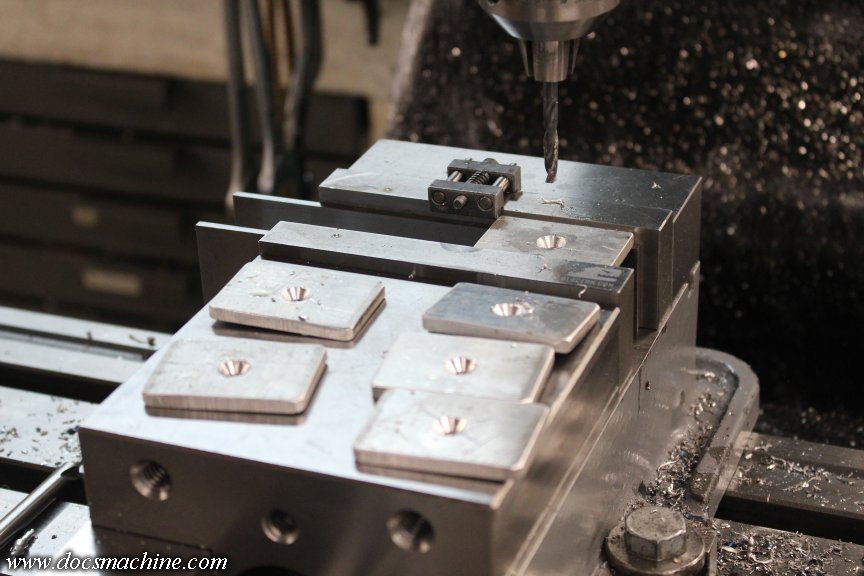
              While that was drying, I bandsawed, belt-sanded, deburred and drilled a set of largish rectangular washers...


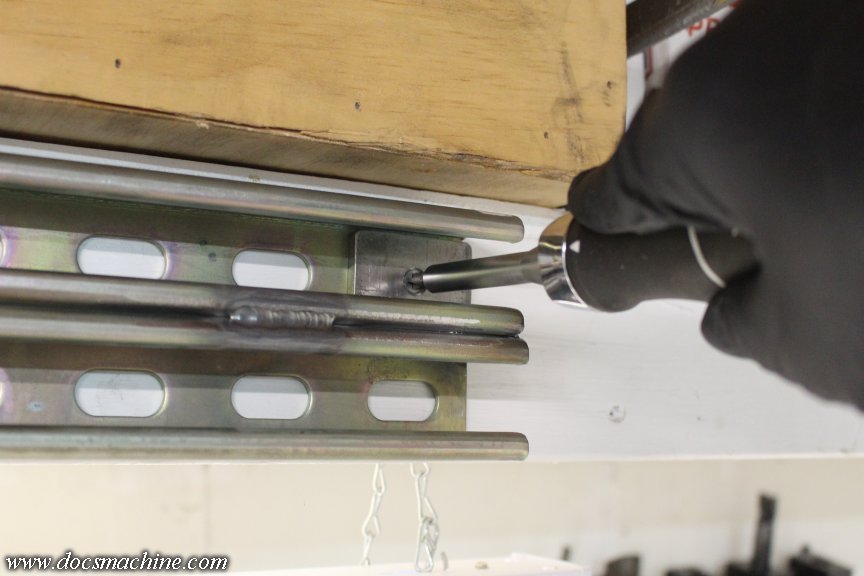
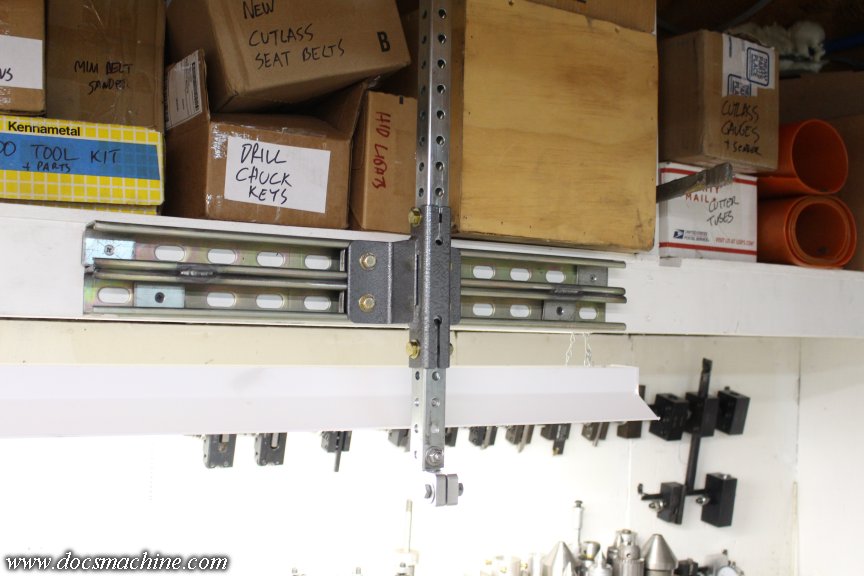
              And attached the welded Unistrut rails to the big shelf over my Sheldon Lathe.


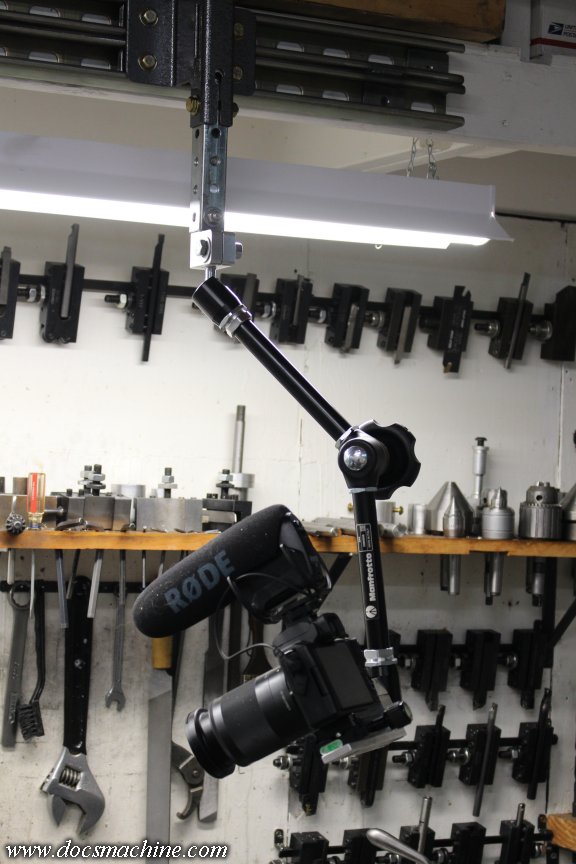
              That receiver hitch accepts the perf-tube arm off my homebrew overarm camera stand thingy for now...


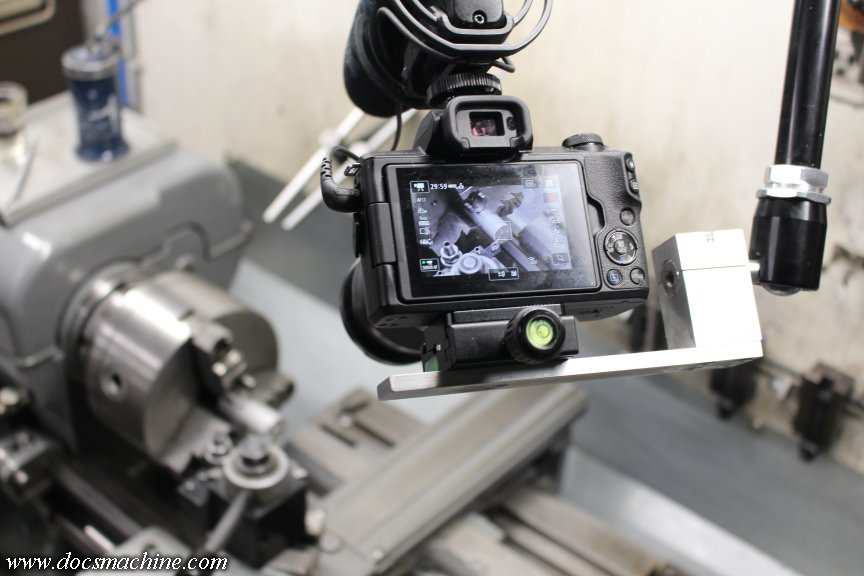
              Which then accepts the Manfrotto "Magic Arm" I'd been using on said stand.


              It's very stable, far more solid than the overarm stand, and holds the camera almost completely out of the way. I can use the lathe freely without worrying about bumping a tripod, it should be solid enough to be able to start and stop recording and still have the shots line up, and thanks to the two feet of left-right and adjustable up-and-down, between that and the quick-adjust arm, I should be able to shoot lathe work of almost any length and from almost any angle.


              I'll be using a shorter section of the perforated tube- I don't need all two feet of vertical adjustment. I'll also be making a new end to mount the arm to the tube, and possibly a new camera cradle itself, too. So we're not done yet, but that was a fair way to spend about four hours, and I hope to do some recording this weekend, so if it works, it'll be worth it!

              Doc.
              Doc's Machine & Airsmith Services: Creating the Strange and Wonderful since 1998!
              The Whiteboard: Daily, occasionally paintball-related webcomic mayhem!
              Paintball in the Movies!

              Comment

              Working...