Inside Doc's Machine Shop

Collapse
X
 
  • Time
  • Show
Clear All
new posts
  • Impactfour
    MCB Member
    • Aug 2021
    • 897
    • Coventry RI

    #256
    Hey Doc, I don't know if this is the place to ask, but how many barrels would you need spoken for to be convinced to make a run of tigershark barrels?

    Jonnydread markdem would you be interested?
    Feedback
    Collection
    GITM based out of Warzone RI

    Comment


    • Jonnydread
      Jonnydread commented
      Editing a comment
      I'd certainly take 1 tighter bore barrel, maybe 2.

    • markdem
      markdem commented
      Editing a comment
      Im happy with what i got. Thanks for thinking of me tho
  • DocsMachine
    MCB Member
    • Jul 2020
    • 2699
    • Alaska

    #257
    Thing is, I can't (yet) make an actual barrel. That is, I don't have a way to finish the actual bore to acceptable standards. Pretty much everything I make is for Freak inserts- the insert takes care of the bore size and finish, I just make the part needed to fit it to the gun.

    And on a Tigershark, that goofy pin-retention system has those pins too close together to properly fit a Freak insert.

    Now, I haven't sat down and done a full survey- and don't have a Tigershark to experiment with (though I do have a TS barrel) - so there may be some ways around it, but first blush? You need a one-piece tight-bore barrel, and I don't have the means (again, yet) to make one to acceptable quality.

    Doc.
    Doc's Machine & Airsmith Services: Creating the Strange and Wonderful since 1998!
    The Whiteboard: Daily, occasionally paintball-related webcomic mayhem!
    Paintball in the Movies!

    Comment


    • Jordan
      Jordan commented
      Editing a comment
      Tigersharks use a threaded barrel, not the Stingray's double pin retention method.

    • DocsMachine
      DocsMachine commented
      Editing a comment
      Sorry, you're right. Apparently my brain's been running on safe mode for a couple of days. I have a Stingray II I bought off of somebody here specifically to look into fitting a Freak. I don't have access to a 'Shark, nor have a TS barrel in my collection. Anybody want to loan me one?
      Doc.

    • Impactfour
      Impactfour commented
      Editing a comment
      I'd be more than happy to, I'm headed to this post office some time this week so just shoot me your address and I'll send one your way
  • jonbobshinigin
    Bunker Buster
    • Apr 2025
    • 114

    #258
    What are the chances of doing some XL Brass Inserts in the future? I’d be VERY interested in that.

    Comment


    • DocsMachine
      DocsMachine commented
      Editing a comment
      I've never made brass inserts. Another MCB'er was having those made- and I believe you have to order a custom-drawn bore. I can look into it, but my plates are already pretty full.
      Doc.
  • Ecapnation
    MCB Member
    • Jul 2020
    • 4209
    • South Central Long Island

    #259
    Is there any future plans for more tracer spacers?

    Comment


    • DocsMachine
      DocsMachine commented
      Editing a comment
      Yup! Just waiting 'til I'm done with the current tooling setup before I swap.

      Doc.

    • Ecapnation
      Ecapnation commented
      Editing a comment
      Cool I'm in on the next run.... Got tracer fever it seems now
  • DocsMachine
    MCB Member
    • Jul 2020
    • 2699
    • Alaska

    #260
    A fun bit for ya lads... Thanks to the generous loan from Impactfour, who shall remain nameless, I now have a Tigershark to play with. It came in yesterday, but what with all those high-level CEO meetings, luncheons with congressmen, and of course the issues in the Middle East, none of which have anything to do with me, I wasn't able to get to it 'til this evening.

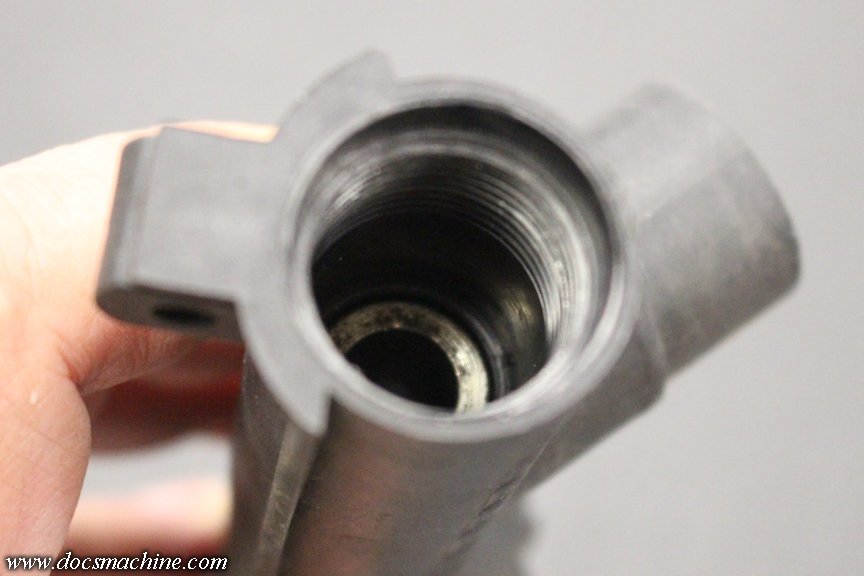
    The task, as noted above, was to fit a better barrel to the poor thing. I can't make a solid bore to an acceptable finish- not affordably, anyway- so we needed to try a Freak. The first issue I was concerned with, was whether or not the bolt seats inside the barrel- thankfully, it does not:


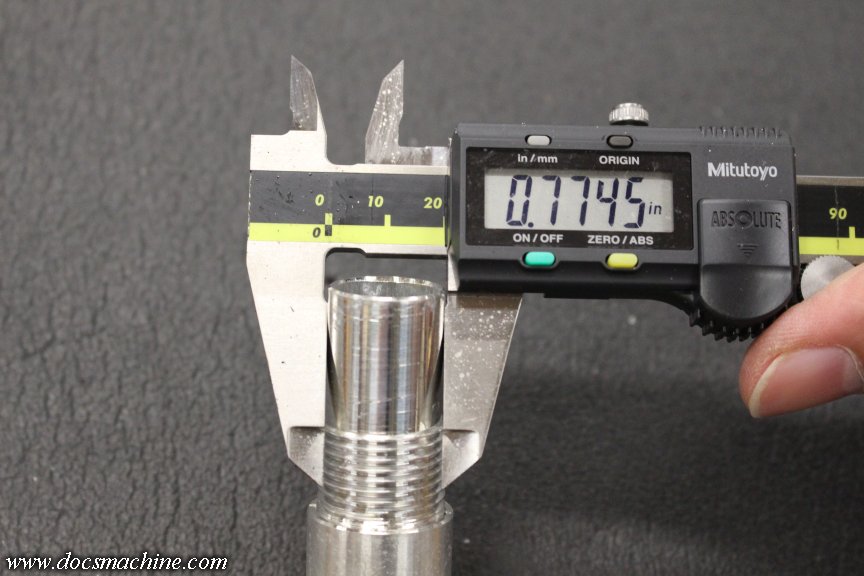
    The second was, can the factory barrel be bored. That answer might be yes, but there's a big asterisk:


    The breech hood, at least on the one I have, measures about .775". The OD of a Freak insert is nominally .750", which would leave us only .025" of wall- or rather .012" per side. That, in my opinion, is just a bit too thin.

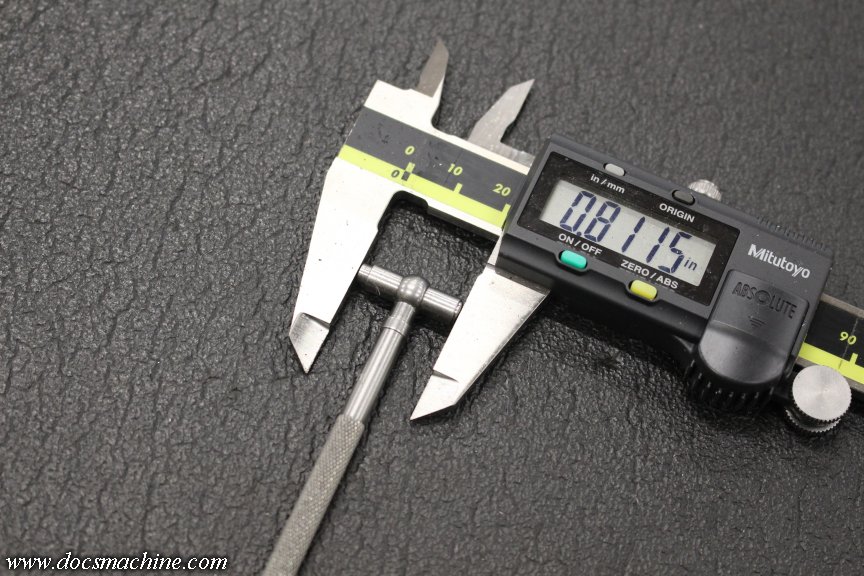
    However... the actual bore of the body measured a much more reasonable .812":


    I figured, to be on the safe side, I could make the breech hood about .800", making the wall thickness .025" per side. I'd like to see a smidge thicker, but that's workable, and not far off from other Freaks.

    Now, the tricky part is the root diameter of the threads. It doesn't do any good to make the breech larger, if the bottom of each thread groove is back down to the original .775".

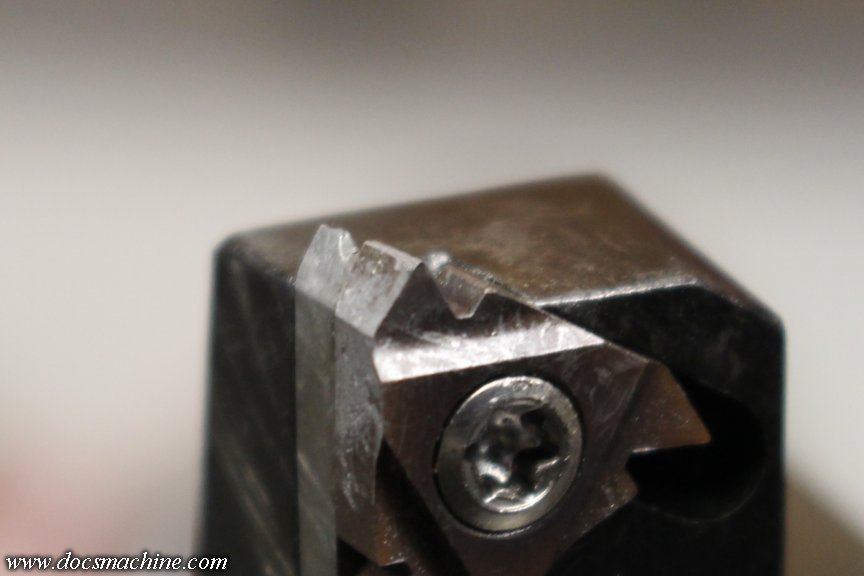
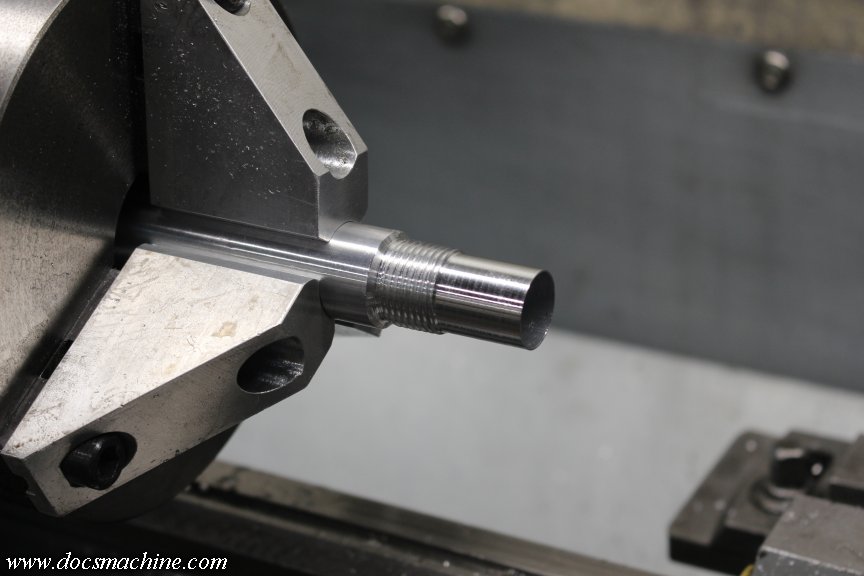
    The Tigershark, though, is an injection molded plastic body, not a machined aluminum one. The threads were molded in, and are not really a full, true threadform. So I took a slightly worn 'laydown' carbide threading insert, and ground just the slightest radius at the tip:


    I was shooting for about ten thou reduction, which should theoretically move that .775" groove depth, closer to .795". But, I was also just eyeballing it, and eventually wound up with a .788" depth.


    Using the old expedient of turning a thread that fits snugly, and then turning the threads off 'til the groove just disappears. Couldn't use thread wires in this case, as the exact nose radius is unknown.

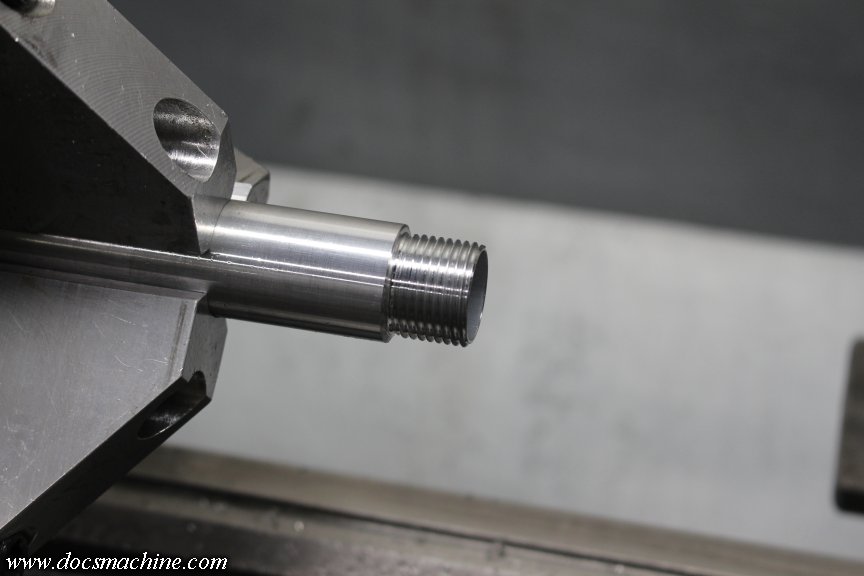
    But, knowing that resulting dimension, as well as having determined the overall OD of the thread, I was able to cut the rest of the breech... with only one minor crash.


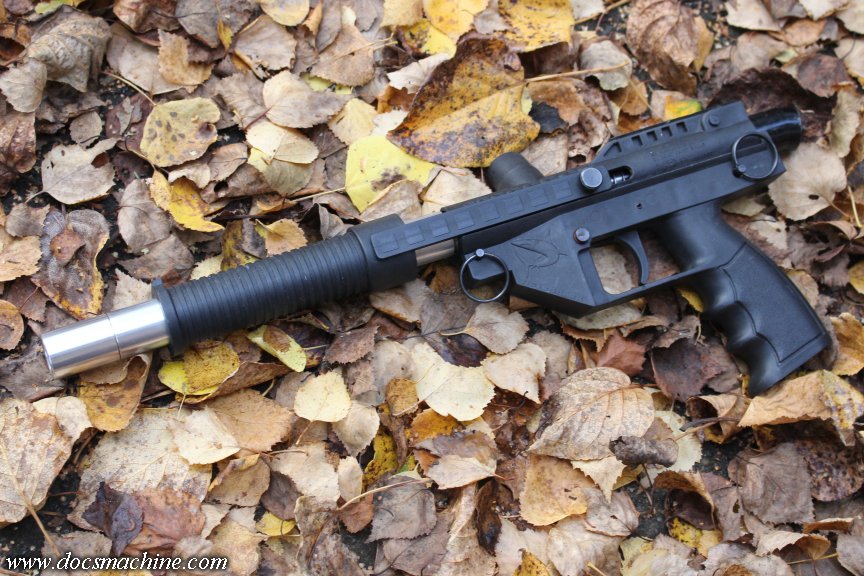
    And since that was one of my "Bull Barrel" blanks, the tip end was already threaded, so I just had to wipe it down, slide an insert in, and go give it a try.


    Seems to work just fine, and being an XL Freak, should be the only barrel you really need for your Shark.

    If I have a little time this weekend, I'd like to try fine-tuning the dimensions a bit. The thread ID in the body is something like .820", so I should be able to get the breech hood to .800" and the groove depth to maybe .805". Not wholly necessary, and I need to make sure I don't get the tolerances too close- I have no idea how worn this body is- but if at all possible, I like to make my stuff as durable as I can.

    Want one? I can't imagine there's enough demand for enough of these to spend CNC time on 'em, but it doesn't take long to cut one if the existing blanks I have. If you want to keep the OG plain aluminum, I can get one out in a few days. Call it the same $90 as my other Bull barrels- these aren't annoed, but I also have to machine 'em by hand. Want one annoed? We can do that!

    PM for more info, thanks!

    Doc
    Doc's Machine & Airsmith Services: Creating the Strange and Wonderful since 1998!
    The Whiteboard: Daily, occasionally paintball-related webcomic mayhem!
    Paintball in the Movies!

    Comment


    • Impactfour
      Impactfour commented
      Editing a comment
      Oh hell yea

    • DocsMachine
      DocsMachine commented
      Editing a comment
      I was gonna send you a PM: "You sent it disassembled! Now how am I supposed to know how it goes back together?!?"


      Doc.

    • Impactfour
      Impactfour commented
      Editing a comment
      Hahaha, gotta get a lot of specialized tools and knowledge to work those complicated tigersharks!
  • DocsMachine
    MCB Member
    • Jul 2020
    • 2699
    • Alaska

    #261
    In response to a couple questions:

    Yes, it's easily possible to do this with a 5" back rather than a "bull", but the 5" would only go about halfway through the pump grip. You'd have to remove the pump to unscrew the back. You'd also need a long bull tip and I'm out of those.

    Yes, it's also possible to make a tip that has grooves that emulate the stock barrel. The spacing won't be exactly the same thanks to the tip threads, but it can be done. I only have these short tips on hand, though, so I'd have to hand-make a longer one.

    Doc.
    Doc's Machine & Airsmith Services: Creating the Strange and Wonderful since 1998!
    The Whiteboard: Daily, occasionally paintball-related webcomic mayhem!
    Paintball in the Movies!

    Comment

    • DocsMachine
      MCB Member
      • Jul 2020
      • 2699
      • Alaska

      #262
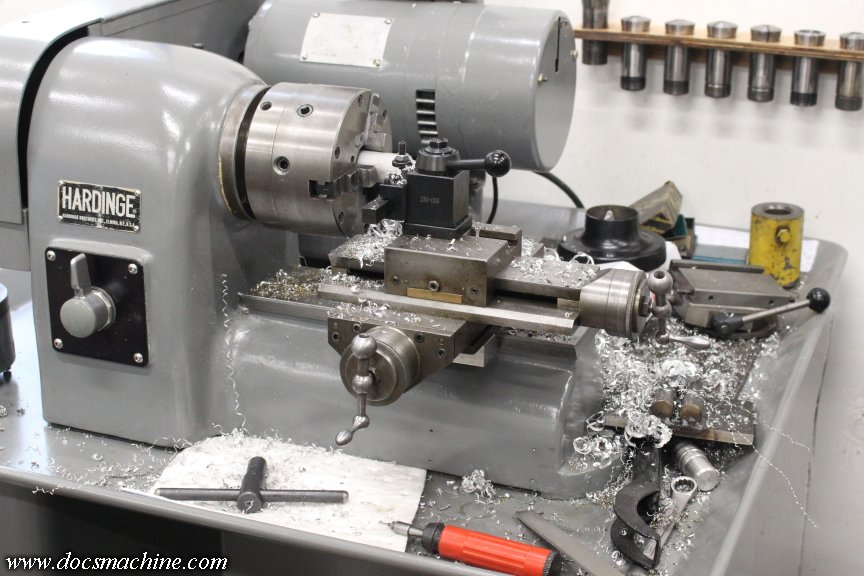
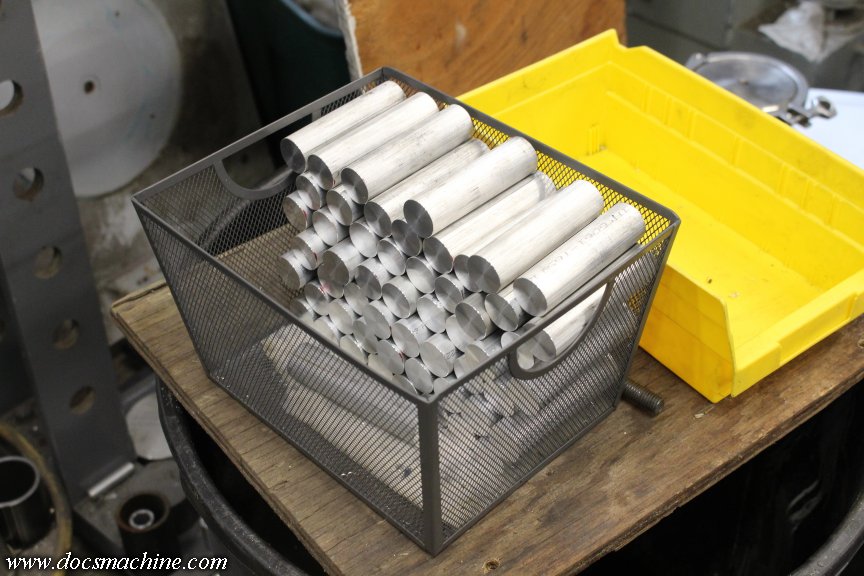
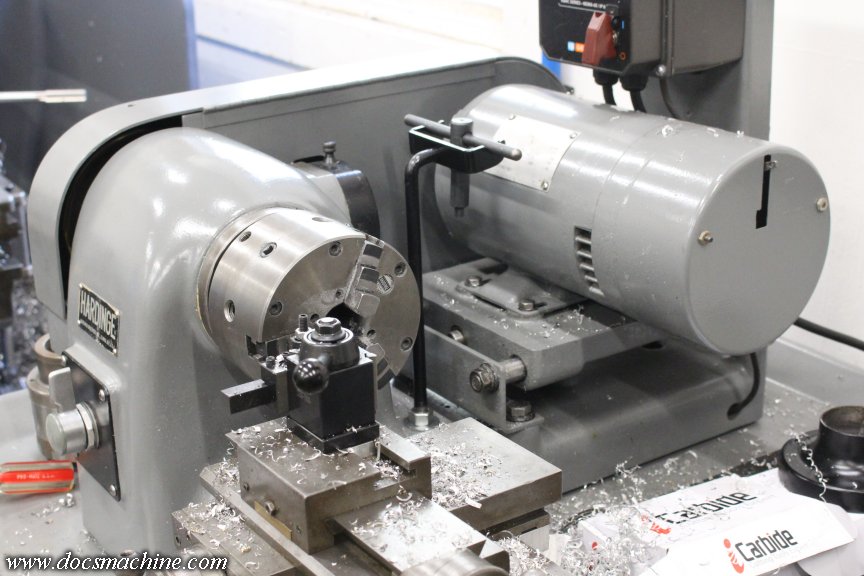
      I've been getting quite a bit of use out of the little speed lathe lately, turning that first reference face on several baskets full of round parts destined either for the CNC turning center or one of the turrets.


      In this case, since the parts are generally fresh from the saw, they'll have a burr at both ends. If I'm using a collet in the lathe, that burr either needs to be hand filed off, or buffed off in the belt grinder. To save a little time, I just swapped over to the 3-jaw and used that. The problem there is I have no place to hang the chuck key- I'd thought about making a storage rack for it on the wall, along with the collet rail, but I need something to hold it while I'm using it.

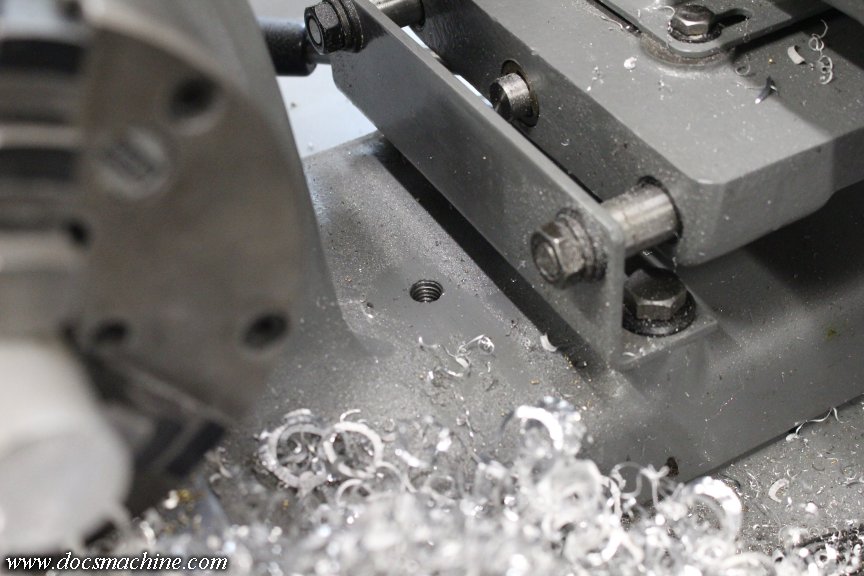
      The base casting of the lathe has this hole, tapped 1/2-13, meant for a lifting eye to move the machine around.


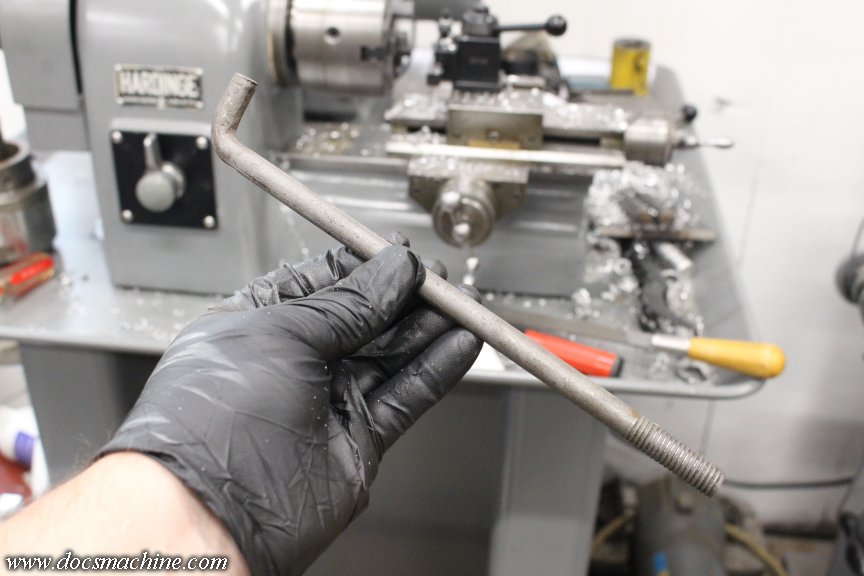
      I pondered some options, and poked around my materials racks, 'til I lucked upon the perfect piece:


      No idea where I got that, but it's an old "J-bolt" or anchor bolt, meant to be cast into concrete with the threads sticking out. That gives you something to bolt the wall or whatever, to. The end is roll-threaded, with kind of poorly formed but functional 1/2-13 threads, and the length, as it turns out, is pretty much perfect.

      And you guys make fun of my packrattery.

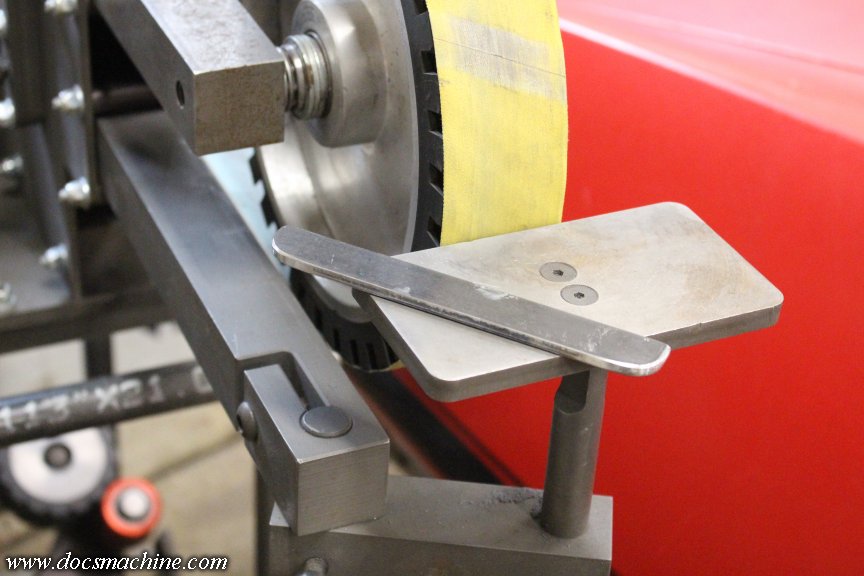
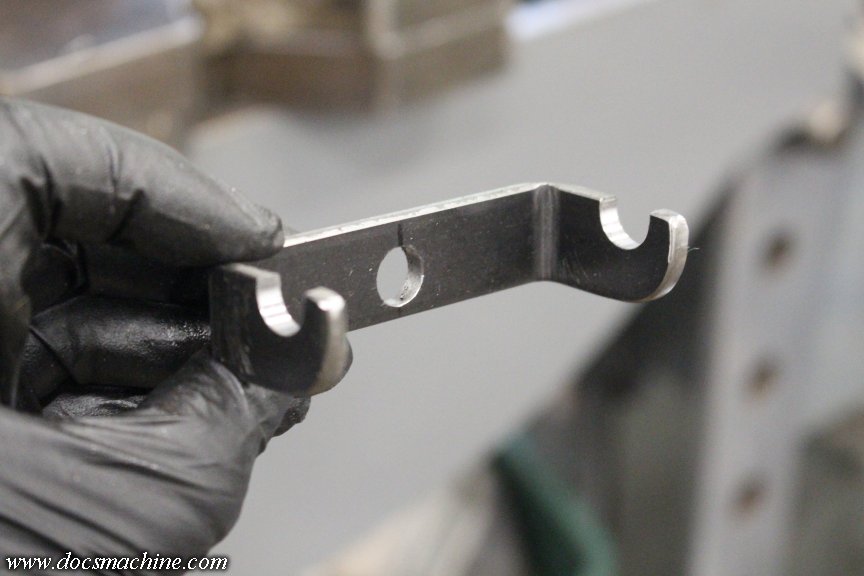
      I grabbed a chunk of some 3/16" flatbar out of the bins, cut it to "that looks about right" and beltground the ends into something that emulates "finished" remarkably well.


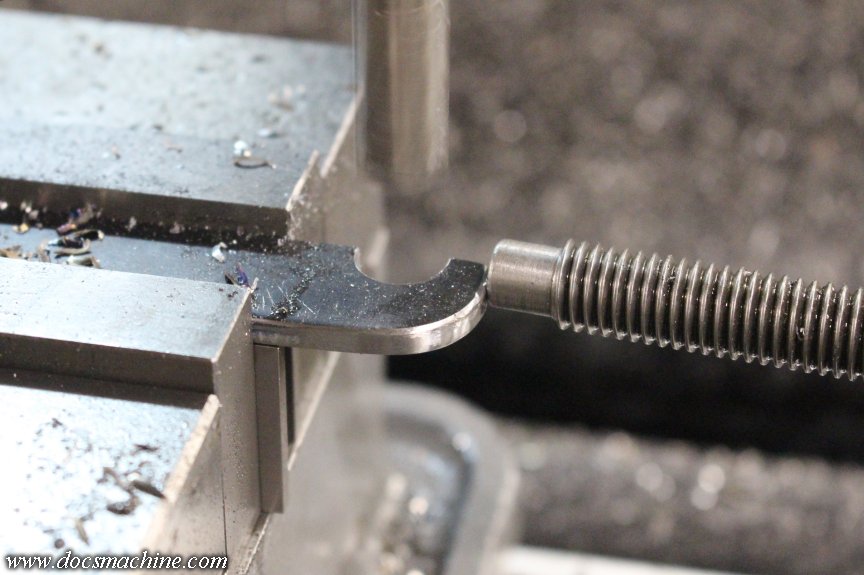
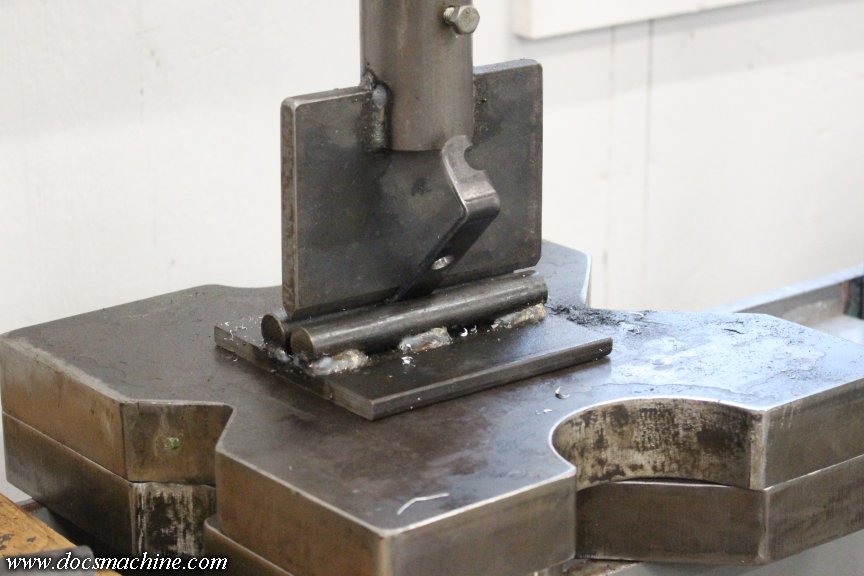
      This goes for a ride through the mill, to get two notches and a hole...


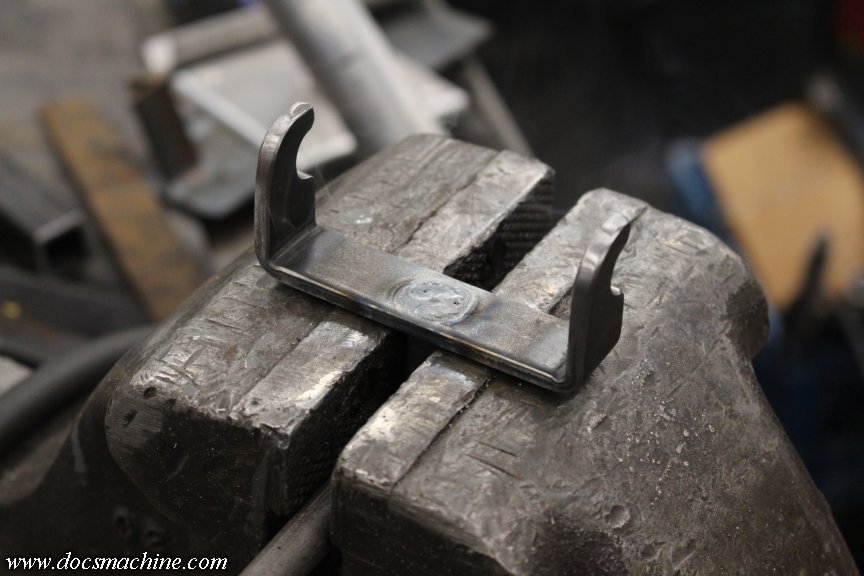
      And then lightly squished in the forty-tonner.


      Et Voilá as the pretentious sorts might say.


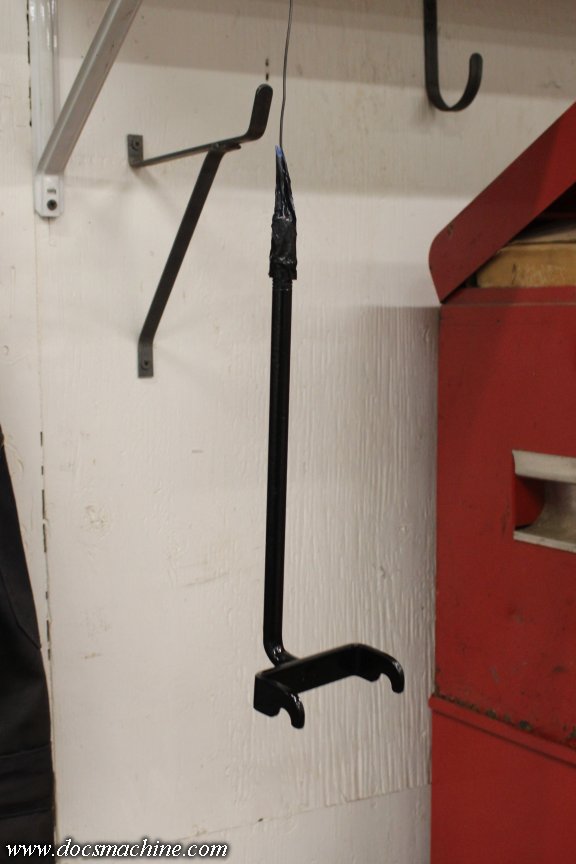
      That gets TIG-welded to the dogleg of the J-bolt...


      And the whole thing sprayed black.


      Once that's had a chance to cure a little, it's screwed into the lathe base and tightened with a nut and washer.


      It's easy to reach and grab, holds the key securely, and keeps it out of the way no matter what you're working on, whether you're using the chuck or the collet assembly.

      Now I just gotta convince that muscle memory to start using it, rather than just dropping the key in the tray like I've been doing for the past three days.

      Doc.​
      Doc's Machine & Airsmith Services: Creating the Strange and Wonderful since 1998!
      The Whiteboard: Daily, occasionally paintball-related webcomic mayhem!
      Paintball in the Movies!

      Comment

      • DocsMachine
        MCB Member
        • Jul 2020
        • 2699
        • Alaska

        #263
        Not the only thing I did today, but this was the big one.

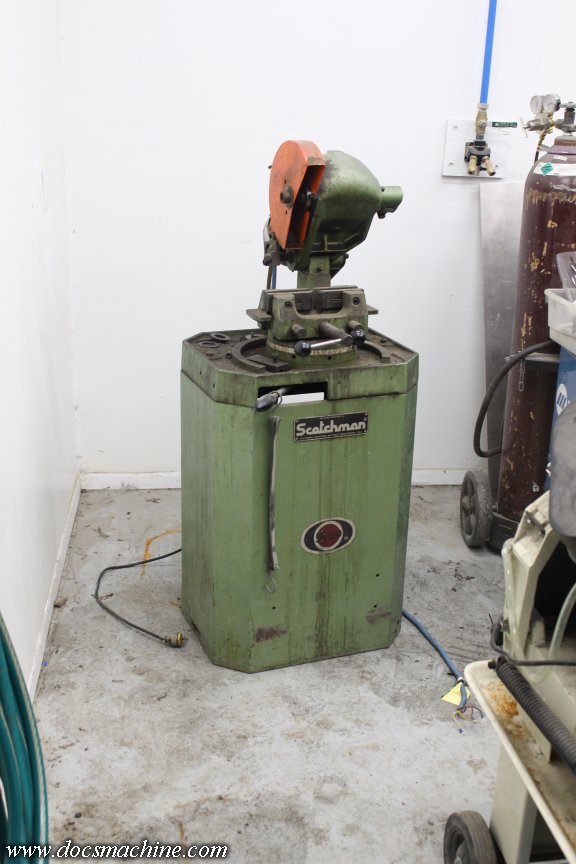
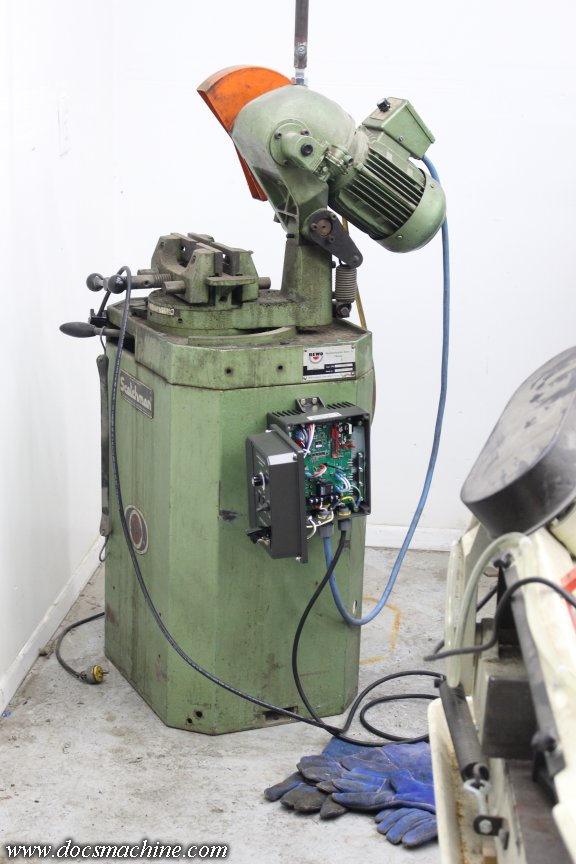
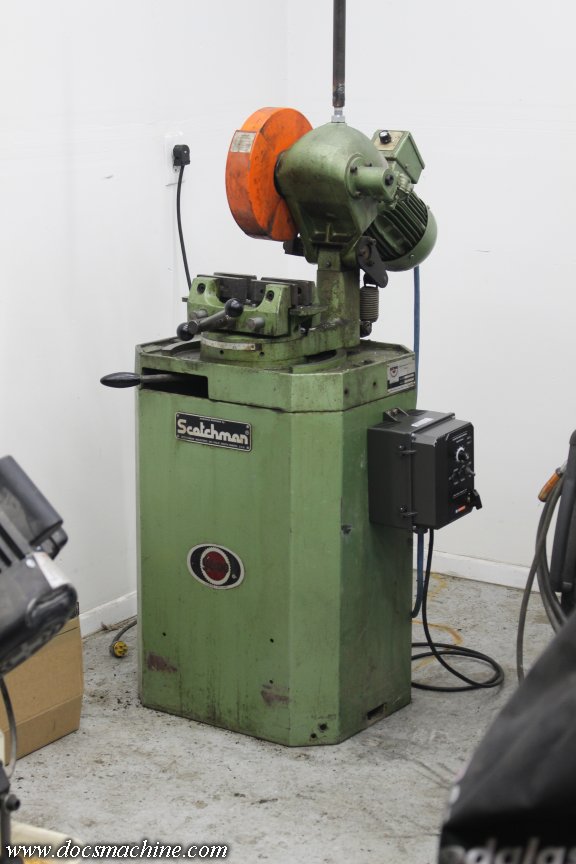
        Nearly a year ago, I needed to cut some material into short bits to feed into the CNC turning center. A buddy of mine has a Scotchman "cold saw", but as I understand it, it had been disconnected (apparently, I find out, back in 1994!) and requiring 3-phase, hadn't been used since. Last year, I at least showed the thing still worked, using a KB VFD, but ran out of foolin'-around time and had to have the parts cut elsewhere.

        The great cycle comes around again, and thanks to my unconscionable wasting of two months to put the new TWB book together, the renewed need is rapidly approaching critical levels.

        In the time since last year, my buddy picked up a VFD of his own for it, and two new blades- the one that was on it was badly worn. Earlier this week, I'd picked up some electrical bits, and so it was time to get this ball rollin'. Said saw had been re-relegated to the back corner, so we once again extracted it.


        One of the first things it needed was the handle- a bar sticking out the top with which the operator, you know, makes the chop saw, well, chop.

        In this case, the bar is also the filler plug for the gearbox- and said bar has been missing for some time. An inspection inside through the hole shows it doesn't look too bad in there, but I plan in flushing the oil a couple of times.

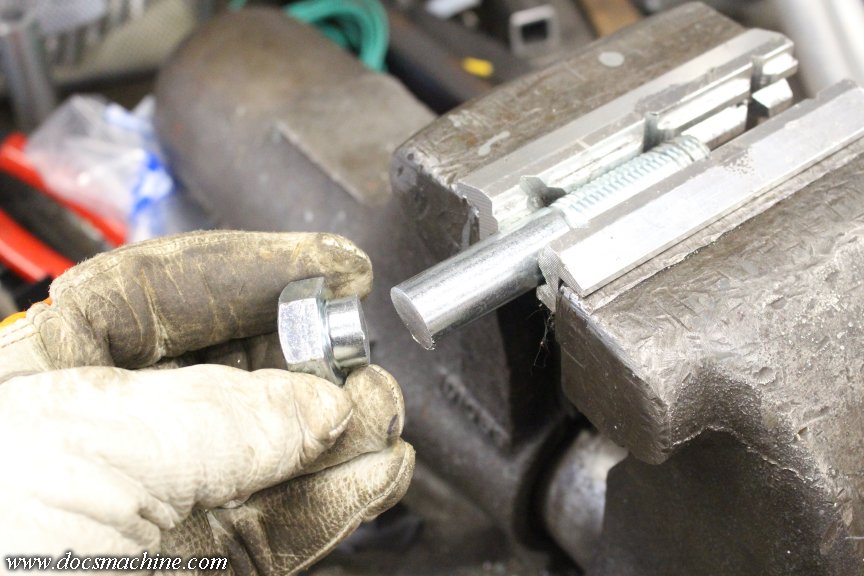
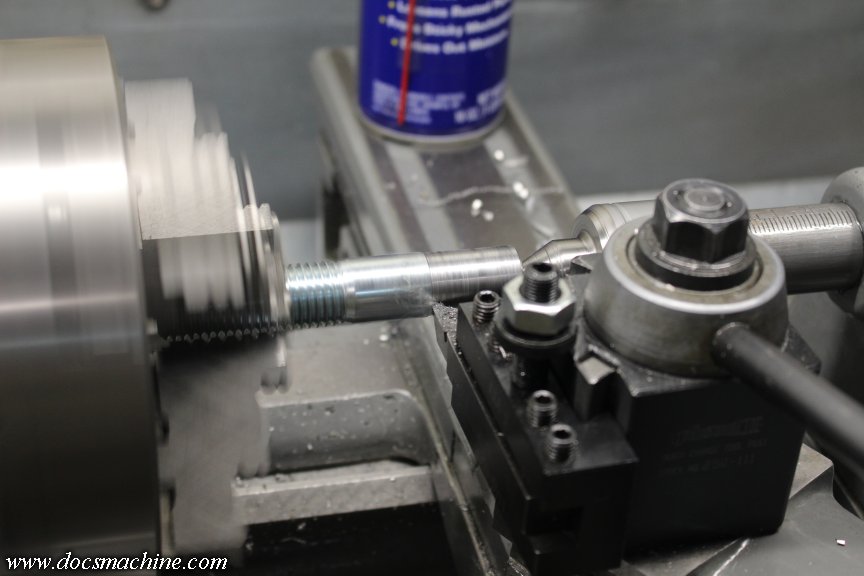
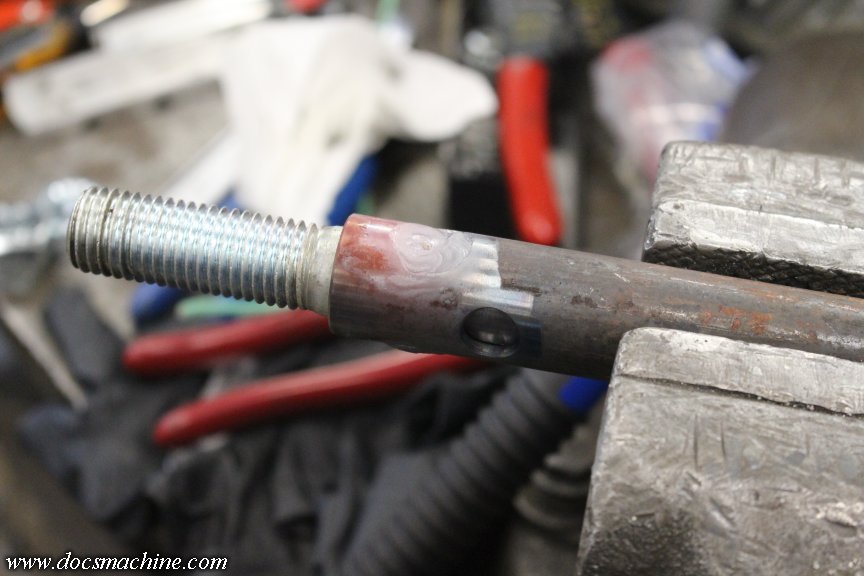
        They think they have the original handle somewhere, but until then, I took a measurement of the hole (the machine was made in Sweden, so it's metric- 20mm coarse) bought a big bolt, and went to work. I porta-banded off the head...


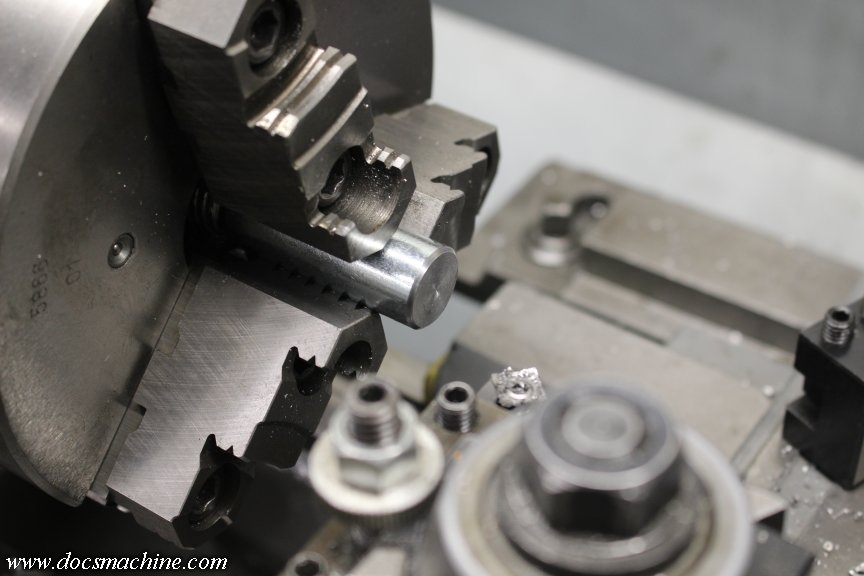
        Faced the end square...


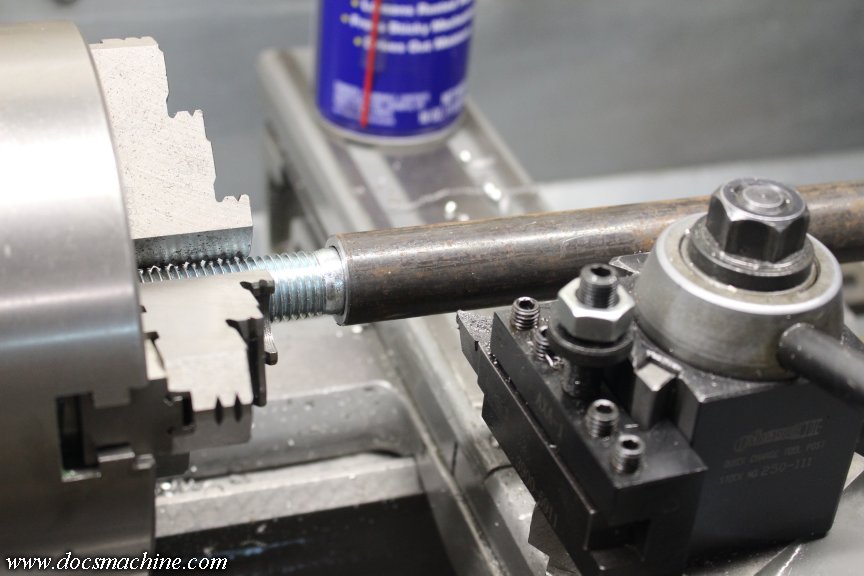
        And turned just a smidgen off the OD so it'd fit inside a chunk of tubing.


        Like so:


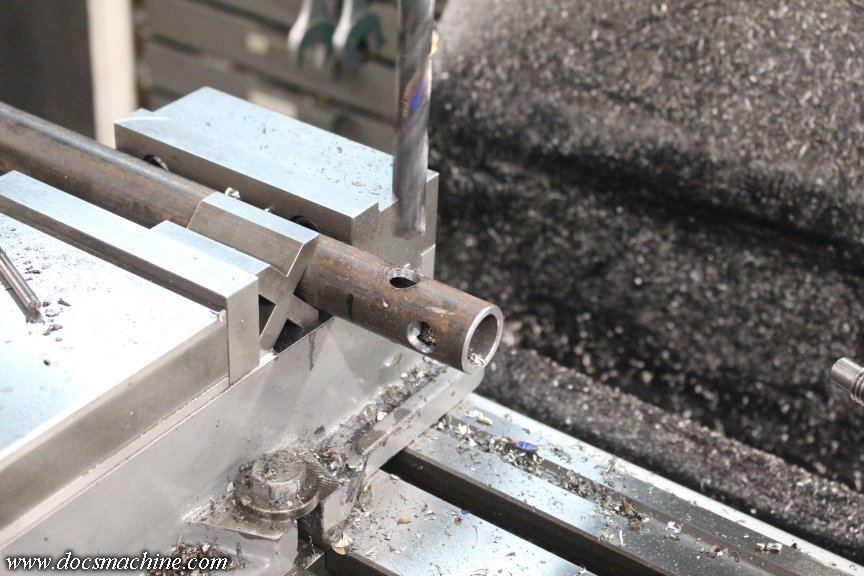
        Said tubing got four 1/2" holes drilled crossways into it...


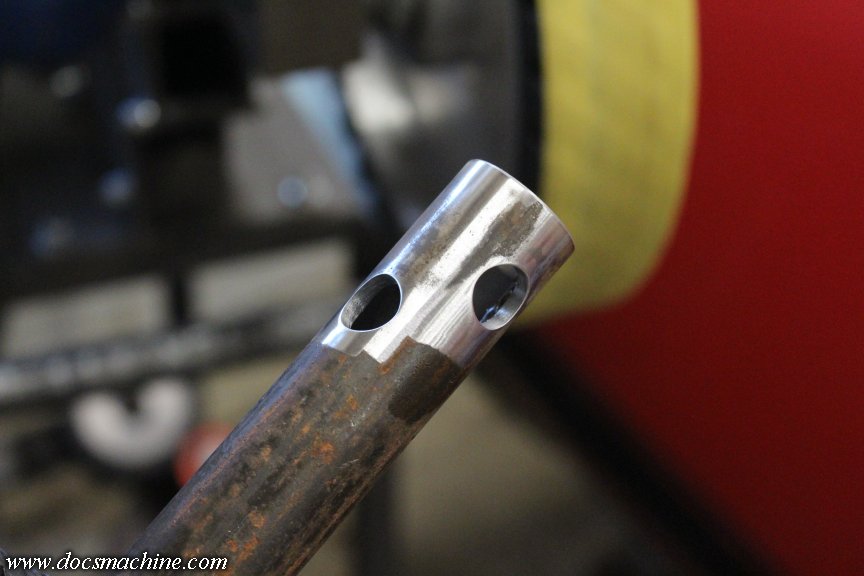
        Which I then cleaned up and deburred.


        With that, the bolt was glued in place with some heavy plug welds, and things generally deburred again.


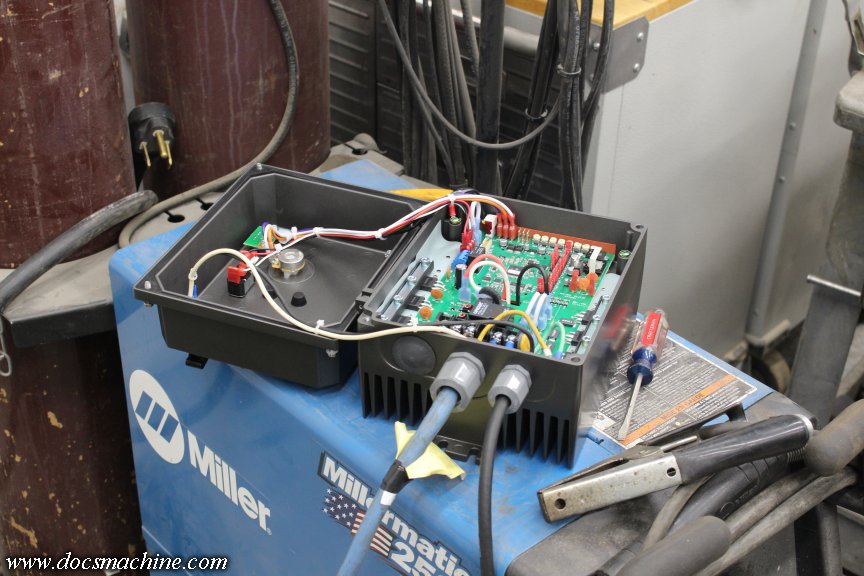
        I hauled the whole mess over to my buddy's shop, and hooked up his VFD to a fresh power cord and power switch.


        The VFD comes with a mounting template, so I drilled the mounting holes in the side of the chassis. Unfortunately the borrowed drills I had were on the dull side, and nobody seemed to have a centerpunch, so things wandered a bit, and it ended up slightly crooked.


        But, once it was all plugged back in, everything worked like a champ, including both settings of the 2-speed motor. (The old lo-off-hi switch is now just lo and hi, with the VFD of course doing the off and on.) We may still add some stop and start buttons on the front of the chassis, but it'll do for now.

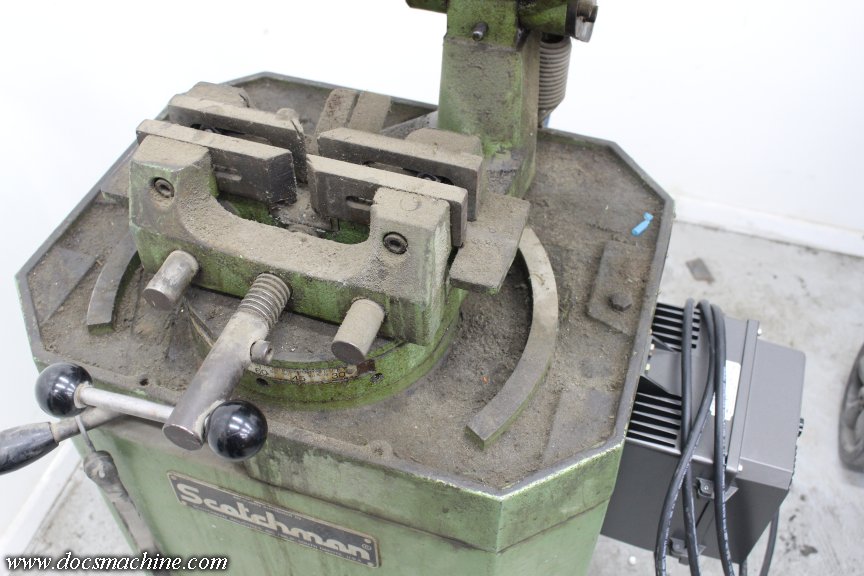
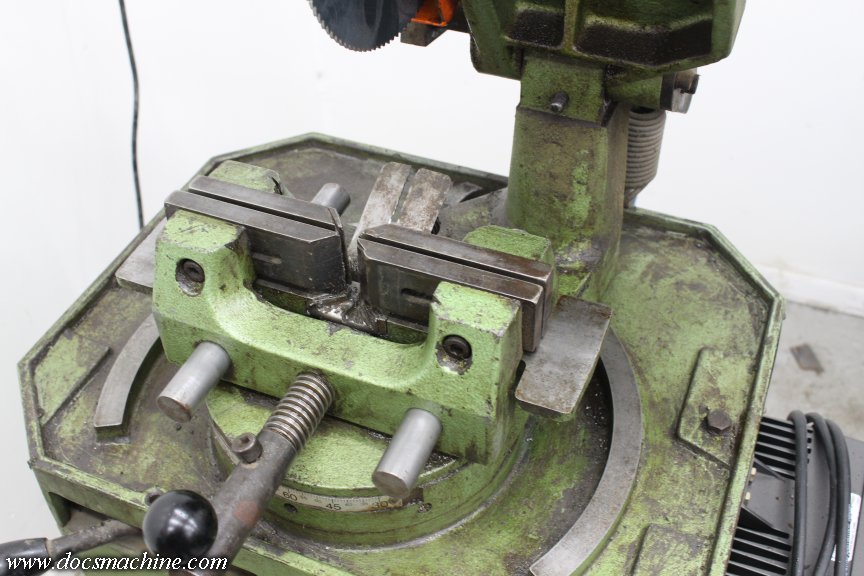
        The other thing that annoyed my OCD was the fact that I'm pretty sure this thing hasn't been cleaned since 1994.


        But scarcely an hour and a half later, with some Purple Power, WD-40, Scotchbrite (which seems somehow appropriate ) and both wire and plastic toothbrushes, I got it fairly clean:
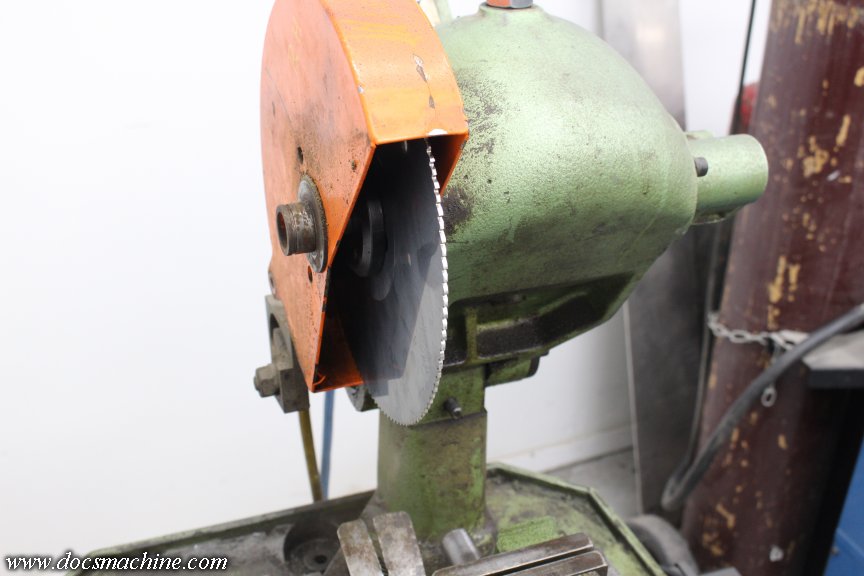


        The new blade plunked right into place...


        And after reinstalling the clamshell blade guard, she was back up to 100% again, and ready to make it's first chips since the Clinton Administration.


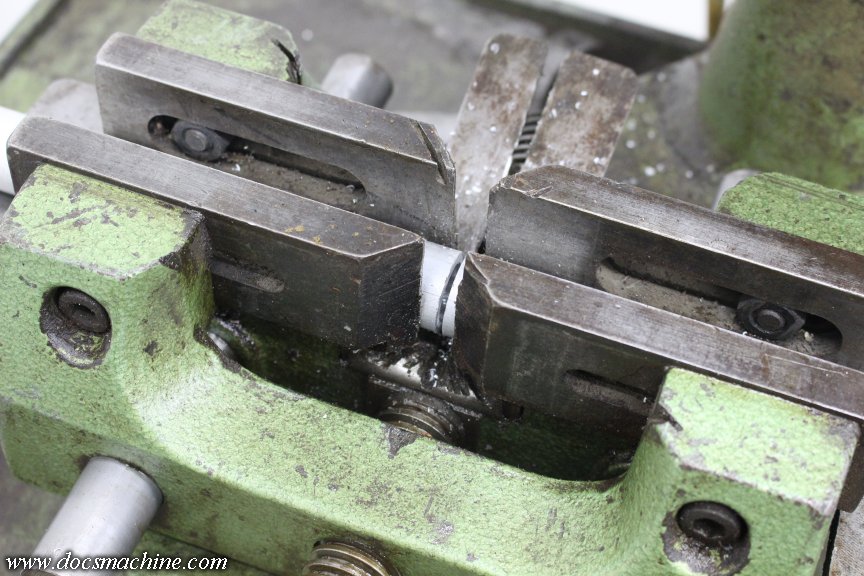
        I'd brought along a chunk of heavywall aluminum tubing- the first chunk of scrap I could grab- and unsurprisingly, it sailed right through it.


        I'm hoping to try the coolant system tomorrow. The machine has a mechanical pump attached to the gearbox- I'm told it's like an old SAAB fuel pump- but it looks like that's been replaced by an electric submersible pump. I hope it works so I don't have to cobble something- and as I need to cut some stainless steel, coolant is a must.

        If I'm lucky, I can get at least one bar sliced up tomorrow, and get them into the Omni over the weekend.

        Doc.​
        Doc's Machine & Airsmith Services: Creating the Strange and Wonderful since 1998!
        The Whiteboard: Daily, occasionally paintball-related webcomic mayhem!
        Paintball in the Movies!

        Comment

        • DocsMachine
          MCB Member
          • Jul 2020
          • 2699
          • Alaska

          #264
          As noted, the old coolant system was a mechanical pump, that had been replaced by an electric submersible. I'm not 100% sure how the reservoir setup was arranged- it kind of looks like the upper chamber was a catch tray, and that went to what was probably a removable tray below that.

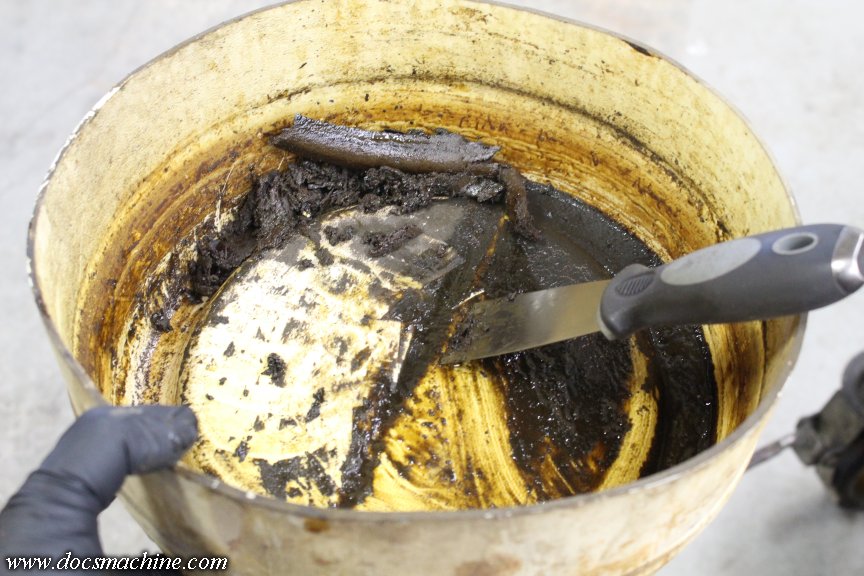
          Either way, the current setup used the cut-off bottom of a plastic solvent barrel as the catch tub- which of course still had some truly antique oily scum in the bottom.


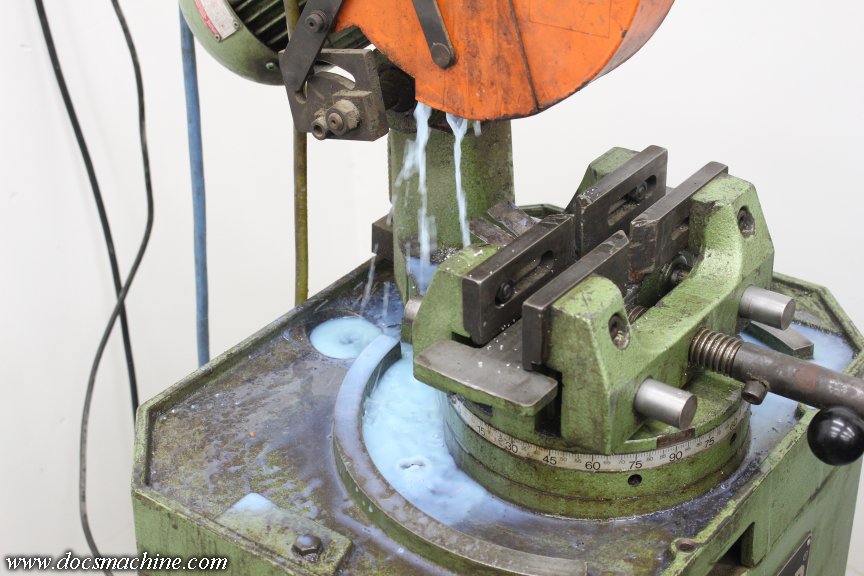
          I scraped most of that out, then dumped in a few gallons of plain water, just to see if the pump worked. Which, thankfully, it did, and quite well. So I added a dose of some soluble oil I had, and let it circ a bit 'til it was mixed.


          I know this coolant mix is tough on paint- I had to paint the drip tray of the Logan with POR-15 to keep this stuff from eating the enamel. So after a couple of days of circulating this stuff, the inside of the pump and tub should be pretty clean- I plan to rinse it out with fresh water when I'm done.

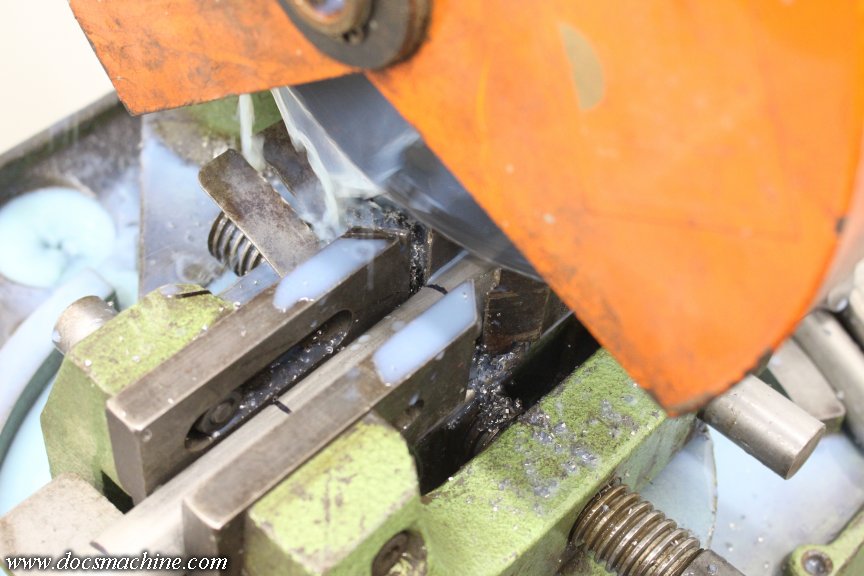
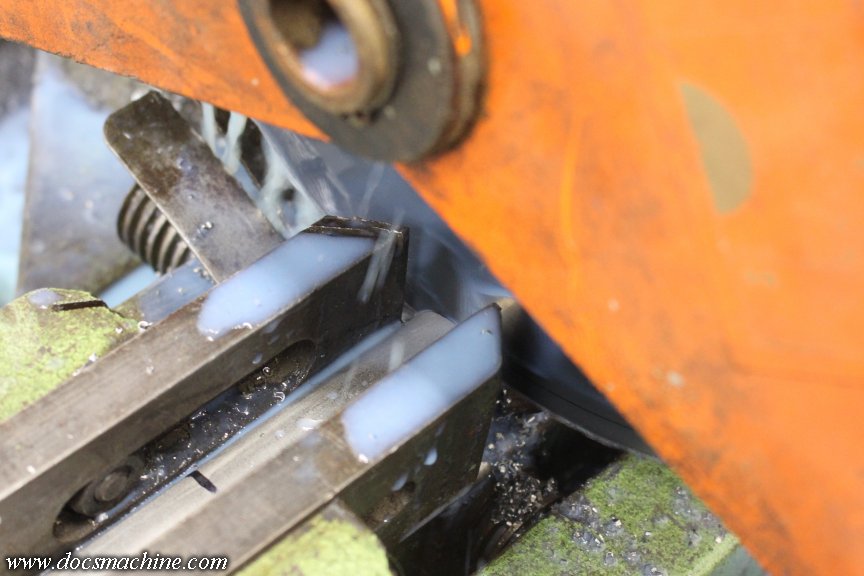
          Anyway, nothing left but to try it! I'd marked off the bar of stainless to the proper length, since this machine doesn't have a work stop, and I didn't have time to fab one. With the saw set to the slower speed...


          ... I can't say it "sailed right through", but it had no difficulty chewing through, and the motor didn't even sound like it knew it was cutting.


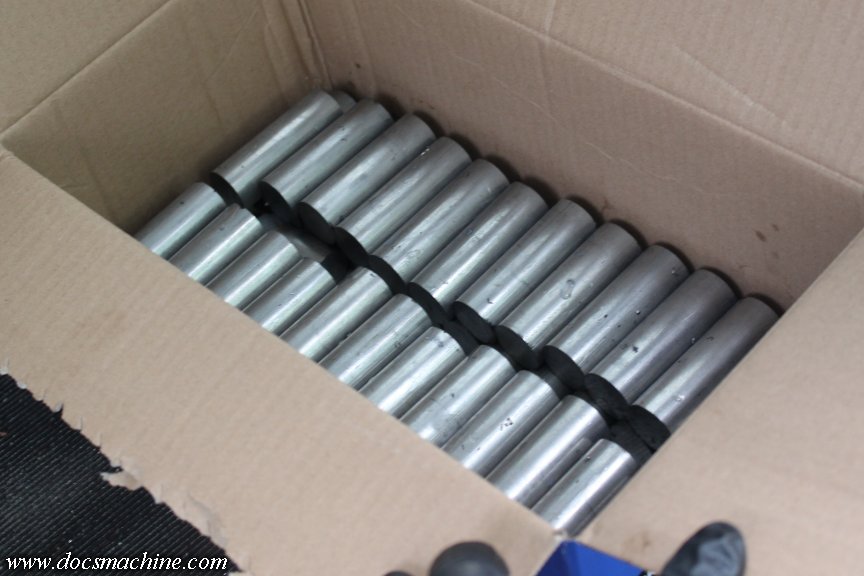
          And, in relatively short order, I had the first bar sliced up into a nice even fifty blanks.


          Blade still seems sharp as when we started, everything seems to be working great. Well worth the time it took to get the thing back up and running- especially since I have three more sticks to do.

          Admittedly the saw's not mine, and I would like to have it, but at least I have almost-unfettered access to it, so that's almost as good.

          On the plus side, I already have this batch into the turret for drilling, let's see how much I can get done this weekend.

          Doc.​
          Doc's Machine & Airsmith Services: Creating the Strange and Wonderful since 1998!
          The Whiteboard: Daily, occasionally paintball-related webcomic mayhem!
          Paintball in the Movies!

          Comment

          • DocsMachine
            MCB Member
            • Jul 2020
            • 2699
            • Alaska

            #265
            Evening update: I didn't get 'em all drilled, but I got a good chunk of 'em done. Too many other things calling for my attention, it's a 'one bite at a time on the elephant' sort of thing.

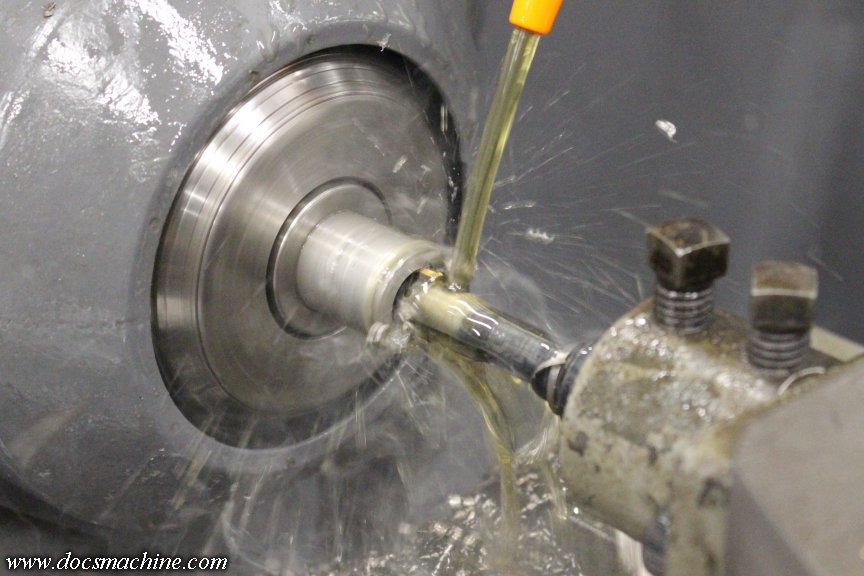
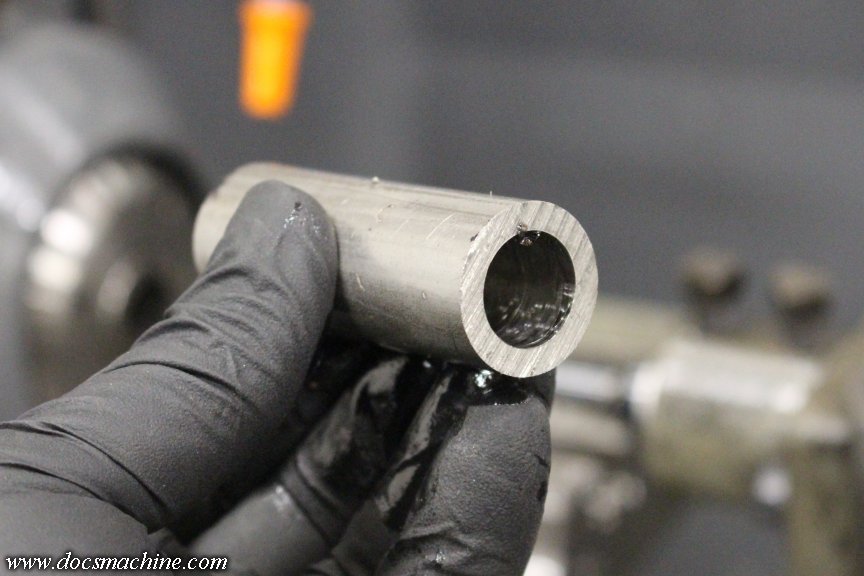
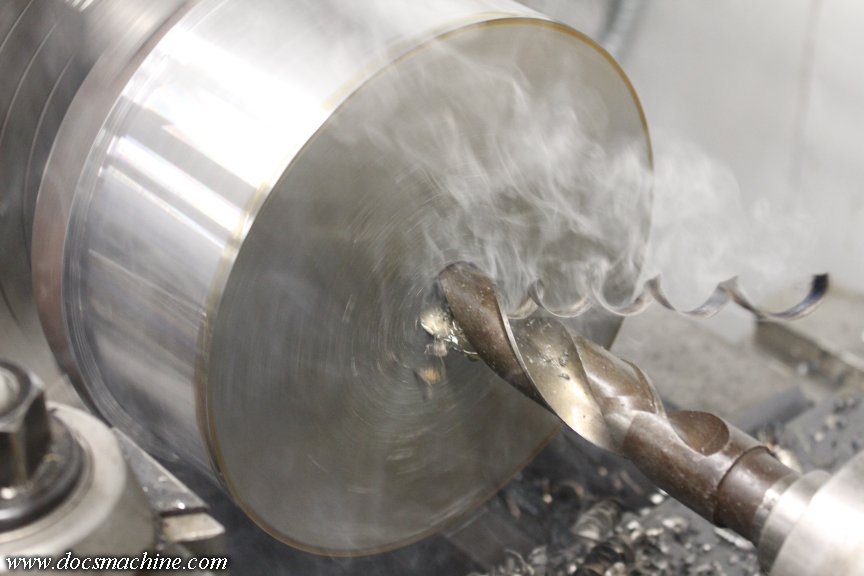
            I've shown this before- an insertable carbide spade drill, run straight in, no center drilling, no pilot hole. Point in fact, this drill wants to chatter if you DO pilot drill. It cuts noticeably smoother if just run in straight. One pass, out to nominally 5/8"- in stainless.


            That's the major blanking steps done. Once I have the whole batch drilled, then it's over to the turning center!


            Some of you gents may recognize what I'm working on.

            Doc.​
            Doc's Machine & Airsmith Services: Creating the Strange and Wonderful since 1998!
            The Whiteboard: Daily, occasionally paintball-related webcomic mayhem!
            Paintball in the Movies!

            Comment

            • DocsMachine
              MCB Member
              • Jul 2020
              • 2699
              • Alaska

              #266
              Makin' progress!

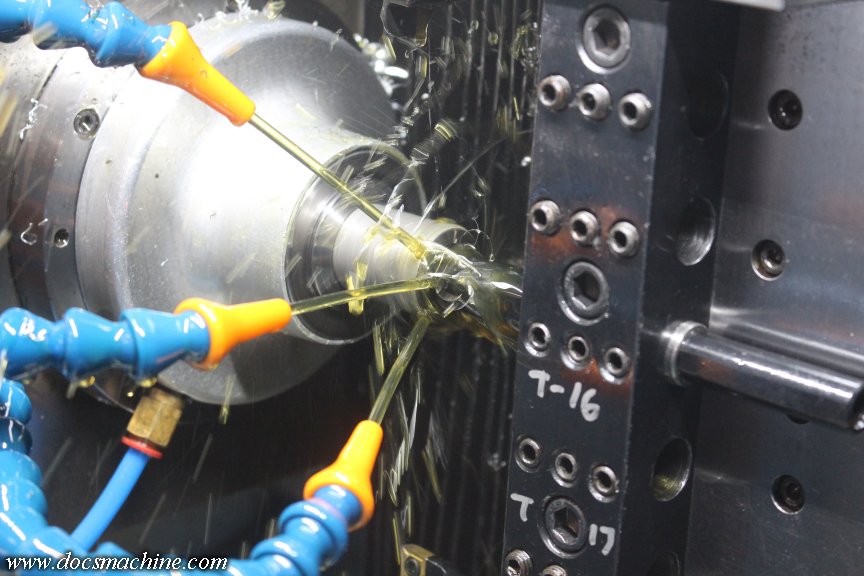
              Re-tooled the CNC- a tale unto itself- and managed to get the program written and proven to face and bore one end of all the drilled blanks, then got the somewhat more complex workin' end program written- faced, bored, chamfered and threaded.


              We're nowhere near done- I still have about half the blanks to drill, and only 'finished' about a dozen of them so far.


              ... To say nothing of the three other sticks of material I need to chop up and run.

              But we're gettin' there!

              Doc.​
              Doc's Machine & Airsmith Services: Creating the Strange and Wonderful since 1998!
              The Whiteboard: Daily, occasionally paintball-related webcomic mayhem!
              Paintball in the Movies!

              Comment

              • DocsMachine
                MCB Member
                • Jul 2020
                • 2699
                • Alaska

                #267
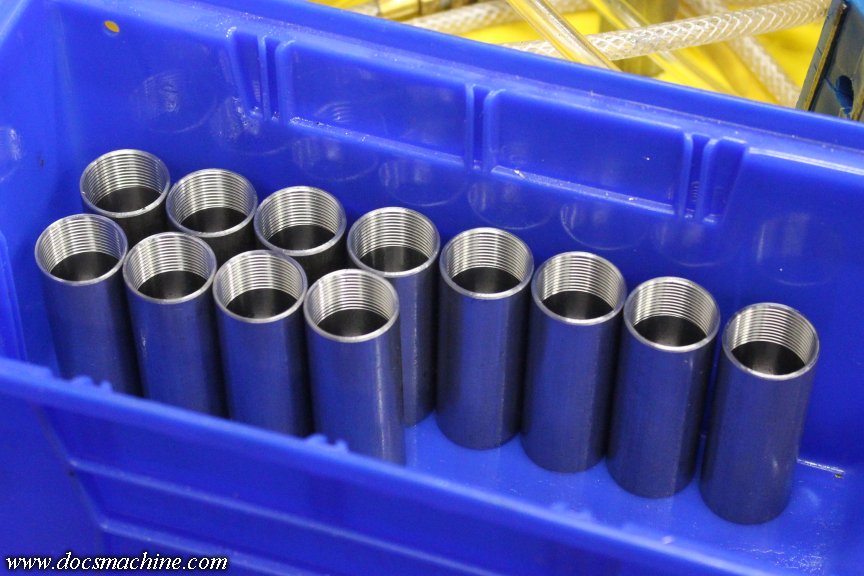
                And done! No pics, it's just more of the same as above. Got the rest of the blanks completed- the undrilled ones drilled, the drilled ones bored, and the bored ones threaded. In the next couple days I'll take 'em for a ride through the mill, then it'll be time to bag 'em and tag 'em into inventory!
                I'll keep chewing through the other material, of course- especially since I have the tooling proven and the program written- but having those back in inventory takes a little of the pressure off, and I needs to slip over to one of the dozen or more other things that are screaming for my attention right now.

                My plan, as it usually is 'roundabout this time of the year, is to have my tables clear, at least of customer work, by the end of the year.

                Sometimes I even manage to pull it off.

                Doc.
                Doc's Machine & Airsmith Services: Creating the Strange and Wonderful since 1998!
                The Whiteboard: Daily, occasionally paintball-related webcomic mayhem!
                Paintball in the Movies!

                Comment


                • Pumps4ever
                  Pumps4ever commented
                  Editing a comment
                  Kick ass Doc, was cool hangin in your live yesterday, Also super cool reminicing about the OG FPshooters!

                • DocsMachine
                  DocsMachine commented
                  Editing a comment
                  Hangin' in my what? Are you confusing me with DocFire again?

                  I'm still (checks underwear) Doc Nickel, of Doc's Machine, Alaska, and have been since 1998.

                  Doc.

                • Pumps4ever
                  Pumps4ever commented
                  Editing a comment
                  Well shit, I guess I was...
              • DocsMachine
                MCB Member
                • Jul 2020
                • 2699
                • Alaska

                #268
                While I don't generally do "job shop" work- I have, but it's often proven more trouble than it's worth- I had a case where a good friend needed a time-sensitive job done. And, as a rare treat, no issues with how much it's gonna cost- they need the part, the company will pay.

                That's not to say I have carte blanche to pad the bill- I don't do such things- but it's case where, when I tell the client an estimate of the cost, they don't say "well, I was hopin' to only spend this much" or something similar.

                Which is a good thing, because this is a big job- at least for me.

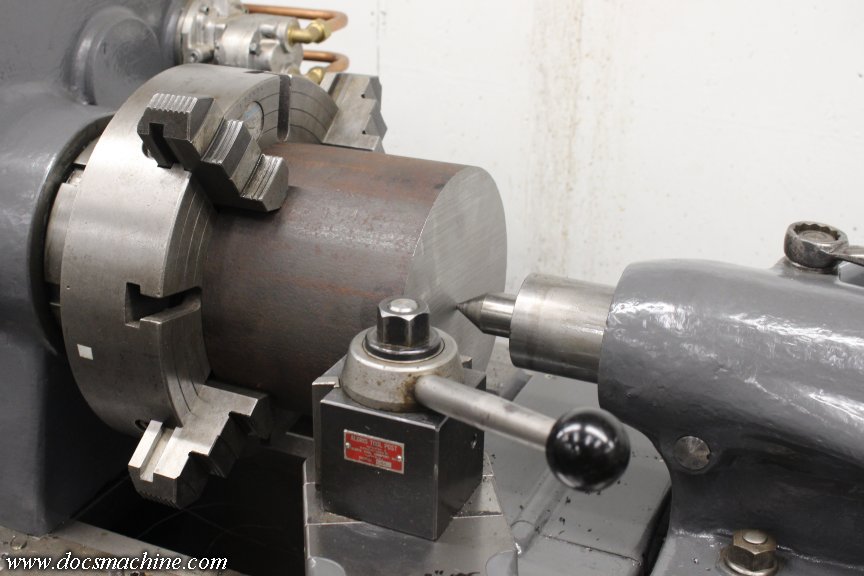
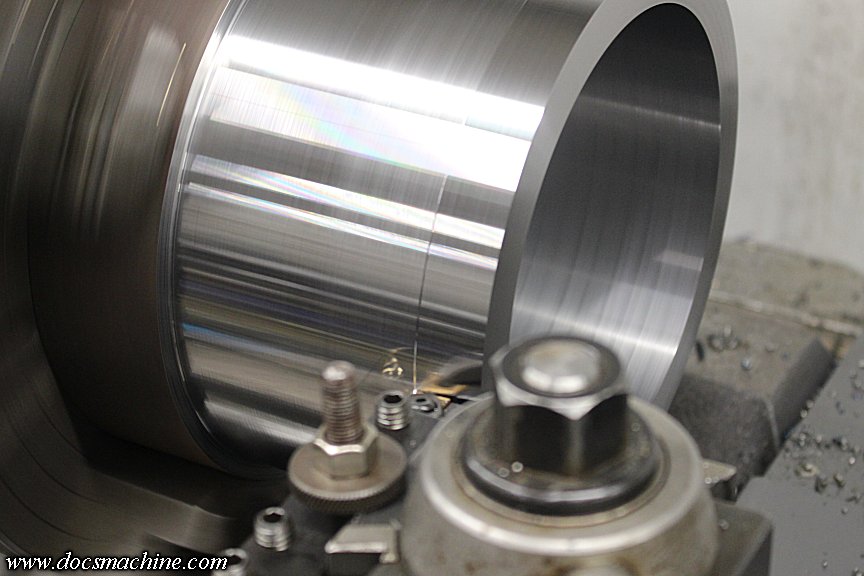
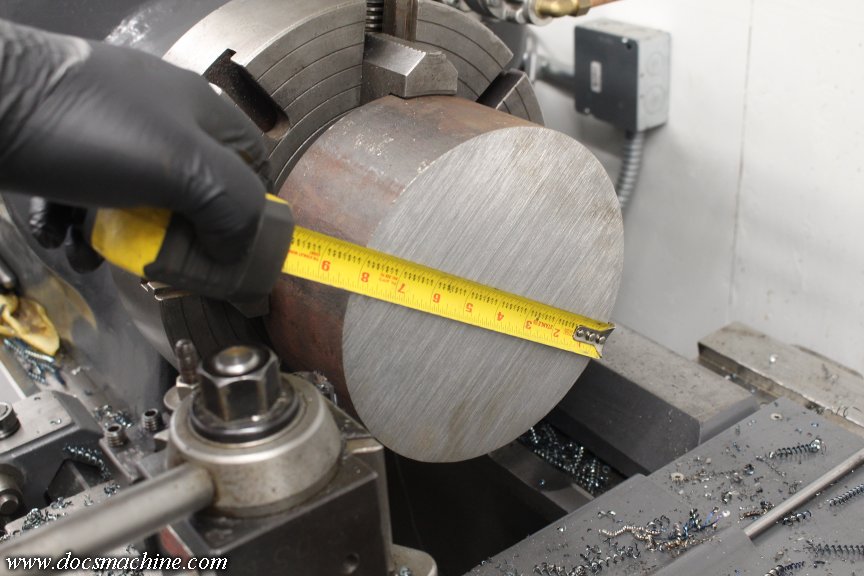
                First, we started with an eight-inch, fifty-pound slug of 4140 chrome-moly steel:


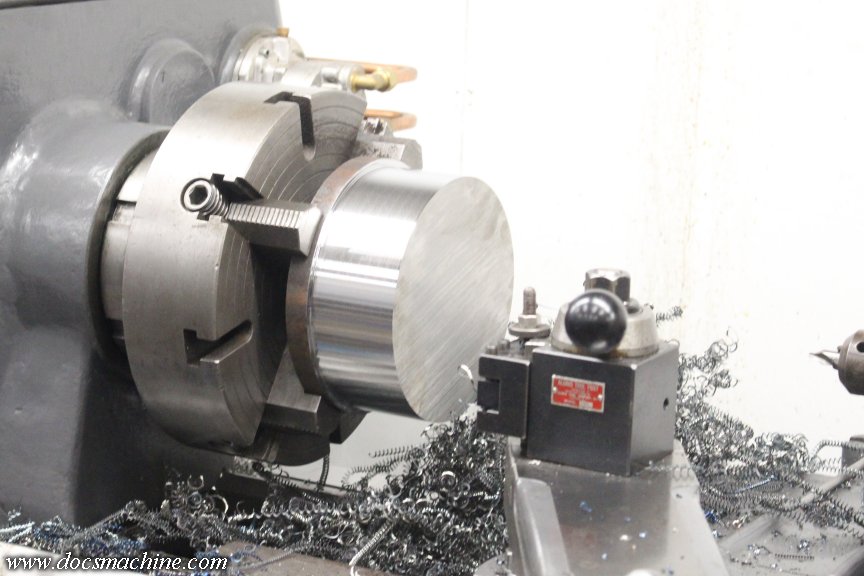
                The OD gets buzzed down to 7-1/2"...


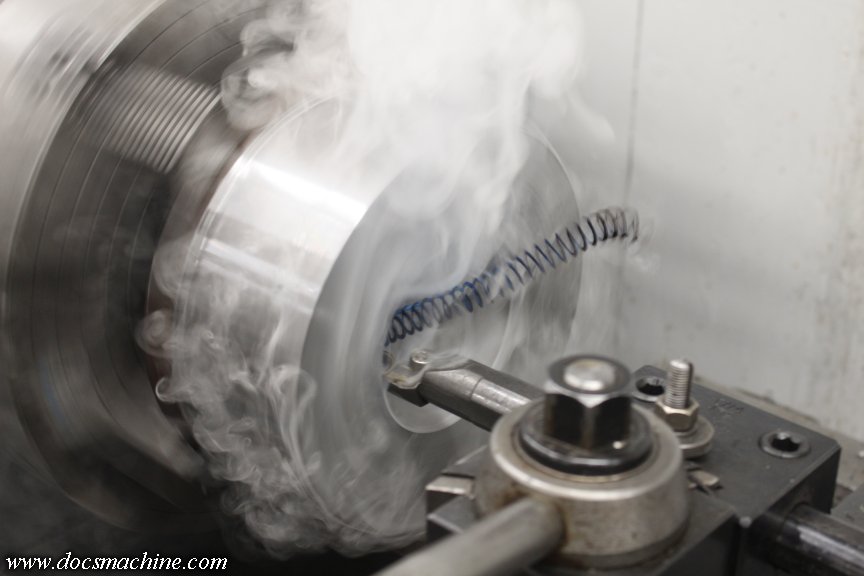
                "Buzzed", in this case, means an hour of heavy turning at 120 RPM on a 10HP machine, with blue-hot swarf flying off.

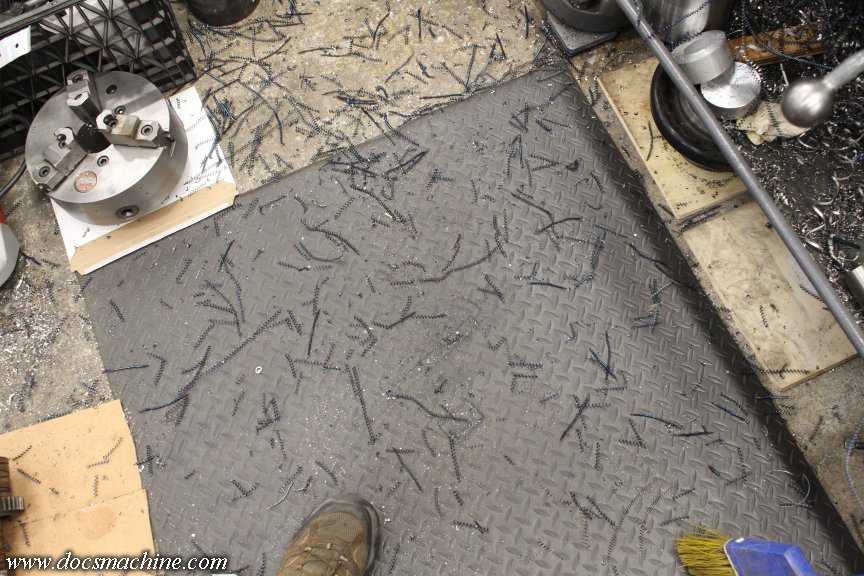
                See all those little springs?


                I can't sweep those off. They've partially melted into the rubber mat.

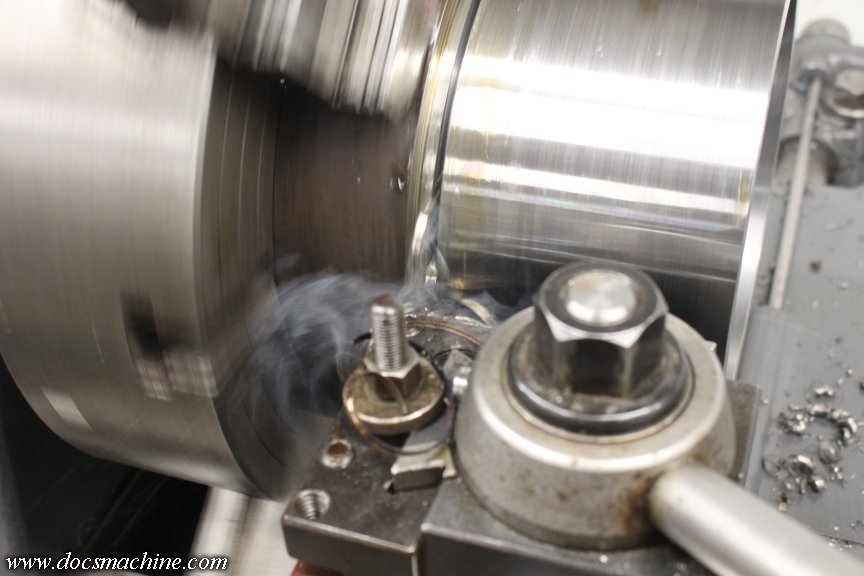
                But now for the fun part. Drilling out up to a 1" pilot hole...


                And then, making roughly three hundred boring passes- in both senses of the word ...


                'Til it's mostly hollow.


                We're a long way from done, the wall thickness will eventually be around half an inch, but that was already about seven hours' work.

                And I have to do two of them.

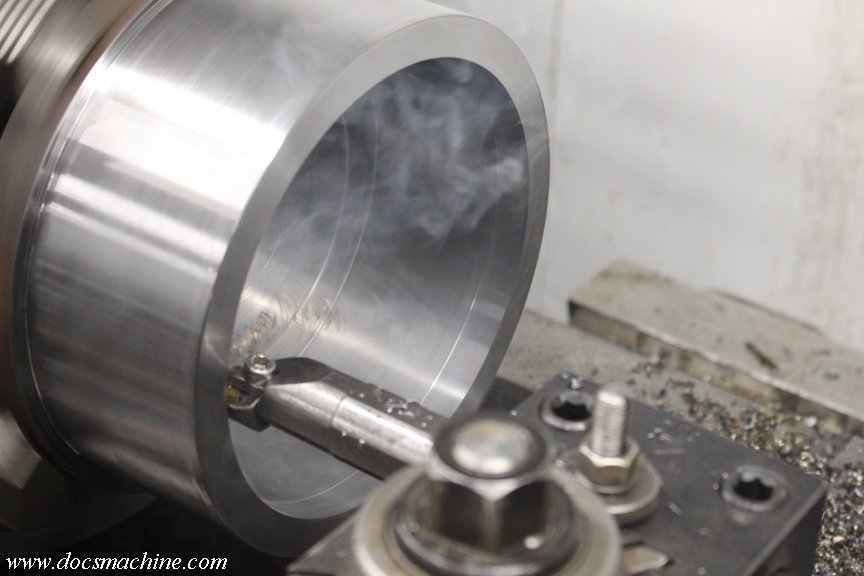
                The white smoke? Vaporized WD-40. I was spraying a little in there basically just to reduce the chance of tip welding, but I'm not sure I was actually doing anything except filling the shop- and my lungs- with oil smoke. I don't have coolant on this machine, and this is one of those cases where I'd need heavy flood, or, well, don't bother.

                I don't really have an easy way to set it up at the moment, so basically, 'til we get down to the finish passes, we gotta do it dry. It's hard on the tools, but we don't have a lot of options.

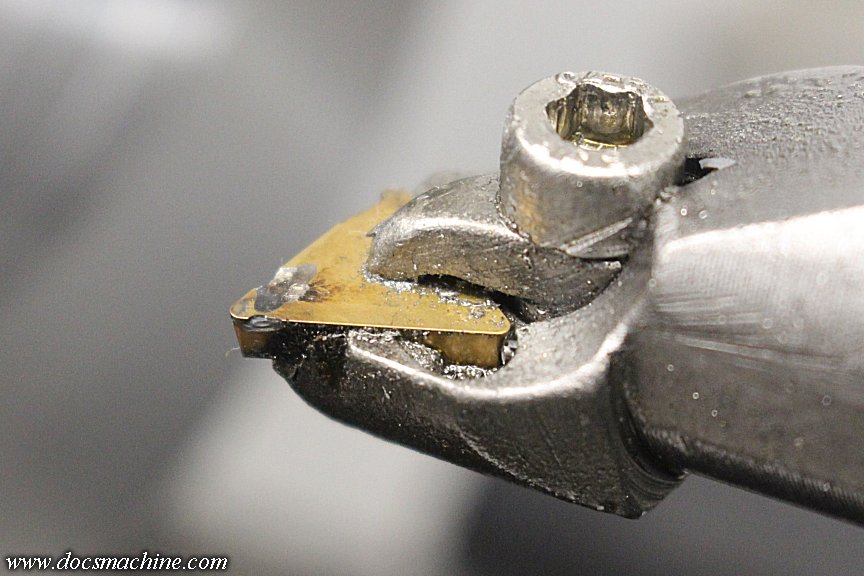
                The tools? I started that bore with a 3/4" shank boring bar, but I needed a bit more rigidity. This machine can take a substantial bite, and I had a lot of meat to move. The client loaned me a good- but worn- 1" shank boring bar, that added a good bit of beef. And I pushed those inserts for all they were worth.


                For those not familiar with tungsten carbide cutting inserts, the right-facing point of the gold bit is still new and untouched. The left facing point... those craters are worn. Those aren't chips or cracks, they're where the swarf come off the tip as it cuts, and scrubs past the insert.

                Why isn't the point itself worn? That is a very good question, and I'm not entirely sure I have a valid answer for that. I looked at the craters under magnification, and they clearly looked worn, not chipped. Why doesn't the cutting edge wear the same way? (Hey, I'm way more familiar with using the 'sharp honed' inserts on small bits of aluminum. )

                Oh, and the rear corner? That one's spalled- flaked off. That was probably thermal shock, most likely from when I sprayed in some WD-40 onto the 300°- 400°F insert.

                These need to be delivered on Monday, so I still have some work to do this weekend.

                Doc.​
                Doc's Machine & Airsmith Services: Creating the Strange and Wonderful since 1998!
                The Whiteboard: Daily, occasionally paintball-related webcomic mayhem!
                Paintball in the Movies!

                Comment

                • DocsMachine
                  MCB Member
                  • Jul 2020
                  • 2699
                  • Alaska

                  #269
                  And DONE, with a day to spare!

                  I did all the above on the 26th, and after the food coma wore off on the 27th, I went out and made the last few passes to bring it to size.


                  It was better in any case that I gave it time to cool down before trying to cut to spec. After I was done boring, the thing was over 200°F, according to the infrared gun. And it's big enough that had I cut it to spec at that point, it would have cooled off to potentially out of spec.

                  When I went to start cutting it cold, I was wondering about that, so I took an .005" skim cut, just out of curiosity. Turns out the OD was both out-of-round, but also tapered- it was narrower at the base, where the thickest part of the metal was. Fortunately I'd left .100" for that reason, and a few light, slow passes brought it back into shape.

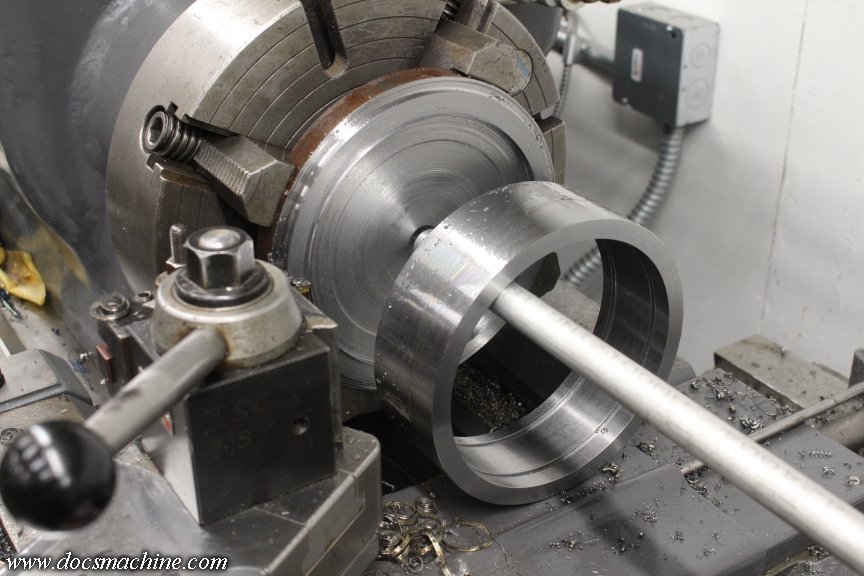
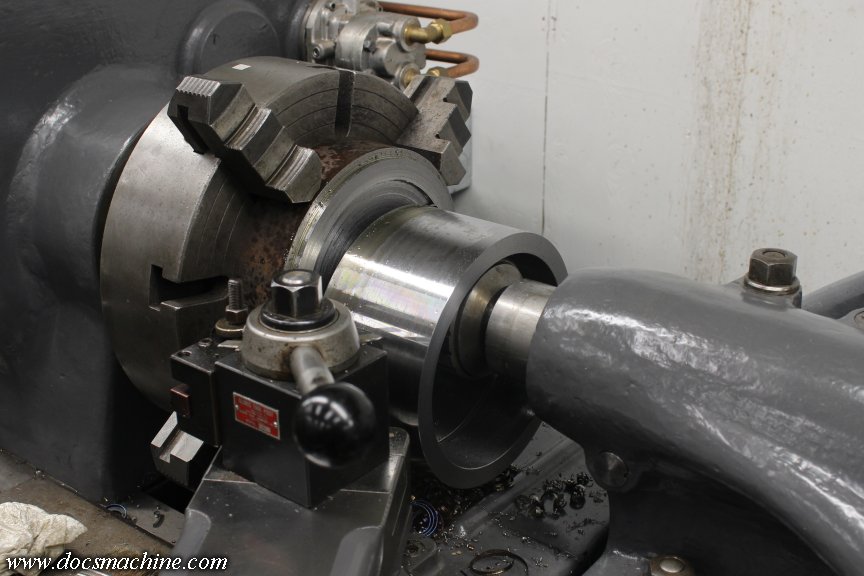
                  Then, I parted it off, slowly and carefully- with a rod held in the tailstock drill chuck to keep the ring from rolling about and maybe getting dented.


                  We're not quite done with that, but there's still the second one to do, which I started on the morning of Black Friday. (Nobody around here has 'doorbuster' sales on lathe tools or endmills, so why bother shopping? )

                  This one was the larger of the two- roughly eighty-six pounds and about as much as that 12" 4-jaw can hold. I have a 15" 4-jaw, but I need the engine crane to mount it.


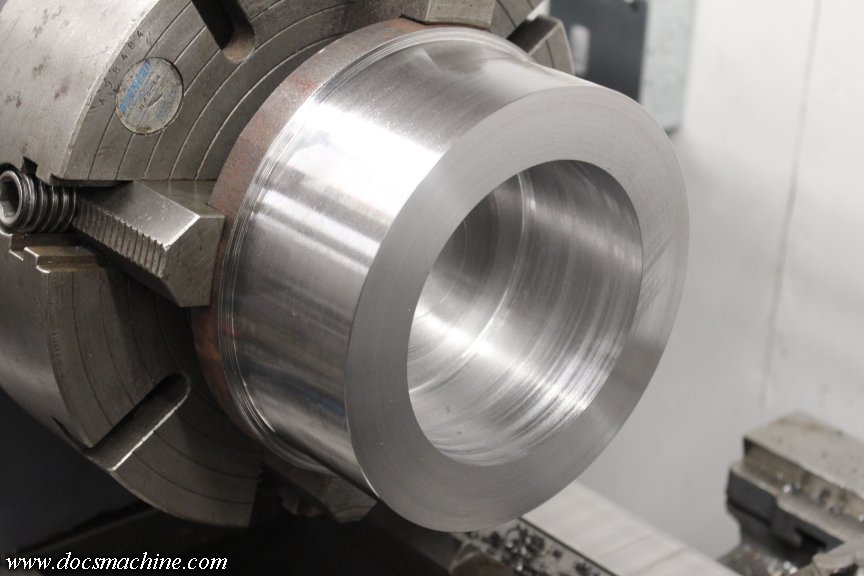
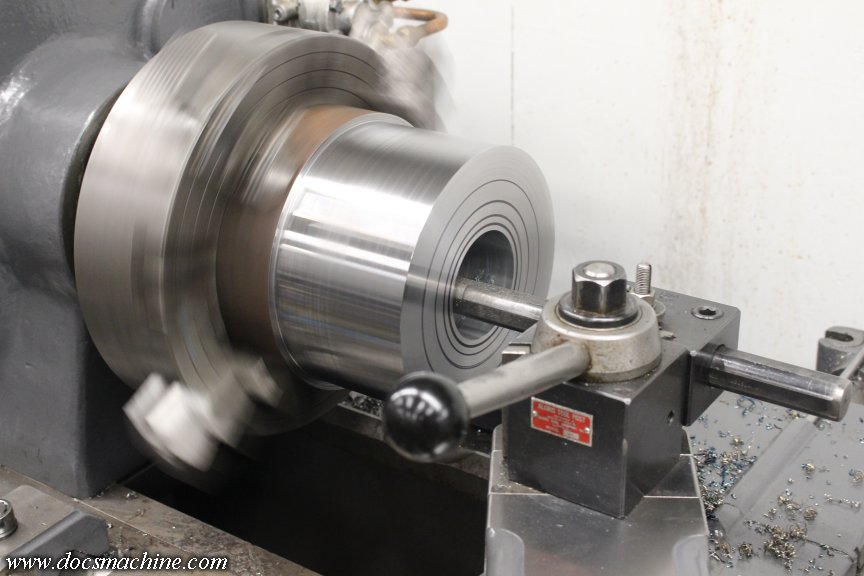
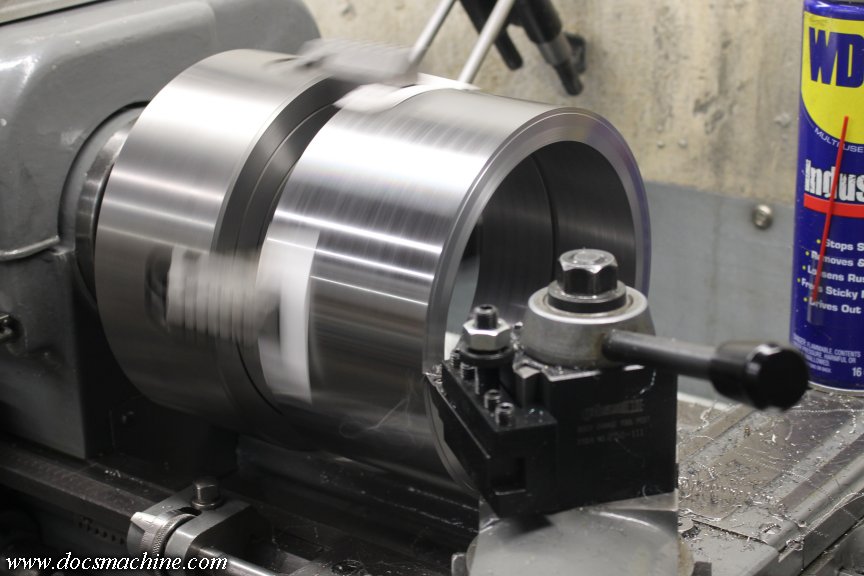
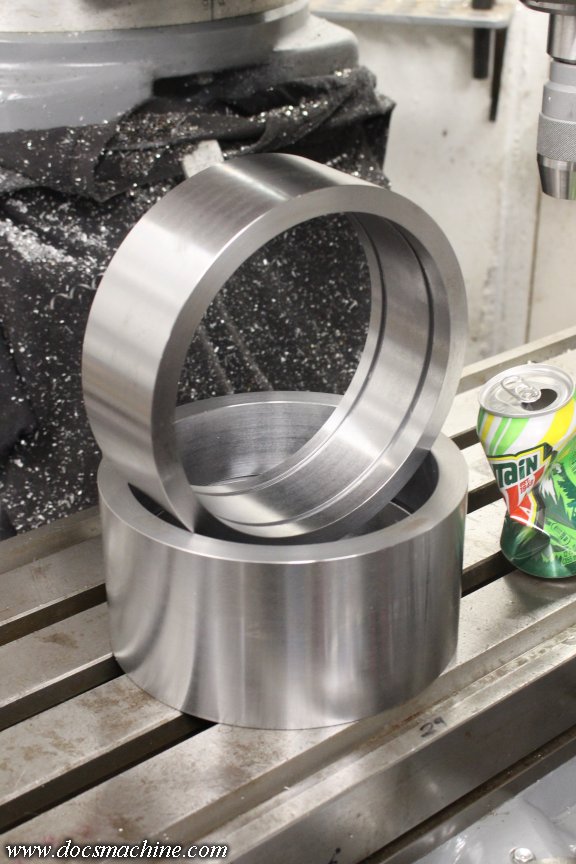
                  But, same operations. I got it faced, roughed to the OD, and drilled, then today (Saturday) I got the rest bored out:


                  The black rings are just pen marks, gives me a better idea of progress since I can make eight or nine passes and the center doesn't seem to get all that much bigger.

                  But, eventually we got down to the finish pass here, too:


                  And once the internal O-ring grooving was done, I parted this one off, too.


                  Captured by the drill chuck directly this time.


                  I used the smaller Sheldon lathe to face the parted end to length, mainly because that thickness was a tight tolerance, and the Sheldon has a better micrometer carriage stop.


                  The big Springfield has a micrometer carriage stop, but the dial is for some reason marked on .0025" increments, and indicated in round numbers. That is, 0 to 1 is .0025", 1 to 2 is .005", 2 to 3 is .0075", 3 to 4 is .010", and so on. I can make it work if I have to, but as a last step on a part I've spent two days on, is due in another day, and cost $150 just in steel? Nope, I know and trust the Sheldon's stop.

                  (I've been meaning to make a new dial, or recut some new marks... along with all the other things on my to-do-list...)

                  And done! With a full day to spare!


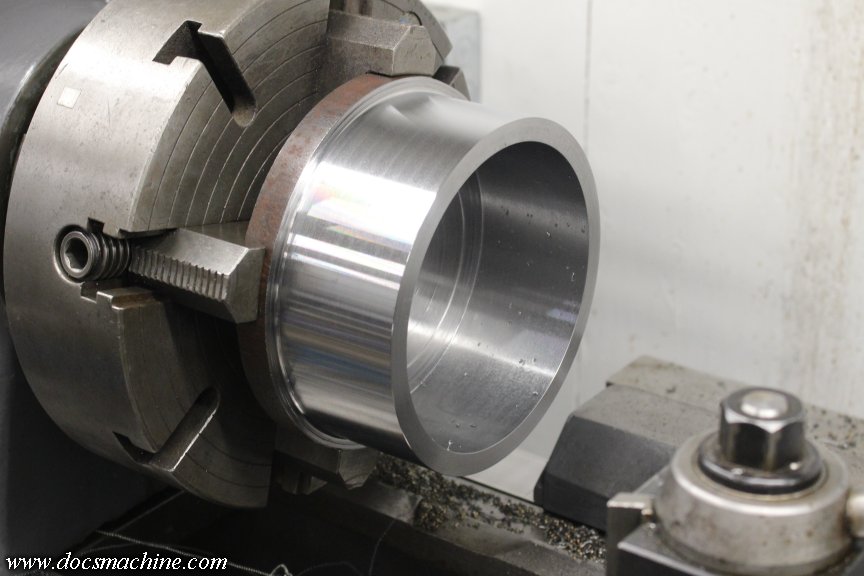
                  Yeah, finished they don't look like much, but due to the size, they had to be cut from solid, and due to the use, they needed to be tough chrome-moly.

                  And since it's the oilfield, they had to have 'em, and were willing to pay for it. (Well, at this point I sure hope I get paid... )

                  Doc.​
                  Doc's Machine & Airsmith Services: Creating the Strange and Wonderful since 1998!
                  The Whiteboard: Daily, occasionally paintball-related webcomic mayhem!
                  Paintball in the Movies!

                  Comment

                  • DocsMachine
                    MCB Member
                    • Jul 2020
                    • 2699
                    • Alaska

                    #270
                    So, after all this, what have I learned?

                    Mainly that I need more tools. Duh!

                    This machine really needs a DRO. I've been pondering getting one for it and another for the Sheldon, but I've never liked how they take up room on the side of the cross slide, since at least on the Sheldon, there isn't that much quill travel to start with. And on the big Springfield, it'd need heavy armor to protect it from getting crushed up against the tailstock base.

                    I also need at least two of my own heavy boring bars. Most of what I have takes HSS, and anything that takes an insert is only 3/4" on the shank. I need a good name-brand 1" and probably a 1-1/4", that take a heavy insert, like a CCMT or a WNMG.

                    I should make a mount for the bigger bars I already have, too.

                    I need to fix that micrometer stop. I knew it was going to be an issue a decade ago when I first fitted it to the machine (it's actually, I think, a Mori-Seki stop) and have meant for years to either re-etch or replace the knob. It has a 20TPI thread, so it could easily have 50 .001" graduations. Needs a spring or something to give the barrel a little friction, too, it turns too easily.

                    I did manage to find an original Springfield carriage stop, but the screw and dial on that were badly damaged and also have to be replaced.

                    I need a worktable or cart I can roll up to this thing. I had tools piled on the bed, on the floor, on the gearbox, on the headstock and on the bandsaw table.

                    Going along with that, I need to make a tool shelf bolted to the wall for this thing, somewhere. And along with that, I have the "tool stand arm" or whatever they call it, for this thing, that bolts to the back of the bed. I need to make a new top plate for that, to keep the occasionally-used tools on hand. The oil can, drill chuck keys, drills, etc.

                    And the big one: I really need to put together the overhead trolley system I've been thinking about since I got this machine back together. The 8" and 10" 3-jaws aren't too big a deal, but the 12" 4-jaw, especially leaned out over the bed of a large lathe, is a pain in the sphincter to install or remove.

                    And the 15" 4-jaw is basically impossible without an engine crane. The 86 pound slug of steel was no picnic either.

                    I have in mind a trolley made out of Unistrut, with maybe a 1/4 ton chainfall, and a heavy steel rack behind the bed, or maybe at the end of the bed, to hold the chucks. (At least the big ones I can't easily manhandle into place.)

                    Now, I've known most of these issues for years, but I use this big machine so relatively rarely, that other needs in the shop tend to take understandable precedence. That said, this job would have gone a lot smoother with those things, and hey, if I'm going to have this six thousand pound monster in my shop, taking up as much room as a small car, I might as well have it capable of doing the jobs it's... well, capable of.

                    ... Well, that was a nice bit of fortuitousness. Just checked eBay and spotted a 1-1/4" boring bar, looks like an older Kennametal, that takes what appears to be CNMG inserts, with an Aloris CXA tool holder block. It's all a bit worn and rusty, but the price is right, and I know how to deal with rust.

                    Doc.​​
                    Doc's Machine & Airsmith Services: Creating the Strange and Wonderful since 1998!
                    The Whiteboard: Daily, occasionally paintball-related webcomic mayhem!
                    Paintball in the Movies!

                    Comment


                    • StaticShocked
                      StaticShocked commented
                      Editing a comment
                      Getting a machine all setup and efficient is so satisfying. Glad to hear the hot weekend job went smoothly.

                      We have been buying a lot of boring bars (coincidentally, CNMG) and allied spade drill holders from eBay recently to surprisingly great success.

                      Also, we are really fond of the Newall brand of DRO's. They are an English company owned by Sansata i think, and we have found the DRO's to be bullet proof (not literally). Very happy with them after almost 15 years of using them. DP700 is on most manual lathes and mills and DP1200 on the big boring mill. They even have hole patterning / basic repeating capabilities for slots and such to make repeat machining easier. The main thing for me was the linear scales a very durable. Leave oil on them, coolant, chips, blow it all around with air, whatever, they keep working (unlike glass scales...).
                  Working...