-
-
-I've thought about that for years, ever since making the first VT. Short answer, I don't know. You'd think it'd feed, but just like paint jamming in an agitated loader, I can see the stack getting "stuck" at the fork. Would a powered loader help? Dunno. The bottom of the "Y" shaped feed neck necessarily has to have a point on it- maybe not a razor sharp one, obviously, but it needs to be fairly pointy just to induce the paint to roll off to one side or the other.Do you think a Y or T on the hopper line would be feasible?
One trick I thought of was to have the tube leading in to the fork of the "Y", be wider- as in oval shaped. That way the paint is already starting to 'spread sideways' before it hits the fork.
Again, would it work? Dunno. I'd like to try it at some point.
-I'd be interested in seeing that, if true. But, as I said, it'd be easier in a brass body, as the separation between the upper and lower barrels could be a lot less. The fabricated nature of the build, too, would let you do a little "porting" for the upper barrel feed, to help push the too-low upper ball back into the breech. That'd be tough to do in a machined-from-block body.Someone on the forums has a PPS OU with single feed into the top.
-You have no idea how monstrously tall this thing is already.ho, space the barrels enough to have a whole ball in between ... that's genus!
-On this vertical, I'm already thinking it may turn out that it really only works as a pump. There may be too much drag with the upper bolt, and the block may bind.Yeah that’s what I’m thinking. You could make it a pump for simplicity or a Lever action.
On the Vee-Twin configuration, the pump rod placement is basically ideal- right in the center between the two bolts and the cocking rod. With the vertical, it's down and to the side, and I suspect we may get binding issues at semiauto speeds.
If that does prove to be the case, I figured a second pump rod on the other side to balance the load, and whip up a pump kit for it.
-Near as I can see, there's only the one problem- the side linkage placement- and I've come up with two different solutions to that. As I get closer to finishing his build, I'll pick your brain about some of the details.Doc, for our mutual friend's project----that kind of set up would solved a lot of problems.
Doc.Doc's Machine & Airsmith Services: Creating the Strange and Wonderful since 1998!
The Whiteboard: Daily, occasionally paintball-related webcomic mayhem!
Paintball in the Movies!Comment
-
-Oh sure, show me up while I'm replying.
You can see the misalignment problem there- which unfortunately just gets worse as the paint shrinks, but is at least workable in the brass body. You can see in the pic of my backblock how much separation there is between the two bores on the 'Cocker.
Doc.Doc's Machine & Airsmith Services: Creating the Strange and Wonderful since 1998!
The Whiteboard: Daily, occasionally paintball-related webcomic mayhem!
Paintball in the Movies!Comment
-
It kind of looks like it could stand a better detent system, too. That lower ball is too far forward, and I don't even see a detent for the upper. (I'm presuming it's on the other side, but I'd have thought we'd see the wire coming over the top, etc.)
Doc.Doc's Machine & Airsmith Services: Creating the Strange and Wonderful since 1998!
The Whiteboard: Daily, occasionally paintball-related webcomic mayhem!
Paintball in the Movies!Comment
-
didn't thought about the oblong hole ... Interesting idea.
The other idea I had was to take a revy and cut it in half lengthwise and add a "spacer" to have 2 exit, one on each side of the paddle ...
you're probably getting close to 3" tall? What's one more inch 😅
What about putting a ram on each side?
It would double your opening force.
Also, how are you planning on routing the air to the second bolt?
Love my brass ... Love my SSR ... Hard choices ...
XEMON's phantom double sided feed
Keep your ATS going: Project rATS 2.0
My FeedbackComment
-
-Approximately a million years ago, back shortly after RamboPreacher commissioned and received his Palmer's Grinder, we were discussing just that over on the Tinker's Guild. Simon (Inception, going by Manike back then) was at the time working for NPS, among other places, and had CAD models of the original HALO.
He made a quick model of what was essentially an "inverted" HALO- normal left and right shells, but with the "inside" halves facing outward.
Basically, take two of those and bolt them together, then take the halves of a normal HALO and attach them to the outer ends, and you had a solid, unified, triple-motor, triple-feed-neck loader.
I think Simon said that it was theoretically possible to have the shells printed- they had access to an industrial-quality resin printer. (This was a few years before the cheap home units became available.) I don't think that ever happened, but it would have been awesome if it had.
-In these days of super-tiny single-tube markers, the 'Cocker already looks "oversized", and older, unmilled, slab-sided bodies bigger still.you're probably getting close to 3" tall? What's one more inch
Now make it roughly 35% bigger still.
-I've been toying with that idea, too. Wouldn't take much to make a dual-ram front block, and you could take a three-way and just drill an extra pair of exhaust ports with hose nipples, so theoretically you'd have the same pressure and timing on each one.What about putting a ram on each side? It would double your opening force.
The big trick would be installing them. You'd have to have them attach to the back block with setscrews, or laboriously screw the ram shafts in at the front and then screw the rams to the block. Not impossible, but tricky. And if you got the spacing off, you'd still get binding as one side 'pushed' more than the other.
But that, too, is something that might be fun to try at some point.
-Same as the over-under Palmer's; the bottom bolt is drilled through, vertically. The air passage going up from the valve and through bolt bolts looks like the letter "F".Also, how are you planning on routing the air to the second bolt?
How efficient it'll be, and how well-regulated each barrel will be, I can't say. I'm told by over-under owners that, like all double-barrel-single-valve guns, it can be a bit difficult to get it up to field speeds, but generally, they seem pretty well regulated barrel-to-barrel.
Looking forward to trying it out.
Doc.Doc's Machine & Airsmith Services: Creating the Strange and Wonderful since 1998!
The Whiteboard: Daily, occasionally paintball-related webcomic mayhem!
Paintball in the Movies!Comment
-
Love my brass ... Love my SSR ... Hard choices ...
XEMON's phantom double sided feed
Keep your ATS going: Project rATS 2.0
My FeedbackComment
-
Haven't forgotten about you, just been slammed with work. That said, some progress!
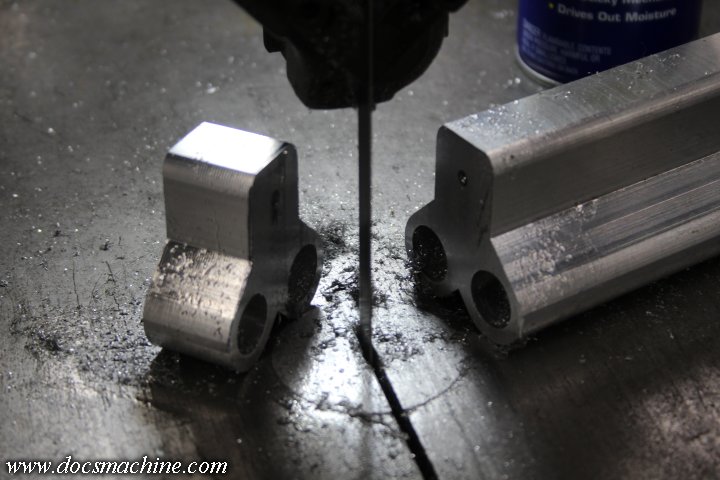
Had to take a moment to rework my bandsaw, converting it over to a slightly more powerful 3-phase motor and improved controls, and cut the block-end off the three contoured bodies.
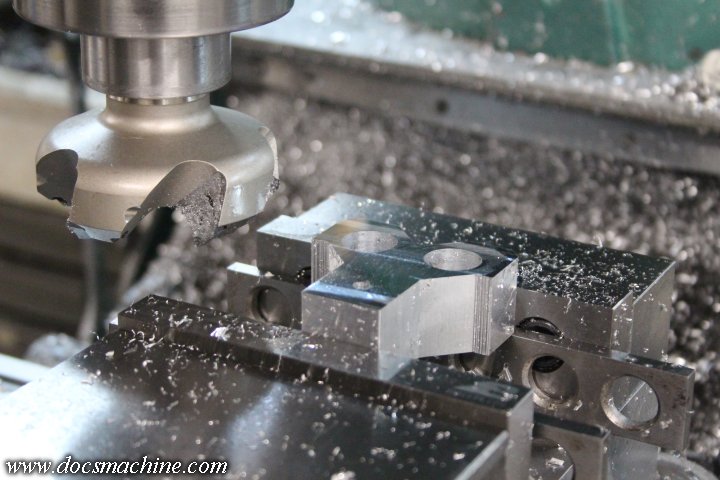
Set up the mill and faced each now-loose block down to 1.000"...
And then drilled each one out to 1/4" for the cocking rod.
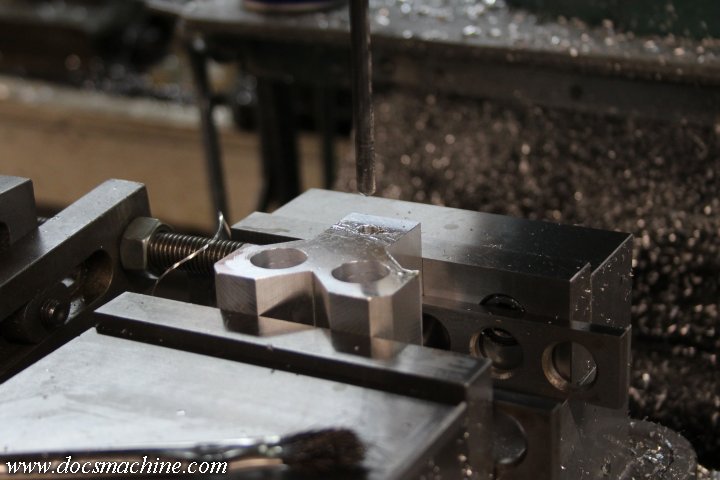
I then located the center and drilled and tapped each one for the pump rod.
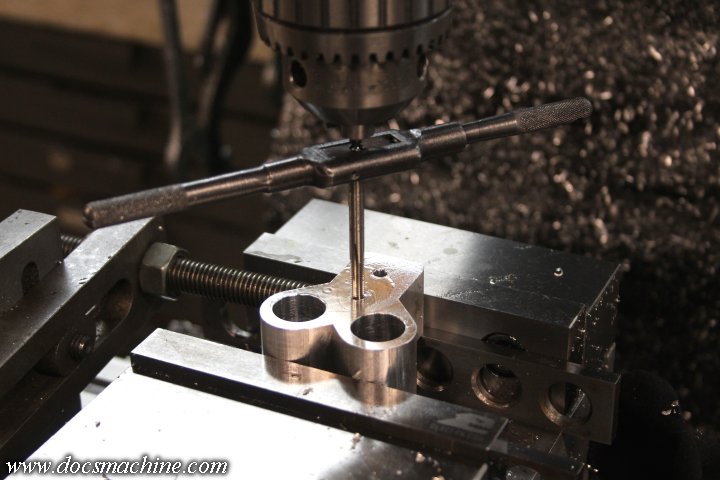
Setting the vertical vise back up, I then faced off the three freshly-cut ends...
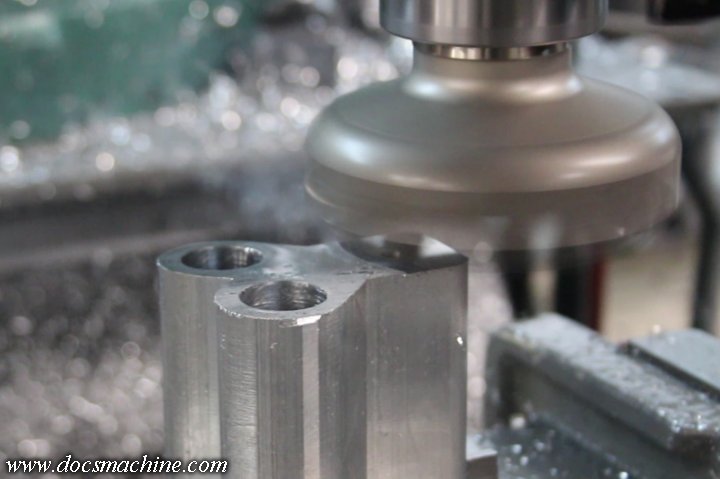
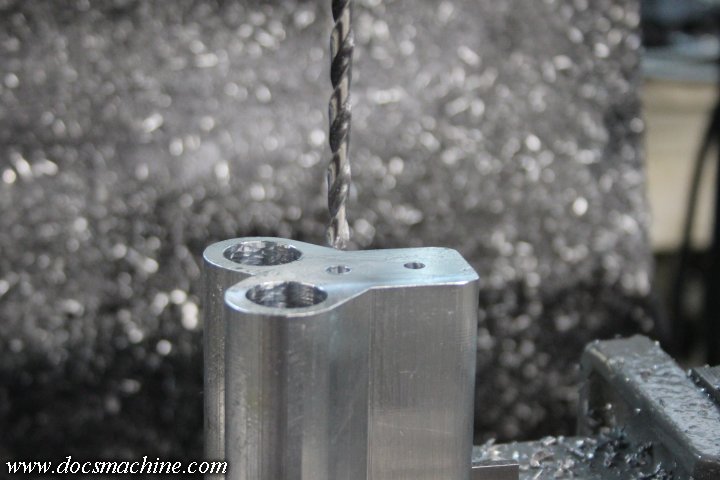
And finished drilling the bodies the rest of the way through for the pump rods.
Now, before I set up to do the upper contouring on the four new bodies, I needed to rough some more of the spare meat off. For that, I dug out my old kit for holding the backblocks in place....
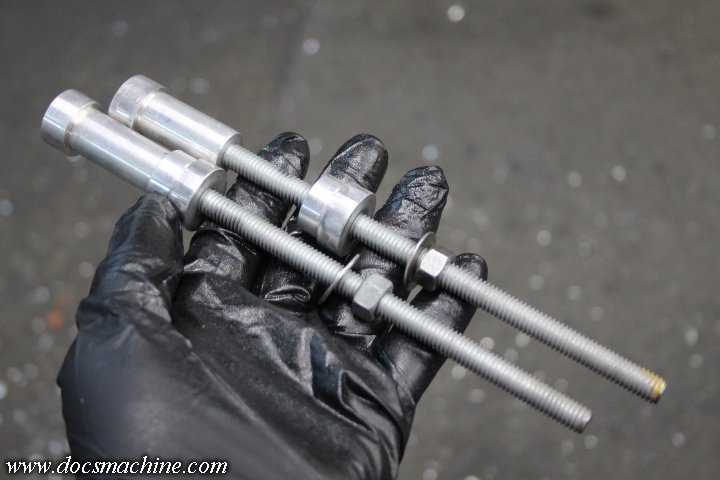
And had to whip up a couple slightly longer threaded rods, and some new front plugs. The old ones were meant to fit in already bored barrel breeches.
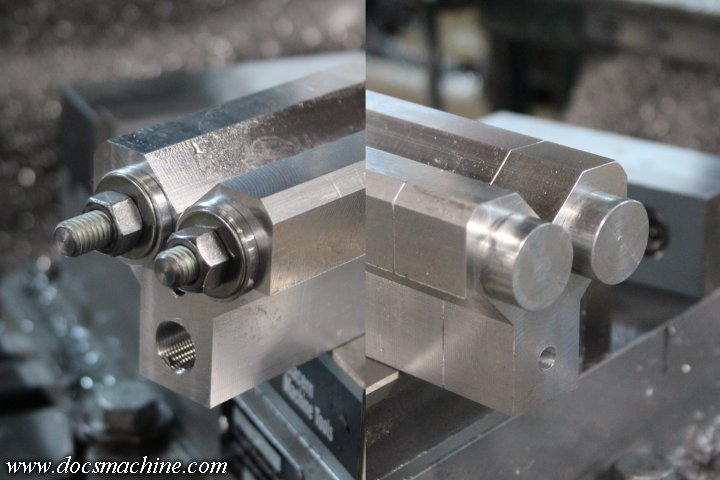
The tight-fitting rear plugs hold the back block in prefect alignment for the rest of the milling, so I roughed more off the top...
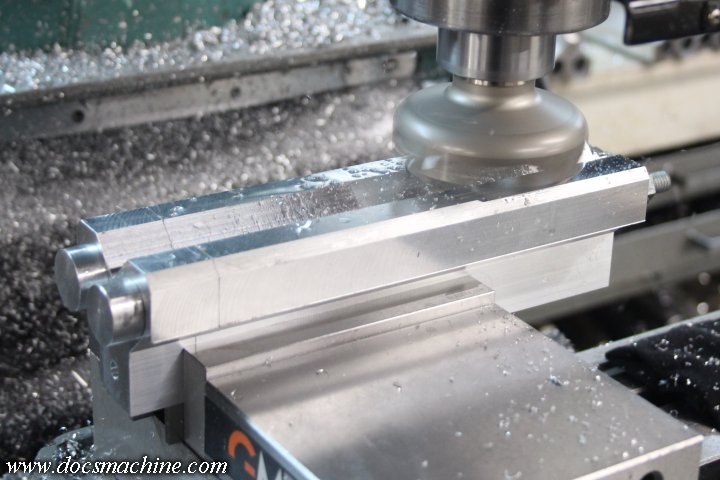
Used the same 90-degree mill to shave down the corner....
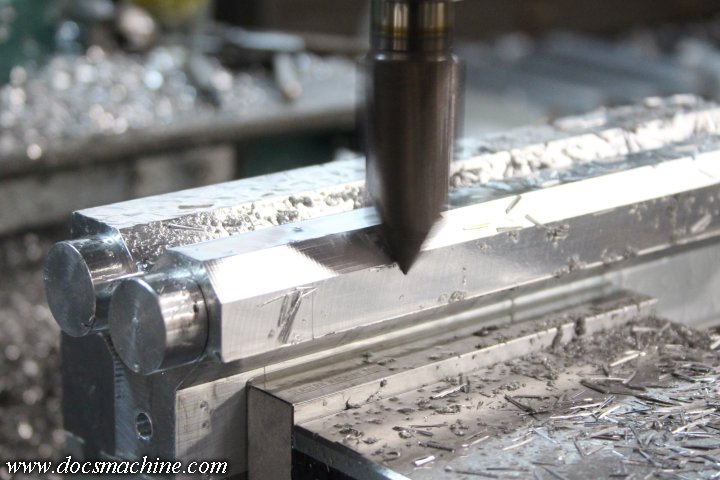
And then brought in the sides.
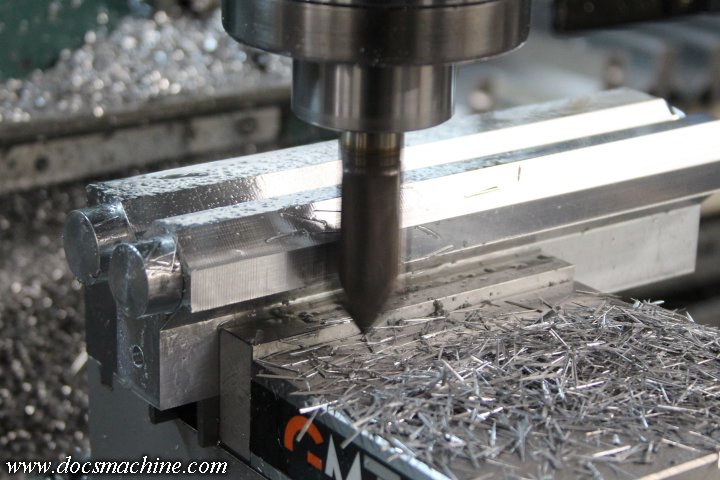
That was as far as I dared rough without taking measurements, but this step was just raw reduction. The next step is of course to double-check my measurements, maybe shave down a touch more, and the break out the corner-rounders for the full, proper profile.
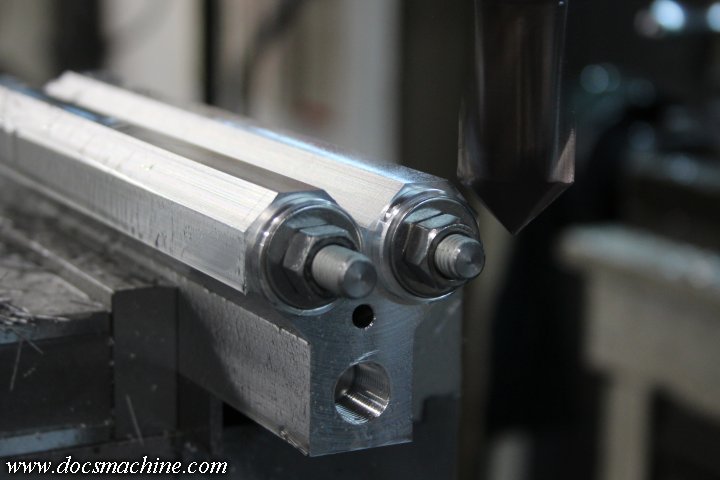
Stand by, more coming- and soon!
Doc.
Doc's Machine & Airsmith Services: Creating the Strange and Wonderful since 1998!
The Whiteboard: Daily, occasionally paintball-related webcomic mayhem!
Paintball in the Movies!Comment
-
Very sweet and awesome pictures you share. I am really liking how it looks with the straight edges.Comment
-
Loving the hard angles. Thanks for keeping us updated!Comment
-
I think the very last pic makes the Vee-Twin look "Surprised" !
'96 RF Mini Cocker, '95 RF Autococker, 68-Automag Classic, Banzai Splash Minimag, Gen-E Matrix, Shoebox Shocker 4x4, Montneel Z-1, Tippmann Pro-Carbine, Tippmann Mini-Lite, Tippmann Model-98, Tippmann 68-Special, Spyder .50 cal Opus/Opus-A , Tippmann .50 Cal Cronus , Gog Enmey .50 cal , Tippmann Vert ASA 68-Carbine, Bob Long Millennium, ICD Grey Green Marble Splash Alleycat Deluxe (runs liquid co2) , Halfblock 2K4 Prostock Autococker , 2K RF Sniper II
Meleager7 Feedback: https://www.mcarterbrown.com/forum/b...ager7-feedback
Mel Eager Productions, Paintball Videos: https://www.youtube.com/@meleagerproductions9082Comment
-
Comment
-
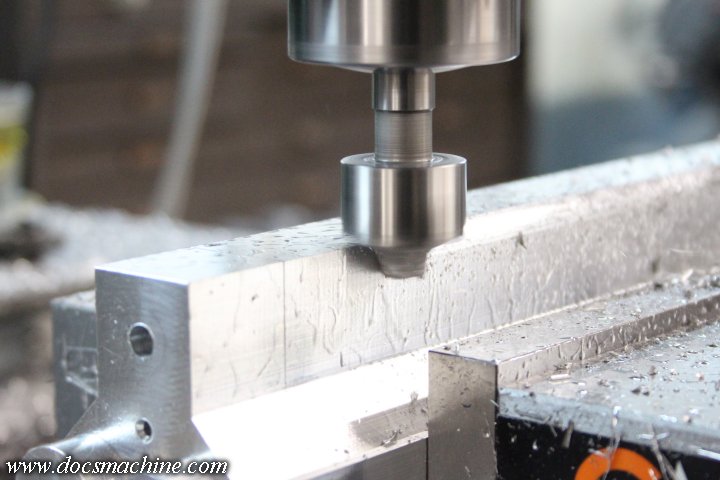
After I'd roughed the lot down, it was time for a bit of contouring. First, the easy bit at the bottom of the valve tube:
After that, it's the tricky part. In previous runs, I'd actually tilt the head of the mill forward to 45 degrees, so I could keep holding the body by the valve tube, and the corner-rounding cutter would be properly aligned with the bolt tubes. The problem here is that it's tricky to align things, as the table movement is no longer "square" to the cutter- and a corner rounding bit has to be aligned carefully to two different faces.
Instead, I simply got out a couple of known-accurate Starrett V-blocks, which were just the right size to hold the body at 45 degrees.
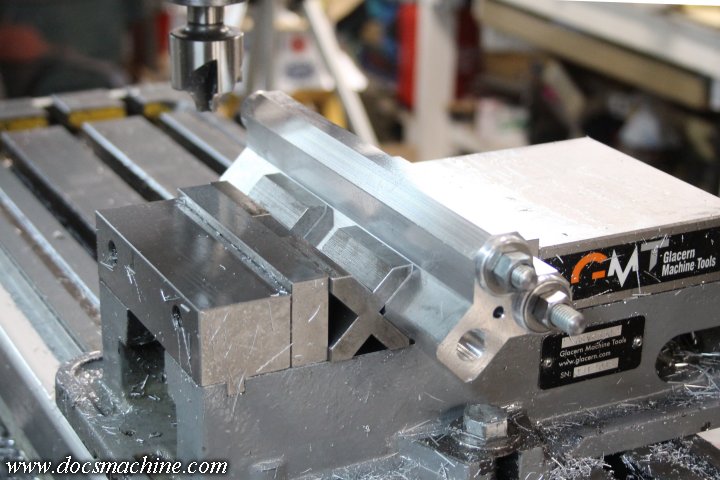
That made aligning the cutter considerably easier- and more importantly, more repeatable- so after that it was simply a matter of carefully lining things up, and buzzing down the flat bits.
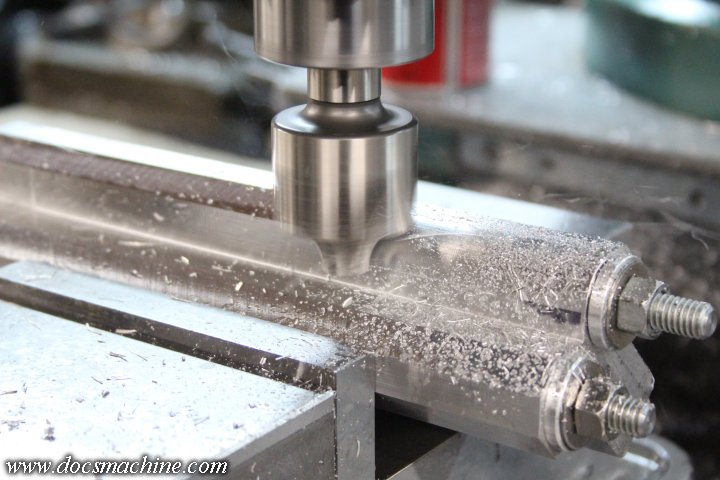
Voilá! (Which I'm pretty sure is French for "Check this s**t out!"
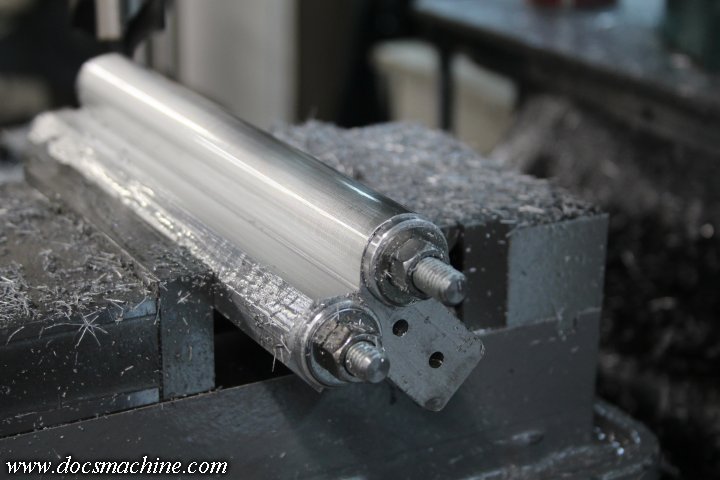
Moreover, that's a considerably smoother surface than my old (cheap import) cutter could produce, so it'll be easier to finish and polish the surfaces.
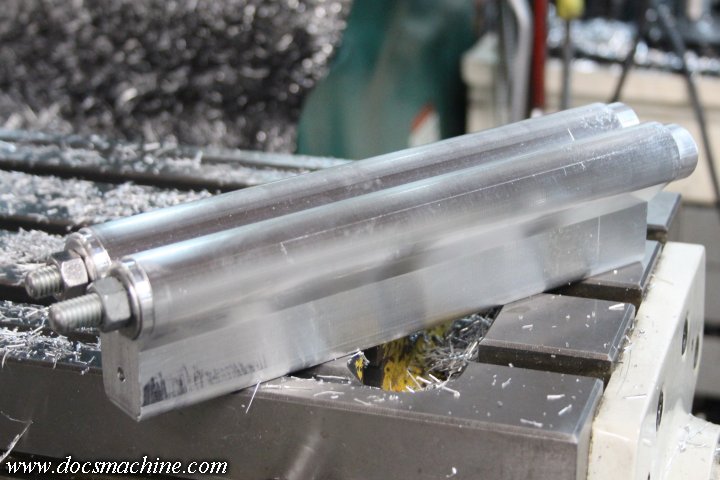
Ran out of time to do them all today, but I'll finish up the rest in the morning.
Doc.
Doc's Machine & Airsmith Services: Creating the Strange and Wonderful since 1998!
The Whiteboard: Daily, occasionally paintball-related webcomic mayhem!
Paintball in the Movies!Comment
-
Are the Starrett V-blocks something you made? Or is that something commonly used? I have never seen those before and they look handy. I Love seeing all the updates and the skill put into marking these happen. Nice work Doc the process is just as interesting as the marker itself.Comment

Comment